HP LD4200 HP LD4200 LCD Monitor User Guide
HP LD4200 - 42" LCD Monitor Manual
 |
UPC - 884420598480
View all HP LD4200 manuals
Add to My Manuals
Save this manual to your list of manuals |
HP LD4200 manual content summary:
- HP LD4200 | HP LD4200 LCD Monitor User Guide - Page 1
HP LD4200 LCD Monitor User Guide - HP LD4200 | HP LD4200 LCD Monitor User Guide - Page 2
© 2009 Hewlett-Packard Development Company, L.P. Microsoft, Windows, and Windows Vista are either trademarks or registered trademarks of Microsoft Corporation in the United States and/or other countries. All other product names mentioned herein may - HP LD4200 | HP LD4200 LCD Monitor User Guide - Page 3
provides information on setting up the monitor, installing drivers, using the on-screen display menu, troubleshooting and technical specifications. WARNING! Text set off in this manner indicates that failure to follow directions could result in bodily harm or loss of life. CAUTION: Text set - HP LD4200 | HP LD4200 LCD Monitor User Guide - Page 4
iv About This Guide ENWW - HP LD4200 | HP LD4200 LCD Monitor User Guide - Page 5
HP LD4200 Model ...1 2 Safety and Maintenance Guidelines Important Safety Information ...2 Maintenance Guidelines ...3 Cleaning the Monitor ...3 Shipping the Monitor ...3 3 Setting Up the Monitor Installing the Stand (Select Models) ...4 Connecting the Speakers Monitors 13 VESA Mounting Support - HP LD4200 | HP LD4200 LCD Monitor User Guide - Page 6
Mode 28 Appendix A Troubleshooting Solving Common Problems ...31 Using the Worldwide Web ...33 Preparing to Call Technical Support 33 Appendix B Technical Specifications HP LD4200 LCD Monitor ...34 Recognizing Preset Display Resolutions 36 HP LD4200 Preset Display Modes 36 DTV Mode ...36 Power - HP LD4200 | HP LD4200 LCD Monitor User Guide - Page 7
25. Tile ID Set (Command : d i 51 26. Natural Mode (In Tilemode) (Command : d j 52 27. Elapsed time 53 30. Auto volume (Command : d u 53 31. Speaker (Command : d v 54 32. Time (Command : f . Power On Delay (Command : f h 58 40. Language (Command : f i 59 41. DPM Select (Command : f j 59 42. - HP LD4200 | HP LD4200 LCD Monitor User Guide - Page 8
...64 Declaration of Conformity for Products Marked with the FCC Logo (United States Only 64 Canadian Notice ...65 Avis Canadien ...65 Power Cord Set Requirements ...65 Product Environmental Notices ...66 Materials Disposal ...66 Chemical Substances ...66 Disposal of Waste Equipment by Users in - HP LD4200 | HP LD4200 LCD Monitor User Guide - Page 9
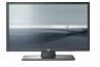
1 Product Features HP LD4200 Model The HP LD4200 LCD digital signage monitor has a wide aspect active matrix thin-film transistor (TFT) panel. The monitor features: ● 106.7 cm (42-inch) widescreen diagonal viewable area display with 1920 x 1080 native resolution ● Wide viewing angle up to 178° - HP LD4200 | HP LD4200 LCD Monitor User Guide - Page 10
specifically labeled as having this ability. Use a power strip whose manufacturer offers a Damage Replacement Policy so you can replace the equipment, if surge protection fails. Use the appropriate and correctly sized furniture designed to properly support your HP LCD monitor. WARNING! LCD monitors - HP LD4200 | HP LD4200 LCD Monitor User Guide - Page 11
controls that are covered in the operating instructions. If the monitor is not operating properly or has been dropped or damaged, contact an authorized HP dealer, reseller, or service provider. ● Use only a power source and connection appropriate for this monitor, as indicated on the label/ back - HP LD4200 | HP LD4200 LCD Monitor User Guide - Page 12
then follow the instructions below. Installing the Stand (Select Models) 1. Remove the six M4 x 12mm screws (1), monitor stand (2) and cable management clip (3) from the box. Figure 3-1 Stand Accessory Contents 2. Place a soft cloth on the table and place the product with the screen facing downward - HP LD4200 | HP LD4200 LCD Monitor User Guide - Page 13
3-3 Securing the Stand to the Monitor Connecting the Speakers (Select Models) 1. Mount the speakers onto the product. Figure 3-4 Mounting the Speakers 2. Use the four Taptite D3 x 12mm screws to secure the speakers to the monitor. Figure 3-5 Securing the Speakers to the Monitor ENWW Connecting - HP LD4200 | HP LD4200 LCD Monitor User Guide - Page 14
the speakers, use the cable holders and cable ties (available on select models) to organize the speaker cables. Figure 3-6 Using the Cable Holders (Feature Available on Select Models) Figure 3-7 Using the Cable Ties (Feature Available on Select Models) 6 Chapter 3 Setting Up the Monitor ENWW - HP LD4200 | HP LD4200 LCD Monitor User Guide - Page 15
Portrait Position (Select Models) When installing the monitor in the portrait position, rotate it clockwise based on its front. The monitor can be rotated in only one direction. NOTE: The monitor cannot be rotated if it is installed on the stand. Figure 3-9 Installing Portrait ENWW Rotating to the - HP LD4200 | HP LD4200 LCD Monitor User Guide - Page 16
(+/-). 3. Close the battery cover. NOTE: Dispose of used batteries in the recycle bin to prevent environmental pollution. Figure 3-10 Inserting Batteries 8 Chapter 3 Setting Up the Monitor ENWW - HP LD4200 | HP LD4200 LCD Monitor User Guide - Page 17
1 AV 2 Sleep 3 PSM 4 Menu 5 Up and Down 6 Mute 7 Power 8 Input Select 9 ARC 10 Auto 11 Exit Function Toggles through video: AV off sound. Turns the monitor on and off. Selects the video signal input. If you press the button once, the input signal window will open. Select the - HP LD4200 | HP LD4200 LCD Monitor User Guide - Page 18
Remote Control Port 6 AV Ports 7 Speaker Ports Function Connects the AC power cord to the monitor Connects to RS-232 devices HDMI supports High Definition input and HDCP (High-bandwidth Digital Content Protection). Some devices require HDCP in order to display HD signals Connects the audio - HP LD4200 | HP LD4200 LCD Monitor User Guide - Page 19
RGB IN (1) connector on the rear of the monitor and the other end to the VGA connector (2) on the computer. NOTE: If connecting to a Mac computer, use the standard Macintosh adapter (3). Figure 3-13 Connecting the VGA Signal Cable b. For digital operation, connect the HDMI to DVI signal cable (not - HP LD4200 | HP LD4200 LCD Monitor User Guide - Page 20
and mechanical safety information. This guide is located on the Web at http://www.hp.com/ergo and/or on the documentation CD, if one is included with the monitor. Figure 3-16 Connecting the Power Cord 5. Turn on power to the monitor by pressing the front panel power button. Figure 3-17 Front Panel - HP LD4200 | HP LD4200 LCD Monitor User Guide - Page 21
VESA Mounting Support This product supports a VESA FDMI compliant mounting interface. On the rear of the monitor are four VESA mounting holes that allow you to install a mounting device to the monitor. The mounting devices are purchased separately and not available from HP. Refer to the instructions - HP LD4200 | HP LD4200 LCD Monitor User Guide - Page 22
and can be purchased from HP. Figure 3-19 VESA Mounting Holes Connecting Video Input 1. Connect the video cable (not included) as shown in the following illustration, and then connect the power cable. a. When connecting with a BNC cable (1), connect the input terminal to the monitor and VCR/ DVD - HP LD4200 | HP LD4200 LCD Monitor User Guide - Page 23
HDCP in order to display HD signals. Component does not support HDCP. 2. Select an input signal. Press the INPUT button on the remote control to select the input signal. Press the SET button to save your change. Or, press the SOURCE button on the back side of the monitor panel. Press the AUTO - HP LD4200 | HP LD4200 LCD Monitor User Guide - Page 24
/1080i/1080p) HDMI supports High Definition Input and HDCP (High-bandwidth Digital Content Protection). Some devices require HDCP in order to display HD signals. 1. Connect the video/audio cable (not included) as shown in the following illustration, and then connect the power cord. (1) Connect an - HP LD4200 | HP LD4200 LCD Monitor User Guide - Page 25
Watching AV Outputs When using AV input, you can connect the AV Out to other monitors. Connect the BNC cable (1) and audio cable (2) to the video/TV (3) and to the monitor (4). Figure 3-23 Connecting AV Out ENWW Connecting to External Devices 17 - HP LD4200 | HP LD4200 LCD Monitor User Guide - Page 26
. ● HP monitor driver software, which automatically detects the computer's Microsoft Operating System and installs the corresponding .INF (Information) and .ICM (Image Color Matching) driver files that are used to configure the HP monitor ● Auto-adjustment pattern utility to optimize the display PDF - HP LD4200 | HP LD4200 LCD Monitor User Guide - Page 27
Driver Software Readme file. 3. Select Install Monitor Driver Software. 4. Follow the on-screen instructions. 5. Ensure that the proper resolution and refresh rates appear in the Windows Display control panel. NOTE: You may need to install the digitally signed monitor .INF and .ICM files manually - HP LD4200 | HP LD4200 LCD Monitor User Guide - Page 28
the screen image. When OSD window is open, press to select a menu item or save changes. Press to turn on the power. Press again to turn it off. Receives signals from the remote control. Lights up blue when the display operates normally (on mode). If the display is in sleep (Energy Saving) mode, the - HP LD4200 | HP LD4200 LCD Monitor User Guide - Page 29
is displayed. 4. Select Open Auto-Adjustment Software. The setup test pattern is displayed. 5. Press the Auto/Set button on the back side of the monitor panel to produce a stable, centered image. 6. Press the ESC key or any other key on the keyboard to exit the test pattern. ENWW Screen Adjustment - HP LD4200 | HP LD4200 LCD Monitor User Guide - Page 30
check serial number and software version Using the Remote Control to Adjust the OSD Use the OSD to adjust the screen image based on your viewing preferences. To access the OSD, do the following: 1. If the monitor is not already on, press the power button to turn on the monitor. 2. Press the MENU - HP LD4200 | HP LD4200 LCD Monitor User Guide - Page 31
functional descriptions. Icon Main Menu Picture Submenu Description Picture Mode Selects your screen presets. Toggle between: ● Vivid - select to display with a sharp image. ● Standard - the most general and natural screen display status. ● Cinema - lowers brightness by one level. ● Sport - HP LD4200 | HP LD4200 LCD Monitor User Guide - Page 32
screen color adjustment settings: ● Gamma - set your own gamma value. On the monitor, high gamma values display whitish images and low gamma values display high contrast images. ● Film Mode - function works in the following mode the image size of the screen to: ● 16:9 - widescreen mode. ● Just Scan - - HP LD4200 | HP LD4200 LCD Monitor User Guide - Page 33
off power when the time set by a user is passed. If active and there is no input signal, the set switches to off mode automatically after 10 minutes. When connecting multiple monitors and turning the power on, the monitors are turned on individually to prevent overload. Using the On-Screen Display - HP LD4200 | HP LD4200 LCD Monitor User Guide - Page 34
or Off. Sets the Logo light on the front of the monitor to On or Off. Turns the power saving mode on or off. Enlarges the screen and is also used with several products to view the screen. To use this function, it: ● must be displayed with several other products. ● must be in a function that can be - HP LD4200 | HP LD4200 LCD Monitor User Guide - Page 35
you to reset the clock manually if the current time is sleep time menu lets you set the monitor power to automatically turn off when the To set the monitor to switch to the off mode automatically after 10 minutes screen is turned on as it was turned off. ENWW Using the On-Screen Display Menu 27 - HP LD4200 | HP LD4200 LCD Monitor User Guide - Page 36
● Set column by row (r = 1, 2, 3, 4, 5; c = 1, 2, 3, 4, 5) up to 5 x 5 ● Configure an integration screen as well as configure one by one display NOTE: Adjustments made to the settings will be saved only after pressing the SET button on the remote control. 28 Chapter 4 Operating the Monitor ENWW - HP LD4200 | HP LD4200 LCD Monitor User Guide - Page 37
Figure 4-2 Tile Mode Enlarged Screen Figure 4-3 Tile Mode Product 1 ~ 4: C(2) x R(2) Figure 4-4 Tile Mode Product 1 ~ 9: C(3) x R(3) Figure 4-5 Tile Mode Product 1 ~ 2: C(2) x R(1) Figure 4-6 Tile Mode Product 1 ~ 16: C(4) x R(4) ENWW Using the On-Screen Display Menu 29 - HP LD4200 | HP LD4200 LCD Monitor User Guide - Page 38
to adjust the Tile Mode: ● H-Size - adjusts the horizontal size of the screen taking into account the size of the bezel. ● V-Size - adjusts the vertical size of the screen taking into account the size of the bezel. ● H-Position - moves the screen position horizontally. ● V-Position - moves - HP LD4200 | HP LD4200 LCD Monitor User Guide - Page 39
, and the recommended solutions. Problem No image is displayed. Possible Cause Power cord not connected. Power is on, power indicator is blue, but Screen needs adjustments. the screen appears extremely dark. Power indicator is amber. Monitor in power saving mode. Out of Range message appears - HP LD4200 | HP LD4200 LCD Monitor User Guide - Page 40
control to check the input signal. Install the monitor driver, which is provided with the monitor or download from the HP Web site (http://www.hp.com). See if the plug & play function is supported by referring to the video card's user manual. The control locking function prevents unintentional OSD - HP LD4200 | HP LD4200 LCD Monitor User Guide - Page 41
knowledge base, monitoring and diagnostic tools, go to http://www.hp.com/support Preparing to Call Technical Support If you can not solve a problem using the troubleshooting tips in this section, you may need to call technical support. Contact your regional HP authorized service provider. Have - HP LD4200 | HP LD4200 LCD Monitor User Guide - Page 42
may vary either higher or lower. HP LD4200 LCD Monitor Table B-1 HP LD4200 Specifications Display Type Viewable Image Size Pixel Pitch Maximum Weight Without Stand & Speaker With Speaker With Stand With Stand & Speaker Dimensions (Without Stand & Speaker) Height Depth Width Dimensions (With - HP LD4200 | HP LD4200 LCD Monitor User Guide - Page 43
Table B-1 HP LD4200 Specifications (continued) Height 67.6 cm 26.6 inches Depth 29.3 cm 11.5 inches Width 99.56 cm 39.2 inches Power Rated Voltage AC 100-240V ~50/60Hz 2.2 A Power Consumption On Mode 220W Typical Sleep Mode ≤ 1W (RGB) / 4W (HDMI/DVI) Off Mode ≤ 1W Maximum - HP LD4200 | HP LD4200 LCD Monitor User Guide - Page 44
and are set as factory defaults. This monitor automatically recognizes these preset modes and they will appear properly sized and centered on the screen. HP LD4200 Preset Display Modes Table B-2 HP LD4200 Factory Preset Display Modes Preset Pixel Format Horz Freq (kHz) Vert Freq (Hz) 1 640 - HP LD4200 | HP LD4200 LCD Monitor User Guide - Page 45
NOTE: DTV/PC selection on RGB and HDMI/DVI inputs is availabe for PC resolutions 640 x 480/60Hz, 1280 x 720/60Hz, 1920 x 1080/60Hz and DTV resolutions: 480p, 720p, 1080p. Power Indicator Mode On Mode Sleep Mode Off Mode Indicator Light Blue Amber ENWW Recognizing Preset Display Resolutions 37 - HP LD4200 | HP LD4200 LCD Monitor User Guide - Page 46
RS-232C cable as shown in the following illustration. The RS-232C protocol is used for communication between the computer and the monitor. You can turn the monitor on/off, select an input source or adjust the OSD menu from the computer. RS-232C Configurations 7-Wire Configurations (Standard RS - HP LD4200 | HP LD4200 LCD Monitor User Guide - Page 47
: None ● Stop Bit: 1bit ● Flow Control: None ● Communication Code: ASCII code ● Use a crossed (reverse) cable Command Reference List 01. Power 02. Input Select 03. Aspect Ratio 04. Screen Mute 05. Volume Mute 06. Volume Control 07. Contrast 08. Brightness 09. Color 10. Tint 11. Sharpness 12. OSD - HP LD4200 | HP LD4200 LCD Monitor User Guide - Page 48
Volume 31. Speaker 32. Time 33. On Timer (On/Off Timer) On, Off 34. Off Timer (On/Off Timer) On, Off 35. On Timer (On/Off Timer) Time 36. Off Timer (On/Off Timer) Time 37. Sleep Time 38. Auto Sleep 39. Power On Delay 40. Language 41. DPM Select 42. Reset 43 - HP LD4200 | HP LD4200 LCD Monitor User Guide - Page 49
indicates present status data. If the data is data write mode, it returns the data of the PC computer. Error Acknowledgement [Command2][ ][Set ID][ ][NG][Data][x] *If there is error, it returns NG 01. Power (Command : a) To control Power On/Off of the Set. Transmission [k][a][ ][Set ID][ ][Data][Cr - HP LD4200 | HP LD4200 LCD Monitor User Guide - Page 50
Data 0 : Power Off 1 : Power On 02. Input Select (Command : screen format. You can also adjust the screen format using the ARC (Aspect Ratio Control) button on remote control or in the Screen menu. Transmission [k][c][ ][Set ID][ ][Data][Cr] Data 1 : Normal Screen (4:3) 2 : Wide Screen (16 :9) 42 - HP LD4200 | HP LD4200 LCD Monitor User Guide - Page 51
RGB PC, HDMI/DVI PC) Acknowledgement [c][ ][Set ID][ ][OK][Data][x] 04. Screen Mute (Command : d) To select screen mute on/off. Transmission [k][d][ ][Set ID][ ][Data][Cr] Data 0 : Screen mute off (Picture on) 1 : Screen mute on (Picture off) Acknowledgement [d][ ][Set ID][ ][OK][Data][x] 05. Volume - HP LD4200 | HP LD4200 LCD Monitor User Guide - Page 52
[f][ ][Set ID][ ][OK][Data][x] Data Min : 00H ~ Max : 64H Refer to "Real data mapping" in this appendix. 07. Contrast (Command : g) To adjust screen contrast. You can also adjust the contrast in the Picture menu. Transmission [k][g][ ][Set ID][ ][Data][Cr] Data Min : 00H ~ Max : 64H Refer to "Real - HP LD4200 | HP LD4200 LCD Monitor User Guide - Page 53
Data][x] * Real data mapping 0 : Step : A : Step 10 : F : Step 15 10 : Step 16 : 64 : Step 100 09. Color (Command : i) (Video only) To adjust the screen color. You can also adjust the color in the Picture menu. Transmission [k][i][ ][Set ID][ ][Data][Cr] Data Min : 00H ~ Max : 64H (Hexadecimal code - HP LD4200 | HP LD4200 LCD Monitor User Guide - Page 54
Data Red: 00H ~ Green: 64H * Tint Real data mapping 0 : Step -50 : 64 : Step 50 11. Sharpness (Command : k) (Video only) To adjust the screen Sharpness. You can also adjust the sharpness in the Picture menu. Transmission [k][k][ ][Set ID][ ][Data][Cr] Data Min : 00H ~ Max : 64H (Hexadecimal code - HP LD4200 | HP LD4200 LCD Monitor User Guide - Page 55
Transmission [k][l][ ][Set ID][ ][Data][Cr] Data 0 : OSD Off 1 : OSD On Acknowledgement [l][ ][Set ID][ ][OK][Data][x] Data 0 : OSD Off 1 : OSD On 13. Remote Lock /Key Lock (Command : m) To control Remote Lock on/off to the set. This function, when controlling RS-232C, locks the remote control and - HP LD4200 | HP LD4200 LCD Monitor User Guide - Page 56
Command : u)v To adjust the screen color temperature. Transmission [k][u][ ][ power off status when Stand-by mode. Transmission [k][z][ ][Set ID][ ][Data][Cr] Data FF : Read 0 : Normal (Power on and signal exist) 1 : No signal (Power on) 2 : Turn the monitor off by remote control 3 : Turn the monitor - HP LD4200 | HP LD4200 LCD Monitor User Guide - Page 57
9 : Turn the monitor off by auto off function Acknowledgement [z][ ][Set ID][ ][OK][Data][x] 17. ISM mode (Command: j p) Used to picture position and minimize image shaking automatically. It works only in RGB(PC) mode. Transmission [j][u][ ][Set ID][ ][Data][Cr] Data 1 : To set Acknowledgement - HP LD4200 | HP LD4200 LCD Monitor User Guide - Page 58
page A18. Acknowledgement [c][ ][Set ID][ ][OK][Data][x] 20. Tile Mode (Command : d d) Change a Tile Mode. Transmission [d][d][][Set ID][][Data][x] Data 00 12 13 14 ... 55 Description Tile mode is off. 1 x 2 mode(column x row) 1 x 3 mode 1 x 4 mode ... 5 x 5 mode *The data can not be set to 0X or - HP LD4200 | HP LD4200 LCD Monitor User Guide - Page 59
22. Tile V Position (Command : d f) To set the Vertical position. Transmission [d][f][][Set ID][][Data][x] Data Min : 00H ~ Max : 64H Acknowledgement [f][][Set ID][][OK/NG][Data][x] 23. Tile H Size (Command : d g) To set the Horizontal size. Transmission [d][g][][Set ID][][Data][x] Data Min : 00H ~ - HP LD4200 | HP LD4200 LCD Monitor User Guide - Page 60
Data Min : 00H ~ Max : 19H (Hexadecimal code) Acknowledgement [i][][Set ID][][OK/NG][Data][x] 26. Natural Mode (In Tilemode) (Command : d j) The image is omitted by the distance between the screens to be naturally shown. Transmission [d][j][][Set ID][][Data][x] Data 0 : Natural Off 1 : Natural On ff - HP LD4200 | HP LD4200 LCD Monitor User Guide - Page 61
Transmission [d][n][][Set ID][][Data][x] * The data is always FF(in Hex). Acknowledgement [n][][Set ID][][OK/NG][Data][x] * The data is 1 byte long in Hexadecimal. 29. Lamp fault Check (Command : d p) To check lamp fault. Transmission [d][p][][Set ID][][Data][x] * The data is always FF(in Hex). - HP LD4200 | HP LD4200 LCD Monitor User Guide - Page 62
31. Speaker (Command : d v) Turn the speaker on or off. Transmission [d][v][][Set ID][][Data][x] Data 0 : Off 1 : On Acknowledgement [v][][Set ID][][OK/NG][Data][x] 32. Time (Command : f a) Set the current time. Transmission [f][a][][Set - HP LD4200 | HP LD4200 LCD Monitor User Guide - Page 63
*When reading data, FFH is inputted for [Data1], [Data2] and [Data3]. In other cases, all are treated as NG. 33. On Timer (On/Off Timer) On, Off (Command : F b) Set days for On Timer. Transmission [f][b][][Set ID][][Data1][][Data2][Cr] [Data1] 0 (Write), FFH(Read) [Data2] 00H~FFH bit0 : Monday On - HP LD4200 | HP LD4200 LCD Monitor User Guide - Page 64
bit0 : Monday Off Timer On(1), Off(0) bit1 : Tuesday Off Timer On(1), Off(0) bit2 : Wednesday Off Timer On(1), Off(0) bit3 : Thursday Off Timer On(1), Off(0) bit4 : Friday Off Timer On(1), Off(0) bit5 : Saturday Off Timer On(1), Off(0) bit6 : Sunday Off Timer On(1), Off(0) bit7 : Everyday Off Timer - HP LD4200 | HP LD4200 LCD Monitor User Guide - Page 65
*When reading data, FFH is inputted for [Data2], [Data3]. In other cases, all are treated as NG. 36. Off Timer (On/Off Timer) Time (Command : f e) Set Off Timer. Transmission [f][e][][Set ID][][Data1][][Data2][][Data3][Cr] [Data1] 0 : Monday 1 : Tuesday 2 : Wednesday 3 : Thursday 4 : Friday 5 : - HP LD4200 | HP LD4200 LCD Monitor User Guide - Page 66
Transmission [f][g][][Set ID][][Data][Cr] Data 0 : Off 1 : On Acknowledgement [g][][Set ID][][OK/NG][Data][x] 39. Power On Delay (Command : f h) Set the schedule delay when the power is turned on (Unit: second). Transmission [f][h][][Set ID][][Data][Cr] Data : 00H ~ 64H (Data value) Acknowledgement - HP LD4200 | HP LD4200 LCD Monitor User Guide - Page 67
][x] 41. DPM Select (Command : f j) Set the DPM (Display Power Management) function. Transmission [f][j][][Set ID][][Data][Cr] Data 0 : Off 1 : On Acknowledgement [j][][Set ID][][OK/NG][Data][x] 42. Reset (Command : f k) Execute the Picture, Screen and Factory Reset functions. ENWW Transmission - HP LD4200 | HP LD4200 LCD Monitor User Guide - Page 68
Transmission [f][k][][Set ID][][Data][Cr] Data 0 : Picture Reset 1 : Screen Reset 2 : Factory Reset Acknowledgement [k][][Set ID][][OK/NG][Data][x] 43. S/W Version (Command : f z) Check the software version. Transmission [f][z][][Set ID][][Data][Cr] Data FFH : Read Acknowledgement [z][][Set ID][][OK - HP LD4200 | HP LD4200 LCD Monitor User Guide - Page 69
2 60H : RGB (PC) 90H : HDMI/DVI (DTV) A0H : HDMI/DVI (PC) IR Codes Use this method to connect your wired remote control port on the monitor. Remote Control IR Code Output Wave ● Single pulse, modulated with 37.9KHz signal at 455kHz ● Carrier Frequency ◦ FCAR = 1/Tc=fosc/12 ◦ Duty Ratio = T1/Tc - HP LD4200 | HP LD4200 LCD Monitor User Guide - Page 70
08 C4 C5 09 98 0B 0E Function ▲ ▼ VOL(►) VOL(◄) POWER ON/OFF POWER ON POWER OFF MUTE AV INPUT SLEEP Note R/C Button R/C Button R/C Button R/C Button R/C Button (Power On/Off) Discrete IR Code (Only Power On) Discrete IR Code (Only Power On) R/C Button R/C Button R/C Button R/C Button 62 Appendix - HP LD4200 | HP LD4200 LCD Monitor User Guide - Page 71
) Discrete IR Code(Input COMPONENT2 Selection) Discrete IR Code(Input RGB PC Selection) Discrete IR Code(Input HDMI/DVI Selection) R/C Button Discrete IR Code(Only 4:3 mode) Discrete IR Code(Only 16:9 mode) Discrete IR Code(Only ZOOM1, ZOOM2 mode) Discrete IR Code ENWW IR Codes 63 - HP LD4200 | HP LD4200 LCD Monitor User Guide - Page 72
has been tested and found to comply with the limits for a Class B digital device, pursuant to Part 15 of the FCC Rules. These limits are frequency energy and, if not installed and used in accordance with the instructions, may cause harmful interference to radio communications. However, there is no - HP LD4200 | HP LD4200 LCD Monitor User Guide - Page 73
Notice This Class B digital apparatus meets all monitor to operate on input voltages between 100-120V or 200-240V. The power cord set (flexible cord or wall plug) received with the monitor the type of power cord to use, contact an authorized HP service provider. A power cord should be routed - HP LD4200 | HP LD4200 LCD Monitor User Guide - Page 74
Disposal This HP product contains mercury in the fluorescent lamp in the display LCD that might the local city office, the household waste disposal service or the shop where you purchased the product. A Japanese regulatory requirement, defined by specification JIS C 0950, 2005, mandates that - HP LD4200 | HP LD4200 LCD Monitor User Guide - Page 75
11363-2006 11363-2006 ENWW Product Environmental Notices 67
-
 1
1 -
 2
2 -
 3
3 -
 4
4 -
 5
5 -
 6
6 -
 7
7 -
8
-
9
-
10
-
11
-
12
-
13
-
14
-
15
-
16
-
17
-
18
-
19
-
20
-
21
-
22
-
23
-
24
-
25
-
26
-
27
-
28
-
29
-
30
-
31
-
32
-
33
-
34
-
35
-
36
-
37
-
38
-
39
-
40
-
41
-
42
-
43
-
44
-
45
-
46
-
47
-
48
-
49
-
50
-
51
-
52
-
53
-
54
-
55
-
56
-
57
-
58
-
59
-
60
-
61
-
62
-
63
-
64
-
65
-
66
-
67
-
68
-
69
-
70
-
71
-
72
-
73
-
74
-
75
 |
 |

HP LD4200 LCD Monitor
User Guide