HP LE1901w HP LE1901w/LE1901wm and LE2201w LCD Monitors User Guide - Page 13
Connecting the Cables, Adjusting the Monitor - speaker bar
 |
UPC - 884420692393
View all HP LE1901w manuals
Add to My Manuals
Save this manual to your list of manuals |
Page 13 highlights
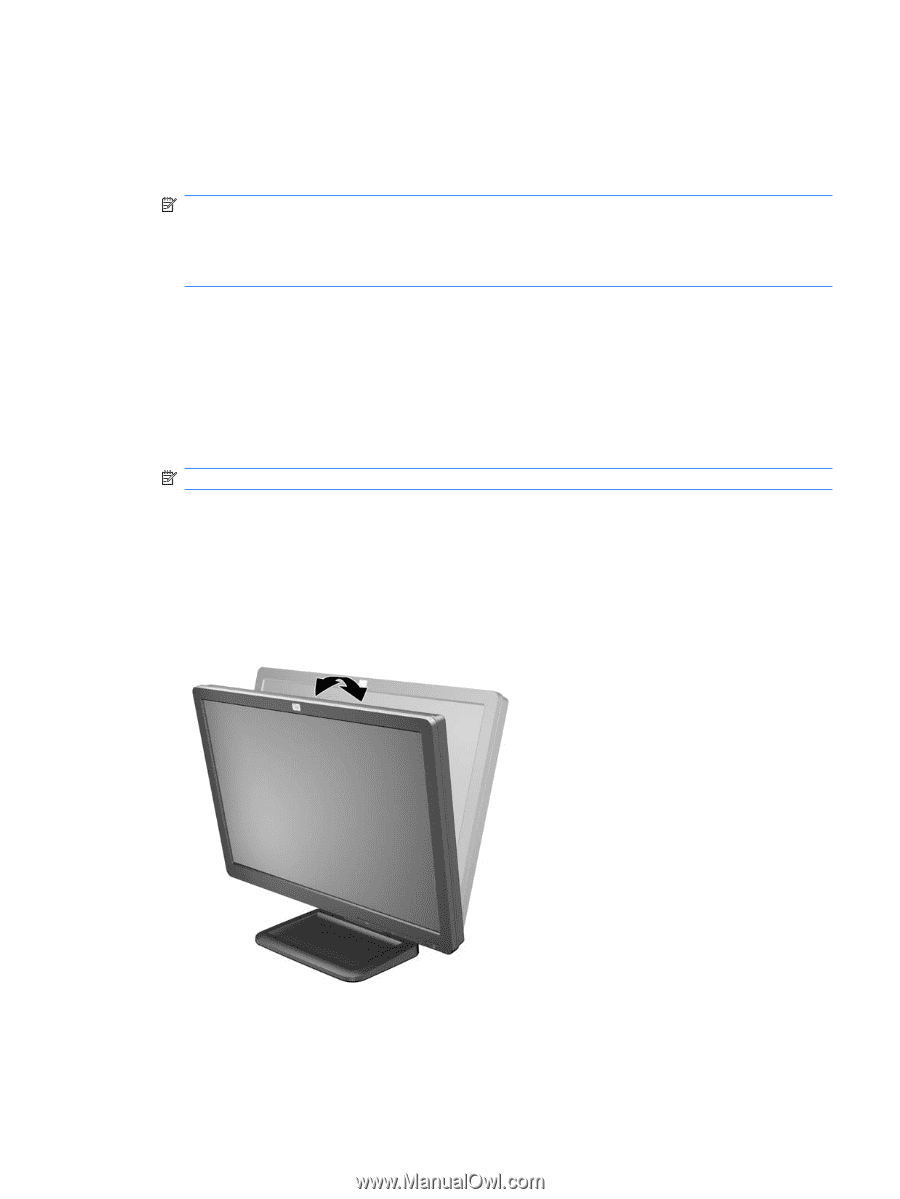
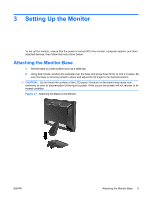
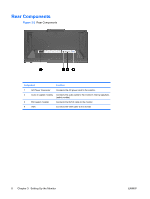
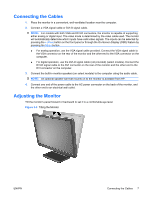
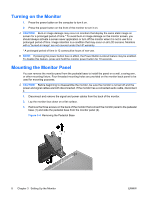
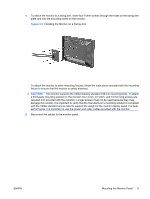
Connecting the Cables 1. Place the monitor in a convenient, well-ventilated location near the computer. 2. Connect a VGA signal cable or DVI-D signal cable. NOTE: For models with both VGA and DVI-D connectors, the monitor is capable of supporting either analog or digital input. The video mode is determined by the video cable used. The monitor will automatically determine which inputs have valid video signals. The inputs can be selected by pressing the + (Plus) button on the front panel or through the On-Screen Display (OSD) feature by pressing the Menu button. ● For analog operation, use the VGA signal cable provided. Connect the VGA signal cable to the VGA connector on the rear of the monitor and the other end to the VGA connector on the computer. ● For digital operation, use the DVI-D signal cable (not provided) (select models). Connect the DVI-D signal cable to the DVI connector on the rear of the monitor and the other end to the DVI connector on the computer. 3. Connect the built-in monitor speakers (on select models) to the computer using the audio cable. NOTE: An optional speaker bar that mounts on to the monitor is available from HP. 4. Connect one end of the power cable to the AC power connector on the back of the monitor, and the other end to an electrical wall outlet. Adjusting the Monitor Tilt the monitor's panel forward or backward to set it to a comfortable eye level. Figure 3-3 Tilting the Monitor ENWW Connecting the Cables 7
-
 1
1 -
2
-
3
-
4
-
5
-
6
-
7
-
 8
8 -
 9
9 -
 10
10 -
 11
11 -
 12
12 -
 13
13 -
 14
14 -
 15
15 -
 16
16 -
 17
17 -
 18
18 -
19
-
20
-
21
-
22
-
23
-
24
-
25
-
26
-
27
-
28
-
29
-
30
-
31
-
32
-
33
-
34
-
35
-
36
-
37
-
38
-
39
-
40
-
41
-
42
-
43
-
44
-
45
 |
 |