HP LE1901w HP LE1901w/LE1901wm and LE2201w LCD Monitors User Guide - Page 18
Installing the .INF and .ICM Files, Installing from the CD, Downloading from the Worldwide Web - driver
 |
UPC - 884420692393
View all HP LE1901w manuals
Add to My Manuals
Save this manual to your list of manuals |
Page 18 highlights
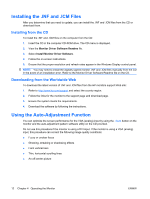
Installing the .INF and .ICM Files After you determine that you need to update, you can install the .INF and .ICM files from the CD or download them. Installing from the CD To install the .INF and .ICM files on the computer from the CD: 1. Insert the CD in the computer CD-ROM drive. The CD menu is displayed. 2. View the Monitor Driver Software Readme file. 3. Select Install Monitor Driver Software. 4. Follow the on-screen instructions. 5. Ensure that the proper resolution and refresh rates appear in the Windows Display control panel. NOTE: You may need to install the digitally signed monitor .INF and .ICM files manually from the CD in the event of an installation error. Refer to the Monitor Driver Software Readme file on the CD. Downloading from the Worldwide Web To download the latest version of .INF and .ICM files from the HP monitors support Web site: 1. Refer to http://www.hp.com/support and select the country region. 2. Follow the links for the monitor to the support page and download page. 3. Ensure the system meets the requirements. 4. Download the software by following the instructions. Using the Auto-Adjustment Function You can optimize the screen performance for the VGA (analog) input by using the -/Auto button on the monitor and the auto-adjustment pattern software utility on the CD provided. Do not use this procedure if the monitor is using a DVI input. If the monitor is using a VGA (analog) input, this procedure can correct the following image quality conditions: ● Fuzzy or unclear focus ● Ghosting, streaking or shadowing effects ● Faint vertical bars ● Thin, horizontal scrolling lines ● An off-center picture 12 Chapter 4 Operating the Monitor ENWW
-
 1
1 -
2
-
3
-
4
-
5
-
6
-
7
-
8
-
9
-
10
-
11
-
12
-
 13
13 -
 14
14 -
 15
15 -
 16
16 -
 17
17 -
 18
18 -
 19
19 -
 20
20 -
 21
21 -
 22
22 -
 23
23 -
24
-
25
-
26
-
27
-
28
-
29
-
30
-
31
-
32
-
33
-
34
-
35
-
36
-
37
-
38
-
39
-
40
-
41
-
42
-
43
-
44
-
45
 |
 |