HP LP2065 HP LP1965 19", LP2065 20", and LP2465 24" LCD Monitor
HP LP2065 - 20.1" LCD Monitor Manual
 |
UPC - 882780206175
View all HP LP2065 manuals
Add to My Manuals
Save this manual to your list of manuals |
HP LP2065 manual content summary:
- HP LP2065 | HP LP1965 19", LP2065 20", and LP2465 24" LCD Monitor - Page 1
HP LP1965 19", LP2065 20", and LP2465 24" LCD Monitors User Guide - HP LP2065 | HP LP1965 19", LP2065 20", and LP2465 24" LCD Monitor - Page 2
© 2005-2008 Hewlett-Packard Development Company, L.P. Microsoft, Windows, and the Windows logo are trademarks of Microsoft Corporation in the U.S. and other countries. All other product names mentioned herein may be trademarks of their respective companies. Hewlett-Packard Company shall not be - HP LP2065 | HP LP1965 19", LP2065 20", and LP2465 24" LCD Monitor - Page 3
About This Guide This guide provides information on setting up the monitor, installing drivers, using the on-screen display menu, troubleshooting and technical specifications. WARNING! Text set off in this manner indicates that failure to follow directions could result in bodily harm or loss of life - HP LP2065 | HP LP1965 19", LP2065 20", and LP2465 24" LCD Monitor - Page 4
iv About This Guide ENWW - HP LP2065 | HP LP1965 19", LP2065 20", and LP2465 24" LCD Monitor - Page 5
Cleaning the Monitor ...4 Shipping the Monitor ...4 3 Setting Up the Monitor Installing the Monitor Pedestal Base ...5 Rear Components ...6 Selecting the Signal Connectors and Cables 7 Connecting the Monitor ...8 Adjusting the Monitor ...9 Turning on the Monitor ...11 Connecting USB Devices ...12 - HP LP2065 | HP LP1965 19", LP2065 20", and LP2465 24" LCD Monitor - Page 6
2000 and Windows XP 28 Appendix A Troubleshooting Solving Common Problems ...30 Using the Worldwide Web ...31 Preparing to Call Technical Support 31 Appendix B Technical Specifications LP1965 Model ...32 LP2065 Model ...33 LP2465 Model ...34 Recognizing Preset Display Resolutions 35 Entering - HP LP2065 | HP LP1965 19", LP2065 20", and LP2465 24" LCD Monitor - Page 7
Appendix D LCD Monitor Quality and Pixel Policy ENWW vii - HP LP2065 | HP LP1965 19", LP2065 20", and LP2465 24" LCD Monitor - Page 8
viii ENWW - HP LP2065 | HP LP1965 19", LP2065 20", and LP2465 24" LCD Monitor - Page 9
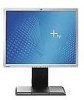
Features HP LP1965, LP2065, and LP2465 Models The flat panel monitors have an active matrix, thin-film transistor (TFT), liquid crystal display (LCD). The monitor features include: ● LP1965 model, large 19-inch (48.3 cm) viewable area display with 1280 × 1024 resolution, plus full-screen support - HP LP2065 | HP LP1965 19", LP2065 20", and LP2465 24" LCD Monitor - Page 10
● AssetControl ● Compliant with the following regulated specifications: ◦ European Union CE Directives ◦ Swedish MPR II 1990 ◦ Swedish TCO Requirements 2 Chapter 1 Product Features ENWW - HP LP2065 | HP LP1965 19", LP2065 20", and LP2465 24" LCD Monitor - Page 11
. This guide is located on the Web at http://www.hp.com/ergo and/or on the documentation CD, if one is included with the monitor. CAUTION: For the protection of the monitor, as well as the computer, connect all power cords for the computer and its peripheral devices (such as a monitor, printer - HP LP2065 | HP LP1965 19", LP2065 20", and LP2465 24" LCD Monitor - Page 12
to service this product yourself. Adjust only those controls that are covered in the operating instructions. If the monitor is not operating properly or has been dropped or damaged, contact an authorized HP dealer, reseller, or service provider. ● Use only a power source and connection appropriate - HP LP2065 | HP LP1965 19", LP2065 20", and LP2465 24" LCD Monitor - Page 13
3 Setting Up the Monitor To set up the monitor, ensure that the power is turned off to the monitor, computer system, and other attached devices, then follow the instructions below. NOTE: Be sure the master power switch, located on the rear panel of the monitor, is in the off position. The master - HP LP2065 | HP LP1965 19", LP2065 20", and LP2465 24" LCD Monitor - Page 14
the monitor. Connects the DVI-I to VGA signal cable or DVI-D signal cable to the monitor. USB Upstream Connector USB Downstream Connectors USB Downstream Connectors (side panel) Connects the monitor USB hub to a host USB port/hub. Connects optional USB devices to the monitor. Connects optional USB - HP LP2065 | HP LP1965 19", LP2065 20", and LP2465 24" LCD Monitor - Page 15
monitor will automatically determine which inputs have valid video signals. The inputs can be selected through the On-Screen Display (OSD) feature by pressing the Input Select button on the front panel. Figure 3-3 Connecting the DVI-I to VGA Signal Cable Figure 3-4 Connecting the DVI-D Signal Cable - HP LP2065 | HP LP1965 19", LP2065 20", and LP2465 24" LCD Monitor - Page 16
convenient, well-ventilated location near the computer. 2. Connect one end of the USB hub cable to the USB connector on the rear panel of the computer, and the other end to the upstream USB connector on the monitor. Figure 3-5 Connecting the USB Cable WARNING! To reduce the risk of electric shock or - HP LP2065 | HP LP1965 19", LP2065 20", and LP2465 24" LCD Monitor - Page 17
management channel on the back of the monitor base. Figure 3-7 Using the Cable Management Feature Adjusting the Monitor 1. Tilt the monitor's panel forward or backward to set it to a comfortable eye level. Figure 3-8 Tilting the Monitor NOTE: The 24" model has a tilt range of -5 to +25 degrees - HP LP2065 | HP LP1965 19", LP2065 20", and LP2465 24" LCD Monitor - Page 18
the display head, press the lock-down/release button on the front of the column. d. Guide the display head up to the desired height. Figure 3-10 Adjusting the Height (LP2065 and LP2465 models) NOTE: The 19" model has a height adjustment range of 100 mm. 10 Chapter 3 Setting Up the Monitor ENWW - HP LP2065 | HP LP1965 19", LP2065 20", and LP2465 24" LCD Monitor - Page 19
application. Figure 3-11 Pivoting the Monitor NOTE: The 20" model (shown above) pivots counter-clockwise; the 19" and 24" models pivot rear of the monitor. 3. Press the power button on the front of the monitor. CAUTION: Burn-in image damage may occur on monitors that display the same static image - HP LP2065 | HP LP1965 19", LP2065 20", and LP2465 24" LCD Monitor - Page 20
rear panel, used to connect devices such as a digital camera, USB keyboard, or USB mouse. NOTE: You must connect the USB hub cable from the monitor to the computer to enable the USB 2.0 ports on the monitor. Refer to Step 2 in Connecting the Monitor on page 8. Figure 3-12 Connecting USB Devices 12 - HP LP2065 | HP LP1965 19", LP2065 20", and LP2465 24" LCD Monitor - Page 21
to mount optional devices, such as the HP speaker bar, to attach to the LCD. Refer to the documentation included with the optional device for detailed mounting instructions. Figure 3-13 Using the Accessory Rails Feature Removing the Monitor Pedestal Base You can remove the monitor panel from the - HP LP2065 | HP LP1965 19", LP2065 20", and LP2465 24" LCD Monitor - Page 22
's mounting solution is compliant with the VESA standard and is rated to support the weight of the monitor display panel. For best performance, it is important to use the power and video cables provided with the monitor. 2. Remove the Quick Release from the pedestal base by removing the four - HP LP2065 | HP LP1965 19", LP2065 20", and LP2465 24" LCD Monitor - Page 23
The Quick Release can also be installed directly to a wall to mount the monitor panel. It is designed to support a maximum of up to 24 lbs. (10.9 kg). If you are mounting to a wall, HP recommends that you consult with a qualified engineering, architectural, or construction professional to determine - HP LP2065 | HP LP1965 19", LP2065 20", and LP2465 24" LCD Monitor - Page 24
Rating Labels The rating labels on the monitor provide the spare part number, product number, and serial number. You may need these numbers when contacting HP about the monitor model. The rating labels are located on the rear panel of the monitor display head. Figure 3-18 Locating the Rating Labels - HP LP2065 | HP LP1965 19", LP2065 20", and LP2465 24" LCD Monitor - Page 25
.ICM files can be downloaded from the HP monitors support Web site. See Downloading from the Worldwide Web on page 18 in this chapter. The Information File The .INF file defines monitor resources used by Microsoft Windows operating systems to ensure monitor compatibility with the computer's graphics - HP LP2065 | HP LP1965 19", LP2065 20", and LP2465 24" LCD Monitor - Page 26
the proper resolution and refresh rates appear in the Windows Display control panel. NOTE: You may need to install the digitally signed monitor .INF and .ICM files manually from the CD in the event of an installation error. Refer to the Monitor Driver Software Readme file on the CD. Downloading from - HP LP2065 | HP LP1965 19", LP2065 20", and LP2465 24" LCD Monitor - Page 27
. 4. Select Open Auto-Adjustment Software . The setup test pattern is displayed. 5. Press the -/Auto button on the monitor front panel to produce a stable, centered image. 6. Press the ESC key or any other key on the keyboard to exit the test pattern. ENWW Using the Auto-Adjustment Function 19 - HP LP2065 | HP LP1965 19", LP2065 20", and LP2465 24" LCD Monitor - Page 28
Navigates forward through the OSD menu and increases adjustment levels. 4 Input Select Selects the video input (DVI-I #1 or DVI-I #2). 5 Power LED Fully powered = Green. Sleep mode = Amber. Sleep Timer mode = Flashing Amber. 6 Power Turns the monitor on or off. 20 Chapter 4 Operating the - HP LP2065 | HP LP1965 19", LP2065 20", and LP2465 24" LCD Monitor - Page 29
Adjusting the Monitor Settings The monitor settings can be adjusted from the On-Screen Display (OSD) menu or from the HP Display Assistant utility. Using the On-Screen Display Menu Use the On-Screen Display (OSD) to adjust the screen image based on your viewing preferences. To access the OSD, do the - HP LP2065 | HP LP1965 19", LP2065 20", and LP2465 24" LCD Monitor - Page 30
and maintains proportional image ● One-to-one-disables video scaling, displays an image that is smaller in size than the monitor's capability and centers the image on the screen in the active viewing area Sharpness (not available on LP1965 model) Adjusts the screen image to look sharper or soft - HP LP2065 | HP LP1965 19", LP2065 20", and LP2465 24" LCD Monitor - Page 31
Menu (continued) Icon Main Menu Submenu Management Power Saver Power On Recall Mode Display Power-On Status Display DDC/CI Support Sleep Timer Description Selects the power management features of the monitor. Enables the power saving feature. Select: ● On ● Off The factory default is On - HP LP2065 | HP LP1965 19", LP2065 20", and LP2465 24" LCD Monitor - Page 32
Settings Provides the current input video mode. Recommended Settings Provides the recommended resolution mode and refresh rate for the monitor. Serial Number Reports the serial number of the monitor. The serial number is needed if contacting HP technical support. Version Reports the firmware - HP LP2065 | HP LP1965 19", LP2065 20", and LP2465 24" LCD Monitor - Page 33
contains advanced circuitry that allows the flat panel screen to function like a standard monitor. Two controls in the on-screen display can be adjusted to improve image performance: Clock and Clock Phase. NOTE: The Clock and Clock Phase controls are adjustable only when using an analog input - HP LP2065 | HP LP1965 19", LP2065 20", and LP2465 24" LCD Monitor - Page 34
uses the default signal input. ● Auto Adjustment is in Progress-Indicates the auto-adjustment function is active. ● Monitor Going to Sleep-Indicates the screen display is entering a sleep mode. ● Check Video Cable-Indicates the video cable is not properly connected to the computer. ● OSD Lock-The - HP LP2065 | HP LP1965 19", LP2065 20", and LP2465 24" LCD Monitor - Page 35
HP Display LiteSaver is a software application, available on the CD, that increases monitor life and saves energy. It allows you to place the monitor into its low power sleep mode at predefined times by shutting down or reducing power to most internal circuits. This helps protect the LCD panel - HP LP2065 | HP LP1965 19", LP2065 20", and LP2465 24" LCD Monitor - Page 36
as an administrator or a member of the administrator's group. If the computer is connected to a network, network policy settings may prevent you from completing this procedure. The sRGB ICM file does not support Windows 95 and Windows NT operating systems. 28 Chapter 4 Operating the Monitor ENWW - HP LP2065 | HP LP1965 19", LP2065 20", and LP2465 24" LCD Monitor - Page 37
icon in the Control Panel. 2. In the Display Properties windows, select the Settings tab, then click the , then click the Add button 5. To activate a color profile for the monitor, you must set it as the Default Monitor Profile. Select sRGB Color Space Profile, then click Set as Default button. - HP LP2065 | HP LP1965 19", LP2065 20", and LP2465 24" LCD Monitor - Page 38
DVI-I cable to the DVI-I connector on the computer. Be sure that the computer power is off while connecting the video cable. Out of Range. Set Monitor to 1280 × 1024 @ 60Hz is displayed on screen. (LP1965 19" model) Video resolution and/or refresh rate are set higher than what the monitor supports - HP LP2065 | HP LP1965 19", LP2065 20", and LP2465 24" LCD Monitor - Page 39
, online assistance, community forums of IT experts, broad mutlivendor knowledge base, monitoring and diagnostic tools, go to http://www.hp.com/support Preparing to Call Technical Support If you cannot solve a problem using the trouble shooting tips in this section, you may need to call technical - HP LP2065 | HP LP1965 19", LP2065 20", and LP2465 24" LCD Monitor - Page 40
LP1965 Model Specifications Display Type Viewable Image Size Tilt Swivel Maximum Weight (Unpacked) Dimensions (include base) Height Depth Width Maximum Graphic Resolution Text Mode Dot Pitch Horizontal Frequency Vertical Refresh Rate Environmental Requirements Temperature 19 inches TFT LCD 19-inch - HP LP2065 | HP LP1965 19", LP2065 20", and LP2465 24" LCD Monitor - Page 41
Input Terminal Two DVI-I connectors with cables included. 0 to 3657.6 m 0 to 12192 m LP2065 Model Table B-2 LP2065 Model Specifications Display Type Viewable Image Size Tilt Swivel Maximum Weight (Unpacked) Dimensions (include base) Height Depth Width Maximum Graphic Resolution Text Mode Dot - HP LP2065 | HP LP1965 19", LP2065 20", and LP2465 24" LCD Monitor - Page 42
Model Specifications Display Type Viewable Image Size Tilt Swivel Maximum Weight (Unpacked) Dimensions (include base) Height Depth Width Maximum Graphic Resolution Text Mode Dot Pitch Horizontal Frequency Vertical Refresh Rate Environmental Requirements Temperature 24.1 inches TFT LCD 24-inch - HP LP2065 | HP LP1965 19", LP2065 20", and LP2465 24" LCD Monitor - Page 43
Recognizing Preset Display Resolutions The display resolutions listed below are the most commonly used modes and are set as factory defaults. This monitor automatically recognized these preset modes and they will appear properly sized and centered on the screen. Table B-4 LP1965 Model Factory - HP LP2065 | HP LP1965 19", LP2065 20", and LP2465 24" LCD Monitor - Page 44
61.8 13 1280 × 768 47.4 14 1280 × 960 60.0 15 1280 × 1024 64.0 16 1280 × 1024 80.0 17 1280 × 1024 91.2 18 1600 × 1200 61.7 19 1600 × 1200 75.0 *20 1600 × 1200 93.8 21 1680 × 1050 65.3 *22 1920 × 1080 67.2 23 1920 × 1200 74.0 Vert Freq (Hz) 59.9 75.0 70 - HP LP2065 | HP LP1965 19", LP2065 20", and LP2465 24" LCD Monitor - Page 45
. Refer to the computer manual for instructions on setting energy saver features (sometimes called power management features). NOTE: The above power saver feature only works when connected to computers that have energy saver features. By selecting the settings in the monitor's Energy Saver utility - HP LP2065 | HP LP1965 19", LP2065 20", and LP2465 24" LCD Monitor - Page 46
installed and used in accordance with the instructions, may cause harmful interference to radio communications device that are not expressly approved by Hewlett Packard Company may void the user's authority to operate the equipment. Cables Connections to this device must be made with shielded cables - HP LP2065 | HP LP1965 19", LP2065 20", and LP2465 24" LCD Monitor - Page 47
Company P. O. Box 692000, Mail Stop 530113 Houston, Texas 77269-2000 Or, call 1-800-HP-INVENT (1-800 474-6836) For questions regarding this FCC declaration, contact: Hewlett Packard Company P. O. Box 692000, Mail Stop 510101 Houston, Texas 77269-2000 Or, call (281) 514-3333 To identify this product - HP LP2065 | HP LP1965 19", LP2065 20", and LP2465 24" LCD Monitor - Page 48
HP brand computers, keyboards and monitors that bear the "GS" approval mark, meet the applicable ergonomic requirements. The installation guides you have questions about the type of power cord to use, contact an authorized HP service provider. A power cord should be routed so that it is not likely to - HP LP2065 | HP LP1965 19", LP2065 20", and LP2465 24" LCD Monitor - Page 49
HP product contains mercury in the fluorescent lamp in the display LCD that waste disposal service or the shop where you purchased the product. Chemical Substances HP is committed hp.com/go/reach Restriction of Hazardous Substances (RoHS) A Japanese regulatory requirement, defined by specification - HP LP2065 | HP LP1965 19", LP2065 20", and LP2465 24" LCD Monitor - Page 50
11363-2006 11363-2006 42 Appendix C Agency Regulatory Notices ENWW - HP LP2065 | HP LP1965 19", LP2065 20", and LP2465 24" LCD Monitor - Page 51
in normal operating mode at a supported resolution and refresh rate, from a distance of approximately 50 cm (20 in). HP expects that, over time, the industry will continue to improve its ability to produce LCDs with fewer cosmetic imperfections and HP will adjust guidelines as improvements are made
-
 1
1 -
 2
2 -
 3
3 -
 4
4 -
 5
5 -
 6
6 -
 7
7 -
8
-
9
-
10
-
11
-
12
-
13
-
14
-
15
-
16
-
17
-
18
-
19
-
20
-
21
-
22
-
23
-
24
-
25
-
26
-
27
-
28
-
29
-
30
-
31
-
32
-
33
-
34
-
35
-
36
-
37
-
38
-
39
-
40
-
41
-
42
-
43
-
44
-
45
-
46
-
47
-
48
-
49
-
50
-
51
 |
 |

HP LP1965 19", LP2065 20", and LP2465 24"
LCD Monitors
User Guide