HP LaserJet M1005 HP LaserJet M1005 MFP - User Guide - Page 53
Settings=Custom, Copy setup, Default Quality, To adjust the copy quality for the current job
 |
View all HP LaserJet M1005 manuals
Add to My Manuals
Save this manual to your list of manuals |
Page 53 highlights
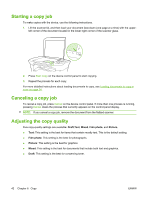
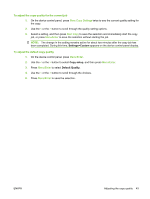
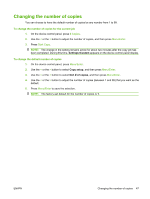
To adjust the copy quality for the current job 1. On the device control panel, press More Copy Settings twice to see the current quality setting for the copy. 2. Use the < or the > button to scroll through the quality setting options. 3. Select a setting, and then press Start Copy to save the selection and immediately start the copy job, or press Menu/Enter to save the selection without starting the job. NOTE: The change in the setting remains active for about two minutes after the copy job has been completed. During this time, Settings=Custom appears on the device control-panel display. To adjust the default copy quality 1. On the device control panel, press Menu/Enter. 2. Use the < or the > button to select Copy setup, and then press Menu/Enter. 3. Press Menu/Enter to select Default Quality. 4. Use the < or the > button to scroll through the choices. 5. Press Menu/Enter to save the selection. ENWW Adjusting the copy quality 43
-
 1
1 -
2
-
3
-
4
-
5
-
6
-
7
-
8
-
9
-
10
-
11
-
12
-
13
-
14
-
15
-
16
-
17
-
18
-
19
-
20
-
21
-
22
-
23
-
24
-
25
-
26
-
27
-
28
-
29
-
30
-
31
-
32
-
33
-
34
-
35
-
36
-
37
-
38
-
39
-
40
-
41
-
42
-
43
-
44
-
45
-
46
-
47
-
 48
48 -
 49
49 -
 50
50 -
 51
51 -
 52
52 -
 53
53 -
 54
54 -
 55
55 -
 56
56 -
 57
57 -
 58
58 -
59
-
60
-
61
-
62
-
63
-
64
-
65
-
66
-
67
-
68
-
69
-
70
-
71
-
72
-
73
-
74
-
75
-
76
-
77
-
78
-
79
-
80
-
81
-
82
-
83
-
84
-
85
-
86
-
87
-
88
-
89
-
90
-
91
-
92
-
93
-
94
-
95
-
96
-
97
-
98
-
99
-
100
-
101
-
102
-
103
-
104
-
105
-
106
-
107
-
108
-
109
-
110
-
111
-
112
-
113
-
114
-
115
-
116
-
117
-
118
-
119
-
120
-
121
-
122
-
123
-
124
-
125
-
126
-
127
-
128
-
129
-
130
-
131
-
132
-
133
-
134
-
135
-
136
-
137
-
138
-
139
-
140
-
141
-
142
 |
 |