HP LaserJet Pro CP1525 HP LaserJet Pro CP1520 - Software Technical Reference - Page 187
Port selection, Windows XP, Windows Server 2003, Windows Vista and Windows 7
 |
View all HP LaserJet Pro CP1525 manuals
Add to My Manuals
Save this manual to your list of manuals |
Page 187 highlights
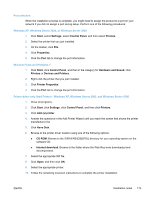
Port selection When the installation process is complete, you might need to assign the product to a port on your network if you did not assign a port during setup. Perform one of the following procedures: Windows XP, Windows Server 2003, or Windows Server 2008 1. Click Start, select Settings, select Control Panel, and then select Printers. 2. Select the printer that you just installed. 3. On the toolbar, click File. 4. Click Properties. 5. Click the Port tab to change the port information. Windows Vista and Windows 7 1. Click Start, click Control Panel, and then in the category for Hardware and Sound, click Printers or Devices and Printers. 2. Right-click the printer that you just installed. 3. Click Printer Properties. 4. Click the Port tab to change the port information. Printer driver only (Add Printer) - Windows XP, Windows Server 2003, and Windows Server 2008 1. Close all programs. 2. Click Start, click Settings, click Control Panel, and then click Printers. 3. Click Add (a) printer. 4. Answer the questions in the Add Printer Wizard until you reach the screen that shows the printer manufacturer list. 5. Click Have Disk. 6. Browse to the printer driver location using one of the following options: ● CD-ROM: Browse to the \DRIVERS\[OS]\[PDL] directory for your operating system on the software CD. ● Internet download: Browse to the folder where the Web files were downloaded and decompressed. 7. Select the appropriate INF file. 8. Click Open, and then click OK. 9. Select the appropriate printer. 10. Follow the remaining onscreen instructions to complete the printer installation. ENWW Installation notes 173
-
 1
1 -
2
-
3
-
4
-
5
-
6
-
7
-
8
-
9
-
10
-
11
-
12
-
13
-
14
-
15
-
16
-
17
-
18
-
19
-
20
-
21
-
22
-
23
-
24
-
25
-
26
-
27
-
28
-
29
-
30
-
31
-
32
-
33
-
34
-
35
-
36
-
37
-
38
-
39
-
40
-
41
-
42
-
43
-
44
-
45
-
46
-
47
-
48
-
49
-
50
-
51
-
52
-
53
-
54
-
55
-
56
-
57
-
58
-
59
-
60
-
61
-
62
-
63
-
64
-
65
-
66
-
67
-
68
-
69
-
70
-
71
-
72
-
73
-
74
-
75
-
76
-
77
-
78
-
79
-
80
-
81
-
82
-
83
-
84
-
85
-
86
-
87
-
88
-
89
-
90
-
91
-
92
-
93
-
94
-
95
-
96
-
97
-
98
-
99
-
100
-
101
-
102
-
103
-
104
-
105
-
106
-
107
-
108
-
109
-
110
-
111
-
112
-
113
-
114
-
115
-
116
-
117
-
118
-
119
-
120
-
121
-
122
-
123
-
124
-
125
-
126
-
127
-
128
-
129
-
130
-
131
-
132
-
133
-
134
-
135
-
136
-
137
-
138
-
139
-
140
-
141
-
142
-
143
-
144
-
145
-
146
-
147
-
148
-
149
-
150
-
151
-
152
-
153
-
154
-
155
-
156
-
157
-
158
-
159
-
160
-
161
-
162
-
163
-
164
-
165
-
166
-
167
-
168
-
169
-
170
-
171
-
172
-
173
-
174
-
175
-
176
-
177
-
178
-
179
-
180
-
181
-
 182
182 -
 183
183 -
 184
184 -
 185
185 -
 186
186 -
 187
187 -
 188
188 -
 189
189 -
 190
190 -
 191
191 -
 192
192 -
193
-
194
-
195
-
196
-
197
-
198
-
199
-
200
 |
 |