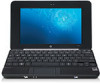
HP Mini 1000 HP MINI User Guide - Windows XP
HP Mini 1000 - PC Manual
 |
View all HP Mini 1000 manuals
Add to My Manuals
Save this manual to your list of manuals |
HP Mini 1000 manual content summary:
- HP Mini 1000 | HP MINI User Guide - Windows XP - Page 1
HP MINI User Guide User Guide - HP Mini 1000 | HP MINI User Guide - Windows XP - Page 2
products and services. Nothing herein should be construed as constituting an additional warranty. HP shall not be liable for technical or editorial errors or omissions contained herein. First Edition: January 2009 Document Part Number: 503591-001 Product notice This user guide describes features - HP Mini 1000 | HP MINI User Guide - Windows XP - Page 3
the device, do not place the device directly on your lap or obstruct the device air vents. Use the device only on a hard, flat surface. Do not allow another hard surface, such as an adjoining optional printer, or a soft surface, such as pillows or rugs or clothing, to block airflow. Also, do - HP Mini 1000 | HP MINI User Guide - Windows XP - Page 4
iv Safety warning notice - HP Mini 1000 | HP MINI User Guide - Windows XP - Page 5
...2 Navigating the Home Screen 2 2 Knowing the parts Identifying the hardware ...4 Top components ...4 TouchPad ...4 Light ...5 Keys ...5 Front components ...6 Right-side components ...7 Left-side components ...8 Display components ...9 Bottom components ...10 Wireless antennas ...11 Additional - HP Mini 1000 | HP MINI User Guide - Windows XP - Page 6
24 Using Bluetooth wireless devices (select battery power ...36 Displaying the remaining battery charge 36 Inserting or removing the battery 36 Charging a battery ...37 Maximizing battery discharge time 38 Managing low battery levels 38 Identifying low battery levels 38 Resolving a low battery - HP Mini 1000 | HP MINI User Guide - Windows XP - Page 7
your photo favorite links 51 Changing your photo favorites 51 Removing your photo favorites 52 Setting a photo album as a screen saver 52 Audio ...52 Connecting external audio devices 52 Checking your audio functions 52 Video ...53 Connecting an external monitor or projector 53 Adding - HP Mini 1000 | HP MINI User Guide - Windows XP - Page 8
9 Pictures and videos Webcam tips ...58 Having a conference call or video chat 58 10 Digital cards Inserting a digital card ...59 Removing a digital card ...60 11 USB devices Using a USB device ...61 Connecting a USB device 61 Removing a USB device ...61 Using the HP Mini Mobile Drive Bay (select - HP Mini 1000 | HP MINI User Guide - Windows XP - Page 9
information ...79 When to back up ...79 Restoring your information ...79 Using System Restore ...79 Using HP MIE Restore Image Creator 80 Restoring using a Windows computer 80 Restoring using a Linux computer 81 18 Routine Care Cleaning the display ...83 Cleaning the TouchPad and keyboard 83 - HP Mini 1000 | HP MINI User Guide - Windows XP - Page 10
x - HP Mini 1000 | HP MINI User Guide - Windows XP - Page 11
1 Welcome The HP MINI is fun and engaging and provides an array of exciting features: ● Browsing the Internet ● Chatting with friends ● Checking e-mail ● Listening to music ● Creating and watching videos ● Taking and viewing photos ● Playing games ● Creating documents, spreadsheets, and - HP Mini 1000 | HP MINI User Guide - Windows XP - Page 12
. Component Description Click the Mail icon to check for new e-mail. Click the Program Switcher icon to display the Start New Program button. Click the Home icon to return to the Home Screen. Click the Start New Program button to open the Program Launcher and view all of the programs installed - HP Mini 1000 | HP MINI User Guide - Windows XP - Page 13
display the system Help and learn about the device. Use the mini player to play/pause, fast-forward, and rewind your music. NOTE: The mini player appears only when you play music from the Home Screen the Wireless Network icon to open the Wireless Network and create, manage, and use wireless - HP Mini 1000 | HP MINI User Guide - Windows XP - Page 14
parts TouchPad* Moves the pointer and selects or activates items on the screen. (4) TouchPad scroll zone Scrolls up or down. (5) Right TouchPad TouchPad is on. ● Amber: TouchPad is off. *This table describes factory settings. To view or change pointing device preferences, select Settings > - HP Mini 1000 | HP MINI User Guide - Windows XP - Page 15
Light Component Caps lock light Keys Description On: Caps lock is on. Identifying the hardware 5 - HP Mini 1000 | HP MINI User Guide - Windows XP - Page 16
to the Home Screen. Displays the Start New Program button from anywhere on the device. Component (1) Power light (2) Power switch (3) Drive light 6 Chapter 2 Knowing the parts Description ● Settings > System tab > Power Management. Blinking: The hard drive or flash drive is being accessed. - HP Mini 1000 | HP MINI User Guide - Windows XP - Page 17
battery reaches a low battery level. ● Blue: An integrated wireless device, such as a wireless local area network (WLAN) device, is on. ● Amber: All wireless devices are off. Turns the wireless during routine operation. Supports the following optional digital card formats: ● MultiMediaCard (MMC) - HP Mini 1000 | HP MINI User Guide - Windows XP - Page 18
lanyard connector Description Connects an optional HP Mini Mobile Drive. Attaches an optional security lanyard to cable, which allows you to connect an external VGA monitor or projector. (5) Audio-out (headphone) jack/Audio-in (microphone Connects a network cable. 8 Chapter 2 Knowing the parts - HP Mini 1000 | HP MINI User Guide - Windows XP - Page 19
(1) Internal display switch (2) Speakers (2) (3) Internal microphone (4) Webcam (5) Webcam light Description Turns off the display if the display is closed while the power is on. Produce sound. Records and captures sound. Captures still photographs and videos. On: The webcam is in - HP Mini 1000 | HP MINI User Guide - Windows XP - Page 20
battery bay. Contains the memory module slot. Enable airflow to cool internal components. NOTE: The device fan starts up automatically to cool internal components and prevent overheating. It is normal for the internal fan to cycle on and off during routine operation. 10 Chapter 2 Knowing the parts - HP Mini 1000 | HP MINI User Guide - Windows XP - Page 21
the areas immediately around the antennas free from obstructions. To see wireless regulatory notices, refer to the section of the Regulatory, Safety country or region. To access these notices, refer to the User Guides disc that is included with the device. Additional hardware components Component - HP Mini 1000 | HP MINI User Guide - Windows XP - Page 22
(p/n) (3). This number provides specific information about the product's hardware components. The part number helps a service technician to determine what components and parts are needed. ◦ Model description (4). This is the number you use to locate documents, drivers, and support for your device - HP Mini 1000 | HP MINI User Guide - Windows XP - Page 23
it easy to find and open a new program from the Home Screen. When you click the Start New Program button, the Program Launcher opens with all of the programs that are installed on your device. NOTE: To learn about adding or removing programs, refer to Installing programs on page 18. Programs with - HP Mini 1000 | HP MINI User Guide - Windows XP - Page 24
To start a new program: 1. Click Start New Program. The Program Launcher opens. - or - Click the Program Switcher icon to display the Start New Program button and open the Program Launcher. 2. Click the program you want to open. NOTE: To exit the Program Launcher, click the - HP Mini 1000 | HP MINI User Guide - Windows XP - Page 25
, view, and manage e-mail. Web Browser Access the Internet. Media programs HP MediaStyle Listen to music, view photos, and watch movies. Cheese Take photos and videos with the integrated webcam. Utilities Calculator Perform basic and advanced calculator functions. gEdit Create and edit - HP Mini 1000 | HP MINI User Guide - Windows XP - Page 26
OpenOffice Impress OpenOffice Draw OpenOffice Calc Adobe® Reader Play programs AisleRiot Solitaire Chess Add and remove programs. Modify time and date settings. Perform updates to programs, BIOS, and operating system. Schedule and manage activities. Design and produce text documents that include - HP Mini 1000 | HP MINI User Guide - Windows XP - Page 27
Gnometrics Sudoku Play a falling-block game. Solve logic puzzles. Identifying installed programs 17 - HP Mini 1000 | HP MINI User Guide - Windows XP - Page 28
, you will be prompted to enter your password before adding or removing programs. To add or remove programs: 1. Click the Settings button at the top-right of the Home Screen, and then click the System tab. 2. Click Add/Remove. The Add/Remove Applications window opens. 3. Select the program that you - HP Mini 1000 | HP MINI User Guide - Windows XP - Page 29
The following types of Internet access are supported on the device: ● Wireless-For mobile Internet access, use a wireless connection. To learn about setting up a wireless network or connecting to an existing network, refer to Connecting to a wireless network on page 20. ● Wired-For broadband - HP Mini 1000 | HP MINI User Guide - Windows XP - Page 30
devices, not the status of individual devices. If the wireless light is blue, at least one wireless device is on. If the wireless light is amber, all wireless devices are off. Because the wireless devices are enabled at the factory, you can use the wireless switch to turn on or turn off all of the - HP Mini 1000 | HP MINI User Guide - Windows XP - Page 31
equipment: ● A broadband modem (either DSL or cable) (1) and high-speed Internet service purchased from an Internet service provider (ISP) ● A wireless router (purchased separately) (2) ● Your HP MINI (3) The illustration below shows an example of a wireless network installation that is connected to - HP Mini 1000 | HP MINI User Guide - Windows XP - Page 32
Be sure that the wireless device is on. If it is on, the wireless light is blue. If the wireless light is amber, slide the wireless switch. 2. Click the Wireless Network icon located in the notification area, at the bottom of the Home Screen. The Wireless Networks window opens. 22 Chapter 4 Internet - HP Mini 1000 | HP MINI User Guide - Windows XP - Page 33
also click Manual Configuration and choose to manually search for and connect to a network or to create a new network connection. 4. After the connection is made, place the mouse pointer over the wireless network connection icon in the notification area, at the bottom of the Home Screen, to verify - HP Mini 1000 | HP MINI User Guide - Windows XP - Page 34
Connecting to a wired network Connecting to a local area network (LAN) requires an 8-pin, RJ-45 network (Ethernet) cable (purchased separately). If the network cable contains noise suppression circuitry (1), which prevents interference from TV and radio reception, orient the circuitry end of the - HP Mini 1000 | HP MINI User Guide - Windows XP - Page 35
models only) A Bluetooth device provides short-range wireless communications that replace the physical cable connections that traditionally link electronic devices such as the and using Bluetooth devices, refer to the Bluetooth software Help. Using Bluetooth wireless devices (select models only) 25 - HP Mini 1000 | HP MINI User Guide - Windows XP - Page 36
Using e-mail The Mail section of the Home Screen makes it easy to view your recent e-mail, check for new e-mail, and configure your e-mail account. When you set up your e-mail, you can - HP Mini 1000 | HP MINI User Guide - Windows XP - Page 37
the type of account you want to set up, and then click Next. 4. Follow the on-screen instructions to set up your e-mail. NOTE: For additional information about Mozilla Thunderbird, refer to the Mozilla Thunderbird software Help. Checking for new e-mail To check for new e-mail, click the Mail icon in - HP Mini 1000 | HP MINI User Guide - Windows XP - Page 38
software Help. Browsing and searching the Web From the Home Screen, you can go to a specific Web site or perform a search for a specific topic. To go to a specific click the arrow button. The Web Browser opens and displays the Web site. To search for a specific topic: ▲ Type the topic in the search - HP Mini 1000 | HP MINI User Guide - Windows XP - Page 39
of your favorite Web sites that appear on the Home Screen. You can create, change, open, and remove the Web favorite links. Creating new Web favorites You Web Browser software Help. 1. Right-click an unassigned Web favorite link, and then click Assign Favorite. The Change Website window opens. 2. - HP Mini 1000 | HP MINI User Guide - Windows XP - Page 40
. - or - ▲ Right-click the Web favorite link that you want to open, and then click Open. The Web Browser opens to your favorite Web site. Removing Web favorites To remove a Web favorite link on the Home Screen: ▲ Right-click the Web favorite link that you want to - HP Mini 1000 | HP MINI User Guide - Windows XP - Page 41
additional information about Pidgin, go to http://www.pidgin.im. To open Pidgin, follow these steps: 1. Click Start New Program > Internet > Pidgin. 2. Follow the on-screen instructions to enable your Pidgin account and start creating instant messages. 31 - HP Mini 1000 | HP MINI User Guide - Windows XP - Page 42
The system is set at the factory to initiate Suspend after 10 minutes of inactivity when running on battery power and 25 minutes of inactivity top-right of the Home Screen, and then click the System tab. 2. Click Power Management. The Power Management Preferences window opens. 3. Modify your power - HP Mini 1000 | HP MINI User Guide - Windows XP - Page 43
, you must enter your password before your work will return to the screen. Initiating and exiting Hibernation The system is set at the factory to initiate Hibernation after 30 minutes of inactivity when running on battery power or when the battery reaches a critical battery level. NOTE: The system - HP Mini 1000 | HP MINI User Guide - Windows XP - Page 44
in the notification area, at the bottom of the Home Screen. The Power icon allows you to quickly access power settings, view remaining battery charge, and select a different power plan. ● To display the percentage of remaining battery charge, position the pointer over the Power icon. ● To access - HP Mini 1000 | HP MINI User Guide - Windows XP - Page 45
the device, a replacement AC adapter provided by HP, or a compatible AC adapter purchased from HP. ● Approved AC battery while you are onboard aircraft. ● When you are charging or calibrating a battery ● When you are installing or modifying system software ● When you are writing information to a CD - HP Mini 1000 | HP MINI User Guide - Windows XP - Page 46
safety issues, use only the battery provided with the device, a replacement battery provided by HP, or a compatible battery purchased from HP. Device battery life varies depending on power management settings, programs running on the device, display brightness, external devices connected to - HP Mini 1000 | HP MINI User Guide - Windows XP - Page 47
latch (3) to lock the battery into place. To remove the battery: 1. Turn the device upside down on a flat surface. 2. Slide the battery release latches (1) to release the battery. 3. Pivot the battery (2) upward and remove the battery from the device (3). Charging a battery WARNING! Do not charge - HP Mini 1000 | HP MINI User Guide - Windows XP - Page 48
the brightness on the display. ● Remove the battery from the device when it is not being used or charged. ● Store the battery in a cool, dry location. Managing low battery levels The information in this section describes the alerts and system responses set at the factory. Some lowbattery alerts and - HP Mini 1000 | HP MINI User Guide - Windows XP - Page 49
. 2. Exit Hibernation by briefly sliding the power switch. Calibrating a battery Calibrate a battery under the following conditions: ● When battery charge displays seem inaccurate ● When you observe a significant change in battery run time Even if a battery is heavily used, it should not need to be - HP Mini 1000 | HP MINI User Guide - Windows XP - Page 50
Screen, and then click Preferences. - or - Select Settings > System tab > Power Management. 2. Under the On AC Power and On Battery Power tabs, record the current values for the following settings: ● Put the display not turn off automatically. ◦ Hard drive speed will not decrease automatically when - HP Mini 1000 | HP MINI User Guide - Windows XP - Page 51
area, at the bottom of the Home Screen, and then click Preferences. - or - Select Settings > System tab > Power Management. 2. Under the On AC Power and On Battery Power tabs, reset the previous values for the following settings: ● Put the display to sleep when the computer is inactive for - HP Mini 1000 | HP MINI User Guide - Windows XP - Page 52
remove the battery and store it separately. To prolong the charge of a stored battery, place it in a cool, dry place. Calibrate a battery display and device. Shut down the device under any of the following conditions: ● When you need to replace the battery switch. The logout screen opens. 3. Click - HP Mini 1000 | HP MINI User Guide - Windows XP - Page 53
. Your device may include the following multimedia components: ● Integrated speakers for listening to music ● Integrated webcam that allows you to capture photographs and videos ● Preinstalled multimedia software that allows you to play and manage your music, movies, and photos NOTE: Your device may - HP Mini 1000 | HP MINI User Guide - Windows XP - Page 54
hotkey (6) Volume down hotkey (7) Volume mute hotkey (8) Audio-out (headphone) jack/Audio-in (microphone) jack Description Records and captures sound. Captures still photographs and videos. On: The webcam is in use. Produce sound. Increases device sound when pressed in combination with the - HP Mini 1000 | HP MINI User Guide - Windows XP - Page 55
and either the f8 (2), f10 (3), or f11 (4) function key: ◦ To mute or restore volume, press fn+f8. ◦ To decrease volume, press fn+f10. ◦ To increase Click the Volume icon in the notification area, at the bottom of the Home Screen. b. Increase or decrease the volume by moving the slider up or down. - HP Mini 1000 | HP MINI User Guide - Windows XP - Page 56
window opens. 3. Modify your sound preferences, and then click Close. Music The Music section of the Home Screen makes it easy to access and listen to your favorite songs and albums. HP ways: ● Use a Secure Digital (SD) Memory Card, a MultiMediaCard (MMC), or a USB device to easily transfer music - HP Mini 1000 | HP MINI User Guide - Windows XP - Page 57
▲ Double-click a music favorite link on the Home Screen. The music begins playing. NOTE: Use the mini player to control the music that is currently playing. To play music in HP MediaStyle: 1. Click Start New Program > Media > HP MediaStyle. HP MediaStyle opens. 2. Click the Music icon. 3. Browse for - HP Mini 1000 | HP MINI User Guide - Windows XP - Page 58
Decrease the volume Decreases the music sound. Listening to the playlists HP MediaStyle creates three playlists from your music: ● Recently played tracks on the Home Screen. You can open, change, and remove the music favorite links. NOTE: The music favorite link on the right displays the most - HP Mini 1000 | HP MINI User Guide - Windows XP - Page 59
and then click Change Favorite. The Select Album, Playlist, or Song window opens. 2. Browse for the album or playlist that you want to Screen. Deleting music favorites To delete a music favorite from the Home Screen: ▲ Right-click the music favorite link that you want to remove, and then click Remove - HP Mini 1000 | HP MINI User Guide - Windows XP - Page 60
Screen makes it easy to view your favorite photos and photo albums. HP MediaStyle is the photo viewer that is installed on your device. With HP HP MediaStyle automatically detects the files that are in the Pictures folder. NOTE: The following file formats are supported the transfer cable that came - HP Mini 1000 | HP MINI User Guide - Windows XP - Page 61
albums directly from the Home Screen or you can open HP MediaStyle and view your photos. NOTE: To view photos from the Home Screen, you need to set images of your photo albums that appear on the Home Screen. You can open, change and remove the photo favorite links. Changing your photo favorites To - HP Mini 1000 | HP MINI User Guide - Windows XP - Page 62
external devices such as external speakers, headphones, or a microphone, refer to the information provided with the device. For best results, remember the following tips: ● Be sure that the device cable is securely connected. ● Be sure to install any drivers required by the external device. NOTE - HP Mini 1000 | HP MINI User Guide - Windows XP - Page 63
to the device. Repeatedly pressing fn+f2 alternates the screen image between the device display and the device. Adding videos to your library When you connect an external device and save videos to the Videos folder in the file manager, HP MediaStyle automatically detects the files that are in the - HP Mini 1000 | HP MINI User Guide - Windows XP - Page 64
After you download your videos, follow these steps to begin watching videos: NOTE: To exit HP MediaStyle, click the Home icon in the top-right of the screen. 1. Click Start New Program > Media > HP MediaStyle. HP MediaStyle opens. 2. Click the Video icon. 3. Browse for the video you want to watch - HP Mini 1000 | HP MINI User Guide - Windows XP - Page 65
8 Games With the HP MINI you can play a variety of games. The following games are installed on the device: ● AisleRiot Solitaire ● Chess ● Gnometrics ● Sudoku To open a tab. 2. Click the game that you want to play. NOTE: For additional information on the games, refer to the game software Help. 55 - HP Mini 1000 | HP MINI User Guide - Windows XP - Page 66
program: 1. Click the Settings button at the top-right of the Home Screen, and then click the System tab. 2. Click Add/Remove. The Add/Remove Applications window opens 3. Click Games in the left column, and then select the game that you want to install. 4. Click Apply Changes. 56 Chapter - HP Mini 1000 | HP MINI User Guide - Windows XP - Page 67
can take photos and record videos with the integrated webcam, located at the top of the display. With the preinstalled webcam software, Cheese, you can use the webcam to take a photo, record a video, make an audio recording, and create special effects. To take photos and videos: 1. Click Start New - HP Mini 1000 | HP MINI User Guide - Windows XP - Page 68
up: 1. Click Start New Program > Internet > Skype. 2. Type your Skype name and password, and then click Sign in. 3. Follow the on-screen instructions to begin your conference call or video chat. To start a conference call or video chat with Skype if you do not have a Skype account set up: 1. Click - HP Mini 1000 | HP MINI User Guide - Windows XP - Page 69
10 Digital cards Optional digital cards provide secure data storage and convenient data sharing. These cards are often used with digital media-equipped cameras and PDAs as well as with other devices. The SD Card Reader supports opens and displays the content of the card. Inserting a digital card 59 - HP Mini 1000 | HP MINI User Guide - Windows XP - Page 70
card CAUTION: To prevent loss of data or an unresponsive system, do not remove a digital card while it is being accessed. 1. Save your information and close all programs associated with the digital card. 2. Press in on the digital card (1), and then remove the card from the slot (2). 60 Chapter - HP Mini 1000 | HP MINI User Guide - Windows XP - Page 71
about device-specific software, refer to the manufacturer's instructions. The device has 2 USB ports, which support USB 1.0, USB 1.1, and USB 2.0 devices. Depending on the model, the device may also have a HP Mini Mobile Drive Bay, which supports an optional HP Mini Mobile Drive. An optional - HP Mini 1000 | HP MINI User Guide - Windows XP - Page 72
Inserting the HP Mini Mobile Drive ▲ Insert the HP Mini Mobile Drive into the HP Mini Mobile Drive Bay, and then push in until firmly seated. NOTE: When the HP Mini Mobile Drive is detected, the file manager opens and displays the content of the drive. Removing the HP Mini Mobile Drive CAUTION: To - HP Mini 1000 | HP MINI User Guide - Windows XP - Page 73
Using the HP Mini Mobile Drive Bay (select models only) 63 - HP Mini 1000 | HP MINI User Guide - Windows XP - Page 74
or modify the keyboard shortcuts: 1. Click the Settings button in the top-right corner of the Home Screen, and then click the System tab. 2. Click Keyboard Shortcuts. The Keyboard Shortcuts window opens. This table includes a list of functions you can perform with keyboard shortcuts. 64 Chapter 12 - HP Mini 1000 | HP MINI User Guide - Windows XP - Page 75
Function Show the Home Screen. Show the Start New Program window. Show the panel menu. Start a program. Close a window. Unmaximize a window. Move a window. Resize a window. Minimize a window. Maximize a window. Keyboard shortcut Home key - or - ctrl+alt+d Program Switcher key - or - alt+tab alt+f1 - HP Mini 1000 | HP MINI User Guide - Windows XP - Page 76
Hibernation and the information stored in memory is saved to the hard drive. The factory setting for critical battery action is Hibernate, but this to the fn+f1 hotkey. Switching the screen image (fn+f2) Press fn+f2 to switch the screen image among display devices connected to the system. For - HP Mini 1000 | HP MINI User Guide - Windows XP - Page 77
QuickLock, press fn+f6 to display the Log On window and lock the device. Then follow the instructions on the screen to enter your password and access the device. Muting speaker sound (fn+f8) Press fn+f8 to mute speaker sound. Press the hotkey again to restore speaker sound. Decreasing speaker sound - HP Mini 1000 | HP MINI User Guide - Windows XP - Page 78
to an external hard drive, initiate Suspend and allow the screen to clear, or properly disconnect the external hard drive. Before handling a drive, discharge static electricity by touching the unpainted metal surface of the drive. Do not touch the connector pins on a removable drive or on the - HP Mini 1000 | HP MINI User Guide - Windows XP - Page 79
44-megabyte diskette drive ● Hard drive module (a hard drive with an adapter attached) ● DVD-ROM Drive ● DVD/CD-RW Combo Drive ● DVD+RW/R and CD-RW Combo Drive ● DVD±RW/R and CD-RW Combo Drive Using optional external devices NOTE: For more information about required software and drivers, or to learn - HP Mini 1000 | HP MINI User Guide - Windows XP - Page 80
of the device can be upgraded by replacing the existing memory module in the primary memory module slot. WARNING! To reduce the risk of electric shock and damage to the equipment, unplug the power cord and remove all batteries before installing a memory module. CAUTION: Electrostatic discharge (ESD - HP Mini 1000 | HP MINI User Guide - Windows XP - Page 81
the memory module by the edges only. Do not touch the components on the memory module. b. Grasp the edge of the memory module (2), and gently pull the module out of the memory module slot. To protect a memory module after removal, place it in an electrostatic-safe container. 10. Insert a new memory - HP Mini 1000 | HP MINI User Guide - Windows XP - Page 82
snap into place. CAUTION: To prevent damage to the memory module, be sure that you do not bend the memory module. 11. Align the tabs (1) on the memory module compartment cover with the notches on the device. 12. Close the cover (2). 13. Replace the battery. 14. Turn the device right-side up, and - HP Mini 1000 | HP MINI User Guide - Windows XP - Page 83
15 Settings 73 - HP Mini 1000 | HP MINI User Guide - Windows XP - Page 84
System Settings window allows you to view and customize basic and advanced system settings. ▲ To access the System Settings, click the Settings button in the top-right corner of the Home Screen. The following are some of the system settings that you can customize: ● Add and remove software ● Change - HP Mini 1000 | HP MINI User Guide - Windows XP - Page 85
Screen, displays the device's current time setting. You can modify the current time and date settings and preferences on the device. NOTE: If your device is password-enabled, you will be prompted to enter your password the Home Screen, and then click Preferences. The Clock Preferences window opens. - HP Mini 1000 | HP MINI User Guide - Windows XP - Page 86
a BIOS update while the device is running on battery power or connected to an optional power source. During the download and installation, follow these instructions: Do not shut down the device or initiate Suspend or Hibernation. Do not insert, remove, connect, or disconnect any device, cable, or - HP Mini 1000 | HP MINI User Guide - Windows XP - Page 87
Update Manager icon in the notification area, at the bottom of the Home Screen. To install critical updates: 1. Click the Critical Update Manager icon to open Update Manager. 2. Follow the on-screen instructions. Performing interim updates When new updates become available, the Update Manager icon - HP Mini 1000 | HP MINI User Guide - Windows XP - Page 88
To protect your information, back up your files and folders. Then if the system fails, you can restore your important files from copies. You can also use the options listed in this appendix to restore the operating system and programs that were installed at the factory. 78 Chapter 17 Backing up and - HP Mini 1000 | HP MINI User Guide - Windows XP - Page 89
the factory. CAUTION: The restore process reformats hard drive, completely erasing all information. All the files you have created and any software installed on the device are permanently removed. The restore process reinstalls the original operating system, software, and drivers. Software, drivers - HP Mini 1000 | HP MINI User Guide - Windows XP - Page 90
HP Mini MIE recovery image onto another computer and then transfer the necessary files to the USB flash drive. The drive can then be used to reboot your device and restore the system. Follow the specific operating system instructions in this section to restore your system. Restoring using a Windows - HP Mini 1000 | HP MINI User Guide - Windows XP - Page 91
is complete, remove the USB flash drive. 8. Insert the USB flash drive into a USB port on your HP MINI. 9. Change the boot order by turning on or restarting the device, and then pressing f9 while the "F9 = Change Boot Device Order" message is displayed in the lower-left corner of the screen. 10. Use - HP Mini 1000 | HP MINI User Guide - Windows XP - Page 92
18 Routine Care 82 Chapter 18 Routine Care - HP Mini 1000 | HP MINI User Guide - Windows XP - Page 93
: To prevent permanent damage to the device, never spray water, cleaning fluids, or chemicals on the display. To remove smudges and lint, frequently clean the display with a soft, damp, lint-free cloth. If the screen requires additional cleaning, use premoistened antistatic wipes or an antistatic - HP Mini 1000 | HP MINI User Guide - Windows XP - Page 94
in advance. ● If the device will be unused and disconnected from external power for more than 2 weeks, remove the battery pack and store it separately. ● If you are shipping the device or a drive, use suitable protective packaging and label the package "FRAGILE." ● If your device is equipped with an - HP Mini 1000 | HP MINI User Guide - Windows XP - Page 95
C cables LAN 24 USB 61 VGA 53 calculator 15 calibrating battery 39 caps lock light, identifying 5 CD drive 69 charging batteries 37, 40 checking audio functions 52 Cheese 15 Chess 16 cleaning display 83 keyboard 83 TouchPad 83 clock preferences, changing 75 compartments, memory module 10 components - HP Mini 1000 | HP MINI User Guide - Windows XP - Page 96
9 wireless 7 local area network (LAN) cable required 24 connecting cable 24 low battery level 38 M Mail section 26 media programs 15 memory module inserting 71 removing 71 memory module compartment cover release latch 70 removing 71 replacing 72 memory module compartment, identifying 10 microphone - HP Mini 1000 | HP MINI User Guide - Windows XP - Page 97
regulatory label 12 wireless certification labels 12 release latches battery 10, 37 memory module compartment cover 70 restoring HP MIE Restore Image Creator 80 System Restore 79 right TouchPad button, identifying 4 RJ-45 (network) jack, identifying 8 routine care 82 S screen brightness hotkeys 67 - HP Mini 1000 | HP MINI User Guide - Windows XP - Page 98
16 software updates 76 USB cable, connecting 61 USB devices connecting 61 description 61 removing 61 USB hubs 61 USB ports, identifying 7, 8, 61 user information, modify 15 utility programs 15 V vents, identifying 7, 8, 10 video 53 video chat, webcam 58 video formats, supported 53 video transmission - HP Mini 1000 | HP MINI User Guide - Windows XP - Page 99
-
 1
1 -
 2
2 -
 3
3 -
 4
4 -
 5
5 -
 6
6 -
 7
7 -
8
-
9
-
10
-
11
-
12
-
13
-
14
-
15
-
16
-
17
-
18
-
19
-
20
-
21
-
22
-
23
-
24
-
25
-
26
-
27
-
28
-
29
-
30
-
31
-
32
-
33
-
34
-
35
-
36
-
37
-
38
-
39
-
40
-
41
-
42
-
43
-
44
-
45
-
46
-
47
-
48
-
49
-
50
-
51
-
52
-
53
-
54
-
55
-
56
-
57
-
58
-
59
-
60
-
61
-
62
-
63
-
64
-
65
-
66
-
67
-
68
-
69
-
70
-
71
-
72
-
73
-
74
-
75
-
76
-
77
-
78
-
79
-
80
-
81
-
82
-
83
-
84
-
85
-
86
-
87
-
88
-
89
-
90
-
91
-
92
-
93
-
94
-
95
-
96
-
97
-
98
-
99
 |
 |

HP MINI User Guide
User Guide