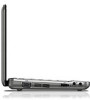
HP Mini 2140 HP MINI User Guide - Windows XP
HP Mini 2140 - Notebook PC Manual
 |
View all HP Mini 2140 manuals
Add to My Manuals
Save this manual to your list of manuals |
HP Mini 2140 manual content summary:
- HP Mini 2140 | HP MINI User Guide - Windows XP - Page 1
HP MINI User Guide - HP Mini 2140 | HP MINI User Guide - Windows XP - Page 2
Microsoft and Windows are U.S. services. Nothing herein should be construed as constituting an additional warranty. HP shall not be liable for technical or editorial errors or omissions contained herein. First Edition: January 2009 Document Part Number: 504179-001 Product notice This user guide - HP Mini 2140 | HP MINI User Guide - Windows XP - Page 3
surface, such as an adjoining optional printer, or a soft surface, such as pillows or rugs or clothing, to block airflow. Also, do not allow the AC adapter to contact the skin or a soft surface, such as pillows or rugs or clothing, during operation. The computer and the - HP Mini 2140 | HP MINI User Guide - Windows XP - Page 4
iv Safety warning notice - HP Mini 2140 | HP MINI User Guide - Windows XP - Page 5
the labels ...10 2 Power management password protection upon exiting Standby 14 Using external AC power ...14 Connecting the AC adapter 15 Using battery power ...15 Displaying the remaining battery charge 16 Inserting or removing the battery 16 Charging a battery ...17 Maximizing battery - HP Mini 2140 | HP MINI User Guide - Windows XP - Page 6
Standby 20 Step 3: Discharge the battery 20 Step 4: Fully recharge the battery 21 Step 5: Reenable Hibernation and Standby 21 Conserving battery power 21 Storing a battery ...21 Disposing of a used battery 22 Replacing the battery ...22 Testing an AC adapter ...23 Shutting down the computer - HP Mini 2140 | HP MINI User Guide - Windows XP - Page 7
removing a USB device 63 Using USB legacy support 64 Using external drives ...65 Using optional external devices 65 Using an optional external MultiBay II 65 Using an optional external optical drive (select models only 66 Inserting an optical disc (CD or DVD 66 Removing an optical disc (CD or - HP Mini 2140 | HP MINI User Guide - Windows XP - Page 8
installed drives ...82 Handling drives ...82 Improving HD performance ...84 Using Disk Defragmenter 84 Using Disk Cleanup ...84 Using HP 3D DriveGuard (select models only 85 Identifying HP 3D DriveGuard status 85 Using HP 3D DriveGuard software 85 Replacing a hard drive ...87 10 Memory - HP Mini 2140 | HP MINI User Guide - Windows XP - Page 9
Restoring factory settings in Computer Setup 96 Computer Setup menus ...96 File menu ...96 Security menu ...97 Diagnostics menu ...97 System Configuration menu 98 Index ...100 ix - HP Mini 2140 | HP MINI User Guide - Windows XP - Page 10
x - HP Mini 2140 | HP MINI User Guide - Windows XP - Page 11
list of hardware installed in the computer, follow these steps: 1. Select Start > My Computer. 2. In the left pane of the System Tasks window, select View system information. 3. Select Hardware tab > Device Manager. You can also add hardware or modify device configurations using Device Manager. Top - HP Mini 2140 | HP MINI User Guide - Windows XP - Page 12
on the screen. (5) TouchPad scroll zone Scrolls up or down. (6) Right TouchPad button* Functions like the right button on an external mouse. *This table describes factory settings. To view or change pointing device preferences, select Start > Control Panel > Printers and Other Hardware > Mouse - HP Mini 2140 | HP MINI User Guide - Windows XP - Page 13
Light Component Caps lock light Description On: Caps lock is on. Identifying the hardware 3 - HP Mini 2140 | HP MINI User Guide - Windows XP - Page 14
functions when pressed in combination with a function key or the esc key. Displays the Windows Start menu. Displays a shortcut menu for items beneath the pointer. Can be used like the keys on an external numeric keypad. Execute frequently used system functions when pressed in combination with the fn - HP Mini 2140 | HP MINI User Guide - Windows XP - Page 15
Hibernation. If the computer has stopped responding and Windows® shutdown procedures are ineffective, slide and hold the and Maintenance > Power Options. Blinking: The hard drive is being accessed. ● Blue: An integrated wireless Supports optional ExpressCards 54. Identifying the hardware 5 - HP Mini 2140 | HP MINI User Guide - Windows XP - Page 16
(network) jack (5) Battery light (6) Power connector (7) Security cable slot Left-side components Description Supports the following optional digital plugged into an external power source, the light stays off until the battery reaches a low battery level. Connects an AC adapter. Attaches an optional - HP Mini 2140 | HP MINI User Guide - Windows XP - Page 17
Component (4) Audio-in (microphone) jack (5) Audio-out (headphone) jack Display components Description Connects an optional computer headset microphone, stereo array microphone, or monaural microphone. Produces sound when connected to optional powered stereo speakers, headphones, ear buds, a - HP Mini 2140 | HP MINI User Guide - Windows XP - Page 18
latches (2) (3) Service tag (4) Vents (4) Description Holds the battery. Release the battery from the battery bay. Provides the product brand and series name, serial number (s/n), and product number (p/n) of your computer. Have this information available when you contact technical support. Enable - HP Mini 2140 | HP MINI User Guide - Windows XP - Page 19
in Help and Support. Additional hardware components Component Description (1) Power cord* Connects an AC adapter to an AC outlet. (2) AC adapter Converts AC power to DC power. (3) Battery* Powers the computer when the computer is not plugged into external power. *Batteries and power cords - HP Mini 2140 | HP MINI User Guide - Windows XP - Page 20
this information available when you contact technical support. The service tag label is affixed to the bottom of the computer. ● Microsoft® Certificate of Authenticity-Contains the Windows Product Key. You may need the Product Key to update or troubleshoot the operating system. This certificate is - HP Mini 2140 | HP MINI User Guide - Windows XP - Page 21
Standby The system is set at the factory to initiate Standby after 10 minutes of inactivity when running on battery power and 25 minutes of inactivity when running on external power. Power settings and timeouts can be changed using Power Options in Windows® Control Panel. With the computer on, you - HP Mini 2140 | HP MINI User Guide - Windows XP - Page 22
, you must enter your Windows password before your work will return to the screen. Initiating and exiting Hibernation The system is set at the factory to initiate Hibernation after 30 minutes of inactivity when running on battery power or when the battery reaches a critical battery level. NOTE: The - HP Mini 2140 | HP MINI User Guide - Windows XP - Page 23
you conserve power and maximize computer performance. The following power schemes are available: ● Portable/Laptop (recommended) ● Home/Office Desk ● Presentation ● Always On ● Minimal Power Management ● Max Battery You can change the settings of these power plans through Power Options. Viewing the - HP Mini 2140 | HP MINI User Guide - Windows XP - Page 24
a replacement AC adapter provided by HP, or a compatible AC adapter purchased from HP. ● Approved AC adapter ● Optional docking device or optional expansion product Connect the computer to external AC power under any of the following conditions: WARNING! Do not charge the computer battery while you - HP Mini 2140 | HP MINI User Guide - Windows XP - Page 25
power. When the computer is plugged into external AC power, the computer runs on AC power. If the computer contains a charged battery and is running on external AC power supplied through the AC adapter, the computer switches to battery power if the AC adapter is disconnected from the computer. NOTE - HP Mini 2140 | HP MINI User Guide - Windows XP - Page 26
of information, initiate Hibernation or shut down the computer through Windows before removing the battery. To insert the battery: 1. Turn the computer upside down on a flat surface, with the battery bay toward you. 2. Insert the battery into the battery bay (1) and push in until it is seated. The - HP Mini 2140 | HP MINI User Guide - Windows XP - Page 27
to release the battery. 3. Remove the battery (2) from the computer. Charging a battery WARNING! Do not charge the computer battery while you are onboard aircraft. The battery charges whenever the computer is plugged into external power through an AC adapter, an optional power adapter, an optional - HP Mini 2140 | HP MINI User Guide - Windows XP - Page 28
the alerts and system responses set at the factory. Some lowbattery alerts and system responses can be changed using Power Options in Windows Control Panel. Preferences set using Power Options do not affect lights. Identifying low battery levels When a battery that is the sole power source for the - HP Mini 2140 | HP MINI User Guide - Windows XP - Page 29
lights turn off. Resolving a low battery level when external power is available ▲ Connect one of the following devices: ● AC adapter ● Optional expansion product or docking device ● Optional power adapter Resolving a low battery level when a charged battery is available 1. Turn off the computer - HP Mini 2140 | HP MINI User Guide - Windows XP - Page 30
battery: 1. Insert the battery into the computer. 2. Connect the computer to an AC adapter, optional power adapter, optional expansion product, or optional docking device, and then plug the adapter or device into external power. The battery batteries and Plugged in columns so that you can reset them - HP Mini 2140 | HP MINI User Guide - Windows XP - Page 31
column. 3. Click OK. Conserving battery power ● Select low power-use settings through Power Options in Windows Control Panel. ● Turn off wireless and local area network (LAN) connections and exit modem applications when you are not using them. ● Disconnect external devices that are not plugged into - HP Mini 2140 | HP MINI User Guide - Windows XP - Page 32
risk of fire or burns, do not disassemble, crush, or puncture; do not short external contacts; do not dispose of in fire or water. Refer to the Regulatory, Safety and Environmental Notices for battery disposal information. Replacing the battery Computer battery life varies, depending on the power - HP Mini 2140 | HP MINI User Guide - Windows XP - Page 33
the AC adapter: 1. Remove the battery from the computer. 2. Connect the AC adapter. 3. Turn on the computer. ● If the power light turns on, the AC adapter is functioning properly. ● If the power light remains off, the AC adapter is not functioning and should be replaced. Contact technical support - HP Mini 2140 | HP MINI User Guide - Windows XP - Page 34
within 10 meters (approximately 33 feet) of each other. Computers with WLAN devices support one or supports data rates of up to 300 Mbps and may operate at 2.4 GHz or 5 GHz, making it backward compatible with 802.11a, b, and g. NOTE: The specifications for the 802.11n WLAN are draft specifications - HP Mini 2140 | HP MINI User Guide - Windows XP - Page 35
more wireless devices, and one or two wireless lights, depending on the model. All of the wireless devices on your computer are enabled at the factory, so the wireless light is on (blue) when you turn on the computer. The wireless light indicates the overall power state of your wireless devices - HP Mini 2140 | HP MINI User Guide - Windows XP - Page 36
, or "hotspots," like coffee shops and airports may not provide any security. New technologies are being developed by wireless manufacturers and hotspot service providers that make the public environment more secure and anonymous. If you are concerned about the security of your computer in a hotspot - HP Mini 2140 | HP MINI User Guide - Windows XP - Page 37
combination of both types. ● Use wireless encryption A variety of sophisticated encryption protocols is available for your WLAN. Find the solution that works best for your network security: ◦ Wired Equivalent Privacy (WEP) is a wireless security protocol that uses a WEP key to encode or encrypt all - HP Mini 2140 | HP MINI User Guide - Windows XP - Page 38
new network connection, as well as troubleshooting connection issues. After the connection is instructions included with your wireless router and other WLAN equipment ● Information and Web site links provided in Help and Support within range of another WLAN, Windows attempts to connect to that - HP Mini 2140 | HP MINI User Guide - Windows XP - Page 39
such as the following: ● Computers (desktop, notebook, PDA) ● Phones (cellular, cordless, smart software Help. Bluetooth and Internet Connection Sharing (ICS) HP does not recommend setting up one computer with Bluetooth as Bluetooth and the Windows operating system. Using Bluetooth wireless devices (select models - HP Mini 2140 | HP MINI User Guide - Windows XP - Page 40
4 Multimedia Multimedia features Your computer includes multimedia features that allow you to listen to music, watch movies, and view pictures. Your computer may include the following multimedia components: ● Integrated speakers for listening to music ● Integrated microphones for recording your own - HP Mini 2140 | HP MINI User Guide - Windows XP - Page 41
Component (1) Internal microphones (2) (2) Webcam (3) Speakers (2) (4) Audio-out (headphone) jack (5) Audio-in (microphone) jack Description Record sound. Records audio and video and captures still photographs. Produce sound. Produces sound when connected to optional powered stereo speakers, - HP Mini 2140 | HP MINI User Guide - Windows XP - Page 42
or f11 (4) function key: ◦ To mute or restore volume, press fn+f8. ◦ To decrease volume, press fn+f10. ◦ To increase volume, press fn+f11. ● Windows volume control: a. Click the Volume icon in the notification area, at the far right of the taskbar. b. Increase or decrease the volume by moving the - HP Mini 2140 | HP MINI User Guide - Windows XP - Page 43
on the computer must be connected to AC power. To install any multimedia software from a CD or DVD, follow these steps: 1. Insert the disc into a connected external optical drive. 2. When the installation wizard opens, follow the on-screen instructions. 3. Restart the computer if you are prompted - HP Mini 2140 | HP MINI User Guide - Windows XP - Page 44
● Download music from the Internet ● Create multimedia presentations using audio and images ● Transmit sound and images with instant messaging programs ● Stream radio programs (select models only) or receive FM radio signals ● Create or "burn" audio CDs using an external optical drive Connecting - HP Mini 2140 | HP MINI User Guide - Windows XP - Page 45
NOTE: For best results when recording, speak directly into the microphone and record sound in a setting free of background noise. ▲ To confirm or change the audio settings on - HP Mini 2140 | HP MINI User Guide - Windows XP - Page 46
over the Internet ● Edit pictures and video to create presentations ● Connect external video devices Connecting an external monitor or projector The external monitor port connects an external display device such as an external monitor or a projector to the computer. ▲ To connect a display device - HP Mini 2140 | HP MINI User Guide - Windows XP - Page 47
external optical drive. You may have one of the following types of drives: ● DVD-ROM Drive ● DVD/CD-RW Combo Drive ● DVD±RW/CD-RW Combo Drive NOTE: Some of the drives listed above may not be supported by your computer. Using optical discs An optical drive, such as a DVD-ROM drive, supports - HP Mini 2140 | HP MINI User Guide - Windows XP - Page 48
NOTE: The external optical drive connected to your computer may not support all the types of optical discs discussed in files ● Making weekly backups of hard drive files ● Updating photos, video, audio, and data continuously DVD±R discs Use blank DVD±R discs to permanently store large amounts of - HP Mini 2140 | HP MINI User Guide - Windows XP - Page 49
box opens and asks how you want to use the media content. Choose Windows Media Player, which is preinstalled on your computer. NOTE: After you DVD to resume playback. Watching a movie An external optical drive allows you to watch movies from a disc. NOTE: Be sure that the external optical drive - HP Mini 2140 | HP MINI User Guide - Windows XP - Page 50
the DVD drive for which you want to change region settings, and then click Properties. 4. Make the desired changes on the DVD Region tab. 5. Click OK. Creating or "burning" a CD or DVD If your external optical drive is a CD-RW, DVD-RW, or DVD±RW optical drive, you can use software such as Windows - HP Mini 2140 | HP MINI User Guide - Windows XP - Page 51
MP3 players or on computers with MP3 software installed. To burn a CD or DVD, follow these steps: 1. Download or copy the source files into a folder on your hard drive. 2. Insert a blank CD or DVD into the external optical drive. 3. Select Start > All Programs and the name of the software you want - HP Mini 2140 | HP MINI User Guide - Windows XP - Page 52
2. Remove the disc (3) from the tray by gently pressing down on the spindle while lifting the outer edges of the disc. Hold the disc by the edges and avoid touching the flat surfaces. NOTE: If the tray is not fully accessible, tilt the disc carefully as you remove it. 3. Close the disc tray and - HP Mini 2140 | HP MINI User Guide - Windows XP - Page 53
properly across some network firewalls. NOTE: If you are having trouble viewing or sending multimedia files to someone on another LAN or and then reenable the firewall. To permanently resolve the problem, reconfigure the firewall as necessary, and adjust the policies > Help and Support. Webcam 43 - HP Mini 2140 | HP MINI User Guide - Windows XP - Page 54
reset of Computer Setup (f10) passwords Stringent security feature in Computer Setup* Unauthorized startup from an optical drive, diskette drive, or internal network adapter Unauthorized access to data Boot options feature in Computer Setup* ● Firewall software ● Windows updates Unauthorized - HP Mini 2140 | HP MINI User Guide - Windows XP - Page 55
and Support. Setting passwords in Windows Windows passwords Function Administrator password* Protects access to a Windows administrator-level account. User password* Protects access to a Windows user account. *For information about setting a Windows administrator password or a Windows user - HP Mini 2140 | HP MINI User Guide - Windows XP - Page 56
drive that is protected by DriveLock, and is set under DriveLock Passwords during the enable process. Setup password The Computer Setup setup password characteristics of the setup password: ● It is not interchangeable with a Windows administrator password, although both passwords can be identical. - HP Mini 2140 | HP MINI User Guide - Windows XP - Page 57
fields, and then press f10. ● To delete a setup password, type your current password in the Old password field, and then press f10. 3. To save your preferences, use the arrow keys to select File > Save changes and exit. Then follow the instructions on the screen. Your preferences go into effect when - HP Mini 2140 | HP MINI User Guide - Windows XP - Page 58
is not displayed as it is set, entered, changed, or deleted. ● It must be set and entered with the same keys. For example, a power-on password set with keyboard number keys will not be recognized if you enter it thereafter with embedded numeric keypad number keys. ● It can include any combination - HP Mini 2140 | HP MINI User Guide - Windows XP - Page 59
, and then press f10. ● To delete a power-on password, type the current password in the Old password field, and then press f10. 3. To save your preferences, use the arrow keys to select File > Save changes and exit. Then follow the instructions on the screen. Your preferences go into effect when the - HP Mini 2140 | HP MINI User Guide - Windows XP - Page 60
Entering a power-on password At the Power-on Password prompt, type your password (using the same kind of keys you used to set the password), and then press enter. After 3 unsuccessful attempts to enter the password, you must turn off the computer, turn it back on, and then try again. 50 Chapter 5 - HP Mini 2140 | HP MINI User Guide - Windows XP - Page 61
> Save changes and exit. Then follow the instructions on the screen. Using Computer Setup DriveLock CAUTION: To prevent the DriveLock-protected hard drive from becoming permanently unusable, record the DriveLock user password and the DriveLock master password in a safe place away from your computer - HP Mini 2140 | HP MINI User Guide - Windows XP - Page 62
your master password in the New password and Verify new password fields, and then press f10. 8. To confirm DriveLock protection on the drive you have selected, type DriveLock in the confirmation field, and then press f10. 9. To exit DriveLock settings, use the arrow keys to select Esc. 10. To save - HP Mini 2140 | HP MINI User Guide - Windows XP - Page 63
Be sure that the hard drive is inserted into the computer (not into an optional docking device or external MultiBay). At the DriveLock Password prompt, type your user or master password (using the same kind of keys you used to set the password), and then press enter. After 2 incorrect attempts - HP Mini 2140 | HP MINI User Guide - Windows XP - Page 64
. Type your current password in the Old password field, and then type the new password in the New password field and in the Verify new password field. Then press f10. 5. To save your preferences, use the arrow keys to select File > Save changes and exit. Then follow the instructions on the screen - HP Mini 2140 | HP MINI User Guide - Windows XP - Page 65
drive, and then press f10. 4. Use the arrow keys to select Disable in the Protection field, and then press f10. 5. Type your master password in the Old password field. Then press f10. 6. To save your preferences, use the arrow keys to select File > Save changes and exit. Then follow the instructions - HP Mini 2140 | HP MINI User Guide - Windows XP - Page 66
arrow keys to select File > Save changes and exit. Then follow the instructions on the screen. Your preferences go into effect when the computer restarts. Using configured setup password, power-on password, or smart card PIN in a safe place away from your computer. Without these passwords or PIN, - HP Mini 2140 | HP MINI User Guide - Windows XP - Page 67
lower-left corner of the screen. 2. Use the arrow keys to select Security > Password options, and then press enter. 3. Use the arrow keys to select Enable in the > Save changes and exit. Then follow the instructions on the screen. Your preferences go into effect when the computer restarts. - HP Mini 2140 | HP MINI User Guide - Windows XP - Page 68
the screen. 2. Use the arrow keys to select Security > Password options and then press enter. 3. Use the arrow keys to > Save changes and exit. Then follow the instructions on the screen. Your preferences go into effect about the computer model. ● Specification information for the processor, cache - HP Mini 2140 | HP MINI User Guide - Windows XP - Page 69
ongoing protection against newly discovered viruses, antivirus software must be updated. Norton Internet Security is preinstalled on the computer. For information > Help and Support. For more information about computer viruses, type viruses in the Search box in Help and Support. Using antivirus - HP Mini 2140 | HP MINI User Guide - Windows XP - Page 70
a firewall can block access to Internet games, interfere with printer or file sharing on a network, or block authorized e-mail attachments. To temporarily solve the problem, disable the firewall, perform the task that you want to perform, and then reenable the firewall. To permanently resolve the - HP Mini 2140 | HP MINI User Guide - Windows XP - Page 71
available updates are installed on the computer, observe these guidelines: ● Run Windows Update monthly to install the latest software from Microsoft. ● Obtain updates, as they are released, from the Microsoft Web site and through the updates link in Help and Support. Installing critical updates 61 - HP Mini 2140 | HP MINI User Guide - Windows XP - Page 72
Installing a security cable NOTE: The security cable is designed to act as a deterrent, but it may not prevent the computer from being mishandled or stolen. 1. Loop the security cable around a secured object. 2. Insert the key (1) into the cable lock (2). 3. Insert the cable lock into the security - HP Mini 2140 | HP MINI User Guide - Windows XP - Page 73
an optional external device, such as a USB keyboard, mouse, drive, printer, scanner, or hub. Some USB devices may require additional support software, which is usually included with the device. For more information about device-specific software, refer to the manufacturer's instructions. Your - HP Mini 2140 | HP MINI User Guide - Windows XP - Page 74
Remove the device. Using USB legacy support USB legacy support (enabled by default) permits the external MultiBay or an optional USB bootable device USB legacy support is enabled at the factory. To disable or enable USB legacy support to enable or disable USB legacy support, and then press f10. 4. - HP Mini 2140 | HP MINI User Guide - Windows XP - Page 75
with an adapter attached) ● DVD-ROM Drive ● DVD/CD-RW Combo Drive ● DVD±RW/CD-RW Combo Drive ● MultiBay device Using optional external devices NOTE: For more information about required software and drivers, or to learn which computer port to use, refer to the manufacturer's instructions. To connect - HP Mini 2140 | HP MINI User Guide - Windows XP - Page 76
provides power to the external optical drive when used with a powered USB cable. An external optical drive connected to the other USB port on the computer must be connected to AC power. An external optical drive, such as a DVD-ROM drive, supports optical discs (CDs and DVDs). These discs store or - HP Mini 2140 | HP MINI User Guide - Windows XP - Page 77
snaps into place. 6. Close the disc tray. Removing an optical disc (CD or DVD) There are 2 ways to remove a disc, depending on whether the disc tray on the drive bezel to release the disc tray, and then gently pull out the tray (2) until it stops. Using an optional external optical drive (select - HP Mini 2140 | HP MINI User Guide - Windows XP - Page 78
a protective case. When the disc tray does not open 1. Insert the end of a paper clip (1) into the release access in the front bezel of the drive. 2. Press in gently on the paper clip until the tray is released, and then pull out the tray (2) until it stops. 68 Chapter - HP Mini 2140 | HP MINI User Guide - Windows XP - Page 79
not fully accessible, tilt the disc carefully as you remove it. 4. Close the disc tray and place the disc in a protective case. Using an optional external optical drive (select models only) 69 - HP Mini 2140 | HP MINI User Guide - Windows XP - Page 80
supports the following formats: ● MultiMediaCard (MMC) ● Secure Digital (SD) Memory Card Inserting a digital card CAUTION: To avoid damaging the digital card or the computer, do not insert any type of adapter into , and a menu of available options may be displayed. 70 Chapter 7 External media cards - HP Mini 2140 | HP MINI User Guide - Windows XP - Page 81
Save your information and close all programs associated with the digital card. NOTE: To stop a data transfer, click Cancel in the operating system Copying window. 2. Stop the digital card: a. Double-click the Safely Remove Hardware icon in the notification area, at the far right of the taskbar. NOTE - HP Mini 2140 | HP MINI User Guide - Windows XP - Page 82
the device drivers for your operating system. ● Do not install other software, such as card services, socket services, or enablers, supplied by the ExpressCard manufacturer. Inserting an ExpressCard CAUTION: To prevent damage to the computer and external media cards, do not insert a PC Card into - HP Mini 2140 | HP MINI User Guide - Windows XP - Page 83
Save your information and close all programs associated with the ExpressCard. NOTE: To stop a data transfer, click Cancel in the operating system Copying window. 2. Stop the ExpressCard: a. Double-click the Safely Remove Hardware icon in the notification area, at the far right of the taskbar. NOTE - HP Mini 2140 | HP MINI User Guide - Windows XP - Page 84
74 Chapter 7 External media cards - HP Mini 2140 | HP MINI User Guide - Windows XP - Page 85
pointing devices Setting pointing device preferences Use Mouse Properties in Windows® to customize settings for pointing devices, such as pointer to go. Use the TouchPad buttons like the corresponding buttons on an external mouse. To scroll up and down using the TouchPad vertical scroll zone, slide - HP Mini 2140 | HP MINI User Guide - Windows XP - Page 86
Alternate between computer display and external display. fn+f2 Decrease screen BIOS version number. In the Windows fn+esc display, the version of the system BIOS (basic input-output system) is displayed as the BIOS date. On some computer models, the BIOS date is displayed in decimal format. The BIOS - HP Mini 2140 | HP MINI User Guide - Windows XP - Page 87
and the information stored in memory is saved to the hard drive. The factory setting for critical battery action is Hibernate, but this setting can be changed in of Standby. NOTE: In all Windows operating system windows, references to the sleep button apply to the fn+f1 hotkey. Using the keyboard - HP Mini 2140 | HP MINI User Guide - Windows XP - Page 88
, the computer cannot be accessed until a Windows user password or a Windows administrator password is entered. NOTE: Before you can use QuickLock, you must set a Windows user password or a Windows administrator password. For instructions, refer to Help and Support. To use QuickLock, press fn+f6 to - HP Mini 2140 | HP MINI User Guide - Windows XP - Page 89
to increase speaker sound incrementally. Using keypads The computer has an embedded numeric keypad and also supports an optional external numeric keypad or an optional external keyboard that includes a numeric keypad. Component (1) fn key (2) Embedded numeric keypad (3) num lk key Description - HP Mini 2140 | HP MINI User Guide - Windows XP - Page 90
◦ Press and hold fn+shift to type in uppercase. Using an optional external numeric keypad Keys on most external numeric keypads function differently according to whether num lock is on or off. (Num lock is turned off at the factory.) For example: ● When num lock is on, most keypad keys type numbers - HP Mini 2140 | HP MINI User Guide - Windows XP - Page 91
Cleaning the TouchPad and keyboard Dirt and grease on the TouchPad can cause the pointer to jump around on the screen. To avoid this, clean the TouchPad with a damp cloth, and wash your hands frequently when using the computer. WARNING! To reduce the risk of electric shock or damage to internal - HP Mini 2140 | HP MINI User Guide - Windows XP - Page 92
Start > My Computer. On models with a secondary hard drive (drive D), the optical drive becomes drive E. The next drive added to the system, such as a new USB drive, will be assigned the next available drive letter. Handling drives Drives are fragile computer components that must be handled with - HP Mini 2140 | HP MINI User Guide - Windows XP - Page 93
the operating system. Do not use excessive force when inserting a drive into a drive bay. Do not type on the keyboard or move the computer while an optional optical drive is writing to a disc. The write process is sensitive to vibration. When the battery is the only source of power, be sure that the - HP Mini 2140 | HP MINI User Guide - Windows XP - Page 94
HD performance Using Disk Defragmenter As you use the computer, files on the hard drive become fragmented. Disk Defragmenter consolidates the fragmented files and folders on the hard drive listing for the hard drive, usually listed as (C:), Cleanup searches the hard drive for unnecessary files that - HP Mini 2140 | HP MINI User Guide - Windows XP - Page 95
● You move the computer with the display closed while the computer is running on battery power. A short time after the end of one of these events, HP 3D DriveGuard returns the hard drive to normal operation. NOTE: Hard drives that are in an optional docking device or are connected to a USB port are - HP Mini 2140 | HP MINI User Guide - Windows XP - Page 96
taskbar. - or - Right-click the icon in the notification area, and then select Settings. 2. Click the appropriate button to change settings. 3. Click OK. 86 Chapter 9 Drives - HP Mini 2140 | HP MINI User Guide - Windows XP - Page 97
system. To remove a hard drive: 1. Save your work. 2. Shut down the computer and close the display. 3. Disconnect all external hardware devices connected to the computer. 4. Unplug the power cord from the AC outlet. 5. Turn the computer upside down on a flat surface, with the battery bay toward you - HP Mini 2140 | HP MINI User Guide - Windows XP - Page 98
expose the hard drive. 10. Loosen and remove the 3 hard drive screws (1). 11. Pull the hard drive tab (2) to the right to disconnect the hard drive, and then lift the hard drive out of the hard drive bay (3). To install a hard drive: 1. Insert the hard drive into the hard drive bay (1). 2. Pull the - HP Mini 2140 | HP MINI User Guide - Windows XP - Page 99
3. Insert and tighten the 3 hard drive screws (3). 4. Insert the front of the keyboard into the keyboard tray (1), and then press the keyboard into place (2). 5. Close the computer display and turn the computer upside down on a flat surface. Replacing a hard drive 89 - HP Mini 2140 | HP MINI User Guide - Windows XP - Page 100
6. Replace the 3 screws on the back edge of the computer. 7. Replace the battery. 90 Chapter 9 Drives - HP Mini 2140 | HP MINI User Guide - Windows XP - Page 101
10 Memory modules The computer has one memory module compartment, which is operating system. 3. Disconnect all external devices connected to the computer. 4. Unplug the power cord from the AC outlet. 5. Turn the computer upside down on a flat surface. 6. Remove the battery from the computer. 7. - HP Mini 2140 | HP MINI User Guide - Windows XP - Page 102
up, with the front toward you, and open the display. 9. Lift the top edge of the keyboard (1) up and remove the keyboard from the computer (2). 10. Remove the existing memory module: a. Pull away the retention clips (1) on each side of the memory module. The memory module tilts up. CAUTION: To - HP Mini 2140 | HP MINI User Guide - Windows XP - Page 103
CAUTION: To prevent damage to the memory module, hold the memory module by the edges only. Do not touch the components on the memory module. a. Align the notched edge (1) of the memory module with the tab in the memory module slot. b. With the memory module at a 45-degree angle from the surface of - HP Mini 2140 | HP MINI User Guide - Windows XP - Page 104
14. Replace the 3 screws on the back edge of the computer. 15. Replace the battery. 16. Reconnect external power and external devices. 17. Turn on the computer. 94 Chapter 10 Memory modules - HP Mini 2140 | HP MINI User Guide - Windows XP - Page 105
Setup menu items listed in this guide may not be supported by your computer. NOTE: Pointing devices are not supported in Computer Setup. You must use make selections. NOTE: An external keyboard connected by USB can be used with Computer Setup only if USB legacy support is enabled. To start Computer - HP Mini 2140 | HP MINI User Guide - Windows XP - Page 106
select File > Ignore changes and exit. Then follow the instructions on the screen. ● To save your preferences and exit specification information for the processor, cache and memory size, and system ROM. Replace the configuration settings in Computer Setup with the original factory settings. (Password - HP Mini 2140 | HP MINI User Guide - Windows XP - Page 107
section may not be supported by your computer. Select Setup password Power-on password Password options DriveLock passwords System IDs Disk Sanitizer Run Disk Sanitizer to destroy all existing data on the primary hard drive. The following options are available: ● Fast: Runs the Disk Sanitizer - HP Mini 2140 | HP MINI User Guide - Windows XP - Page 108
supported Enable/disable internal network adapter boot. ● Enable ◦ 4th boot device: Notebook hard drive ◦ 5th boot device: drive, diskette drive, or optical drive connected by a USB port to the computer. ● Enable/disable BIOS DMA data transfers. ● Enable/disable fan always on while connected to an AC - HP Mini 2140 | HP MINI User Guide - Windows XP - Page 109
Select Port options To do this ● Enable/disable LAN/WLAN Switching. ● Enable/disable Wake on LAN. ● Enable/disable the integrated camera (webcam) ● Enable/disable USB port. ● Enable/disable ExpressCard slot. Computer Setup menus 99 - HP Mini 2140 | HP MINI User Guide - Windows XP - Page 110
Index A AC adapter connecting 15 identifying 9 administrator password 45 airport security devices 83 antennae 8 applications key, Windows 4 audio devices, connecting external 34 audio functions, checking 34 audio-in (microphone) jack 7, 31 audio-out (headphone) jack 7, 31 B battery calibrating 19 - HP Mini 2140 | HP MINI User Guide - Windows XP - Page 111
fn 4 function 4 keypad 4 Windows applications 4 Windows logo 4 L labels Bluetooth 10 Microsoft Certificate of Authenticity 10 regulatory 10 service tag 8, 10 wireless certification 10 WLAN 10 latches, battery release 8 legacy support, USB 95, 98 lights battery 6 caps lock 3 drive 5 power 5 TouchPad - HP Mini 2140 | HP MINI User Guide - Windows XP - Page 112
Certificate of Authenticity label 10 Product Key 10 optical disc inserting 38, 66 removing 41, 67 optical discs, using 37 optical drive 37, 65 P passwords administrator 45 DriveLock 51 power-on 48 setup 46 user 45 pointing devices setting preferences 75 ports external monitor 6, 36 USB 6, 63 - HP Mini 2140 | HP MINI User Guide - Windows XP - Page 113
-
 1
1 -
 2
2 -
 3
3 -
 4
4 -
 5
5 -
 6
6 -
 7
7 -
8
-
9
-
10
-
11
-
12
-
13
-
14
-
15
-
16
-
17
-
18
-
19
-
20
-
21
-
22
-
23
-
24
-
25
-
26
-
27
-
28
-
29
-
30
-
31
-
32
-
33
-
34
-
35
-
36
-
37
-
38
-
39
-
40
-
41
-
42
-
43
-
44
-
45
-
46
-
47
-
48
-
49
-
50
-
51
-
52
-
53
-
54
-
55
-
56
-
57
-
58
-
59
-
60
-
61
-
62
-
63
-
64
-
65
-
66
-
67
-
68
-
69
-
70
-
71
-
72
-
73
-
74
-
75
-
76
-
77
-
78
-
79
-
80
-
81
-
82
-
83
-
84
-
85
-
86
-
87
-
88
-
89
-
90
-
91
-
92
-
93
-
94
-
95
-
96
-
97
-
98
-
99
-
100
-
101
-
102
-
103
-
104
-
105
-
106
-
107
-
108
-
109
-
110
-
111
-
112
-
113
 |
 |

HP MINI
User Guide