HP N6310 HP Scanjet N6310 User Guide - Page 32
Check that the scanner has power, Reset the scanner, Power, Scanner initialization failed, Scanner - problems initializing
 |
UPC - 883585956005
View all HP N6310 manuals
Add to My Manuals
Save this manual to your list of manuals |
Page 32 highlights
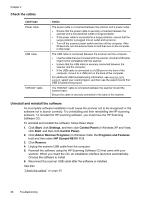
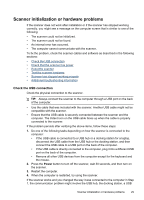
Chapter 4 port, or another USB device. Leave the scanner directly connected to the computer through a USB port on the back of the computer. Try using the scanner after reconnecting each additional USB device, and disconnect any USB devices that prevent the scanner from working correctly. If the scanner does not work, uninstall and then reinstall the HP scanning software. See also "Uninstall and reinstall the software" on page 28 Check that the scanner has power The power cable is connected between the scanner and a power outlet. • Ensure that the power cable is securely connected between the scanner and a live electrical outlet. • If the power cable is connected to a surge protector, ensure that the surge protector is plugged into an outlet and turned on. • Ensure that the Power button on the scanner panel is on; when on and no error or attention conditions exist, the Power LED is lit with a steady green light. If the problem persists after verifying the above items, follow these steps: 1. Press the Power button to turn off the scanner, and then disconnect the power cable from the scanner. 2. Wait 30 seconds. 3. Reconnect the power cable to the scanner, then turn on the scanner. After 30 seconds, the Power LED is lit with a steady green light and the Attention LED is off. See also • "Basic troubleshooting tips" on page 26 • "Scanner LEDs" on page 27 • "Check the cables" on page 28 Reset the scanner If you receive an error message similar to Scanner initialization failed or Scanner not found when trying to use the scanner, you should reset the scanner. To reset the scanner, follow these steps: 1. Close the HP scanning software, if it is open. 2. Disconnect the USB cable that connects the scanner to the computer. 3. Turn the computer off, wait 60 seconds, and then turn on the computer. 4. Reconnect the USB cable to a USB port on the back of the computer. • Make sure that the USB cable is connected to the back of the scanner correctly. The trident icon on the USB cable faces up when the cable is properly connected to the scanner. • Try connecting the USB cable to a different USB port on the back of the computer. 5. Ensure that the TMA/ADF cable is securely connected. 30 Troubleshooting
-
 1
1 -
2
-
3
-
4
-
5
-
6
-
7
-
8
-
9
-
10
-
11
-
12
-
13
-
14
-
15
-
16
-
17
-
18
-
19
-
20
-
21
-
22
-
23
-
24
-
25
-
26
-
 27
27 -
 28
28 -
 29
29 -
 30
30 -
 31
31 -
 32
32 -
 33
33 -
 34
34 -
 35
35 -
 36
36 -
 37
37 -
38
-
39
-
40
-
41
-
42
-
43
-
44
-
45
-
46
-
47
-
48
 |
 |