HP Officejet 4500 User Guide - Page 207
To turn off wireless communication, To print a wireless test Reset wireless settings - wireless printer setup
 |
View all HP Officejet 4500 manuals
Add to My Manuals
Save this manual to your list of manuals |
Page 207 highlights
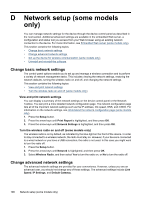
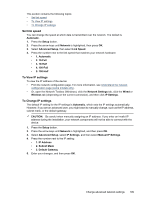
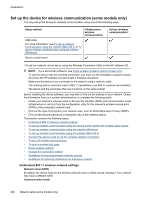
To turn off wireless communication • Device control panel: Press Setup, then select Wireless, then select Wireless ON/OFF, and then select either On or Off. • Press the wireless button on the front of the device. To print a wireless test page Print the wireless test page for information about the device's wireless connection. The wireless test page provides information about the device's status, MAC address, and IP address. If the device is connected to a network, the test page displays details about the network settings. ▲ Device control panel: Press Setup, select Print Report, select Wireless Test, and then press OK. Reset wireless settings Reset network configuration settings If the device is still unable to communicate with the network, reset the device's network settings. • Press Setup. Press an arrow button to move to Network, and then press OK. • Press an arrow button to move to Reset Wireless, and then press OK. • Print the wireless configuration page and verify that the network settings have been reset. For more information, see Understand the network configuration page (some models only). By default, the network name (SSID) is "hpsetup" and the communication mode is "ad hoc." Change the connection method If you have installed the software and connected your HP device using a USB or Ethernet cable, you can change to a wireless connection any time you want. Change from a USB connection to a wireless connection (Windows) 1. Select Start, Programs, HP, select your device, and then select Change Connection Method. 2. Press Add a Device. 3. Follow the onscreen instructions and remove the USB cable when prompted. Change from a USB connection to a wireless connection (Mac OS X) 1. Click the HP Device Manager icon on the Dock or in the Hewlett Packard folder in the Applications folder. 2. From the Information and Settings list, select Network Printer Setup Utility. 3. Follow the onscreen instructions to configure the network settings. Change from an Ethernet connection to a wireless connection NOTE: For Ethernet-enabled HP devices only. 1. Open the embedded Web server (EWS). For more information, see Embedded Web server (some models only). 2. Click the Networking tab, and then click Wireless (802.11) in the left pane. 3. On the Wireless Setup tab, press Start Wizard. 4. Follow the onscreen instructions to change from an Ethernet connection to a wireless connection. 5. After you finish changing the settings, disconnect the Ethernet cable. Set up the device for wireless communication (some models only) 203
-
 1
1 -
2
-
3
-
4
-
5
-
6
-
7
-
8
-
9
-
10
-
11
-
12
-
13
-
14
-
15
-
16
-
17
-
18
-
19
-
20
-
21
-
22
-
23
-
24
-
25
-
26
-
27
-
28
-
29
-
30
-
31
-
32
-
33
-
34
-
35
-
36
-
37
-
38
-
39
-
40
-
41
-
42
-
43
-
44
-
45
-
46
-
47
-
48
-
49
-
50
-
51
-
52
-
53
-
54
-
55
-
56
-
57
-
58
-
59
-
60
-
61
-
62
-
63
-
64
-
65
-
66
-
67
-
68
-
69
-
70
-
71
-
72
-
73
-
74
-
75
-
76
-
77
-
78
-
79
-
80
-
81
-
82
-
83
-
84
-
85
-
86
-
87
-
88
-
89
-
90
-
91
-
92
-
93
-
94
-
95
-
96
-
97
-
98
-
99
-
100
-
101
-
102
-
103
-
104
-
105
-
106
-
107
-
108
-
109
-
110
-
111
-
112
-
113
-
114
-
115
-
116
-
117
-
118
-
119
-
120
-
121
-
122
-
123
-
124
-
125
-
126
-
127
-
128
-
129
-
130
-
131
-
132
-
133
-
134
-
135
-
136
-
137
-
138
-
139
-
140
-
141
-
142
-
143
-
144
-
145
-
146
-
147
-
148
-
149
-
150
-
151
-
152
-
153
-
154
-
155
-
156
-
157
-
158
-
159
-
160
-
161
-
162
-
163
-
164
-
165
-
166
-
167
-
168
-
169
-
170
-
171
-
172
-
173
-
174
-
175
-
176
-
177
-
178
-
179
-
180
-
181
-
182
-
183
-
184
-
185
-
186
-
187
-
188
-
189
-
190
-
191
-
192
-
193
-
194
-
195
-
196
-
197
-
198
-
199
-
200
-
201
-
 202
202 -
 203
203 -
 204
204 -
 205
205 -
 206
206 -
 207
207 -
 208
208 -
 209
209 -
 210
210 -
 211
211 -
 212
212 -
213
-
214
-
215
-
216
-
217
-
218
-
219
-
220
-
221
-
222
-
223
-
224
-
225
-
226
-
227
-
228
 |
 |