HP Officejet 4620 User Guide - Page 51
To schedule a fax from the printer control panel, Send Fax Later, Quick, Contacts, Start Fax Black
 |
View all HP Officejet 4620 manuals
Add to My Manuals
Save this manual to your list of manuals |
Page 51 highlights
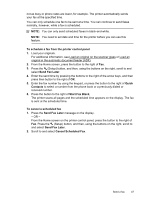
not as busy or phone rates are lower, for example. The printer automatically sends your fax at the specified time. You can only schedule one fax to be sent at a time. You can continue to send faxes normally, however, while a fax is scheduled. NOTE: You can only send scheduled faxes in black-and-white. NOTE: You need to set date and time for the printer before you can use this feature. To schedule a fax from the printer control panel 1. Load your originals. For additional information, see Load an original on the scanner glass or Load an original in the automatic document feeder (ADF). 2. From the Home screen, press the button to the right of Fax. 3. Press the (Setup) button, and then, using the buttons on the right, scroll to and select Send Fax Later. 4. Enter the send time by pressing the buttons to the right of the arrow keys, and then press then button to the right of OK. 5. Enter the fax number by using the keypad, or press the button to the right of Quick Contacts to select a number from the phone book or a previously dialed or received number. 6. Press the button to the right of Start Fax Black. The printer scans all pages and the scheduled time appears on the display. The fax is sent at the scheduled time. To cancel a scheduled fax 1. Press the Send Fax Later message on the display. - OR - From the Home screen on the printer control panel, press the button to the right of Fax. Press the (Setup) button, and then, using the buttons on the right, scroll to and select Send Fax Later. 2. Scroll to and select Cancel Scheduled Fax. Send a fax 47
-
 1
1 -
2
-
3
-
4
-
5
-
6
-
7
-
8
-
9
-
10
-
11
-
12
-
13
-
14
-
15
-
16
-
17
-
18
-
19
-
20
-
21
-
22
-
23
-
24
-
25
-
26
-
27
-
28
-
29
-
30
-
31
-
32
-
33
-
34
-
35
-
36
-
37
-
38
-
39
-
40
-
41
-
42
-
43
-
44
-
45
-
 46
46 -
 47
47 -
 48
48 -
 49
49 -
 50
50 -
 51
51 -
 52
52 -
 53
53 -
 54
54 -
 55
55 -
 56
56 -
57
-
58
-
59
-
60
-
61
-
62
-
63
-
64
-
65
-
66
-
67
-
68
-
69
-
70
-
71
-
72
-
73
-
74
-
75
-
76
-
77
-
78
-
79
-
80
-
81
-
82
-
83
-
84
-
85
-
86
-
87
-
88
-
89
-
90
-
91
-
92
-
93
-
94
-
95
-
96
-
97
-
98
-
99
-
100
-
101
-
102
-
103
-
104
-
105
-
106
-
107
-
108
-
109
-
110
-
111
-
112
-
113
-
114
-
115
-
116
-
117
-
118
-
119
-
120
-
121
-
122
-
123
-
124
-
125
-
126
-
127
-
128
-
129
-
130
-
131
-
132
-
133
-
134
-
135
-
136
-
137
-
138
-
139
-
140
-
141
-
142
-
143
-
144
-
145
-
146
-
147
-
148
-
149
-
150
-
151
-
152
-
153
-
154
-
155
-
156
-
157
-
158
-
159
-
160
-
161
-
162
-
163
-
164
-
165
-
166
-
167
-
168
-
169
-
170
-
171
-
172
-
173
-
174
-
175
-
176
-
177
-
178
-
179
-
180
-
181
-
182
-
183
-
184
-
185
-
186
-
187
-
188
-
189
-
190
-
191
-
192
-
193
-
194
-
195
-
196
-
197
-
198
-
199
-
200
-
201
-
202
-
203
-
204
-
205
-
206
-
207
-
208
-
209
-
210
-
211
-
212
-
213
-
214
-
215
-
216
-
217
-
218
-
219
-
220
-
221
-
222
-
223
-
224
-
225
-
226
-
227
-
228
 |
 |