HP Officejet 4620 User Guide - Page 80
Store printing supplies, Related topics - ink cartridge
 |
View all HP Officejet 4620 manuals
Add to My Manuals
Save this manual to your list of manuals |
Page 80 highlights
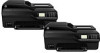
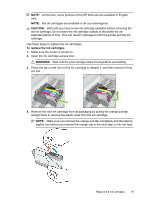
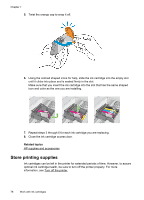
Chapter 7 5. Twist the orange cap to snap it off. 6. Using the colored shaped icons for help, slide the ink cartridge into the empty slot until it clicks into place and is seated firmly in the slot. Make sure that you insert the ink cartridge into the slot that has the same shaped icon and color as the one you are installing. 7. Repeat steps 3 through 6 for each ink cartridge you are replacing. 8. Close the ink cartridge access door. Related topics HP supplies and accessories Store printing supplies Ink cartridges can be left in the printer for extended periods of time. However, to assure optimal ink cartridge health, be sure to turn off the printer properly. For more information, see Turn off the printer. 76 Work with ink cartridges
-
 1
1 -
2
-
3
-
4
-
5
-
6
-
7
-
8
-
9
-
10
-
11
-
12
-
13
-
14
-
15
-
16
-
17
-
18
-
19
-
20
-
21
-
22
-
23
-
24
-
25
-
26
-
27
-
28
-
29
-
30
-
31
-
32
-
33
-
34
-
35
-
36
-
37
-
38
-
39
-
40
-
41
-
42
-
43
-
44
-
45
-
46
-
47
-
48
-
49
-
50
-
51
-
52
-
53
-
54
-
55
-
56
-
57
-
58
-
59
-
60
-
61
-
62
-
63
-
64
-
65
-
66
-
67
-
68
-
69
-
70
-
71
-
72
-
73
-
74
-
 75
75 -
 76
76 -
 77
77 -
 78
78 -
 79
79 -
 80
80 -
 81
81 -
 82
82 -
 83
83 -
 84
84 -
 85
85 -
86
-
87
-
88
-
89
-
90
-
91
-
92
-
93
-
94
-
95
-
96
-
97
-
98
-
99
-
100
-
101
-
102
-
103
-
104
-
105
-
106
-
107
-
108
-
109
-
110
-
111
-
112
-
113
-
114
-
115
-
116
-
117
-
118
-
119
-
120
-
121
-
122
-
123
-
124
-
125
-
126
-
127
-
128
-
129
-
130
-
131
-
132
-
133
-
134
-
135
-
136
-
137
-
138
-
139
-
140
-
141
-
142
-
143
-
144
-
145
-
146
-
147
-
148
-
149
-
150
-
151
-
152
-
153
-
154
-
155
-
156
-
157
-
158
-
159
-
160
-
161
-
162
-
163
-
164
-
165
-
166
-
167
-
168
-
169
-
170
-
171
-
172
-
173
-
174
-
175
-
176
-
177
-
178
-
179
-
180
-
181
-
182
-
183
-
184
-
185
-
186
-
187
-
188
-
189
-
190
-
191
-
192
-
193
-
194
-
195
-
196
-
197
-
198
-
199
-
200
-
201
-
202
-
203
-
204
-
205
-
206
-
207
-
208
-
209
-
210
-
211
-
212
-
213
-
214
-
215
-
216
-
217
-
218
-
219
-
220
-
221
-
222
-
223
-
224
-
225
-
226
-
227
-
228
 |
 |
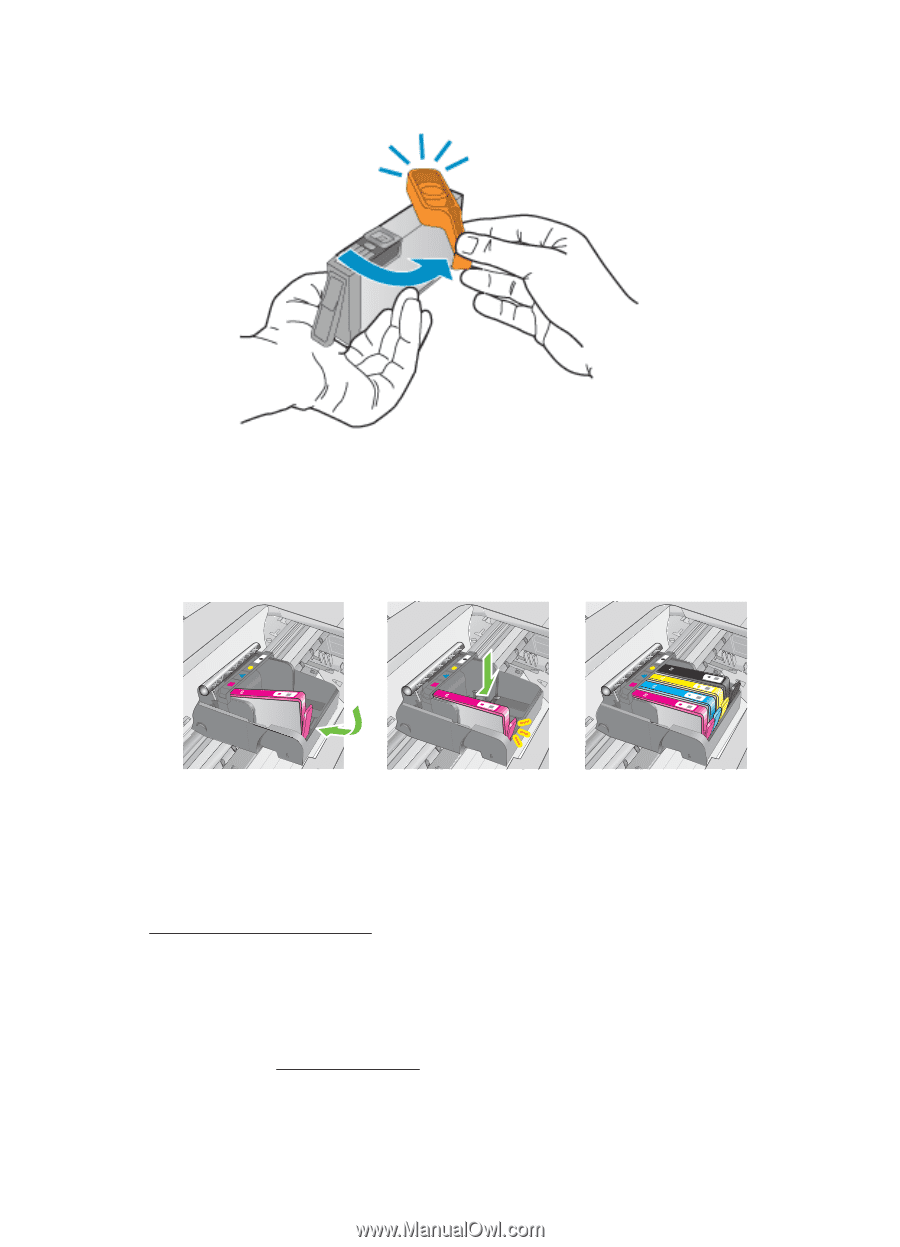
5.
Twist the orange cap to snap it off.
6.
Using the colored shaped icons for help, slide the ink cartridge into the empty slot
until it clicks into place and is seated firmly in the slot.
Make sure that you insert the ink cartridge into the slot that has the same shaped
icon and color as the one you are installing.
7.
Repeat steps 3 through 6 for each ink cartridge you are replacing.
8.
Close the ink cartridge access door.
Related topics
HP supplies and accessories
Store printing supplies
Ink cartridges can be left in the printer for extended periods of time. However, to assure
optimal ink cartridge health, be sure to turn off the printer properly. For more
information, see
Turn off the printer.
Chapter 7
76
Work with ink cartridges