HP Officejet 6500A User Guide - Page 119
Ragged, irregularly streaked, or faded bars
 |
View all HP Officejet 6500A manuals
Add to My Manuals
Save this manual to your list of manuals |
Page 119 highlights
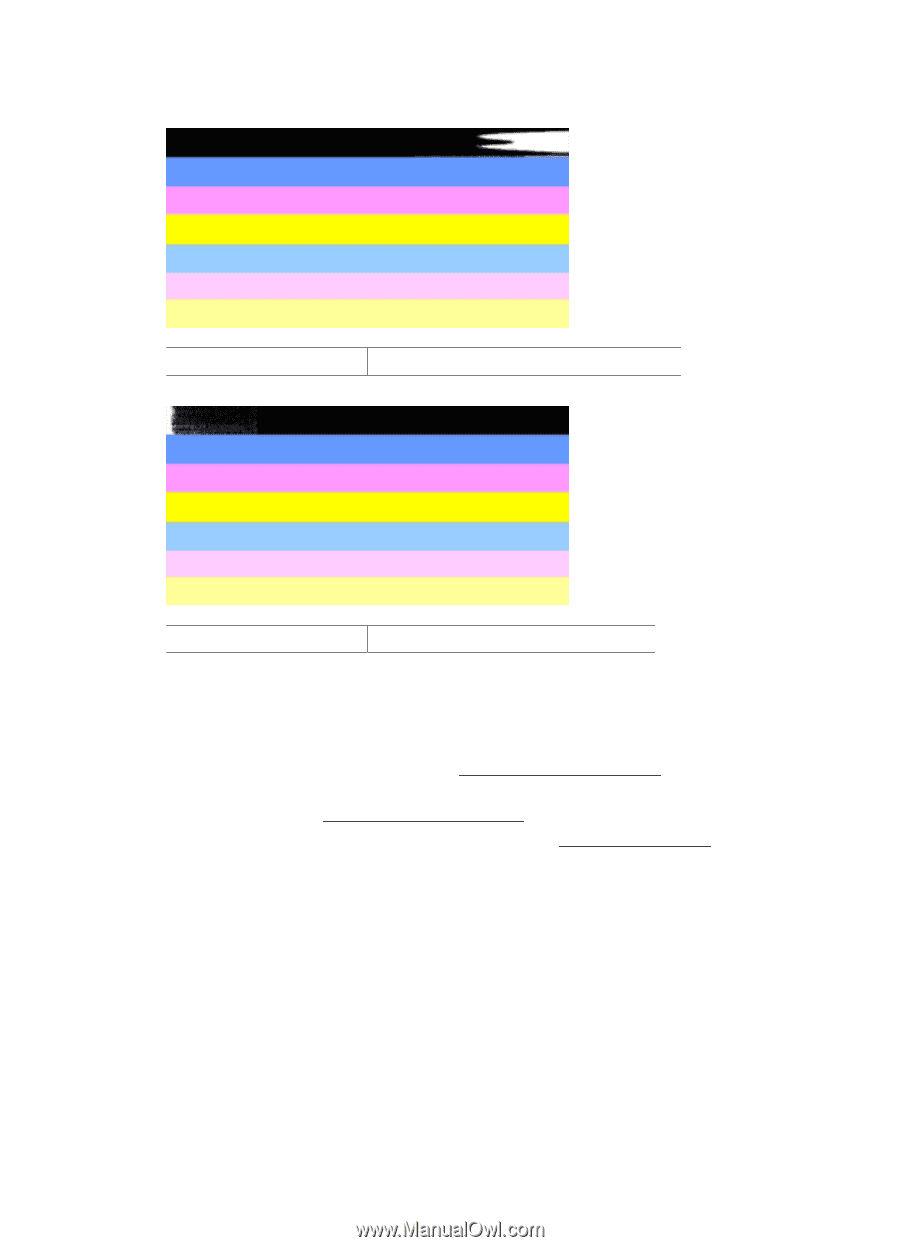
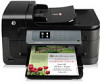
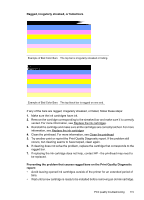
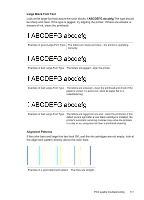
Ragged, irregularly streaked, or faded bars Example of Bad Color Bars The top bar is irregularly streaked or fading. Example of Bad Color Bars The top black bar is ragged on one end. If any of the bars are ragged, irregularly streaked, or faded, follow these steps: 1. Make sure the ink cartridges have ink. 2. Remove the cartridge corresponding to the streaked bar and make sure it is correctly vented. For more information, see Replace the ink cartridges. 3. Reinstall the cartridge and make sure all the cartridges are correctly latched. For more information, see Replace the ink cartridges 4. Clean the printhead. For more information, see Clean the printhead 5. Try another print or reprint the Print Quality Diagnostic report. If the problem still occurs, but cleaning seems to have helped, clean again. 6. If cleaning does not solve the problem, replace the cartridge that corresponds to the ragged bar. 7. If replacing the ink cartridge does not help, contact HP - the printhead may need to be replaced. Preventing the problem that causes ragged bars on the Print Quality Diagnostic report: • Avoid leaving opened ink cartridges outside of the printer for an extended period of time. • Wait until a new cartridge is ready to be installed before removing an old ink cartridge. Print quality troubleshooting 115
-
 1
1 -
2
-
3
-
4
-
5
-
6
-
7
-
8
-
9
-
10
-
11
-
12
-
13
-
14
-
15
-
16
-
17
-
18
-
19
-
20
-
21
-
22
-
23
-
24
-
25
-
26
-
27
-
28
-
29
-
30
-
31
-
32
-
33
-
34
-
35
-
36
-
37
-
38
-
39
-
40
-
41
-
42
-
43
-
44
-
45
-
46
-
47
-
48
-
49
-
50
-
51
-
52
-
53
-
54
-
55
-
56
-
57
-
58
-
59
-
60
-
61
-
62
-
63
-
64
-
65
-
66
-
67
-
68
-
69
-
70
-
71
-
72
-
73
-
74
-
75
-
76
-
77
-
78
-
79
-
80
-
81
-
82
-
83
-
84
-
85
-
86
-
87
-
88
-
89
-
90
-
91
-
92
-
93
-
94
-
95
-
96
-
97
-
98
-
99
-
100
-
101
-
102
-
103
-
104
-
105
-
106
-
107
-
108
-
109
-
110
-
111
-
112
-
113
-
 114
114 -
 115
115 -
 116
116 -
 117
117 -
 118
118 -
 119
119 -
 120
120 -
 121
121 -
 122
122 -
 123
123 -
 124
124 -
125
-
126
-
127
-
128
-
129
-
130
-
131
-
132
-
133
-
134
-
135
-
136
-
137
-
138
-
139
-
140
-
141
-
142
-
143
-
144
-
145
-
146
-
147
-
148
-
149
-
150
-
151
-
152
-
153
-
154
-
155
-
156
-
157
-
158
-
159
-
160
-
161
-
162
-
163
-
164
-
165
-
166
-
167
-
168
-
169
-
170
-
171
-
172
-
173
-
174
-
175
-
176
-
177
-
178
-
179
-
180
-
181
-
182
-
183
-
184
-
185
-
186
-
187
-
188
-
189
-
190
-
191
-
192
-
193
-
194
-
195
-
196
-
197
-
198
-
199
-
200
-
201
-
202
-
203
-
204
-
205
-
206
-
207
-
208
-
209
-
210
-
211
-
212
-
213
-
214
-
215
-
216
-
217
-
218
-
219
-
220
-
221
-
222
-
223
-
224
-
225
-
226
-
227
-
228
-
229
-
230
-
231
-
232
-
233
-
234
-
235
-
236
-
237
-
238
-
239
-
240
-
241
-
242
-
243
-
244
-
245
-
246
-
247
-
248
-
249
-
250
 |
 |