HP Officejet 7000 User Guide - Page 19
Understand specifications for supported media, Cards and envelopes, Photo media, Transparencies - driver for windows 7
 |
View all HP Officejet 7000 manuals
Add to My Manuals
Save this manual to your list of manuals |
Page 19 highlights
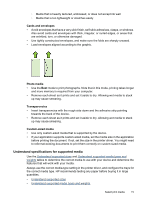
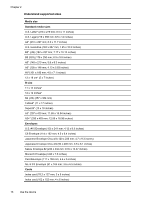
◦ Media that is heavily textured, embossed, or does not accept ink well ◦ Media that is too lightweight or stretches easily Cards and envelopes • Avoid envelopes that have a very slick finish, self-stick adhesives, clasps, or windows. Also avoid cards and envelopes with thick, irregular, or curled edges, or areas that are wrinkled, torn, or otherwise damaged. • Use tightly constructed envelopes, and make sure the folds are sharply creased. • Load envelopes aligned according to the graphic. Photo media • Use the Best mode to print photographs. Note that in this mode, printing takes longer and more memory is required from your computer. • Remove each sheet as it prints and set it aside to dry. Allowing wet media to stack up may cause smearing. Transparencies • Insert transparencies with the rough side down and the adhesive strip pointing towards the back of the device. • Remove each sheet as it prints and set it aside to dry. Allowing wet media to stack up may cause smearing. Custom-sized media • Use only custom-sized media that is supported by the device. • If your application supports custom-sized media, set the media size in the application before printing the document. If not, set the size in the printer driver. You might need to reformat existing documents to print them correctly on custom-sized media. Understand specifications for supported media Use the Understand supported sizes and Understand supported media types and weights tables to determine the correct media to use with your device and determine the features that will work with your media. Always use the correct media-type setting in the printer driver, and configure the trays for the correct media type. HP recommends testing any paper before buying it in large quantities. • Understand supported sizes • Understand supported media types and weights Select print media 15
-
 1
1 -
2
-
3
-
4
-
5
-
6
-
7
-
8
-
9
-
10
-
11
-
12
-
13
-
 14
14 -
 15
15 -
 16
16 -
 17
17 -
 18
18 -
 19
19 -
 20
20 -
 21
21 -
 22
22 -
 23
23 -
 24
24 -
25
-
26
-
27
-
28
-
29
-
30
-
31
-
32
-
33
-
34
-
35
-
36
-
37
-
38
-
39
-
40
-
41
-
42
-
43
-
44
-
45
-
46
-
47
-
48
-
49
-
50
-
51
-
52
-
53
-
54
-
55
-
56
-
57
-
58
-
59
-
60
-
61
-
62
-
63
-
64
-
65
-
66
-
67
-
68
-
69
-
70
-
71
-
72
-
73
-
74
-
75
-
76
-
77
-
78
-
79
-
80
-
81
-
82
-
83
-
84
-
85
-
86
-
87
-
88
-
89
-
90
-
91
-
92
-
93
-
94
-
95
-
96
-
97
-
98
-
99
-
100
-
101
-
102
-
103
-
104
-
105
-
106
-
107
-
108
-
109
-
110
-
111
-
112
-
113
-
114
-
115
-
116
-
117
-
118
-
119
-
120
-
121
-
122
-
123
-
124
-
125
-
126
-
127
-
128
-
129
-
130
-
131
-
132
-
133
-
134
-
135
-
136
-
137
-
138
-
139
-
140
-
141
-
142
-
143
-
144
-
145
-
146
-
147
-
148
 |
 |
