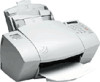
HP Officejet 720 HP OfficeJet 700 Series All-in-One - (English) User Guide
HP Officejet 720 - All-in-One Printer Manual
 |
View all HP Officejet 720 manuals
Add to My Manuals
Save this manual to your list of manuals |
HP Officejet 720 manual content summary:
- HP Officejet 720 | HP OfficeJet 700 Series All-in-One - (English) User Guide - Page 1
H ............ HP OfficeJet Series 700 User's Guide - HP Officejet 720 | HP OfficeJet 700 Series All-in-One - (English) User Guide - Page 2
to reduce risk of injury from fire or electric shock. 1. Read and understand all instructions in the Setup Guide. WARNING: Potential Shock Hazard 2. Use only a grounded electrical outlet when connecting the HP OfficeJet to a power source. If you don't know whether the outlet is grounded, check with - HP Officejet 720 | HP OfficeJet 700 Series All-in-One - (English) User Guide - Page 3
1-4 Faxing 1-5 Faxing paper documents 1-5 Faxing from the keypad 1-5 Faxing from the HP OfficeJet Manager 1-6 Faxing from your software application 1-7 Speed dialing 1-7 Receiving faxes 1-7 Choosing automatic versus manual fax receiving . . . 1-8 Manually receiving faxes 1-9 Receiving faxes - HP Officejet 720 | HP OfficeJet 700 Series All-in-One - (English) User Guide - Page 4
(PC-connected 3-1 Cleaning the HP OfficeJet 3-2 Cleaning the exterior 3-2 Cleaning the scanner glass 3-2 Cleaning the print cartridges and surrounding areas . 3-2 Cleaning the paper rollers 3-4 Uninstalling the software 3-5 Troubleshooting 3-6 Common problems 3-7 Error messages 3-8 ...ii - HP Officejet 720 | HP OfficeJet 700 Series All-in-One - (English) User Guide - Page 5
scan text to edit using OCR (page 1-15). Click Help for online help, trouble-shooting, or to see information about your HP OfficeJet. Click Settings to change fax, print, and scan to email settings, or to see the phone book, fax log, or maintenance tasks. Click Copy to copy in black and white or - HP Officejet 720 | HP OfficeJet 700 Series All-in-One - (English) User Guide - Page 6
Loading the Paper Supply The HP OfficeJet prints on a variety of papers. (See "Paper Types and Sizes" in the More Information guide.) For best results, adjust the paper settings each time you change paper types. To adjust paper settings, see "Printing" on page 1-17. Using a scan/copy - HP Officejet 720 | HP OfficeJet 700 Series All-in-One - (English) User Guide - Page 7
2 Pull up the Paper Extension at the back of the HP extension OfficeJet to support the paper. 3 Load about a 1/2-inch stack of paper, print side Stack forward, into the Paper Tray. Fit the paper behind guides the Stack Guides as shown. Tips: l When loading specialty paper like photo paper - HP Officejet 720 | HP OfficeJet 700 Series All-in-One - (English) User Guide - Page 8
stamp edge down. Loading multiple envelopes l Pull the Document Tray forward and remove any paper from the Paper Tray. l Pinch and slide the right Paper Guide to the envelope position inscribed on the Paper Tray. l Load up to ten envelopes with the address side facing you and the stamp edge down - HP Officejet 720 | HP OfficeJet 700 Series All-in-One - (English) User Guide - Page 9
One Faxing With the HP OfficeJet, you can fax paper documents or you can send faxes directly from your PC. Note: You can fax in color through the HP OfficeJet Manager if the fax recipient also has color fax capability. Faxing paper documents You can fax paper documents using either the keypad on - HP Officejet 720 | HP OfficeJet 700 Series All-in-One - (English) User Guide - Page 10
down with the printed side away from you. The HP OfficeJet Manager asks what you want to do. If you don't see the HP OfficeJet Manager on your PC screen, minimize open applications. 2 Click Fax and explore the additional options in the Send Fax dialog box, such as attaching a cover sheet. The Send - HP Officejet 720 | HP OfficeJet 700 Series All-in-One - (English) User Guide - Page 11
One Faxing from your software application 1 With your PC software application open and your document file displayed on your PC screen, select Print from the File menu. 2 Select HP OfficeJet Series 700 Fax as the printer and click OK. Note: Make this selection from wherever your software application - HP Officejet 720 | HP OfficeJet 700 Series All-in-One - (English) User Guide - Page 12
change the number of rings before the HP OfficeJet answers the phone, either through the software or from the front panel. Here's how: For PC-connected users 1 On your Windows desktop, double-click HP OfficeJet Manager, and click Settings. 2 Select Fax Setup, then select Receive Settings. Click the - HP Officejet 720 | HP OfficeJet 700 Series All-in-One - (English) User Guide - Page 13
One Manually receiving faxes If you're set up to receive faxes manually (Auto Answer light on keypad is off), use the following procedure to receive faxes. Make sure there are no documents in the document tray, or they may be faxed after the next steps. 1 When the HP OfficeJet rings, pick up the - HP Officejet 720 | HP OfficeJet 700 Series All-in-One - (English) User Guide - Page 14
re set up to receive faxes manually, follow the instructions under "Manually receiving faxes." For more information about faxing, refer to the Help system: Doubleclick HP OfficeJet Manager on your Windows desktop and click Help, then select HP OfficeJet Series 700 Help. Click Faxing, and select from - HP Officejet 720 | HP OfficeJet 700 Series All-in-One - (English) User Guide - Page 15
One Copying Use the keypad to copy in black and white only. Use the HP OfficeJet Manager for color copying, or in the document tray with the printed side away from you. If necessary, adjust the document guides for the width of your document. 2 Press the Copy button, then enter the number of copies - HP Officejet 720 | HP OfficeJet 700 Series All-in-One - (English) User Guide - Page 16
making your selections, click Start Copy to begin copying. For more information about copying, refer to the Help system: Double-click HP OfficeJet Manager on your Windows desktop and click Help, then select HP OfficeJet Series 700 Help. Click Copying, and select from the menu of topics. ...1-12 - HP Officejet 720 | HP OfficeJet 700 Series All-in-One - (English) User Guide - Page 17
One Scanning You can scan photographs, drawings, and text in color, tray, top down with the printed side away from you. If necessary, adjust the document guides for the width of your original. The HP OfficeJet Manager appears on your PC screen. If you don't see it, minimize open applications. 2 - HP Officejet 720 | HP OfficeJet 700 Series All-in-One - (English) User Guide - Page 18
scan a document or photo, the scanned image appears in the HP OfficeJet Image Viewer. Use the Image Viewer to edit, print, or To select an area, press the left mouse button and hold it as you drag across the part of the image you want to select. Release the mouse button and the selected area has a - HP Officejet 720 | HP OfficeJet 700 Series All-in-One - (English) User Guide - Page 19
your OCR software, such as the one provided with the HP OfficeJet. Refer to step 8 in the Setup Guide. To software. Note: To change the selected word processing program, double-click HP OfficeJet Manager on your Windows desktop, click Settings, then select Settings and Maintenance. Click the Software - HP Officejet 720 | HP OfficeJet 700 Series All-in-One - (English) User Guide - Page 20
on MAPI setup, refer to your email user's manual, or look under "Email" in the HP OfficeJet Help index. With your email application as the default the Help system: Double-click HP OfficeJet Manager on your Windows desktop and click Help, then select HP OfficeJet Series 700 Help. Click Scanning, and - HP Officejet 720 | HP OfficeJet 700 Series All-in-One - (English) User Guide - Page 21
in the More Information guide for supported paper types. Printing a document You can print directly from the software application you use to create your document. 1 From your application's File menu, select Print. 2 Make sure the HP OfficeJet Series 700 Printer is the selected printer. Specify which - HP Officejet 720 | HP OfficeJet 700 Series All-in-One - (English) User Guide - Page 22
change the setting. Double-click HP OfficeJet Manager on your Windows desktop. On the HP OfficeJet Manager, click Settings, then select Print Settings. The Print Settings dialog box appears. Explore all four Print Settings tabs: Setup, Features, Color, and Services. For information about a setting - HP Officejet 720 | HP OfficeJet 700 Series All-in-One - (English) User Guide - Page 23
paper. See "Paper Types and Sizes" in the More Information guide. l Reserve the photo cartridge for final prints. Print rough drafts using the black and color print cartridges, then replace the black cartridge with the photo cartridge for your final print. Note: The first time you purchase a photo - HP Officejet 720 | HP OfficeJet 700 Series All-in-One - (English) User Guide - Page 24
menu of Help. To access the main Help menu: Double-click HP OfficeJet Manager on your desktop. The HP OfficeJet Manager appears on your screen. If you do not see it, minimize open applications. Click Help, then select HP OfficeJet Series 700 Help to display the Help system Table of Contents. Explore - HP Officejet 720 | HP OfficeJet 700 Series All-in-One - (English) User Guide - Page 25
only in black and white. As a stand-alone tool, the HP OfficeJet provides fax and copy capability. To fax, refer to "Faxing from the keypad" on page 1-5. To receive faxes, refer to "Receiving faxes" on page 1-7 and "Manually receiving faxes" on page 1-9. To copy, refer to "Copying from the keypad - HP Officejet 720 | HP OfficeJet 700 Series All-in-One - (English) User Guide - Page 26
Using The Menu System The HP OfficeJet uses a menu system enabling you to customize settings to control how your copies and faxes look. Navigating the menus With a little practice, using the menus is simple. Just remember these basic principles: l The following instructions all start from the time - HP Officejet 720 | HP OfficeJet 700 Series All-in-One - (English) User Guide - Page 27
for text, but slower transmission speed Photo: Best quality for photos/graphics; slowest transmission speed The first three settings are black and white only. Photo supports the gray scale. Remember, the HP OfficeJet will only fax at the highest resolution supported by the receiving - HP Officejet 720 | HP OfficeJet 700 Series All-in-One - (English) User Guide - Page 28
The HP OfficeJet enables you to print four reports: Fax Log Report: Lists your last 30 faxes sent and received Speed Dial Report: Lists your speed dial/group speed dial numbers Menu Report: Lists in outline form the entire menu system Self Test Report: Helps diagnose print cartridge problems 5 Menu - HP Officejet 720 | HP OfficeJet 700 Series All-in-One - (English) User Guide - Page 29
to All Rings. If you do have Distinctive Ring service, have your telephone company assign one ring pattern to voice calls and another to fax calls. Then use the Answer Ring Pattern setting to set your HP OfficeJet to automatically answer the fax call pattern. Note: If you have an answering machine - HP Officejet 720 | HP OfficeJet 700 Series All-in-One - (English) User Guide - Page 30
Leave Silent Detect off unless all of the following are true: l You expect to receive a fax from an older-model machine. l Your telephone answering machine is connected directly to the HP OfficeJet. l The HP OfficeJet is set to Auto Answer (green light on the keypad is on). Country and Language This - HP Officejet 720 | HP OfficeJet 700 Series All-in-One - (English) User Guide - Page 31
7 Menu then press 1 7 Menu then press 2 Speed Dial Setup Assign Speed Dial codes to frequently used fax numbers to quickly dial those numbers using the Speed Dial button and a one- or twodigit code. See "Speed dialing" on page 2-1. Individual Speed Dial The first unassigned speed dial code - HP Officejet 720 | HP OfficeJet 700 Series All-in-One - (English) User Guide - Page 32
for example, if your print cartridge runs out of ink while printing a fax. Since this option prints all faxes in memory, press Stop to stop printing faxes you don't need. 8 Menu then press 2 Clean Print Cartridge Cleaning the print cartridges may solve some print problems but should be done only - HP Officejet 720 | HP OfficeJet 700 Series All-in-One - (English) User Guide - Page 33
) This section does not apply to stand-alone fax/copier users. There are several maintenance tasks which help diagnose or solve printing problems. To perform maintenance tasks: 1 Double-click HP OfficeJet Manager on your Windows desktop. The HP OfficeJet Manager appears on your PC screen. If you - HP Officejet 720 | HP OfficeJet 700 Series All-in-One - (English) User Guide - Page 34
Scanner cover Cleaning the HP OfficeJet Keep your HP OfficeJet clean to ensure that it delivers the best quality service. l Keep fluids away from the interior of the HP OfficeJet cartridge. To correct this problem, clean the print cartridges, cartridge holder, and the inside area of the HP OfficeJet - HP Officejet 720 | HP OfficeJet 700 Series All-in-One - (English) User Guide - Page 35
the HP OfficeJet and lift the top cover. The print cartridges move to the center. l With the print cartridges in the center, unplug the power cord. l Remove the print cartridges and place them on their sides on a scrap piece of paper. Caution: l Don't leave the print cartridges outside the printer - HP Officejet 720 | HP OfficeJet 700 Series All-in-One - (English) User Guide - Page 36
OfficeJet: l Reinstall the print cartridges, and close the top cover. l Reconnect the power cord. l Print a self test page. See "Maintenance tasks (PC-connected)" on page 3-1 for details. Stand-alone fax/copier users refer to "Print Report" on page 2-4. l Examine the printout for ink streaking. If - HP Officejet 720 | HP OfficeJet 700 Series All-in-One - (English) User Guide - Page 37
#1 into your floppy drive. Choose Run from the Start menu in Windows, then type: a:\setup.exe where a: represents the letter of your floppy drive. Click OK. 2 At the HP OfficeJet Welcome screen, click Uninstall the HP OfficeJet Series 700 software. You will be asked to confirm the process, then the - HP Officejet 720 | HP OfficeJet 700 Series All-in-One - (English) User Guide - Page 38
experience while using your HP OfficeJet. If your problem isn't listed, the Help system provides troubleshooting information on every aspect of using your HP OfficeJet. To view the Help system Table of Contents: l On the HP OfficeJet Manager, click Help. Select HP OfficeJet Series 700 Help. The Help - HP Officejet 720 | HP OfficeJet 700 Series All-in-One - (English) User Guide - Page 39
Remove and reinsert the CD. l Reinstall the software. During the installation, install OmniPage. See the Setup Guide for details on installing the HP OfficeJet software. Dialog boxes don't fit on you screen or you can't close the viewer. l Through Windows, change your screen resolution to 800 x 600 - HP Officejet 720 | HP OfficeJet 700 Series All-in-One - (English) User Guide - Page 40
jam-clearing instructions on your PC screen, from the Help index, double-click "Jammed paper.") Then reload the paper, and press Start to clear the message and reset the HP OfficeJet. l Replace scanner cover Problem: Either you removed the scanner cover from inside the HP OfficeJet and didn
-
 1
1 -
 2
2 -
 3
3 -
 4
4 -
 5
5 -
 6
6 -
 7
7 -
8
-
9
-
10
-
11
-
12
-
13
-
14
-
15
-
16
-
17
-
18
-
19
-
20
-
21
-
22
-
23
-
24
-
25
-
26
-
27
-
28
-
29
-
30
-
31
-
32
-
33
-
34
-
35
-
36
-
37
-
38
-
39
-
40
 |
 |

HP OfficeJet Series 700
...................................................................................................
............
H
User’s Guide