HP Officejet 7500A User Guide - Page 115
Ink streaks on the back of the paper, Poor black text, Solution 2: Use TrueType or OpenType fonts
 |
View all HP Officejet 7500A manuals
Add to My Manuals
Save this manual to your list of manuals |
Page 115 highlights
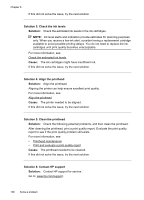
Solution 3: Ensure that the rear access panel is securely installed Solution: Make sure that the rear door is securely installed. If you removed the rear door to clear a paper jam, replace it. Gently push the door forward until it snaps into place. Cause: The rear door was not securely installed. Ink streaks on the back of the paper Try the following solutions if there is smeared ink on the back of your printout. • Solution 1: Print on a page of plain paper • Solution 2: Wait while the ink dries Solution 1: Print on a page of plain paper Solution: Print one or several pages of plain paper to soak up any excess ink in the printer. To remove excess ink using plain paper 1. Load several sheets of plain paper in the input tray. 2. Wait five minutes. 3. Print a document with little or no text. 4. Check the back of the paper for ink. If there is still ink on the back of the paper, try printing on another page of plain paper. Cause: Ink accumulated inside the printer, where the back of the paper rests during printing. If this did not solve the issue, try the next solution. Solution 2: Wait while the ink dries Solution: Wait at least thirty minutes for the ink inside the printer to dry, then try the print job again. Cause: The excess ink in the printer needed to dry out. Poor black text Try the following solutions if the text in your printouts is not sharp and the edges are rough. • Solution 1: Wait before you attempt to reprint • Solution 2: Use TrueType or OpenType fonts • Solution 3: Align the printhead • Solution 4: Clean the printhead Solution 1: Wait before you attempt to reprint Solution: If the black cartridge is new, allow time for automatic servicing to clear up the problem. Black print quality should start to improve in a few hours. If you do Print quality troubleshooting 111
-
 1
1 -
2
-
3
-
4
-
5
-
6
-
7
-
8
-
9
-
10
-
11
-
12
-
13
-
14
-
15
-
16
-
17
-
18
-
19
-
20
-
21
-
22
-
23
-
24
-
25
-
26
-
27
-
28
-
29
-
30
-
31
-
32
-
33
-
34
-
35
-
36
-
37
-
38
-
39
-
40
-
41
-
42
-
43
-
44
-
45
-
46
-
47
-
48
-
49
-
50
-
51
-
52
-
53
-
54
-
55
-
56
-
57
-
58
-
59
-
60
-
61
-
62
-
63
-
64
-
65
-
66
-
67
-
68
-
69
-
70
-
71
-
72
-
73
-
74
-
75
-
76
-
77
-
78
-
79
-
80
-
81
-
82
-
83
-
84
-
85
-
86
-
87
-
88
-
89
-
90
-
91
-
92
-
93
-
94
-
95
-
96
-
97
-
98
-
99
-
100
-
101
-
102
-
103
-
104
-
105
-
106
-
107
-
108
-
109
-
 110
110 -
 111
111 -
 112
112 -
 113
113 -
 114
114 -
 115
115 -
 116
116 -
 117
117 -
 118
118 -
 119
119 -
 120
120 -
121
-
122
-
123
-
124
-
125
-
126
-
127
-
128
-
129
-
130
-
131
-
132
-
133
-
134
-
135
-
136
-
137
-
138
-
139
-
140
-
141
-
142
-
143
-
144
-
145
-
146
-
147
-
148
-
149
-
150
-
151
-
152
-
153
-
154
-
155
-
156
-
157
-
158
-
159
-
160
-
161
-
162
-
163
-
164
-
165
-
166
-
167
-
168
-
169
-
170
-
171
-
172
-
173
-
174
-
175
-
176
-
177
-
178
-
179
-
180
-
181
-
182
-
183
-
184
-
185
-
186
-
187
-
188
-
189
-
190
-
191
-
192
-
193
-
194
-
195
-
196
-
197
-
198
-
199
-
200
-
201
-
202
-
203
-
204
-
205
-
206
-
207
-
208
-
209
-
210
-
211
-
212
-
213
-
214
-
215
-
216
-
217
-
218
-
219
-
220
-
221
-
222
-
223
-
224
-
225
-
226
-
227
-
228
-
229
-
230
-
231
-
232
-
233
-
234
-
235
-
236
-
237
-
238
-
239
-
240
-
241
-
242
-
243
-
244
-
245
-
246
-
247
-
248
-
249
-
250
-
251
-
252
 |
 |