HP Officejet J4500/J4600 Fax Getting Started Guide
HP Officejet J4500/J4600 - All-in-One Printer Manual
 |
View all HP Officejet J4500/J4600 manuals
Add to My Manuals
Save this manual to your list of manuals |
HP Officejet J4500/J4600 manual content summary:
- HP Officejet J4500/J4600 | Fax Getting Started Guide - Page 1
HP Officejet/HP Officejet Pro Fax Getting Started Guide Guide de démarrage du télécopieur Guía de introducción del fax Guia de Introdução ao Fax User Guide - HP Officejet J4500/J4600 | Fax Getting Started Guide - Page 2
statements accompanying such products and services. Nothing herein should be construed as constituting an additional warranty. HP shall not be liable for technical or editorial errors or omissions contained herein. Trademark credits Microsoft® and Windows® are U.S. registered trademarks of Microsoft - HP Officejet J4500/J4600 | Fax Getting Started Guide - Page 3
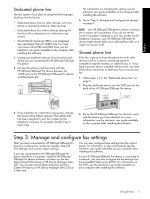
too short, see the "Solve fax problems" on page 8. Step 1: Identify the type of phone system you are using (parallel or serial) NOTE: Before setting up the fax, connect the HP Officejet/Officejet Pro device and install the software. NOTE: The instructions for fax setup differ depending on whether - HP Officejet J4500/J4600 | Fax Getting Started Guide - Page 4
phone line). If you are going to connect another device to the HP Officejet/Officejet Pro device, you will need to change settings such as how many rings to allow before picking up, whether you have a distinctive ring service, and whether to automatically answer the phone line. NOTE: You cannot - HP Officejet J4500/J4600 | Fax Getting Started Guide - Page 5
Center (Windows) or HP Device Manager (Mac OS) at a later time. You can also configure these settings from the control panel. For information on the control panel, see the electronic user guide available on your computer after installing the software. If your HP Officejet/Officejet Pro device - HP Officejet J4500/J4600 | Fax Getting Started Guide - Page 6
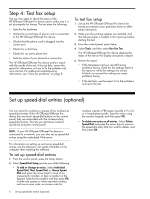
review the report for information on how to fix the problem and rerun the test. For additional troubleshooting information, see "Solve fax problems" on page 8. To test fax setup 1. Set up the HP Officejet/Officejet Pro device for faxing according to your particular home or office setup instructions - HP Officejet J4500/J4600 | Fax Getting Started Guide - Page 7
, see the onscreen User Guide available after you install the software. NOTE: You must install the software before setting up Fax to PC. Save a fax to the PC 1. Incoming black-and-white faxes are sent to the HP Officejet/Officejet Pro device 2. HP Officejet/Officejet Pro device sends black-and - HP Officejet J4500/J4600 | Fax Getting Started Guide - Page 8
see the test report for possible solutions. For more detailed information, see the electronic user guide available on the computer after installing the software. The HP Officejet/Officejet Pro device is having problems sending and receiving faxes Make sure you use the phone cord that came with the - HP Officejet J4500/J4600 | Fax Getting Started Guide - Page 9
Off, or you have a voice mail service at the same phone number you use for fax calls, you can only receive faxes manually. If you have a computer dial-up modem on the same phone line with the HP Officejet/Officejet Pro device, check to make sure that the software that came with your modem is not - HP Officejet J4500/J4600 | Fax Getting Started Guide - Page 10
ensure that HP Digital Imaging monitor is turned on at all times. Make sure Fax to PC is activated and the computer is configured to receive faxes. If the computer receiving faxes is different from the one used for setup, both computers should be switched on at all times. 10 Solve fax problems - HP Officejet J4500/J4600 | Fax Getting Started Guide - Page 11
to the customer or any HP support contract with the customer. However, if printer failure or damage is attributable to the use of a non-HP or refilled cartridge or an expired ink cartridge, HP will charge its standard time and materials charges to service the printer for the particular failure or - HP Officejet J4500/J4600 | Fax Getting Started Guide - Page 12
du télécopieur Ce guide de démarrage rapide fournit des instructions relatives à l'installation du télécopieur. Pour plus d'informations sur les fonctions de télécopie disponibles avec votre périphérique HP Officejet/ Officejet Pro, reportez-vous à la version électronique du guide de l'utilisateur - HP Officejet J4500/J4600 | Fax Getting Started Guide - Page 13
ée). Si vous allez connecter un autre appareil au périphérique HP Officejet/Officejet Pro, vous devrez changer les paramètres, notamment combien de sonneries autoriser avant décrochage, s'il convient de prévoir un service de sonnerie distinctive, et s'il faut répondre automatiquement à la ligne - HP Officejet J4500/J4600 | Fax Getting Started Guide - Page 14
directement l'appareil périphérique HP Officejet/Officejet Pro à un ordinateur, installez les logiciels de l'appareil périphérique HP Officejet/ Officejet Pro, puis lancez l'Assistant de configuration du télécopieur (Windows) ou le Gestionnaire de périphériques HP (Mac OS). Vous pouvez également - HP Officejet J4500/J4600 | Fax Getting Started Guide - Page 15
électronique du guide de l'utilisateur sur votre ordinateur après avoir installé le logiciel. Si votre périphérique HP Officejet/Officejet Pro est 1. Configurez l'appareil périphérique HP Officejet/ Officejet Pro pour télécopier selon vos instructions spécifiques de configuration de domicile ou - HP Officejet J4500/J4600 | Fax Getting Started Guide - Page 16
Télécopie vers PC (Windows seulement) La fonction électronique du Guide de l'utilisateur instructions qui apparaissent à l'écran pour installer Télécopie vers PC. REMARQUE : Vous pouvez désactiver la fonction Télécopie vers PC à partir du panneau de commande du périphérique HP Officejet/Officejet - HP Officejet J4500/J4600 | Fax Getting Started Guide - Page 17
lectronique du Guide de l'utilisateur disponible sur votre ordinateur après l'installation du logiciel. Le périphérique HP Officejet/Officejet Pro ou réseau numérique à intégration de services (RNIS), vérifiez que le périphérique HP Officejet/Officejet Pro est connecté au port approprié et que - HP Officejet J4500/J4600 | Fax Getting Started Guide - Page 18
Le périphérique Si vous n'utilisez pas de service de sonnerie distincte, assurez-vous que la fonction Sonneries HP Officejet/Officejet distinctes du périphérique HP Officejet/Officejet Pro est réglée sur Toutes sonneries. Pro ne peut pas recevoir de télécopies mais peut Si Réponse auto. est - HP Officejet J4500/J4600 | Fax Getting Started Guide - Page 19
é à l'arrière du périphérique HP Officejet/Officejet Pro. 2. Connectez un deuxième cordon téléphonique au port ouvert du coupleur et à la prise téléphonique murale. Je ne peux pas imprimer Pour imprimer les télécopies couleur, assurez-vous que l'option Imprimer télécopies entrantes est activée de - HP Officejet J4500/J4600 | Fax Getting Started Guide - Page 20
ée HP est valable uniquement en cas d'impossibilité d'exécuter les instructions de programmation. HP ne de la garantie ni d'un contrat de support HP. Toutefois, si la panne ou les HP est valable dans tout pays dans lequel le produit HP couvert est distribué par HP. Des contrats apportant des services - HP Officejet J4500/J4600 | Fax Getting Started Guide - Page 21
el tipo de sistema telefónico que está usando (en paralelo o en serie) NOTA: Antes de configurar el fax, conecte el Dispositivo HP Officejet/Officejet Pro e instale el software. NOTA: Las instrucciones para configurar el envío y recepción de faxes varían en función de si el sistema telefónico es - HP Officejet J4500/J4600 | Fax Getting Started Guide - Page 22
y contestadores automáticos) no permite la conexión física en el puerto "2-EXT" del Dispositivo HP Officejet/ Officejet Pro. Debe conectar el equipo al conector telefónico de pared. NOTA: En algunos países que se encuentra disponible en su equipo después de instalar el software. 22 Configurar el fax - HP Officejet J4500/J4600 | Fax Getting Started Guide - Page 23
después de instalar el software. Si conecta el Dispositivo HP Officejet/Officejet Pro directamente a un equipo, instale el software del Dispositivo HP Officejet/Officejet Pro y luego ejecute el Asistente de configuración de fax (Windows) o el Administrador de dispositivos HP (Mac OS). También puede - HP Officejet J4500/J4600 | Fax Getting Started Guide - Page 24
Prueba el estado de la conexión de la línea telefónica El Dispositivo HP Officejet/Officejet Pro imprime un informe con los resultados de la prueba. Si la prueba usuario electrónica disponible en su equipo después de instalar el software. Para configurar entradas de marcación rápida 1. En el panel - HP Officejet J4500/J4600 | Fax Getting Started Guide - Page 25
Configurar Fax a PC (sólo Windows) Fax a PC permite guardar software. NOTA: Debe instalar el software antes de configurar Fax a PC. Español Guardar un fax en la PC 1. Los faxes en blanco y negro entrantes se envían al Dispositivo HP Officejet/Officejet Pro 2. Dispositivo HP Officejet/Officejet - HP Officejet J4500/J4600 | Fax Getting Started Guide - Page 26
ón detallada, consulte la Guía del usuario electrónica que se encuentra disponible en su equipo después de instalar el software. El Dispositivo HP Officejet/ Officejet Pro tiene dificultades para enviar y recibir faxes Compruebe que está utilizando el cable telefónico suministrado con Dispositivo - HP Officejet J4500/J4600 | Fax Getting Started Guide - Page 27
en la misma línea telefónica que Dispositivo HP Officejet/Officejet Pro, compruebe que el software del módem no esté configurado para recibir faxes Si envía un fax en forma manual desde su teléfono que está conectado directamente al Dispositivo HP Officejet/Officejet Pro, debe usar el teclado numé - HP Officejet J4500/J4600 | Fax Getting Started Guide - Page 28
1. Conecte un extremo del cable telefónico incluido en la caja del Dispositivo HP Officejet/ Officejet Pro en el acoplador y el otro extremo al puerto 1-LINE situado en la parte posterior de Dispositivo HP Officejet/Officejet Pro. 2. Conecte un segundo cable telefónico al puerto libre del acoplador - HP Officejet J4500/J4600 | Fax Getting Started Guide - Page 29
ón empieza el día de la compra por parte del cliente. 2. Para los productos de software, la garantía limitada de HP se aplica únicamente a la incapacidad del programa para ejecutar las instrucciones. HP no garantiza que el funcionamiento de los productos se interrumpa o no contenga errores. 3. La - HP Officejet J4500/J4600 | Fax Getting Started Guide - Page 30
o tipo de sistema telefônico que está usando (paralelo ou serial) OBSERVAÇÃO: Antes de configurar o fax, conecte o. Dispositivo HP Officejet/Officejet Pro e instale o software. OBSERVAÇÃO: As instruções para configuração do fax podem variar conforme o sistema telefônico, paralelo ou serial. Antes - HP Officejet J4500/J4600 | Fax Getting Started Guide - Page 31
usam sistemas telefônicos do tipo serial, o cabo telefônico que acompanha o Dispositivo HP Officejet/Officejet Pro pode ter um plugue de parede adicional encaixado nele. Isso permite a conexão de do usuário disponível no computador após a instalação do software. Configuração do fax 31 Português - HP Officejet J4500/J4600 | Fax Getting Started Guide - Page 32
Services Digital Network). Para obter mais informações sobre as linhas PBX e ISDN, consulte o guia eletrônico do usuário, disponível no computador após a instalação do software. 1. Desconecte os dispositivos telefônicos da tomada do telefone à qual você está conectando a Dispositivo HP Officejet - HP Officejet J4500/J4600 | Fax Getting Started Guide - Page 33
hora e de país/região. Se estiver conectando a Dispositivo HP Officejet/ Officejet Pro diretamente a um computador, instale o software da Dispositivo HP Officejet/Officejet Pro e execute o Assistente de configuração de fax (Windows) ou o HP Device Manager (Mac OS). Também será possível ativar essas - HP Officejet J4500/J4600 | Fax Getting Started Guide - Page 34
Pro 2. O Dispositivo HP Officejet/Officejet Pro envia os fax em preto e branco para o computador e imprime fax colorido 3. Os fax recebidos são salvos no computador 4. Uma mensagem pop-up é exibida notificando para indicar o recebimento de um fax 34 Configuração de Fax para PC (apenas no Windows) - HP Officejet J4500/J4600 | Fax Getting Started Guide - Page 35
do usuário disponível no computador após a instalação do software. O Dispositivo HP Officejet/ Officejet Pro está tendo problemas para enviar e receber fax Use o cabo telefônico que acompanha o Dispositivo HP Officejet/Officejet Pro. Talvez esteja sendo usado outro equipamento que utiliza a mesma - HP Officejet J4500/J4600 | Fax Getting Started Guide - Page 36
linha que o Dispositivo HP Officejet/ Officejet Pro, verifique se o software que acompanha o modem HP Officejet/Officejet Pro, incluindo: Argentina, Austrália, Brasil, problemas para enviar um fax Canadá, Chile, China, Colômbia, Grécia, Índia, Indonésia, Irlanda, Japão, Coréia, América manual - HP Officejet J4500/J4600 | Fax Getting Started Guide - Page 37
ônico, que pode ser um cabo padrão que já tenha em sua casa ou no escritório. 1. Com o cabo telefônico que acompanha o Dispositivo HP Officejet/Officejet Pro, conecte uma extremidade ao acoplador e, em seguida, conecte a outra extremidade à porta rotulada 1-LINE na parte traseira do Dispositivo - HP Officejet J4500/J4600 | Fax Getting Started Guide - Page 38
- HP Officejet J4500/J4600 | Fax Getting Started Guide - Page 39
where no one can step on or trip over the line cord, and the line cord cannot be damaged. 11. If the device does not operate normally, see "Maintaining and troubleshooting" in the onscreen user guide on the Starter CD. 12. There are no user-serviceable parts inside. Refer servicing to qualified - HP Officejet J4500/J4600 | Fax Getting Started Guide - Page 40
© 2008 Hewlett-Packard Development Company, L.P. Printed in US Imprimé aux Etats-Unis Impreso en EE.UU. Impresso nos E.U.A. www.hp.com/support EN FR ES PT *CB053-90003* *CB053-90003* CB053-90003
-
 1
1 -
 2
2 -
 3
3 -
 4
4 -
 5
5 -
 6
6 -
 7
7 -
8
-
9
-
10
-
11
-
12
-
13
-
14
-
15
-
16
-
17
-
18
-
19
-
20
-
21
-
22
-
23
-
24
-
25
-
26
-
27
-
28
-
29
-
30
-
31
-
32
-
33
-
34
-
35
-
36
-
37
-
38
-
39
-
40
 |
 |

User Guide
HP Officejet/HP Officejet Pro
Fax Getting Started Guide
Guide de démarrage du télécopieur
Guía de introducción del fax
Guia de Introdução ao Fax