HP Officejet Pro 8600 Getting Started Guide - Page 19
Change the connection type, Step 2: Test the wireless connection, English, Mac OS X, Windows - software
 |
View all HP Officejet Pro 8600 manuals
Add to My Manuals
Save this manual to your list of manuals |
Page 19 highlights
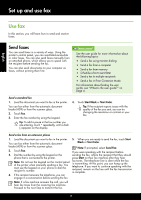
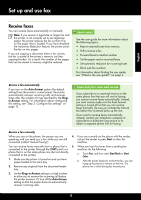
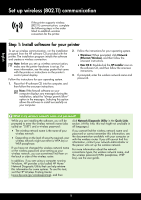
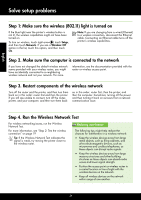
Set up wireless (802.11) communication Step 2: Test the wireless connection To test the wireless connection and make sure it is working properly, complete the following steps: 1. Make sure the printer is turned on and paper is loaded in the tray. 2. On the printer control panel, touch right arrow , touch Setup, and then touch Network. 3. Touch Print Wireless Network Test. The printer prints a report with the results of the test. If the test fails, review the report for information on how to fix the problem and rerun the test. For additional troubleshooting information, see "Wireless (802.11) setup problems" on page 23. English Change the connection type If you have installed the HP software, you can change to a different connection any time you want. Note: If you are changing from a wired (Ethernet) to a wireless connection, disconnect the Ethernet cable. Connecting an Ethernet cable turns off the printer's wireless capabilities. Follow the instructions for your operating system. Windows 1. On the printer control panel, touch right arrow , touch Setup, and then touch Network. 2. Touch Restore Network Defaults, and then touch Yes to confirm. 3. On the computer desktop, click Start, select Programs or All Programs, click HP, select your printer name, and then click Printer Setup & Software. 4. Follow the display instructions to complete the setup. Mac OS X 1. On the printer control panel, touch right arrow , touch Setup, and then touch Network. 2. Touch Restore Network Defaults, and then touch Yes to confirm. 3. Open HP Utility. (HP Utility is located in the Hewlett-Packard folder in the Applications folder at the top level of the hard disk.) 4. Click Applications on the toolbar. 5. Double-click HP Setup Assistant, and then follow the onscreen instructions. 19
-
 1
1 -
2
-
3
-
4
-
5
-
6
-
7
-
8
-
9
-
10
-
11
-
12
-
13
-
 14
14 -
 15
15 -
 16
16 -
 17
17 -
 18
18 -
 19
19 -
 20
20 -
 21
21 -
 22
22 -
 23
23 -
 24
24 -
25
-
26
-
27
-
28
-
29
-
30
-
31
-
32
-
33
-
34
-
35
-
36
-
37
-
38
-
39
-
40
-
41
-
42
-
43
-
44
-
45
-
46
-
47
-
48
-
49
-
50
-
51
-
52
-
53
-
54
-
55
-
56
-
57
-
58
-
59
-
60
-
61
-
62
-
63
-
64
-
65
-
66
-
67
-
68
-
69
-
70
-
71
-
72
-
73
-
74
-
75
-
76
-
77
-
78
-
79
-
80
-
81
-
82
-
83
-
84
-
85
-
86
-
87
-
88
-
89
-
90
-
91
-
92
-
93
-
94
-
95
-
96
-
97
-
98
-
99
-
100
-
101
-
102
-
103
-
104
-
105
-
106
-
107
-
108
 |
 |