HP Officejet Pro 8600 Getting Started Guide - Page 24
Step 4. Run the Wireless Network Test, Step 3. Restart components of the wireless network - power cable
 |
View all HP Officejet Pro 8600 manuals
Add to My Manuals
Save this manual to your list of manuals |
Page 24 highlights
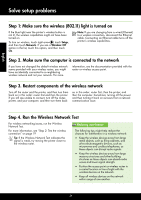
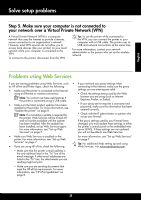
English Solve setup problems Step 1: Make sure the wireless (802.11) light is turned on If the blue light near the printer's wireless button is not lit, the wireless capabilities might not have been turned on. To turn on wireless, touch right arrow , touch Setup, and then touch Network. If you see a Wireless: Off option in the list, touch this option, and then touch On. Note: If you are changing from a wired (Ethernet) to a wireless connection, disconnect the Ethernet cable. Connecting an Ethernet cable turns off the printer's wireless capabilities. Step 2. Make sure the computer is connected to the network If you have not changed the default wireless network name provided with your wireless router, you might have accidentally connected to a neighboring wireless network and not your network. For more information, see the documentation provided with the router or wireless access point. Step 3. Restart components of the wireless network Turn off the router and the printer, and then turn them back on in this order: router first and then the printer. If you still are unable to connect, turn off the router, printer, and your computer, and then turn them back on in this order: router first, then the printer, and then the computer. Sometimes, turning off the power and then turning it back on recovers from a network communication issue. Step 4. Run the Wireless Network Test For wireless networking issues, run the Wireless Network Test. For more information, see "Step 2: Test the wireless connection" on page 19. Tip: If the Wireless Network Test indicates the signal is weak, try moving the printer closer to the wireless router. Reducing interference The following tips might help reduce the chances for interference in a wireless network: • Keep the wireless devices away from large metal objects, such as filing cabinets, and other electromagnetic devices, such as microwaves and cordless telephones, as these objects can disrupt radio signals. • Keep the wireless devices away from large masonry structures and other building structures as these objects can absorb radio waves and lower signal strength. • Position the access point or wireless router in a central location in line of sight with the wireless devices on the network. • Keep all wireless devices on the network within range of one another. 24
-
 1
1 -
2
-
3
-
4
-
5
-
6
-
7
-
8
-
9
-
10
-
11
-
12
-
13
-
14
-
15
-
16
-
17
-
18
-
 19
19 -
 20
20 -
 21
21 -
 22
22 -
 23
23 -
 24
24 -
 25
25 -
 26
26 -
 27
27 -
 28
28 -
 29
29 -
30
-
31
-
32
-
33
-
34
-
35
-
36
-
37
-
38
-
39
-
40
-
41
-
42
-
43
-
44
-
45
-
46
-
47
-
48
-
49
-
50
-
51
-
52
-
53
-
54
-
55
-
56
-
57
-
58
-
59
-
60
-
61
-
62
-
63
-
64
-
65
-
66
-
67
-
68
-
69
-
70
-
71
-
72
-
73
-
74
-
75
-
76
-
77
-
78
-
79
-
80
-
81
-
82
-
83
-
84
-
85
-
86
-
87
-
88
-
89
-
90
-
91
-
92
-
93
-
94
-
95
-
96
-
97
-
98
-
99
-
100
-
101
-
102
-
103
-
104
-
105
-
106
-
107
-
108
 |
 |