HP Officejet Pro 8600 Getting Started Guide - Page 7
Set up Web Services, English, Learn more, What's the printer's email address? - wireless
 |
View all HP Officejet Pro 8600 manuals
Add to My Manuals
Save this manual to your list of manuals |
Page 7 highlights
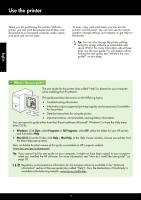
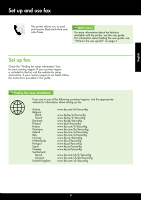
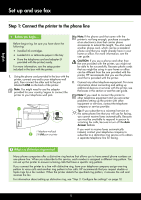
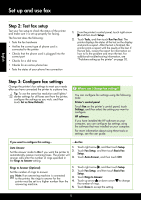
English Use the printer Set up Web Services You can set up Web Services when you install the HP printer software. Note: If you've already installed the HP printer software, see the user guide for setup instructions. 1. Place the HP software CD into the computer, and then follow the onscreen instructions. Note: If the firewall software on your computer displays any messages during the installation, select the "always permit/allow" option in the messages. Selecting this option allows the software to install successfully on your computer. 2. Follow the instructions for your operating system: • Windows: When prompted, click Network (Ethernet/Wireless), and then follow the onscreen instructions. • Mac OS X: Double-click the HP Installer icon on the software CD, and then follow the onscreen instructions. 3. If you are connecting to a wireless network, enter the wireless network name and password (if prompted). 4. When prompted, do the following: • Accept the Web Services Terms of Use. • Enable the printer to automatically check for and install product updates. • If your network uses proxy settings when connecting to the Internet, enter these settings. 5. After the printer prints an information page, follow the instructions to finish the setup. Note: The information page also includes the email address you will use for printing documents using HP ePrint. For more information, see "Use Web Services" on this page. Learn more! For more information about managing and configuring HP ePrint settings and to learn about the latest features, visit ePrintCenter (www.eprintcenter.com). Use Web Services To print using HP ePrint To print documents using HP ePrint, complete the following steps: 1. On your computer or mobile device, open your email application. Note: For information about using the email application on your computer or mobile device, see the documentation provided with the application. 2. Create a new email message, and then attach the file that you want to print. For a list of files that can be printed using HP ePrint, as well as guidelines to follow when using HP ePrint, see "HP ePrint guidelines" on page 8. 3. Enter the printer's email address in the "To" line of the email message, and then select the option to send the email message. Note: Make sure that the printer's email address is the only address listed in the "To" line of the email message. If other email addresses are listed in the "To" line, the attachments you are sending might not print. What's the printer's email address? To obtain your printer's HP ePrint email address, touch (HP ePrint) from the Home screen. 7
-
 1
1 -
 2
2 -
 3
3 -
 4
4 -
 5
5 -
 6
6 -
 7
7 -
 8
8 -
 9
9 -
 10
10 -
 11
11 -
 12
12 -
13
-
14
-
15
-
16
-
17
-
18
-
19
-
20
-
21
-
22
-
23
-
24
-
25
-
26
-
27
-
28
-
29
-
30
-
31
-
32
-
33
-
34
-
35
-
36
-
37
-
38
-
39
-
40
-
41
-
42
-
43
-
44
-
45
-
46
-
47
-
48
-
49
-
50
-
51
-
52
-
53
-
54
-
55
-
56
-
57
-
58
-
59
-
60
-
61
-
62
-
63
-
64
-
65
-
66
-
67
-
68
-
69
-
70
-
71
-
72
-
73
-
74
-
75
-
76
-
77
-
78
-
79
-
80
-
81
-
82
-
83
-
84
-
85
-
86
-
87
-
88
-
89
-
90
-
91
-
92
-
93
-
94
-
95
-
96
-
97
-
98
-
99
-
100
-
101
-
102
-
103
-
104
-
105
-
106
-
107
-
108
 |
 |