HP Officejet Pro L7600 User Guide - Page 137
To set up wireless communication using SecureEasySetup (SES) - wireless setup
 |
View all HP Officejet Pro L7600 manuals
Add to My Manuals
Save this manual to your list of manuals |
Page 137 highlights
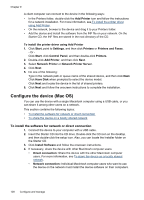
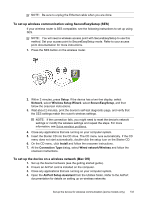
NOTE: Be sure to unplug the Ethernet cable when you are done. To set up wireless communication using SecureEasySetup (SES) If your wireless router is SES compatible, see the following instructions to set up using SES. NOTE: You will need a wireless access point with SecureEasySetup to use this method. Set your access point to SecureEasySetup mode. Refer to your access point documentation for more instructions. 1. Press the SES button on the wireless router. 2. Within 2 minutes, press Setup. If the device has a two-line display, select Network, select Wireless Setup Wizard, select SecureEasySetup, and then follow the onscreen instructions. 3. Wait about 2 minutes, print the device's self-test diagnostic page, and verify that the SES settings match the router's wireless settings. NOTE: If the connection fails, you might need to reset the device's network settings or modify the wireless settings and repeat the steps. For more information, see Solve wireless problems. 4. Close any applications that are running on your computer system. 5. Insert the Starter CD into the CD drive. The CD menu runs automatically. If the CD menu does not start automatically, double-click the setup icon on the Starter CD. 6. On the CD menu, click Install and follow the onscreen instructions. 7. At the Connection Type dialog, select Wired network/Wireless and follow the onscreen instructions. To set up the device on a wireless network (Mac OS) 1. Set up the device hardware (see the getting started guide). 2. Ensure an AirPort card is installed on the computer. 3. Close any applications that are running on your computer system. 4. Open the AirPort Setup Assistant from the Utilities folder. Refer to the AirPort documentation for details on setting up on wireless networks. Set up the device for wireless communication (some models only) 133
-
 1
1 -
2
-
3
-
4
-
5
-
6
-
7
-
8
-
9
-
10
-
11
-
12
-
13
-
14
-
15
-
16
-
17
-
18
-
19
-
20
-
21
-
22
-
23
-
24
-
25
-
26
-
27
-
28
-
29
-
30
-
31
-
32
-
33
-
34
-
35
-
36
-
37
-
38
-
39
-
40
-
41
-
42
-
43
-
44
-
45
-
46
-
47
-
48
-
49
-
50
-
51
-
52
-
53
-
54
-
55
-
56
-
57
-
58
-
59
-
60
-
61
-
62
-
63
-
64
-
65
-
66
-
67
-
68
-
69
-
70
-
71
-
72
-
73
-
74
-
75
-
76
-
77
-
78
-
79
-
80
-
81
-
82
-
83
-
84
-
85
-
86
-
87
-
88
-
89
-
90
-
91
-
92
-
93
-
94
-
95
-
96
-
97
-
98
-
99
-
100
-
101
-
102
-
103
-
104
-
105
-
106
-
107
-
108
-
109
-
110
-
111
-
112
-
113
-
114
-
115
-
116
-
117
-
118
-
119
-
120
-
121
-
122
-
123
-
124
-
125
-
126
-
127
-
128
-
129
-
130
-
131
-
 132
132 -
 133
133 -
 134
134 -
 135
135 -
 136
136 -
 137
137 -
 138
138 -
 139
139 -
 140
140 -
 141
141 -
 142
142 -
143
-
144
-
145
-
146
-
147
-
148
-
149
-
150
-
151
-
152
-
153
-
154
-
155
-
156
-
157
-
158
-
159
-
160
-
161
-
162
-
163
-
164
-
165
-
166
-
167
-
168
-
169
-
170
-
171
-
172
-
173
-
174
-
175
-
176
-
177
-
178
-
179
-
180
-
181
-
182
-
183
-
184
-
185
-
186
-
187
-
188
-
189
-
190
-
191
-
192
-
193
-
194
-
195
-
196
-
197
-
198
-
199
-
200
-
201
-
202
-
203
-
204
-
205
-
206
-
207
-
208
-
209
-
210
-
211
-
212
-
213
-
214
-
215
-
216
-
217
-
218
-
219
-
220
-
221
-
222
-
223
-
224
-
225
-
226
-
227
-
228
-
229
-
230
-
231
-
232
-
233
-
234
-
235
-
236
-
237
-
238
-
239
-
240
-
241
-
242
-
243
-
244
-
245
 |
 |