HP Officejet Pro L7600 User Guide - Page 209
Remove the control-panel faceplate, Power, To remove printheads before shipment
 |
View all HP Officejet Pro L7600 manuals
Add to My Manuals
Save this manual to your list of manuals |
Page 209 highlights
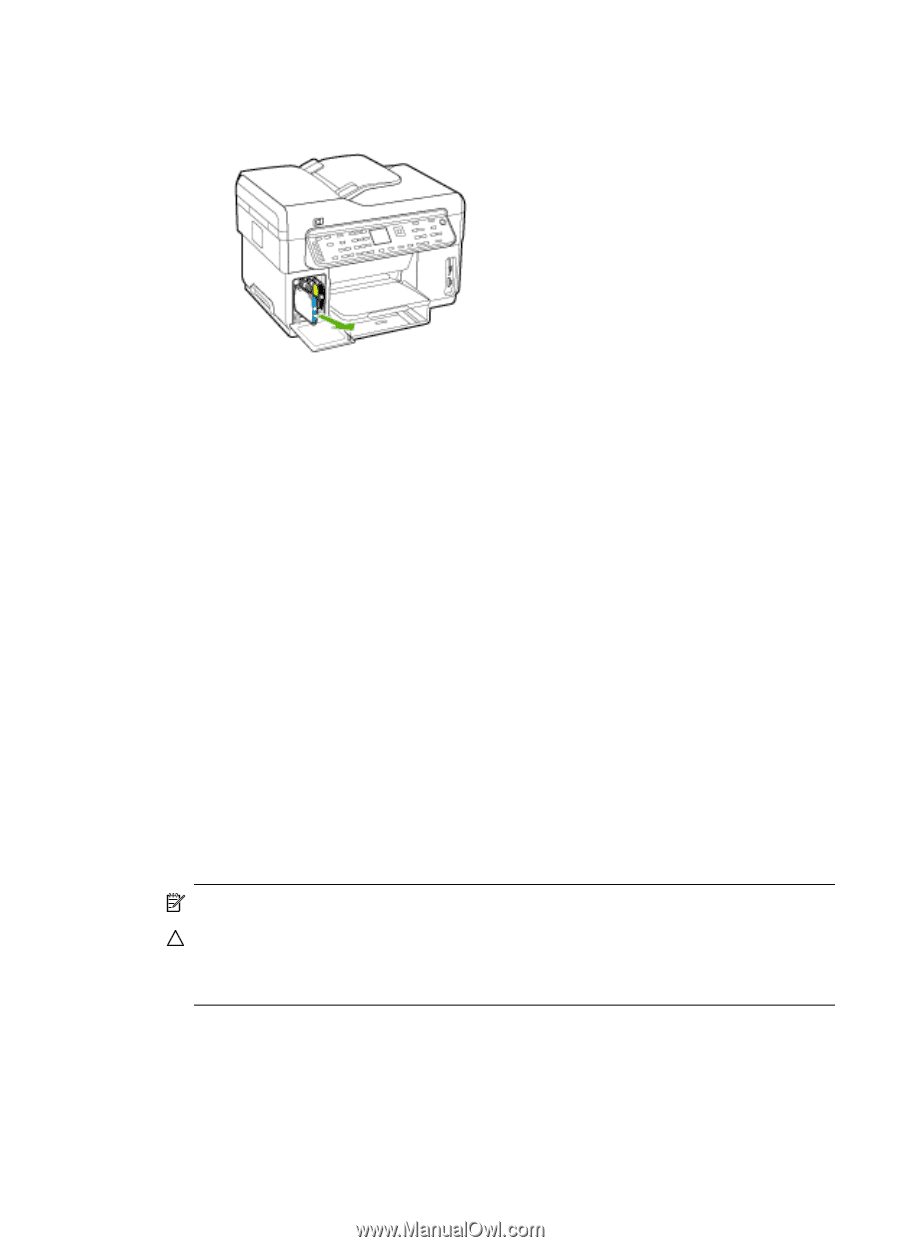
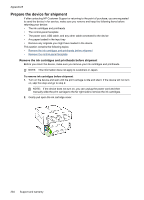
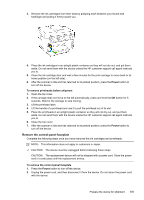
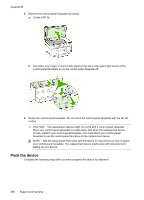
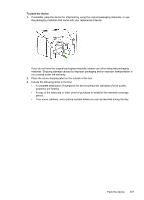
3. Remove the ink cartridges from their slots by grasping each between your thumb and forefinger and pulling it firmly toward you. 4. Place the ink cartridges in an airtight plastic container so they will not dry out, and put them aside. Do not send them with the device unless the HP customer support call agent instructs you to. 5. Close the ink cartridge door and wait a few minutes for the print carriage to move back to its home position (on the left side). 6. After the scanner is idle and has returned to its parked position, press the Power button to turn off the device. To remove printheads before shipment 1. Open the top cover. 2. If the carriage does not move to the left automatically, press and hold the OK button for 5 seconds. Wait for the carriage to stop moving. 3. Lift the printhead latch. 4. Lift the handle of a printhead and use it to pull the printhead out of its slot. 5. Place the printheads in an airtight plastic container so they will not dry out, and put them aside. Do not send them with the device unless the HP customer support call agent instructs you to. 6. Close the top cover. 7. After the scanner is idle and has returned to its parked position, press the Power button to turn off the device. Remove the control-panel faceplate Complete the following steps once you have removed the ink cartridges and printheads. NOTE: This information does not apply to customers in Japan. CAUTION: The device must be unplugged before following these steps. CAUTION: The replacement device will not be shipped with a power cord. Store the power cord in a safe place until the replacement arrives. To remove the control-panel faceplate 1. Press the Power button to turn off the device. 2. Unplug the power cord, and then disconnect it from the device. Do not return the power cord with the device. Prepare the device for shipment 205
-
 1
1 -
2
-
3
-
4
-
5
-
6
-
7
-
8
-
9
-
10
-
11
-
12
-
13
-
14
-
15
-
16
-
17
-
18
-
19
-
20
-
21
-
22
-
23
-
24
-
25
-
26
-
27
-
28
-
29
-
30
-
31
-
32
-
33
-
34
-
35
-
36
-
37
-
38
-
39
-
40
-
41
-
42
-
43
-
44
-
45
-
46
-
47
-
48
-
49
-
50
-
51
-
52
-
53
-
54
-
55
-
56
-
57
-
58
-
59
-
60
-
61
-
62
-
63
-
64
-
65
-
66
-
67
-
68
-
69
-
70
-
71
-
72
-
73
-
74
-
75
-
76
-
77
-
78
-
79
-
80
-
81
-
82
-
83
-
84
-
85
-
86
-
87
-
88
-
89
-
90
-
91
-
92
-
93
-
94
-
95
-
96
-
97
-
98
-
99
-
100
-
101
-
102
-
103
-
104
-
105
-
106
-
107
-
108
-
109
-
110
-
111
-
112
-
113
-
114
-
115
-
116
-
117
-
118
-
119
-
120
-
121
-
122
-
123
-
124
-
125
-
126
-
127
-
128
-
129
-
130
-
131
-
132
-
133
-
134
-
135
-
136
-
137
-
138
-
139
-
140
-
141
-
142
-
143
-
144
-
145
-
146
-
147
-
148
-
149
-
150
-
151
-
152
-
153
-
154
-
155
-
156
-
157
-
158
-
159
-
160
-
161
-
162
-
163
-
164
-
165
-
166
-
167
-
168
-
169
-
170
-
171
-
172
-
173
-
174
-
175
-
176
-
177
-
178
-
179
-
180
-
181
-
182
-
183
-
184
-
185
-
186
-
187
-
188
-
189
-
190
-
191
-
192
-
193
-
194
-
195
-
196
-
197
-
198
-
199
-
200
-
201
-
202
-
203
-
 204
204 -
 205
205 -
 206
206 -
 207
207 -
 208
208 -
 209
209 -
 210
210 -
 211
211 -
 212
212 -
 213
213 -
 214
214 -
215
-
216
-
217
-
218
-
219
-
220
-
221
-
222
-
223
-
224
-
225
-
226
-
227
-
228
-
229
-
230
-
231
-
232
-
233
-
234
-
235
-
236
-
237
-
238
-
239
-
240
-
241
-
242
-
243
-
244
-
245
 |
 |