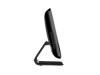
HP Omni 100-5157 Getting Started Guide
HP Omni 100-5157 Manual
 |
View all HP Omni 100-5157 manuals
Add to My Manuals
Save this manual to your list of manuals |
HP Omni 100-5157 manual content summary:
- HP Omni 100-5157 | Getting Started Guide - Page 1
- HP Omni 100-5157 | Getting Started Guide - Page 2
for Hewlett-Packard products and services are set forth in the express statements accompanying such products and services. Nothing herein should be trademarks of Microsoft Corporation in the U.S. and other countries. HP supports lawful use of technology and does not endorse or encourage the use - HP Omni 100-5157 | Getting Started Guide - Page 3
Understanding hard disk drive space The hard disk drive on the Hewlett-Packard and Compaq computers with the Microsoft® Windows® operating system preinstalled may appear to be smaller than the size stated in the product specifications, in the documentation, or on the box. Hard disk drives are - HP Omni 100-5157 | Getting Started Guide - Page 4
- HP Omni 100-5157 | Getting Started Guide - Page 5
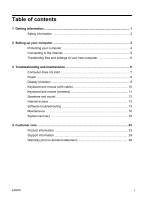
8 Keyboard and mouse (with cable 10 Keyboard and mouse (wireless 11 Speakers and sound 12 Internet access 12 Software troubleshooting 13 Maintenance 16 System recovery 18 4 Customer care ...23 Product information 23 Support information 24 Warranty print on demand statement 26 ENWW v - HP Omni 100-5157 | Getting Started Guide - Page 6
vi ENWW - HP Omni 100-5157 | Getting Started Guide - Page 7
. ● Order parts and find additional troubleshooting help. HP Support website: http://www.hp.com/support ● Upgrade or replace components of your computer. Upgrading and Servicing Guide Click Start, click All Programs, and then click HP User Manuals. If the guide is not available there, visit http - HP Omni 100-5157 | Getting Started Guide - Page 8
then click HP User Manuals. If the guide is not available there, visit http://www.hp.com/support PC Help & Tools folder Click Start, click All Programs, and then click PC Help & Tools. HP Support Assistant - Maintains your computer performance and resolve problems faster by using automated updates - HP Omni 100-5157 | Getting Started Guide - Page 9
lifting procedures when moving the computer. To reduce the risk of serious injury read the Safety & Comfort Guide. The guide is located on the web at http://www.hp.com/ergo. 2 Setting up your computer NOTE: Open your internet browser and go to http://www.hp.com/support. ENWW Safety information 3 - HP Omni 100-5157 | Getting Started Guide - Page 10
if necessary, and click Support & Drivers. d. Select wish to download. h. Follow the on-screen instructions to install each downloaded update. 4. Look in in the HP User Manuals folder. 6. Read the Safety & Comfort Guide for proper workstation setup service. 4 Chapter 2 Setting up your computer ENWW - HP Omni 100-5157 | Getting Started Guide - Page 11
to the Internet: 1. Connect the hardware as shown on the setup poster. 2. Get Internet service. ● Sign up with an Internet Service Provider (ISP). If you already have an account with an ISP, skip this step and follow the instructions provided by the ISP. ● If you did not set up the computer for - HP Omni 100-5157 | Getting Started Guide - Page 12
box, and then click Windows Easy Transfer. 2. Follow the on-screen instructions in the Windows Easy Transfer wizard to transfer your files to your new 3 Troubleshooting and maintenance Refer to the documentation provided by the product manufacturer for information about peripheral-specific problems, - HP Omni 100-5157 | Getting Started Guide - Page 13
and then press the Power button to restart the computer. 3. If Windows opens, immediately back up all important data to a backup hard disk drive. 4. Contact Support, whether it was possible or not to start up Windows. Either the hard disk drive or the system board may need to be replaced. Computer - HP Omni 100-5157 | Getting Started Guide - Page 14
any of the pins are bent, replace the monitor connector cable. ● If no pins are bent, reconnect the monitor connector cable to the computer. 8 Chapter 3 Troubleshooting and maintenance ENWW - HP Omni 100-5157 | Getting Started Guide - Page 15
Symptom Possible solution Images on the screen are too large or too small, or the images are fuzzy. Adjust the monitor resolution setting in Windows 7: 1. Click Start, and then click Control Panel. 2. Under Appearance and Personalization, click Adjust Screen Resolution. 3. Adjust resolution as - HP Omni 100-5157 | Getting Started Guide - Page 16
Enter. 6. After the shutdown is complete, unplug and reconnect the mouse connector to the back of your computer, and then restart your computer. 10 Chapter 3 Troubleshooting and maintenance ENWW - HP Omni 100-5157 | Getting Started Guide - Page 17
Keyboard and mouse (wireless) Symptom Possible solution Wireless ● keyboard or mouse does not work or is ● not detected. ● ● Ensure that you are using the wireless keyboard or wireless mouse within range of the receiver, approximately 10 meters (32 feet) for normal use, and within 30 cm (12 - HP Omni 100-5157 | Getting Started Guide - Page 18
No sound is produced. For Windows 7: 1. Click Start, click Control Panel, click Action Center, and then click Troubleshooting. 2. Under Hardware and Sound, click Troubleshoot and audio playback. If you use an High-Definition Multimedia Interface (HDMI) connector on the graphics card (select models - HP Omni 100-5157 | Getting Started Guide - Page 19
antenna is internal, try to move the computer. Try to connect again later, or contact your Internet service provider (ISP) for assistance. Software troubleshooting To repair software ● problems, try these methods: ● ● ● ● Turn the computer off completely and then turn it on again. This is - HP Omni 100-5157 | Getting Started Guide - Page 20
and then follow the on-screen instructions. Microsoft System Restore If you have a problem that might be due to software , and then follow the on-screen instructions. To add restore points manually: 1. Close all open programs. 2. instructions. 14 Chapter 3 Troubleshooting and maintenance ENWW - HP Omni 100-5157 | Getting Started Guide - Page 21
screen. 3. Choose the program you want to install, click Next, and follow the on-screen instructions. 4. When you have finished reinstalling, restart the computer. Do not skip this last step. You d. Click Yes if you want to continue with the uninstall process. ENWW Software troubleshooting 15 - HP Omni 100-5157 | Getting Started Guide - Page 22
discs of important information, including personal files, email messages, and website bookmarks. You can also move data to an external hard disk drive. 16 Chapter 3 Troubleshooting and maintenance ENWW - HP Omni 100-5157 | Getting Started Guide - Page 23
once a month for visible signs of dust and debris, and clean it about once every three months. Visit http://www.hp.com/support for additional cleaning instructions. Cleaning the computer vents Air vents keep the computer and monitor cool. Keep these vents clean by using a small, battery-powered - HP Omni 100-5157 | Getting Started Guide - Page 24
use the System Recovery program - see Microsoft System Restore under Software troubleshooting on page 13. Some features might not be available on systems discs purchased from HP Support. To purchase recovery discs, visit http://www.hp.com/support. 18 Chapter 3 Troubleshooting and maintenance ENWW - HP Omni 100-5157 | Getting Started Guide - Page 25
System Recovery from the Windows 7 Start Menu CAUTION: System Recovery deletes all data and programs you created or installed. Back up any important data to a removable disc or USB flash drive. If the computer is working and Windows 7 is responding, use these steps to perform a System Recovery. 1. - HP Omni 100-5157 | Getting Started Guide - Page 26
registration process, and wait until you see the desktop. 9. Turn off the computer, reconnect all peripheral devices, and turn the computer back on. 20 Chapter 3 Troubleshooting and maintenance ENWW - HP Omni 100-5157 | Getting Started Guide - Page 27
System Recovery from recovery media CAUTION: System Recovery deletes all data and programs you created or installed. Back up any important data to a removable disc or USB flash drive. To create recovery media, see Creating recovery media under System recovery on page 18. To perform a System - HP Omni 100-5157 | Getting Started Guide - Page 28
correct. You can quit the process at any time. The next time you run the program, it will resume where it left off. 22 Chapter 3 Troubleshooting and maintenance ENWW - HP Omni 100-5157 | Getting Started Guide - Page 29
media using blank DVD(s), and then click Next. 4. Follow the on-screen instructions. Label each disc as you make it (for example, Recovery 1, Recovery 2). flash drive and deletes all on files on it. 6. Follow the on-screen instructions. Be sure to label the USB flash drive and store it in a secure - HP Omni 100-5157 | Getting Started Guide - Page 30
software questions. Click Start, and then click Help and Support. The Help and Support Center provides useful troubleshooting information and includes the following: ● E-mail support ● HP Real Time Chat with qualified support specialists ● Support phone numbers 3. If you think you have a hardware - HP Omni 100-5157 | Getting Started Guide - Page 31
Hardware Limited Warranty section of the Limited Warranty and Support Guide. Thank you for choosing this computer. We hope you enjoy discovering updated software, tips and tricks, answers for common problems, and other information. Go to the Support website listed earlier in this document and search for - HP Omni 100-5157 | Getting Started Guide - Page 32
fix your computer. These services are covered during the warranty period. There are a few limitations and exclusions to the warranty (as well as some important details), which are described in the Hardware Limited Warranty section of the Limited Warranty and Support Guide. Warranty print on demand - HP Omni 100-5157 | Getting Started Guide - Page 33
-
 1
1 -
 2
2 -
 3
3 -
 4
4 -
 5
5 -
 6
6 -
 7
7 -
8
-
9
-
10
-
11
-
12
-
13
-
14
-
15
-
16
-
17
-
18
-
19
-
20
-
21
-
22
-
23
-
24
-
25
-
26
-
27
-
28
-
29
-
30
-
31
-
32
-
33
 |
 |