HP P8737AA#ABA User Guide - 75, 705, 7540, 7600 and 7650 Series 17" CRT M
HP P8737AA#ABA - Compaq FS 7600E Manual
 |
UPC - 882780437531
View all HP P8737AA#ABA manuals
Add to My Manuals
Save this manual to your list of manuals |
HP P8737AA#ABA manual content summary:
- HP P8737AA#ABA | User Guide - 75, 705, 7540, 7600 and 7650 Series 17" CRT M - Page 1
User Guide 75, 705, 7540, 7600 and 7650 Series CRT Monitors Document Part Number: 368239-006 August 2007 This guide provides information on setting up the monitor, installing drivers, using the on-screen display menu, troubleshooting, regulatory notices, and technical specifications. - HP P8737AA#ABA | User Guide - 75, 705, 7540, 7600 and 7650 Series 17" CRT M - Page 2
in bodily harm or loss of life. Ä CAUTION: Text set off in this manner indicates that failure to follow directions could result in damage to equipment or loss of information. User Guide 75, 705, 7540, 7600 and 7650 Series CRT Monitors Sixth Edition (August 2007) Document Part Number: 368239-006 - HP P8737AA#ABA | User Guide - 75, 705, 7540, 7600 and 7650 Series 17" CRT M - Page 3
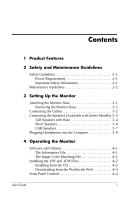
2-2 3 Setting Up the Monitor Attaching the Monitor Base 3-1 Removing the Monitor Base 3-2 Connecting the Cables 3-2 Connecting the Speakers (Available with Select Models) 3-4 Tall Speakers with Base 3-4 Short Speakers 3-6 USB Speakers 3-7 Plugging Headphones into the Computer 3-8 4 Operating - HP P8737AA#ABA | User Guide - 75, 705, 7540, 7600 and 7650 Series 17" CRT M - Page 4
Mode 4-10 A Troubleshooting Solving Common Problems A-1 Using the Worldwide Web A-4 Preparing to Call Technical Support A-4 B Technical Specifications 75 and 7540 Series Curved CRT Monitors B-1 705 and 7600 Series Flat CRT Monitors B-3 7650 Series Flat CRT Monitors B-5 C Agency Regulatory - HP P8737AA#ABA | User Guide - 75, 705, 7540, 7600 and 7650 Series 17" CRT M - Page 5
-based computer. It provides an easy to use on-screen display menu technology that allows you to adjust the monitor to your specific viewing needs. The CRT monitor features include: ■ 16" (41 cm) viewable area display. ■ 1024 x 768 @85 Hz recommended resolution. ■ Tilt and swivel base. ■ Monitor AC - HP P8737AA#ABA | User Guide - 75, 705, 7540, 7600 and 7650 Series 17" CRT M - Page 6
if supported by your system. ■ On-screen display (OSD) adjustments for ease of setup and screen optimization; allows you to adjust all elements of the screen image. ■ Energy Saver feature to meet requirements for reduced power consumption. ■ Compliant with the following regulated specifications - HP P8737AA#ABA | User Guide - 75, 705, 7540, 7600 and 7650 Series 17" CRT M - Page 7
only a power source and connection appropriate for this monitor. For information on the correct power cord set to use with your monitor, refer to the "Power Cord Set Requirements" section in Appendix C. Important Safety Information by grasping the plug firmly. Never pull on the cord. User Guide 2-1 - HP P8737AA#ABA | User Guide - 75, 705, 7540, 7600 and 7650 Series 17" CRT M - Page 8
dropped or damaged, first unplug from power outlet, then contact your Hewlett-Packard authorized dealer, reseller, or service provider. ■ Adjust only those controls that are discussed in the operating instructions. ■ Place your monitor at least 3 inches (76 mm) away from walls or other enclosures - HP P8737AA#ABA | User Guide - 75, 705, 7540, 7600 and 7650 Series 17" CRT M - Page 9
screen requires additional cleaning, use an antistatic CRT screen cleaner. Ä CAUTION: Do not use benzene, thinner, ammonia, or any other volatile substances to clean your monitor or the screen of your monitor. Water or dirt from the plant may get into the vents. ■ Do not drop your monitor or place - HP P8737AA#ABA | User Guide - 75, 705, 7540, 7600 and 7650 Series 17" CRT M - Page 10
■ Do not place the monitor face down. Damage could result to the front panel controls or the monitor screen. 2-4 User Guide - HP P8737AA#ABA | User Guide - 75, 705, 7540, 7600 and 7650 Series 17" CRT M - Page 11
3 Setting Up the Monitor Attaching the Monitor Base 1. Carefully position the monitor bottom side up. 2. Align the hooks on the base with the sockets on the bottom of the monitor and attach the base. 3. Push the base toward the front of the monitor until it stops. User Guide 3-1 - HP P8737AA#ABA | User Guide - 75, 705, 7540, 7600 and 7650 Series 17" CRT M - Page 12
these instructions: 1. If you must remove the base attachment, release the catch and slide the base toward the back of the monitor. 2. Lift the base up and away from the monitor. Connecting the Cables Before setting up the monitor, place it in a convenient, well-ventilated location near the computer - HP P8737AA#ABA | User Guide - 75, 705, 7540, 7600 and 7650 Series 17" CRT M - Page 13
Setting Up the Monitor 4. Power on the computer and monitor. ✎ If the monitor fails to function properly, refer to Appendix A, "Troubleshooting." 5. If necessary, adjust the front panel monitor controls according to your personal preference. See Chapter 4, "Front Panel Controls" for detailed - HP P8737AA#ABA | User Guide - 75, 705, 7540, 7600 and 7650 Series 17" CRT M - Page 14
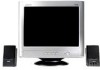
. With the opening in the base toward the rear of the speaker, align the key slot on the base with the center tab on the speaker, and then lower the base onto the speaker. 2. Place the speaker set near the monitor so that the speaker with the controls is on the right side when you view the - HP P8737AA#ABA | User Guide - 75, 705, 7540, 7600 and 7650 Series 17" CRT M - Page 15
Setting Up the Monitor 3. Attach the green connector from the control speaker to the green port on the back of the computer. 4. Attach the speaker power adapter cable to the connector on the back of the control speaker, and then plug the AC adapter into an electrical outlet. 5. Use the control knob - HP P8737AA#ABA | User Guide - 75, 705, 7540, 7600 and 7650 Series 17" CRT M - Page 16
Up the Monitor Short Speakers 1. Place the speaker set near the monitor so that the speaker with the controls is on the right side when you view the monitor from the front. 2. Attach the speaker power adapter cable to the black connector on the back of the control speaker, then connect the AC - HP P8737AA#ABA | User Guide - 75, 705, 7540, 7600 and 7650 Series 17" CRT M - Page 17
Up the Monitor USB Speakers 1. Place the speaker set near the monitor so that the speaker with the controls is on the right side when you view the monitor from the front. 2. Plug the USB cable 1 on the control speaker into a USB port on the computer. 3. If available, plug the green connector (audio - HP P8737AA#ABA | User Guide - 75, 705, 7540, 7600 and 7650 Series 17" CRT M - Page 18
Setting Up the Monitor Plugging Headphones into the Computer To use headphones, if your speaker does not have a headphone port, plug them into the connector on the back of the computer labeled Out, Line Out or Speaker. You may need to disconnect the speakers to connect the headphones. 3-8 User - HP P8737AA#ABA | User Guide - 75, 705, 7540, 7600 and 7650 Series 17" CRT M - Page 19
from the HP monitors support Web site. See "Downloading from the Worldwide Web" in this chapter. The Information File The .INF file enables the computer to communicate with the monitor and use all the monitor features. The INF file defines monitor resources used by Microsoft Windows operating - HP P8737AA#ABA | User Guide - 75, 705, 7540, 7600 and 7650 Series 17" CRT M - Page 20
scanner to monitor screen. The .ICM file contains a monitor color system profile. This file is activated from within graphics programs that support this feature. ✎ The ICM color profile is written in accordance with the International Color Consortium (ICC) Profile Format specification. Installing - HP P8737AA#ABA | User Guide - 75, 705, 7540, 7600 and 7650 Series 17" CRT M - Page 21
the HP monitors support Web site: 1. Refer to http://www.hp.com/support and select your country region. 2. Follow the links for your monitor to the support page and download page. 3. Ensure your system meets the requirements. 4. Download the software by following the instructions. User Guide 4-3 - HP P8737AA#ABA | User Guide - 75, 705, 7540, 7600 and 7650 Series 17" CRT M - Page 22
displays and exits the menus and On-Screen Display. Moves backward through menu options or decreases adjustment levels. Moves forward through menu options or increases adjustment levels. Selects function and adjustment levels in the OSD menu Controls power to the monitor. The LED on the power button - HP P8737AA#ABA | User Guide - 75, 705, 7540, 7600 and 7650 Series 17" CRT M - Page 23
on your viewing preferences. To access the OSD, do the following: 1. If the monitor is not already on, press the power button to turn on the monitor. 2. Press the menu button to display the On-Screen Display menu. A screen similar to this one appears. For a description of the icons that appear on - HP P8737AA#ABA | User Guide - 75, 705, 7540, 7600 and 7650 Series 17" CRT M - Page 24
Monitor 5. The adjustment window displays. Press the Right-Adjustment or Left-Adjustment buttons to increase (Right) or decrease (Left) the level of adjustment. 6. Press select to save the new adjustment. 7. To exit the On-Screen Display, press the menu button once. On-Screen size. 4-6 User Guide - HP P8737AA#ABA | User Guide - 75, 705, 7540, 7600 and 7650 Series 17" CRT M - Page 25
demagnetizes the screen to reduce color impurities. ✎ It is recommended that you not degauss more than once within a 30-minute period of time. Right-Adjustment selects the color temperature to the right and Left-Adjustment selects the color temperature to the left. This control resets the monitor to - HP P8737AA#ABA | User Guide - 75, 705, 7540, 7600 and 7650 Series 17" CRT M - Page 26
Operating the Monitor Monitor Messages No Signal Message If a No Signal message displays on the monitor screen, check to be sure the video cable is properly connected and ensure that the computer is powered on. 4-8 User Guide - HP P8737AA#ABA | User Guide - 75, 705, 7540, 7600 and 7650 Series 17" CRT M - Page 27
the video resolution or refresh rate on the monitor: 1. Restart the computer. 2. Enter Safe Mode on the computer. Refer to the computer's operating system Help for instructions on entering Safe Mode. 3. Change the display settings to a supported setting (see "Technical Specifications"). 4. Restart - HP P8737AA#ABA | User Guide - 75, 705, 7540, 7600 and 7650 Series 17" CRT M - Page 28
the monitor is connected to a computer that also has energy saver features. The Energy Saver utility, with its energy saving features, is available with all Microsoft Windows operating systems. Some features are also available in DOS. Refer to the computer's user guide for instructions on setting - HP P8737AA#ABA | User Guide - 75, 705, 7540, 7600 and 7650 Series 17" CRT M - Page 29
Troubleshooting Solving Common Problems The following table lists possible problems, the possible cause of each problem, and the recommended solutions. Problem Screen is blank. Image appears blurred, indistinct, or too dark. Color the On-Screen Display. Select the Brightness and/or Contrast icons to - HP P8737AA#ABA | User Guide - 75, 705, 7540, 7600 and 7650 Series 17" CRT M - Page 30
Problem Possible Cause Monitor may have been moved or inadvertently bumped. Image is too large or Horizontal width may need too small. adjustment. Vertical height may need adjustment. Solution Press the menu button to access the On-Screen Display. Select Degauss to activate. Hewlett-Packard - HP P8737AA#ABA | User Guide - 75, 705, 7540, 7600 and 7650 Series 17" CRT M - Page 31
Troubleshooting Problem "No Signal" is displayed on screen. "Out of Frequency" is displayed on screen. Monitor is overheating. Possible Cause Monitor video cable is disconnected. Video resolution and/or refresh rate are set higher than what your monitor supports. There is not enough air space to - HP P8737AA#ABA | User Guide - 75, 705, 7540, 7600 and 7650 Series 17" CRT M - Page 32
services, refer to the support Web site at: http://www.hp.com/support. Preparing to Call Technical Support If you cannot solve a problem using the troubleshooting tips in this section, you may need to call technical support. Have the following information available when you call: ■ The monitor - HP P8737AA#ABA | User Guide - 75, 705, 7540, 7600 and 7650 Series 17" CRT M - Page 33
either higher or lower. 75 and 7540 Series Curved CRT Monitors Screen Size Viewable screen size 16" (41 cm) Anti-Glare Coating Dot Pitch 0.28 mm (diagonal) Display Area Default 234 x 312 (mm) typical Display Colors Infinite Display Resolutions 640 x 480 640 x 480 640 x 480 720 x 400 800 - HP P8737AA#ABA | User Guide - 75, 705, 7540, 7600 and 7650 Series 17" CRT M - Page 34
Technical Specifications Synchronization (Horizontal) Synchronization (Vertical) Max Pixel Clock Input Signal Hz 30 amps @ 120V AC 60 amps @ 220V AC 75 W (Max.) 16.2 x 16.2 x 17 inches (maximum) 410 x 410 x 430 mm (maximum) 38 lb Max. 17 kg Max. 50o F to 95o F 10o C to 35o C -22o F to 140o F -30o - HP P8737AA#ABA | User Guide - 75, 705, 7540, 7600 and 7650 Series 17" CRT M - Page 35
Technical Specifications 705 and 7600 Series Flat CRT Monitors Screen Size Dot Pitch Display Area Default Display Colors Display Resolutions 640 x 480 640 x 480 640 x 480 720 x 400 800 x 600 800 x 600 1024 x 768 1024 x 768 1280 x 1024 Synchronization (Horizontal) Synchronization (Vertical) Max - HP P8737AA#ABA | User Guide - 75, 705, 7540, 7600 and 7650 Series 17" CRT M - Page 36
Technical Specifications Weight Operating Temperature Storage Temperature Humidity Altitude TCO Requirements MPRII Plug and Play 38 lb Max. 17 kg Max. 50o F to 95o F 10o C to 35o C -22o F to 140o F -30o C to 60o C 20% to 80% (non-condensing) Up to 10,000 ft./3048 - HP P8737AA#ABA | User Guide - 75, 705, 7540, 7600 and 7650 Series 17" CRT M - Page 37
Technical Specifications 7650 Series Flat CRT Monitors Screen Size Dot Pitch Display Area Default Display Colors Display Resolutions 640 x 480 640 x 480 640 x 480 720 x 400 800 x 600 800 x 600 1024 x 768 1024 x 768 1280 x 1024 1600 x 1200 Synchronization (Horizontal) Synchronization (Vertical) Max - HP P8737AA#ABA | User Guide - 75, 705, 7540, 7600 and 7650 Series 17" CRT M - Page 38
Technical Specifications Weight Operating Temperature Storage Temperature Humidity Altitude TCO Requirements MPRII Plug and Play 38 lb Max. 17 kg Max. 50o F to 95o F 10o C to 35o C -22o F to 140o F -30o C to 60o C 20% to 80% (non-condensing) Up to 10,000 ft./3048 - HP P8737AA#ABA | User Guide - 75, 705, 7540, 7600 and 7650 Series 17" CRT M - Page 39
radiate radio frequency energy and, if not installed and used in accordance with the instructions, may cause harmful interference to radio communications. However, there is no guarantee that connected. ■ Consult the dealer or an experienced radio or television technician for help. User Guide C-1 - HP P8737AA#ABA | User Guide - 75, 705, 7540, 7600 and 7650 Series 17" CRT M - Page 40
Packard Company P. O. Box 692000, Mail Stop 530113 Houston, Texas 77269-2000 Or, call 1-800-HP-INVENT (1-800 474-6836) For questions regarding this FCC declaration, contact: Hewlett Packard Company P. O. Box 692000, Mail Stop 510101 Houston, Texas 77269-2000 Or, call (281) 514-3333 C-2 User Guide - HP P8737AA#ABA | User Guide - 75, 705, 7540, 7600 and 7650 Series 17" CRT M - Page 41
European standards (European Norms) which are listed on the EU Declaration of Conformity issued by Hewlett-Packard for this product or product family. This compliance is indicated by the following products. *Notified body number (used only if applicable refer to the product label) User Guide C-3 - HP P8737AA#ABA | User Guide - 75, 705, 7540, 7600 and 7650 Series 17" CRT M - Page 42
Agency Regulatory Notices Hewlett-Packard GmbH, HQ-TRE, and recycling of your waste equipment at the time of disposal will help to conserve natural resources and ensure that it is recycled in a household waste disposal service or the shop where you purchased the product. Japanese Notice C-4 User - HP P8737AA#ABA | User Guide - 75, 705, 7540, 7600 and 7650 Series 17" CRT M - Page 43
monitor to operate on input voltages between 100-120V or 200-240V. The power cord set (flexible cord or wall plug) received with the monitor If you have questions about the type of power cord to use, contact your HP authorized service provider. A power cord should be routed so that it is not likely - HP P8737AA#ABA | User Guide - 75, 705, 7540, 7600 and 7650 Series 17" CRT M - Page 44
Agency Regulatory Notices Japanese Power Cord Requirements For use in Japan, use only the power cord received with this product. Ä CAUTION: Do not use the power cord received with this product on any other products. C-6 User Guide
-
 1
1 -
 2
2 -
 3
3 -
 4
4 -
 5
5 -
 6
6 -
 7
7 -
8
-
9
-
10
-
11
-
12
-
13
-
14
-
15
-
16
-
17
-
18
-
19
-
20
-
21
-
22
-
23
-
24
-
25
-
26
-
27
-
28
-
29
-
30
-
31
-
32
-
33
-
34
-
35
-
36
-
37
-
38
-
39
-
40
-
41
-
42
-
43
-
44
 |
 |

User Guide
75, 705, 7540, 7600 and 7650
Series CRT Monitors
Document Part Number: 368239-006
August 2007
This guide provides information on setting up the monitor,
installing drivers, using the on-screen display menu,
troubleshooting, regulatory notices, and technical specifications.