HP Passport 1912nm User Guide
HP Passport 1912nm Manual
 |
View all HP Passport 1912nm manuals
Add to My Manuals
Save this manual to your list of manuals |
HP Passport 1912nm manual content summary:
- HP Passport 1912nm | User Guide - Page 1
HP Passport 1912nm and 1912nc Internet Monitors User Guide - HP Passport 1912nm | User Guide - Page 2
© 2011 Hewlett-Packard Development Company, L.P. The only warranties for HP products and services are set forth in the express warranty statements accompanying such products and services . Nothing herein should be construed as constituting an additional warranty. HP shall not be liable for technical - HP Passport 1912nm | User Guide - Page 3
About This Guide This guide provides information on setting up and using the Internet monitor. WARNING! Text set off in this manner indicates that failure to follow directions could result - HP Passport 1912nm | User Guide - Page 4
iv About This Guide ENWW - HP Passport 1912nm | User Guide - Page 5
Table of contents 1 Product Features ...1 HP Passport 1912nm and 1912nc Internet Monitors 1 Net Mode vs PC Mode ...2 2 Setting Up the Monitor ...3 Preparing the Monitor for Desktop Use 3 Preparing the Monitor for Wall-Mounting 4 Rear Components ...6 Connecting the Cables ...7 Connecting the - HP Passport 1912nm | User Guide - Page 6
4 Finding More Information ...23 5 Technical Specifications ...24 1912nm and 1912nc Models ...24 Recognizing Preset Display Resolutions 26 1912nm and 1912nc Models (PC Mode 26 Entering User Modes ...26 Energy Saver Feature ...27 vi ENWW - HP Passport 1912nm | User Guide - Page 7
, music player, and photo viewer ● Internet access and streaming views of media content without the need for a PC when in Net mode ● PC connectivity support when used as a standard monitor in PC mode ● Plug and play capability in PC mode ● Mode button on front panel that toggles between PC mode - HP Passport 1912nm | User Guide - Page 8
with the following regulated specifications (for additional certifications and agency notices, refer to the HP LCD Monitors Reference Guide available on http://www.hp.com/ support): ◦ European Union CE Directives ◦ Swedish TCO Requirements Net Mode vs PC Mode The monitor can operate as a stand - HP Passport 1912nm | User Guide - Page 9
turned off to the monitor and all attached devices, then follow the instructions below for your configuration. Preparing the Monitor for Desktop Use To assemble and push the center column onto the base (1). Then align the monitor support column with the center column and push the monitor all the way - HP Passport 1912nm | User Guide - Page 10
bracket. To attach the monitor to a mounting fixture: 1. Set the monitor screen face down on a flat, soft, protected table or desk surface with the support column overhanging the edge. 2. If the center column and base are attached to the monitor, pinch together the two release tabs on the bottom of - HP Passport 1912nm | User Guide - Page 11
they may damage the monitor. It is important to verify that the manufacturer's mounting solution is compliant with the VESA standard and is rated to support the weight of the monitor display panel. For best performance, it is important to use the power and video cables provided with the monitor - HP Passport 1912nm | User Guide - Page 12
Connects external USB devices to the monitor. 8 USB Out Connector Connects external USB devices to the monitor. 9 4-in-1 Media Card Reader Slot Supports SD, MMC, MS, and xD cards. 10 Lock Slot Attaches a locking mechanism to the monitor. 11 Speakers Two 2-watt stereo speakers. NOTE - HP Passport 1912nm | User Guide - Page 13
Connecting the Cables The cable connections required depends on whether you will operate the monitor as a stand-alone Internet monitor (Net mode) or as a standard external monitor connected to a PC (PC mode). NOTE: You can connect the cables for both Net mode and PC mode and switch between the two - HP Passport 1912nm | User Guide - Page 14
3. Connect the supplied keyboard and mouse (required to navigate) to the USB ports on the monitor's rear panel. Figure 2-7 Connecting the Keyboard and Mouse 4. Connect one end of the power cord to the AC power connector on the back of the monitor and the other end to an electrical wall outlet. - HP Passport 1912nm | User Guide - Page 15
Connecting the Cables for PC Mode 1. Place the monitor in a convenient, well-ventilated location near the PC. 2. Connect the supplied keyboard and mouse (required to navigate) to the USB ports on the monitor's rear panel. Figure 2-9 Connecting the Keyboard and Mouse 3. Connect a VGA cable between - HP Passport 1912nm | User Guide - Page 16
4. Connect the upstream end of a USB cable to the USB In connector on the monitor's rear panel and the downstream end to a USB Out connector on the PC. NOTE: This step is optional. However, the USB cable is required for the USB Out ports and the 4-in-1 media card reader on the monitor to function in - HP Passport 1912nm | User Guide - Page 17
6. Connect one end of the power cord to the AC power connector on the back of the monitor and the other end to an electrical wall outlet. Figure 2-13 Connecting the Power Cord 7. After turning on power to the monitor, you must press the Mode button on the monitor's front panel to change from Net - HP Passport 1912nm | User Guide - Page 18
Front Panel Controls Figure 2-15 Monitor Front Panel Controls Table 2-1 Monitor Front Panel Controls Control Function 1 Menu Opens the On-Screen Display (OSD) menu, selects items within the OSD menu, and closes the OSD menu. 2 - (Minus) If the OSD menu is on, press to navigate backward - HP Passport 1912nm | User Guide - Page 19
Adjusting the Tilt For optimal viewing, adjust the screen tilt to your own preference. 1. Face the front of the monitor and hold the base so that you do not topple the monitor while changing the tilt. 2. Adjust the tilt by moving the top edge of the monitor either toward or away from you, without - HP Passport 1912nm | User Guide - Page 20
video again, it is stored as a sample in the Video player. After the video ends or is bypassed the Startup Wizard will begin. Follow the instructions in the Startup Wizard to: ● Select your language ● Set the date and time ● Set the timer to turn off the display after an assigned period - HP Passport 1912nm | User Guide - Page 21
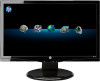
3 Using the Net Mode Interface The Net mode Home page is displayed when the monitor is powered on. Click on one of the icons to use that feature of the Internet monitor. NOTE: The user interface and features in this chapter are only available when the monitor is in Net mode. Figure 3-1 Net Mode Home - HP Passport 1912nm | User Guide - Page 22
proxy configuration to use the browser. On the browser toolbar, go to Edit > Preferences > Advanced > Network > Settings > Manual Proxy Configuration, enter the information provided by your IT support and click the OK button to apply. 4. Use the browser to browse the Internet. To change your browser - HP Passport 1912nm | User Guide - Page 23
5. To return to the navigation folder where your music is stored, click show player. at the bottom of the slide The following audio formats are supported and will be displayed: ● MP3 ● AAC ● WMA Watching Videos You can use the video player to watch videos that you have stored on a USB flash - HP Passport 1912nm | User Guide - Page 24
module. 5. To return to the navigation folder where your photographs are stored, click the bottom of the slide show player. The following picture formats are supported and will be displayed: ● JPEG ● GIF ● PNG ● BMP at the bottom at 18 Chapter 3 Using the Net Mode Interface ENWW - HP Passport 1912nm | User Guide - Page 25
. To configure the network settings: 1. Select the Network tab in the Settings module. 2. Click the Auto button in the Wizard section and follow the instructions on the screen, or click the Manual button to enter the information manually then click the Apply button. ENWW Adjusting the Settings 19 - HP Passport 1912nm | User Guide - Page 26
: 1. Select the Date/Time tab in the Settings module. 2. Select your time zone to automatically set the date and time or click the Manual button and manually set the date and time. 3. Click the Apply button to save the settings. Language Settings The Language settings allow you to select a language - HP Passport 1912nm | User Guide - Page 27
NOTE: The monitor must be connected to the Internet to update the software. Internet access is not provided. Contact your local Broadband supplier. 1. Select the System tab in the Settings module. 2. In the Software Version section, click the Update Now button or click the Auto Update button and - HP Passport 1912nm | User Guide - Page 28
you will have more control over how your printouts appear. Introducing ePrint HP ePrint lets you print from virtually anywhere to an HP printer that supports ePrint. Once enabled, ePrint assigns an email address to your printer. To print, simply send an email containing your document to your printer - HP Passport 1912nm | User Guide - Page 29
on using and adjusting your monitor, go to http://www.hp.com/support. Select your country or region, select Product Support & Troubleshooting, and then enter your monitor model in the SEARCH window. NOTE: The monitor user guide, reference guide, and drivers are available at http://www.hp.com - HP Passport 1912nm | User Guide - Page 30
Graphic Resolution Optimum Graphic Resolution Power Source Graphics Input Terminal ARM based Processor Flash RAM Memory DDR II Memory USB 2.0 ports Supported USB Devices Audio HID Operating System Image / Component Updates Internet Solution (Browser) 3.65 kg 8.05 lbs 34.8 cm 13.7 inches 18 - HP Passport 1912nm | User Guide - Page 31
Table 5-1 1912nm and 1912nc Specifications (continued) Video Player Support Audio Player Support Photo Frame Support Video Codecs H.264, H.263, MPEG2, MPEG4, VC-1 Video Container MP4, M4V, MPG, MKV, WMV, AVI, MOV, ASF, 3GP, VOB Audio Codecs MP3, AACLC, HE-ACC, - HP Passport 1912nm | User Guide - Page 32
Recognizing Preset Display Resolutions The display resolutions listed below are the most commonly used modes and are set as factory defaults. This monitor automatically recognizes these preset modes and they will appear properly sized and centered on the screen. NOTE: The preset modes can only be - HP Passport 1912nm | User Guide - Page 33
Energy Saver Feature The monitors support a reduced power state. The reduced power state will before the monitor will return to its normal operating mode. Refer to the computer manual for instructions on setting energy saver features (sometimes called power management features). NOTE: The above
-
 1
1 -
 2
2 -
 3
3 -
 4
4 -
 5
5 -
 6
6 -
 7
7 -
8
-
9
-
10
-
11
-
12
-
13
-
14
-
15
-
16
-
17
-
18
-
19
-
20
-
21
-
22
-
23
-
24
-
25
-
26
-
27
-
28
-
29
-
30
-
31
-
32
-
33
 |
 |

HP Passport 1912nm and 1912nc
Internet Monitors
User Guide