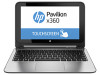
HP Pavilion 11-n040ca HP Pavilion 11 x360 PC Maintenance and Service Guide
HP Pavilion 11-n040ca Manual
 |
View all HP Pavilion 11-n040ca manuals
Add to My Manuals
Save this manual to your list of manuals |
HP Pavilion 11-n040ca manual content summary:
- HP Pavilion 11-n040ca | HP Pavilion 11 x360 PC Maintenance and Service Guide - Page 1
HP Pavilion 11 x360 PC Maintenance and Service Guide IMPORTANT! This document is intended for HP authorized service providers only. - HP Pavilion 11-n040ca | HP Pavilion 11 x360 PC Maintenance and Service Guide - Page 2
-001 Product notice This guide describes features that are common to most models. Some features may not be available on your computer. Not all features are available on all editions of Windows 8. This computer may require upgraded and/or separately purchased hardware, drivers, and/or software to - HP Pavilion 11-n040ca | HP Pavilion 11 x360 PC Maintenance and Service Guide - Page 3
Safety warning notice WARNING! To reduce the possibility of heat-related injuries or of overheating the device, do not place the device directly on your lap or obstruct the device air vents. Use the device only on a hard, flat surface. Do not allow another hard surface, such as an adjoining optional - HP Pavilion 11-n040ca | HP Pavilion 11 x360 PC Maintenance and Service Guide - Page 4
iv Safety warning notice - HP Pavilion 11-n040ca | HP Pavilion 11 x360 PC Maintenance and Service Guide - Page 5
to an entertainment stand 8 Changing your notebook to a tablet 8 Top ...9 TouchPad ...9 Speakers ...9 Lights ...10 Keys ...11 Service tag and PCID label ...12 Service tag ...12 PCID label ...13 3 Illustrated parts catalog ...14 Computer major components ...14 Display assembly subcomponents ...17 - HP Pavilion 11-n040ca | HP Pavilion 11 x360 PC Maintenance and Service Guide - Page 6
Power button board ...43 Fan ...45 Heat sink ...46 Battery ...49 Speakers ...50 TouchPad button board ...51 Display assembly ...53 Power connector cable ...59 System board ...60 Keyboard ...62 6 Using Setup Utility (BIOS) and HP PC Hardware Diagnostics (UEFI 64 Starting Setup Utility (BIOS) ...64 - HP Pavilion 11-n040ca | HP Pavilion 11 x360 PC Maintenance and Service Guide - Page 7
Changing the computer boot order 72 Removing the HP Recovery partition 72 9 Power cord set requirements ...73 Requirements for all countries ...73 Requirements for specific countries and regions 73 10 Recycling ...75 Index ...76 vii - HP Pavilion 11-n040ca | HP Pavilion 11 x360 PC Maintenance and Service Guide - Page 8
viii - HP Pavilion 11-n040ca | HP Pavilion 11 x360 PC Maintenance and Service Guide - Page 9
Audio and video Description HP Pavilion 11 x360 PC Intel® Pentium N3520 processor (2.17GHz/2.42GHz, 2 MB L2, 1333MHz) Intel Celeron N2820 processor (2.13GHz/2.39GHz, 1 MB L2, 1066MHz) Intel Bay Trail-M SoC Internal graphics: Intel HD Graphics Support for DX11 Support for HD playback, streaming - HP Pavilion 11-n040ca | HP Pavilion 11 x360 PC Maintenance and Service Guide - Page 10
with image sensor Taps enabled as default Multitouch gestures enabled: 2-finger scroll, pinch Support for PS/2 and SMB interface Support for Windows 8.1 Modern TouchPad Gestures Support for the following AC adapters: ● 45-W HP Smart AC adapter (non-PFC, MSH) (for Germany only) 2 Chapter 1 Product - HP Pavilion 11-n040ca | HP Pavilion 11 x360 PC Maintenance and Service Guide - Page 11
Serviceability Description ● 45-W HP Smart AC adapter (non-PFC, with 26.5 mm z-height adapter [non-slim]) (not for India/People's Republic of China) ● 65-W HP Smart AC adapter (non-PFC, EM, 4.5-mm) (only for India/People's Republic of China) Embedded 2-cell, 29-Wh, Li-ion battery Supports battery - HP Pavilion 11-n040ca | HP Pavilion 11 x360 PC Maintenance and Service Guide - Page 12
Hard drive light (2) SIM slot (select models only) (3) Memory card reader (4) USB ● Amber: HP 3D DriveGuard has temporarily parked the hard drive. Supports a wireless subscriber adapter is connected and the battery is charged. ● Off: The computer is using battery power. Connects an AC adapter - HP Pavilion 11-n040ca | HP Pavilion 11 x360 PC Maintenance and Service Guide - Page 13
being mishandled or stolen. ● When the computer is off, press the button to turn on the computer. ● When the computer is on, press the button briefly to initiate press and hold the power button down for at least 5 seconds to turn off the computer. To learn more about your power settings, see your - HP Pavilion 11-n040ca | HP Pavilion 11 x360 PC Maintenance and Service Guide - Page 14
or a headset. For additional safety information, refer to the Regulatory, Safety, and Environmental Notices. To access this guide, from the Start screen, type support, and then select the HP Support Assistant app. NOTE: When a device is connected to the jack, the computer speakers are disabled. NOTE - HP Pavilion 11-n040ca | HP Pavilion 11 x360 PC Maintenance and Service Guide - Page 15
(3) Webcam Records video and captures photographs. Some models allow you to video conference and chat online using (WLANs). (6) Internal display switch Turns off the display and initiates Sleep access this guide, from the Start screen, type support, and then select the HP Support Assistant app. - HP Pavilion 11-n040ca | HP Pavilion 11 x360 PC Maintenance and Service Guide - Page 16
Changing your notebook to an entertainment stand To change your notebook to an entertainment stand, raise the display, and then rotate the display backward to a stand position (about 315 degrees). Changing your notebook to a tablet To change your notebook to a tablet, raise the display, and then - HP Pavilion 11-n040ca | HP Pavilion 11 x360 PC Maintenance and Service Guide - Page 17
TouchPad button Component Speakers (2) Description Moves the on-screen pointer and selects or activates items on the screen. NOTE: The TouchPad also supports edge-swipe gestures. Functions like the left button on an external mouse. Functions like the right button on an external mouse. Description - HP Pavilion 11-n040ca | HP Pavilion 11 x360 PC Maintenance and Service Guide - Page 18
Lights Component (1) (2) Caps lock light Mute light Description On: Caps lock is on, which switches the keys to all capital letters. ● Amber: Computer sound is off. ● Off: Computer sound is on. 10 Chapter 2 External component identification - HP Pavilion 11-n040ca | HP Pavilion 11 x360 PC Maintenance and Service Guide - Page 19
open app or the Windows desktop. NOTE: Pressing the Windows key again will return you to the previous screen. Execute frequently used system functions. Top 11 - HP Pavilion 11-n040ca | HP Pavilion 11 x360 PC Maintenance and Service Guide - Page 20
the product's hardware components. The part number helps a service technician to determine what components and parts are needed. ● Model/Warranty period (3). Model is the alphanumeric identifier used to locate documents, drivers, and support for the computer. Warranty describes the duration (in - HP Pavilion 11-n040ca | HP Pavilion 11 x360 PC Maintenance and Service Guide - Page 21
factory shipped specifications when replacing the system board. The label may have a different number of characters depending on the operating system on the computer. Windows 8 models Non-Windows 8 models Service tag and PCID label 13 - HP Pavilion 11-n040ca | HP Pavilion 11 x360 PC Maintenance and Service Guide - Page 22
on supported parts for your computer, go to http://partsurfer.hp.com, select your country or region, and then follow the on-screen instructions. Item (1) Component Display assembly (11.6-in [29.5-cm], AG, SVA, LED TouchScreen) (includes webcam/ microphone module) For use in red models without - HP Pavilion 11-n040ca | HP Pavilion 11 x360 PC Maintenance and Service Guide - Page 23
Item (2) (3) (4) (5) (6) Component Top cover (includes TouchPad) For use in silver models For use in red models TouchPad button board (includes bracket and cable) Power connector cable Keyboard For use in Belgium For use in Brazil For use in Bulgaria For use - HP Pavilion 11-n040ca | HP Pavilion 11 x360 PC Maintenance and Service Guide - Page 24
cell, 29-Wh, 3.82-Ah, Li-ion battery 751875-005 USB board (includes cable) 755734-001 Bottom cover For use in red models 755725-001 For use in silver models 755726-001 For use in red models with WWAN 755743-001 For use in silver models with WWAN 755744-001 16 Chapter 3 Illustrated parts - HP Pavilion 11-n040ca | HP Pavilion 11 x360 PC Maintenance and Service Guide - Page 25
Display assembly subcomponents Item (1) (2) (3) (4) Component Display enclosure For use in silver models For use in red models Display cable Webcam Display hinge covers For use in red models For use in silver models Spare part number 739573-001 758845-001 758846-001 761350-001 758848-001 758847- - HP Pavilion 11-n040ca | HP Pavilion 11 x360 PC Maintenance and Service Guide - Page 26
bracket Hard drive connector cable Screws External DVD±RW Double-Layer with SuperMulti Drive Miscellaneous parts Component AC adapter 45-W HP Smart AC adapter (non-PFC, 4.5-mm, non-slim) 65-W HP Smart AC adapter (non-PFC, EM, 4.5-mm) Power cord (3-pin, black, 1.83-m): For use in Argentina For use in - HP Pavilion 11-n040ca | HP Pavilion 11 x360 PC Maintenance and Service Guide - Page 27
Smart AC adapter (non-PFC, 4.5-mm, non-slim) External DVD±RW Double-Layer with SuperMulti Drive HP hs3110 HSPA+ Mobile Broadband Module 2-cell, 29-Wh, 3.82-Ah, Li-ion battery Power cord for use in North America (3-pin, black, 1.83-m) Power cord for use in Australia (3-pin, black, 1.83-m) Power cord - HP Pavilion 11-n040ca | HP Pavilion 11 x360 PC Maintenance and Service Guide - Page 28
connector cable Heat sink (includes replacement thermal material) Fan 11.6-in [29.5-cm], AG, SVA, LED TouchScreen display assembly for use in red models without WWAN Power button board (includes cable) USB board (includes cable) RTC battery (includes cable) Rubber Feet Kit (includes 2 rubber feet - HP Pavilion 11-n040ca | HP Pavilion 11 x360 PC Maintenance and Service Guide - Page 29
(includes keyboard cable and TouchPad) 11.6-in [29.5-cm], AG, SVA, LED TouchScreen display assembly for use in red models with WWAN Top cover for use in silver models (includes TouchPad) Display rear cover for use in silver models Display rear cover for use in red models Display hinge covers for use - HP Pavilion 11-n040ca | HP Pavilion 11 x360 PC Maintenance and Service Guide - Page 30
and replacement procedures: ● Flat-bladed screw driver ● Magnetic screw driver ● Phillips P0 and P1 screw drivers Service considerations The following sections include some of points designated in the maintenance instructions. 22 Chapter 4 Removal and replacement procedures preliminary requirements - HP Pavilion 11-n040ca | HP Pavilion 11 x360 PC Maintenance and Service Guide - Page 31
Cables and connectors CAUTION: When servicing the computer, be sure that cables are placed in their drive, shut down the computer. If you are unsure whether the computer is off or in Hibernation, turn the computer on, and then shut it down through the operating system. Before handling a drive, be - HP Pavilion 11-n040ca | HP Pavilion 11 x360 PC Maintenance and Service Guide - Page 32
DIPS from Styrofoam Removing bubble pack from PCB Packing PCBs in foam-lined box Typical electrostatic voltage levels 10% 35,000 V 12,000 V 6,000 V 2,000 V 11,500 V 14,500 V 26,500 V 21,000 V Relative humidity 40% 15,000 V 5,000 V 800 V 700 V 4,000 V 5,000 V 20,000 - HP Pavilion 11-n040ca | HP Pavilion 11 x360 PC Maintenance and Service Guide - Page 33
properly grounded tools and equipment. ● Use conductive field service tools, such as cutters, screw drivers, and vacuums. ● When fixtures must directly contact . ● Avoid contact with pins, leads, or circuitry. ● Turn off power and input signals before inserting or removing connectors or test equipment - HP Pavilion 11-n040ca | HP Pavilion 11 x360 PC Maintenance and Service Guide - Page 34
with ground cords of one megohm resistance ● Static-dissipative tables or floor mats with hard ties to the ground ● Field service kits ● Static awareness labels ● Material-handling packages ● Nonconductive plastic bags, tubes, or boxes ● Metal tote boxes ● Electrostatic voltage levels and - HP Pavilion 11-n040ca | HP Pavilion 11 x360 PC Maintenance and Service Guide - Page 35
current information on supported parts for your computer, go to http://partsurfer.hp.com, select your country or region, and then follow the on-screen instructions. Component replacement procedures This chapter provides removal and replacement procedures for Authorized Service Provider only parts - HP Pavilion 11-n040ca | HP Pavilion 11 x360 PC Maintenance and Service Guide - Page 36
models with WWAN Bottom cover for use in silver models with WWAN Rubber Kit (includes rear feet) Spare part number 755725-001 755726-001 755743-001 755744-001 755736-001 Before removing the bottom cover, follow these steps: 1. Turn and replacement procedures for Authorized Service Provider parts - HP Pavilion 11-n040ca | HP Pavilion 11 x360 PC Maintenance and Service Guide - Page 37
4. Remove the two Phillips PM2.5×8.0 screws (1) and the seven Phillips PM2.0×7.0 screws (2) that secure the bottom cover to the computer. 5. Separate the bottom cover from the computer by lifting up at the seam near the display hinges (1), and then lift the cover up and off the computer (2) far - HP Pavilion 11-n040ca | HP Pavilion 11 x360 PC Maintenance and Service Guide - Page 38
USB/audio board cable from the system board connector (2). Reverse this procedure to install the bottom cover. 30 Chapter 5 Removal and replacement procedures for Authorized Service Provider parts - HP Pavilion 11-n040ca | HP Pavilion 11 x360 PC Maintenance and Service Guide - Page 39
the USB/audio board, follow these steps: 1. Shut down the computer. If you are unsure whether the computer is off or in Hibernation, turn the computer on, and then shut it down through the operating system. 2. Disconnect all external devices connected to the computer. 3. Disconnect the power - HP Pavilion 11-n040ca | HP Pavilion 11 x360 PC Maintenance and Service Guide - Page 40
functionality, and then contact technical support. Before removing the WLAN module, follow these steps: 1. Turn off the computer. If you bottom cover (see Bottom cover on page 28). 5. Disconnect the battery. Remove the WLAN module: 1. Disconnect the WLAN antenna cable (1) Service Provider parts - HP Pavilion 11-n040ca | HP Pavilion 11 x360 PC Maintenance and Service Guide - Page 41
3. Remove the WLAN module (3) by pulling the module away from the slot at an angle. NOTE: If the WLAN antenna cables are not connected to the terminals on the WLAN module, the protective sleeves must be installed on the antenna connectors, as shown in the following illustration. Reverse this - HP Pavilion 11-n040ca | HP Pavilion 11 x360 PC Maintenance and Service Guide - Page 42
HP hs3110 HSPA+ Mobile Broadband Module Spare part number 748599-001 Before removing the WWAN module, follow these steps: 1. Turn bottom cover (see Bottom cover on page 28). 5. Disconnect the battery. Remove the WWAN module: 1. Disconnect the WWAN antenna cables (1) Service Provider parts - HP Pavilion 11-n040ca | HP Pavilion 11 x360 PC Maintenance and Service Guide - Page 43
3. Remove the WWAN module (3) by pulling the module away from the slot. NOTE: WWAN modules are designed with a notch to prevent incorrect insertion. NOTE: If the WWAN antennas are not connected to the terminals on the WWAN module, the protective sleeves must be installed on the antenna connectors, - HP Pavilion 11-n040ca | HP Pavilion 11 x360 PC Maintenance and Service Guide - Page 44
1. Turn off the computer. If you are unsure whether the computer is off or in Hibernation, turn the Bottom cover on page 28). 5. Disconnect the battery. Remove the hard drive: 1. Disconnect the .0×7.0 screw (2) that secures the hard drive and battery to the computer. 3. Remove the three Phillips - HP Pavilion 11-n040ca | HP Pavilion 11 x360 PC Maintenance and Service Guide - Page 45
4. A small part of the hard drive sits under one of the battery screw tabs (4). To remove it, slide the hard drive toward the top of the computer (5), and then lift it out of the computer (6). 5. If it - HP Pavilion 11-n040ca | HP Pavilion 11 x360 PC Maintenance and Service Guide - Page 46
Reverse this procedure to install the hard drive. 38 Chapter 5 Removal and replacement procedures for Authorized Service Provider parts - HP Pavilion 11-n040ca | HP Pavilion 11 x360 PC Maintenance and Service Guide - Page 47
(includes cable) Spare part number 755735-001 Before removing the RTC battery, follow these steps: 1. Turn off the computer. If you are unsure whether the computer is off or in Hibernation, turn the computer on, and then shut it down through the operating system. 2. Disconnect the power from - HP Pavilion 11-n040ca | HP Pavilion 11 x360 PC Maintenance and Service Guide - Page 48
2. Detach the RTC battery (2) from the system board. (The RTC battery is secured with double-sided tape.) 3. Remove the RTC battery. Reverse this procedure to install the RTC battery. 40 Chapter 5 Removal and replacement procedures for Authorized Service Provider parts - HP Pavilion 11-n040ca | HP Pavilion 11 x360 PC Maintenance and Service Guide - Page 49
prior to installing new memory may result in various system problems. To update BIOS: 1. Navigate to www.hp.com. 2. Click Support & Drivers > click Drivers & Software. 3. In the Enter a product name/number box, type the computer model information, and then click Search. 4. Click the link for the - HP Pavilion 11-n040ca | HP Pavilion 11 x360 PC Maintenance and Service Guide - Page 50
2. Remove the memory module (2) by pulling the module away from the slot at an angle. Reverse this procedure to install a memory module. 42 Chapter 5 Removal and replacement procedures for Authorized Service Provider parts - HP Pavilion 11-n040ca | HP Pavilion 11 x360 PC Maintenance and Service Guide - Page 51
, follow these steps: 1. Turn off the computer. If you are unsure whether the computer is off or in Hibernation, turn the computer on, and then Remove the bottom cover (see Bottom cover on page 28). 5. Disconnect the battery. Remove the power button board: 1. Disconnect the power button board cable - HP Pavilion 11-n040ca | HP Pavilion 11 x360 PC Maintenance and Service Guide - Page 52
3. Remove the power button board and cable (3). Reverse this procedure to install the power button board. 44 Chapter 5 Removal and replacement procedures for Authorized Service Provider parts - HP Pavilion 11-n040ca | HP Pavilion 11 x360 PC Maintenance and Service Guide - Page 53
, follow these steps: 1. Turn off the computer. If you are unsure whether the computer is off or in Hibernation, turn the computer on, and then . 4. Remove the bottom cover (see Bottom cover on page 28). 5. Disconnect the battery. Remove the fan: NOTE: You do not have to remove the heat sink to - HP Pavilion 11-n040ca | HP Pavilion 11 x360 PC Maintenance and Service Guide - Page 54
sink, follow these steps: 1. Turn off the computer. If you are unsure whether the computer is off or in Hibernation, turn the computer on, and then shut bottom cover (see Bottom cover on page 28). 5. Disconnect the battery. 6. Remove the fan (see Fan on page 45). 46 Chapter 5 Removal - HP Pavilion 11-n040ca | HP Pavilion 11 x360 PC Maintenance and Service Guide - Page 55
and the system board components each time the heat sink is removed. Thermal paste is used on the processor (1) and the heat sink section (2) that services it Component replacement procedures 47 - HP Pavilion 11-n040ca | HP Pavilion 11 x360 PC Maintenance and Service Guide - Page 56
Reverse this procedure to install the heat sink. 48 Chapter 5 Removal and replacement procedures for Authorized Service Provider parts - HP Pavilion 11-n040ca | HP Pavilion 11 x360 PC Maintenance and Service Guide - Page 57
(see Bottom cover on page 28). Remove the battery: WARNING! To reduce potential safety issues, use only the battery provided with the computer, a replacement battery provided by HP, or a compatible battery purchased from HP. 1. Disconnect the battery cable from the system board (1). 2. Remove the - HP Pavilion 11-n040ca | HP Pavilion 11 x360 PC Maintenance and Service Guide - Page 58
, turn the computer on, and then shut it down through the operating system. 2. Disconnect the power from the computer by unplugging the power cord from the computer. 3. Disconnect all external devices from the computer. 4. Remove the bottom cover (see Bottom cover on page 28). 5. Remove the battery - HP Pavilion 11-n040ca | HP Pavilion 11 x360 PC Maintenance and Service Guide - Page 59
, turn the computer on, and then shut it down through the operating system. 2. Disconnect the power from the computer by unplugging the power cord from the computer. 3. Disconnect all external devices from the computer. 4. Remove the bottom cover (see Bottom cover on page 28). 5. Remove the battery - HP Pavilion 11-n040ca | HP Pavilion 11 x360 PC Maintenance and Service Guide - Page 60
5. Lift the bottom of the touchpad upward (2), and then lift it off the computer (3). Reverse this procedure to install the TouchPad button board. 52 Chapter 5 Removal and replacement procedures for Authorized Service Provider parts - HP Pavilion 11-n040ca | HP Pavilion 11 x360 PC Maintenance and Service Guide - Page 61
models without WWAN Display assembly, 11.6-in [29.5-cm] HD, anti-glare, touchscreen, for use in red models with WWAN Webcam Display cable Display enclosure for use in silver models Display enclosure for use in red models Hinge covers for use in red models 5. Remove the battery (see Battery on page 49 - HP Pavilion 11-n040ca | HP Pavilion 11 x360 PC Maintenance and Service Guide - Page 62
removing the screws. Failure to support the display assembly can result in damage to the display assembly and other computer components. 6. Lift the computer to force the hinges to rotate upward to an angle (4). 54 Chapter 5 Removal and replacement procedures for Authorized Service Provider parts - HP Pavilion 11-n040ca | HP Pavilion 11 x360 PC Maintenance and Service Guide - Page 63
: 1. To remove the display enclosure: NOTE: The display enclosure is available using spare part number 758846-001 for red models and 758845-001 for silver models. a. Remove the two screw covers (1). b. Remove the two Phillips PM2.5×4.0 screws (2) that secure the enclosure to the display. Component - HP Pavilion 11-n040ca | HP Pavilion 11 x360 PC Maintenance and Service Guide - Page 64
. a. Lift the webcam module (1) enough to gain access to the cable. b. Disconnect the cable (2) from the module. 56 Chapter 5 Removal and replacement procedures for Authorized Service Provider parts - HP Pavilion 11-n040ca | HP Pavilion 11 x360 PC Maintenance and Service Guide - Page 65
3. To remove the display hinge covers: NOTE: The display hinge covers are available using spare part number 758847-001 for red models and 759503-001 for silver models. a. Separate the top hinge cover by prying and rotating it off (1). b. Remove the four Phillips PM2.5×5.0 screws (2) that secure the - HP Pavilion 11-n040ca | HP Pavilion 11 x360 PC Maintenance and Service Guide - Page 66
the display cable from the display enclosure (5). Reverse this procedure to reassemble and install the display assembly. 58 Chapter 5 Removal and replacement procedures for Authorized Service Provider parts - HP Pavilion 11-n040ca | HP Pavilion 11 x360 PC Maintenance and Service Guide - Page 67
, turn the computer on, and then shut it down through the operating system. 2. Disconnect the power from the computer by unplugging the power cord from the computer. 3. Disconnect all external devices from the computer. 4. Remove the bottom cover (see Bottom cover on page 28). 5. Remove the battery - HP Pavilion 11-n040ca | HP Pavilion 11 x360 PC Maintenance and Service Guide - Page 68
, turn the computer on, and then shut it down through the operating system. 2. Disconnect the power from the computer by unplugging the power cord from the computer. 3. Disconnect all external devices from the computer. 4. Remove the bottom cover (see Bottom cover on page 28). 5. Remove the battery - HP Pavilion 11-n040ca | HP Pavilion 11 x360 PC Maintenance and Service Guide - Page 69
2. Remove the four Phillips PM2.0×3.0 screws (1) that secure the system board to the computer. 3. Remove the system board (2) from the computer. Reverse this procedure to install the system board. Component replacement procedures 61 - HP Pavilion 11-n040ca | HP Pavilion 11 x360 PC Maintenance and Service Guide - Page 70
follow these steps: 1. Turn off the computer. If you are unsure whether the computer is off or in Hibernation, turn the computer on, and ). 7. Remove the heat sink (see Heat sink on page 46). 8. Remove the battery (see Battery on page 49). 9. Remove the system board (see System board on page 60). - HP Pavilion 11-n040ca | HP Pavilion 11 x360 PC Maintenance and Service Guide - Page 71
2. Remove the keyboard from the top cover. Top covers are available using spare part number 759976-001 for red models and 756116-001 for silver models. Reverse this procedure to install the keyboard. Component replacement procedures 63 - HP Pavilion 11-n040ca | HP Pavilion 11 x360 PC Maintenance and Service Guide - Page 72
HP PC ) To start Setup Utility (BIOS), turn on or restart the computer, quickly HP website. Most BIOS updates on the HP website are packaged in compressed files called SoftPaqs. Some download packages contain a file named Readme.txt, which contains information regarding installing and troubleshooting - HP Pavilion 11-n040ca | HP Pavilion 11 x360 PC Maintenance and Service Guide - Page 73
any device, cable, or cord. 1. From the Start screen, type hp support assistant, and then select the HP Support Assistant app. 2. Click Updates and tune-ups, and then click Check for HP updates now. 3. Follow the on-screen instructions. 4. At the download area, follow these steps: a. Identify the - HP Pavilion 11-n040ca | HP Pavilion 11 x360 PC Maintenance and Service Guide - Page 74
software components. To start HP PC Hardware Diagnostics UEFI: 1. Turn on or restart the Instructions for downloading HP PC Hardware Diagnostics (UEFI) are provided in English only. 1. Go to http://www.hp.com. 2. Point to Support, located at the top of the page, and then click the Download Drivers - HP Pavilion 11-n040ca | HP Pavilion 11 x360 PC Maintenance and Service Guide - Page 75
7 Specifications Computer specifications Metric U.S. Dimensions Width Depth Height Weight Input power Operating voltage and current Temperature Operating Nonoperating Relative humidity (noncondensing) Operating Nonoperating Maximum altitude (unpressurized) Operating Nonoperating 308 mm 215.1 mm - HP Pavilion 11-n040ca | HP Pavilion 11 x360 PC Maintenance and Service Guide - Page 76
(typical read, including setting) Single track 1.5 ms 1.5 ms Average (read/write) 11/13 ms 11/13 ms Maximum 22 ms 22 ms Logical blocks 976,773,168 628,142,448 Disk less. NOTE: Certain restrictions and exclusions apply. Contact technical support for details. 68 Chapter 7 Specifications - HP Pavilion 11-n040ca | HP Pavilion 11 x360 PC Maintenance and Service Guide - Page 77
Image Recovery-Reinstalls the operating system and all hardware-related drivers and software, but not other software applications. ● Factory Reset steps, see Help and Support. From the Start screen, type help, and then select Help and Support. Creating HP Recovery media HP Recovery Manager is a - HP Pavilion 11-n040ca | HP Pavilion 11 x360 PC Maintenance and Service Guide - Page 78
screen, type help, and then select Help and Support. ● If you need to correct a problem with a preinstalled application or driver, use the Drivers and Applications Reinstall option of HP Recovery Manager to reinstall the individual application or driver. From the Start screen, type recovery, select - HP Pavilion 11-n040ca | HP Pavilion 11 x360 PC Maintenance and Service Guide - Page 79
.hp.com/support, select your country or region, and follow the on-screen instructions. IMPORTANT: HP Recovery Manager does not automatically provide backups of your personal data. Before beginning recovery, back up any personal data you wish to retain. Using the HP Recovery partition (select models - HP Pavilion 11-n040ca | HP Pavilion 11 x360 PC Maintenance and Service Guide - Page 80
, change the computer boot order. See Changing the computer boot order on page 72. 3. Follow the on-screen instructions. Changing the computer boot order If computer does not restart in HP Recovery Manager, you can change the computer boot order, which is the order of devices listed in BIOS where - HP Pavilion 11-n040ca | HP Pavilion 11 x360 PC Maintenance and Service Guide - Page 81
9 Power cord set requirements The wide-range input feature of the computer permits it to operate from any line voltage from 100 to 120 volts AC, or from 220 to 240 volts AC. The 3-conductor power cord set included with the computer meets the requirements for use in the country or region where the - HP Pavilion 11-n040ca | HP Pavilion 11 x360 PC Maintenance and Service Guide - Page 82
Country/region Accredited agency Applicable note number South Korea EK 4 Sweden CEMKO 1 Switzerland SEV 1 Taiwan BSMI 4 The United Kingdom BSI 1 The United States UL 2 1. The flexible cord must be Type HO5VV-F, 3-conductor, 1.0-mm² conductor size. Power cord set fittings ( - HP Pavilion 11-n040ca | HP Pavilion 11 x360 PC Maintenance and Service Guide - Page 83
in general household waste. Follow the local laws and regulations in your area for battery disposal. HP encourages customers to recycle used electronic hardware, HP original print cartridges, and rechargeable batteries. For more information about recycling programs, see the HP Web site at http://www - HP Pavilion 11-n040ca | HP Pavilion 11 x360 PC Maintenance and Service Guide - Page 84
identifying 11 audio, product description 1 audio-out (headphone)/audio-in (microphone) jack 6 B backups 69 battery removal specifications 67 connector, power 4 connectors, service considerations 23 D deleted files restoring 70 HP PC Hardware Diagnostics (UEFI) downloading 66 using 66 76 Index - HP Pavilion 11-n040ca | HP Pavilion 11 x360 PC Maintenance and Service Guide - Page 85
numbers 15, 20, 21 keys action 11 esc 11 fn 11 Windows 11 L lights AC adapter 4 caps creating 71 model name 1 serviceability 3 video 1 wireless 2 product name 1 R recovery discs 69, 72 HP Recovery Manager 71 media 72 options 70 starting 71 supported discs 69 system 71 USB flash drive 72 using HP - HP Pavilion 11-n040ca | HP Pavilion 11 x360 PC Maintenance and Service Guide - Page 86
service tag 12 serviceability, product description 3 SIM slot, identifying 4 slots memory card reader 4 security cable 5 SIM 4 Speaker Kit, spare part number 16, 20, 50 speakers identifying 9 removal 50 spare part number 16, 20, 50 specifications computer 67 hard drive 68 supported 11 wireless
-
 1
1 -
 2
2 -
 3
3 -
 4
4 -
 5
5 -
 6
6 -
 7
7 -
8
-
9
-
10
-
11
-
12
-
13
-
14
-
15
-
16
-
17
-
18
-
19
-
20
-
21
-
22
-
23
-
24
-
25
-
26
-
27
-
28
-
29
-
30
-
31
-
32
-
33
-
34
-
35
-
36
-
37
-
38
-
39
-
40
-
41
-
42
-
43
-
44
-
45
-
46
-
47
-
48
-
49
-
50
-
51
-
52
-
53
-
54
-
55
-
56
-
57
-
58
-
59
-
60
-
61
-
62
-
63
-
64
-
65
-
66
-
67
-
68
-
69
-
70
-
71
-
72
-
73
-
74
-
75
-
76
-
77
-
78
-
79
-
80
-
81
-
82
-
83
-
84
-
85
-
86
 |
 |

HP Pavilion 11 x360 PC
Maintenance and Service Guide
IMPORTANT! This document is intended for HP
authorized service providers only.