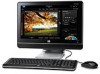
HP Pavilion All-in-One MS210 Maintenance and Service Guide: HP Pro All-in-One
HP Pavilion All-in-One MS210 - Desktop PC Manual
 |
View all HP Pavilion All-in-One MS210 manuals
Add to My Manuals
Save this manual to your list of manuals |
HP Pavilion All-in-One MS210 manual content summary:
- HP Pavilion All-in-One MS210 | Maintenance and Service Guide: HP Pro All-in-One - Page 1
Maintenance and Service Guide HP Pro All-in-One ms218/219 - HP Pavilion All-in-One MS210 | Maintenance and Service Guide: HP Pro All-in-One - Page 2
HP products and services are set forth in the express warranty statements accompanying such products and services. Nothing herein should be construed as constituting an additional warranty. HP Company. Maintenance and Service Guide First Edition (December 2009) Document Part Number: 602765-001 - HP Pavilion All-in-One MS210 | Maintenance and Service Guide: HP Pro All-in-One - Page 3
About This Book WARNING! Text set off in this manner indicates that failure to follow directions could result in bodily harm or loss of life. CAUTION: Text set off in this manner indicates that failure to follow directions could result in damage to equipment or loss of information. NOTE: Text set - HP Pavilion All-in-One MS210 | Maintenance and Service Guide: HP Pro All-in-One - Page 4
iv About This Book - HP Pavilion All-in-One MS210 | Maintenance and Service Guide: HP Pro All-in-One - Page 5
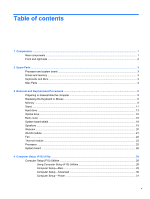
and system board ...3 Drives and memory ...3 Keyboards and Mice ...3 Misc Parts ...4 3 Removal and Replacement Procedures ...5 Preparing to disassemble the computer 5 Replacing the Keyboard or Mouse ...6 Memory ...8 Stand ...11 Hard drive ...13 Optical drive ...16 Back cover ...18 System board - HP Pavilion All-in-One MS210 | Maintenance and Service Guide: HP Pro All-in-One - Page 6
System Restore ...33 Software Program and Hardware Driver Reinstallation 34 Creating data backup discs ...35 Clearing CMOS and password settings 35 Troubleshooting ...38 Computer does not start ...38 Power ...38 Display ...39 Keyboard and mouse (with cable 39 Wireless keyboard and mouse 41 Audio - HP Pavilion All-in-One MS210 | Maintenance and Service Guide: HP Pro All-in-One - Page 7
and Memory Stick Pro (MS Pro) memory cards. Additional media cards can be supported by using an adapter sleeve (purchased separately): Mini SD, RS-MMC, Micro NOTE: When a device is connected to the headphone jack, the computer speakers are disabled. Ethernet (Local Area Network [LAN]) port - HP Pavilion All-in-One MS210 | Maintenance and Service Guide: HP Pro All-in-One - Page 8
screen display. Press this button to dim the screen display. Indicates hard disk drive activity. Indicator light is blue when computer is on; the light is off when computer is in sleep or hibernate mode. Use the built-in stereo speakers for a powerful media experience when listening to music - HP Pavilion All-in-One MS210 | Maintenance and Service Guide: HP Pro All-in-One - Page 9
2 Spare Parts See the following available spare parts for the HP Pro All-in-One. Processor and system board Description AMD Athlon M2 3250e processor (1.5-GHz, 1-MB L2 cache) System board Spare Part Number 597923-001 597920-001 Drives and - HP Pavilion All-in-One MS210 | Maintenance and Service Guide: HP Pro All-in-One - Page 10
Misc Parts Description 802.11b/g WLAN PCIe adapter LCD cable Thermal module, UMA Thermal module, MXM Fan Webcam module Speaker, right Speaker, left Power adapter, 120W Spare Part Number 597929-001 597921-001 597924-001 597925-001 597926-001 597928-001 597930-001 597931-001 597922-001 4 Chapter 2 - HP Pavilion All-in-One MS210 | Maintenance and Service Guide: HP Pro All-in-One - Page 11
To avoid injury and equipment damage, always complete the following steps in order, when opening the HP Pro All-in-One. 1. Remove all media (CD, DVD, etc.) from the computer. 2. Shut down the computer. 3. After the system has completely shut down, disconnect the power adapter from the back of the - HP Pavilion All-in-One MS210 | Maintenance and Service Guide: HP Pro All-in-One - Page 12
. 2. If you are replacing the wireless mouse, remove the old receiver and plug the new receiver into the back of the computer. Skip this step if you are replacing the keyboard only. 3. Remove the tab from the battery compartment on the bottom of the mouse and/or - HP Pavilion All-in-One MS210 | Maintenance and Service Guide: HP Pro All-in-One - Page 13
off when synchronization is complete. NOTE: If the synchronization does not work, remove and then re-insert the wireless receiver from the back of the computer and synchronize the keyboard and/or mouse again. Replacing the Keyboard or Mouse 7 - HP Pavilion All-in-One MS210 | Maintenance and Service Guide: HP Pro All-in-One - Page 14
Memory 1. Prepare the computer for disassembly (see Preparing to disassemble the computer on page 5). 2. Locate the memory compartment in the upper right corner of the computer. 3. Lift up the rubber cover over the screw. 8 Chapter 3 Removal and Replacement Procedures - HP Pavilion All-in-One MS210 | Maintenance and Service Guide: HP Pro All-in-One - Page 15
4. Remove the Phillips screw that secures the cover to the computer. 5. Slide the memory compartment cover off. Memory 9 - HP Pavilion All-in-One MS210 | Maintenance and Service Guide: HP Pro All-in-One - Page 16
of the memory module socket (1), and remove the memory module from the socket (2). NOTE: If you are removing both cards, you must remove the upper one before removing the lower one. To install a memory module, reverse the removal procedures. 10 Chapter 3 Removal and Replacement Procedures - HP Pavilion All-in-One MS210 | Maintenance and Service Guide: HP Pro All-in-One - Page 17
Stand 1. Prepare the computer for disassembly (see Preparing to disassemble the computer on page 5). 2. Use a flathead screwdriver to open the cover on the back of the computer behind the stand. 3. Use a Phillips screwdriver to remove the three screws that secure the stand to the computer. Stand 11 - HP Pavilion All-in-One MS210 | Maintenance and Service Guide: HP Pro All-in-One - Page 18
4. Slide the stand assembly down and out to remove it. To install the stand, reverse the removal procedures. 12 Chapter 3 Removal and Replacement Procedures - HP Pavilion All-in-One MS210 | Maintenance and Service Guide: HP Pro All-in-One - Page 19
Hard drive 1. Prepare the computer for disassembly (see Preparing to disassemble the computer on page 5). 2. Lift up the rubber screw cover. 3. Use a Phillips screwdriver to remove the hard disk drive cover screw. Hard drive 13 - HP Pavilion All-in-One MS210 | Maintenance and Service Guide: HP Pro All-in-One - Page 20
4. Slide the hard disk drive cover off. 5. Loosen the screw at the front of the hard disk drive cage. 14 Chapter 3 Removal and Replacement Procedures - HP Pavilion All-in-One MS210 | Maintenance and Service Guide: HP Pro All-in-One - Page 21
6. Lift up the metal handle on the hard disk drive cage and pull it firmly toward you to remove the hard disk drive cage from its bay. To remove the hard drive from the hard drive cage: 1. Remove the four screws that secure the hard drive into the hard drive cage. 2. Remove the drive from the cage. - HP Pavilion All-in-One MS210 | Maintenance and Service Guide: HP Pro All-in-One - Page 22
Optical drive 1. Prepare the computer for disassembly (see Preparing to disassemble the computer on page 5). 2. Lift up the screw cover and move it out of the way. 3. Use a Phillips screwdriver to remove the optical drive screw. 16 Chapter 3 Removal and Replacement Procedures - HP Pavilion All-in-One MS210 | Maintenance and Service Guide: HP Pro All-in-One - Page 23
4. Insert a small flathead screwdriver gently into the notch and use a levering motion to disengage the optical drive assembly. 5. Pull the optical drive assembly out of the computer. To install an optical drive, reverse the removal procedures. Optical drive 17 - HP Pavilion All-in-One MS210 | Maintenance and Service Guide: HP Pro All-in-One - Page 24
front bezel, as follows: a. Using your fingers at the outside seam between the back cover and front bezel, pry the back cover away from the computer at the area near the stand mounting bracket. b. Move around the bottom to the left side of the - HP Pavilion All-in-One MS210 | Maintenance and Service Guide: HP Pro All-in-One - Page 25
the back cover (see Back cover on page 18). 6. Remove the system board shield by removing the four screws and lifting it off the computer. NOTE: The bottom right screw also secures a speaker grounding cable. To install the system board shield, reverse the removal procedures. Speakers 1. Prepare the - HP Pavilion All-in-One MS210 | Maintenance and Service Guide: HP Pro All-in-One - Page 26
the cables that connect the two speakers together (2), and remove the speaker cable from the tape (3) the secures it to the computer. 9. Each speaker has two screws that secure the speaker to the computer. To remove either speaker, remove the two screws (4), and then lift the speaker from the - HP Pavilion All-in-One MS210 | Maintenance and Service Guide: HP Pro All-in-One - Page 27
8. Remove the two screws that secure the webcam to the computer, and lift it off the computer. To install the webcam, reverse the removal procedures. WLAN module 1. Prepare the computer for disassembly (see Preparing to disassemble the computer on page 5). 2. Remove the stand (see Stand on page 11 - HP Pavilion All-in-One MS210 | Maintenance and Service Guide: HP Pro All-in-One - Page 28
module has a notch to prevent incorrect installation. To install the WLAN module, reverse the removal procedures. Fan 1. Prepare the computer for disassembly (see Preparing to disassemble the computer on page 5). 2. Remove the stand (see Stand on page 11). 3. Remove the hard drive (see Hard drive on - HP Pavilion All-in-One MS210 | Maintenance and Service Guide: HP Pro All-in-One - Page 29
fan cable from the system board (2), and then remove the fan from the computer. To install the fan, reverse the removal procedures. Thermal module 1. Prepare the computer for disassembly (see Preparing to disassemble the computer on page 5). 2. Remove the stand (see Stand on page 11). 3. Remove the - HP Pavilion All-in-One MS210 | Maintenance and Service Guide: HP Pro All-in-One - Page 30
9. Lift the thermal module off the system board. To install the system board, reverse the removal procedures. Note the following thermal module features: ● (1) Radiator that fits into the fan assembly ● (2) Heat sink for the chipset ● (3) Heat sink for the processor ● (4) Heat sink for the graphics - HP Pavilion All-in-One MS210 | Maintenance and Service Guide: HP Pro All-in-One - Page 31
Make sure the heat sinks have new thermal material when installing a thermal module. Processor 1. Prepare the computer for disassembly (see Preparing to disassemble the computer on page 5). 2. Remove the stand (see Stand on page 11). 3. Remove the hard drive (see Hard drive on page 13). 4. Remove - HP Pavilion All-in-One MS210 | Maintenance and Service Guide: HP Pro All-in-One - Page 32
covering from the bottom of the heat sink and place it in position atop the processor. System board 1. Prepare the computer for disassembly (see Preparing to disassemble the computer on page 5). 2. Remove the stand (see Stand on page 11). 3. Remove the hard drive (see Hard drive on page 13 - HP Pavilion All-in-One MS210 | Maintenance and Service Guide: HP Pro All-in-One - Page 33
thermal module (see Thermal module on page 23). 10. Disconnect all remaining connectors. 11. Remove the eight screws that secure the system board to the computer. 12. Lift the system board out of the computer. To install the system board, reverse the removal procedures. System board 27 - HP Pavilion All-in-One MS210 | Maintenance and Service Guide: HP Pro All-in-One - Page 34
if necessary. NOTE: If you do not press F10 at the appropriate time, you must restart the computer and again press F10 before the unit boots to the operating system to access the utility. 3. The Computer Setup Utility screen is divided into menu headings and actions. Five menu headings appear on the - HP Pavilion All-in-One MS210 | Maintenance and Service Guide: HP Pro All-in-One - Page 35
Menu Heading Table Main Computer Setup-Main on page 29 Advanced Computer Setup-Advanced on page 30 Boot Computer Setup-Boot on page 31 Power Computer Setup-Power on page 31 Exit Computer Setup-Exit on page 32 Computer Setup-Main NOTE: Support for specific Computer Setup options may - HP Pavilion All-in-One MS210 | Maintenance and Service Guide: HP Pro All-in-One - Page 36
) ● Installed Memory ● Memory Bank 1 ● Memory Bank 2 ● BIOS Revision ● Core Version ● Model Number ● Product Number ● Build ID Computer Setup-Advanced NOTE: Support for specific Computer Setup options may vary depending on the hardware configuration. WARNING! Setting items on this menu to - HP Pavilion All-in-One MS210 | Maintenance and Service Guide: HP Pro All-in-One - Page 37
power loss: ● Stay Off ● Power On ● Auto Disables/enables the processor's XD feature. Virtualization Technology Allows you to disable/enable Virtualization Technology. Computer Setup-Boot NOTE: Support for specific Computer Setup options may vary depending on the hardware configuration. Table - HP Pavilion All-in-One MS210 | Maintenance and Service Guide: HP Pro All-in-One - Page 38
. Computer Setup-Exit NOTE: Support for specific Computer Setup options may vary depending on the hardware configuration. Table 4-6 Computer Setup which are available from the HP website. These updates often contain fixes for known issues in the BIOS. To find out whether a PC needs a BIOS update, - HP Pavilion All-in-One MS210 | Maintenance and Service Guide: HP Pro All-in-One - Page 39
the driver if the new one does not solve your problem: 1. Click the Start instructions. Microsoft System Restore Microsoft Windows 7 includes a feature that enables you to restore your computer configuration to a configuration that was in use before the current software problem existed. The feature - HP Pavilion All-in-One MS210 | Maintenance and Service Guide: HP Pro All-in-One - Page 40
screen instructions. To manually add restore points: 1. Close all open programs. 2. Click the Start button, right-click Computer, the on-screen instructions. For more information about software restore points: 1. Click the Start button, and then click Help and Support. 2. Type Software Troubleshooting - HP Pavilion All-in-One MS210 | Maintenance and Service Guide: HP Pro All-in-One - Page 41
instructions. 5. When you have finished reinstalling, restart the computer. NOTE: Do not skip this last step. You must restart the computer Depending on your disc recording software, you may need to manually enable this feature (refer to the software documentation). If you encounter recording issues - HP Pavilion All-in-One MS210 | Maintenance and Service Guide: HP Pro All-in-One - Page 42
cords of the computer and any external devices from the power outlet. 3. Disconnect any external devices that are connected to the computer. 4. Remove all components required to gain access to the system board. 5. Locate the solder points on the system board. 36 Chapter 5 Software Troubleshooting - HP Pavilion All-in-One MS210 | Maintenance and Service Guide: HP Pro All-in-One - Page 43
the two solder pads labeled CLEAR CMOS. -orTo clear CMOS, make a short on the two solder pads labeled PASSWORD. 7. Reassemble the computer. 8. Reconnect the external equipment. 9. Plug in the computer and turn on the power. Allow the operating system to start. Clearing CMOS and password settings 37 - HP Pavilion All-in-One MS210 | Maintenance and Service Guide: HP Pro All-in-One - Page 44
to it. Incompatible memory (RAM) may have been installed. Reinstall the old memory to return your computer to its original state. For instructions, refer to the Upgrading and Servicing Guide. Computer seems to be locked up Use the Windows Task Manager to close any programs not responding, or - HP Pavilion All-in-One MS210 | Maintenance and Service Guide: HP Pro All-in-One - Page 45
the keyboard to resume from Sleep or Hibernate mode. Press the On button to turn on the computer. Images on the screen are too large or too small, or the images are fuzzy. Adjust the reconnect the mouse connector to the back of your computer, and then turn on your computer. Troubleshooting 39 - HP Pavilion All-in-One MS210 | Maintenance and Service Guide: HP Pro All-in-One - Page 46
reflective surface under the mouse. For detailed cleaning instructions, go to: http://www.hp.com/support Select your country/region and language, search on your computer model number, and then search on the keyword cleaning arrow keys on the number key pad. 40 Chapter 5 Software Troubleshooting - HP Pavilion All-in-One MS210 | Maintenance and Service Guide: HP Pro All-in-One - Page 47
not work or is not detected. A Check for these problems: ● Ensure you are using the wireless keyboard or wireless mouse other devices. 1. Unplug and reconnect the receiver into a USB connector on the computer. The receiver may have an LED light 2. Check that the mouse is on, . Troubleshooting 41 - HP Pavilion All-in-One MS210 | Maintenance and Service Guide: HP Pro All-in-One - Page 48
solution No sound is produced. Press the Mute button on the keyboard to see whether the Mute feature is enabled. Or 1. Right-click the Volume icon on the taskbar, and then click Open the Esc key. Unplug headphones if they are connected to your computer. 42 Chapter 5 Software Troubleshooting - HP Pavilion All-in-One MS210 | Maintenance and Service Guide: HP Pro All-in-One - Page 49
Follow the on-screen instructions. Use Device Manager to verify that the integrated WLAN device is installed on the computer correctly: 1. Click open the tray. If you suspect a problem with the Eject button itself: 1. Click the Start button, and then click Computer. 2. Right-click the CD or DVD - HP Pavilion All-in-One MS210 | Maintenance and Service Guide: HP Pro All-in-One - Page 50
track if it exceeds the available space on your disc. You can make space available by removing one or more tracks from the list before recording the files to the disc. Close all software programs Close all programs and windows, and then restart your computer. 44 Chapter 5 Software Troubleshooting - HP Pavilion All-in-One MS210 | Maintenance and Service Guide: HP Pro All-in-One - Page 51
peripheral devices, visit the HP Web site: http://www.hp.com/support Ensure that all cables are properly and securely connected and that the pins in the cable or connector are not bent. Turn off the computer, turn on the external device, and then turn on the computer to integrate the device with - HP Pavilion All-in-One MS210 | Maintenance and Service Guide: HP Pro All-in-One - Page 52
a device conflict, you may need to disable one of the devices or uninstall an old device Click the plus sign (+) next to the problem device and check for an exclamation point in Troubleshoot button, and follow the on-screen instructions in the device troubleshooter wizard. 7. Restart the computer - HP Pavilion All-in-One MS210 | Maintenance and Service Guide: HP Pro All-in-One - Page 53
stored data does not exceed the storage limit of the memory card. Ensure the memory card is one of the supported types: Memory Stick (MS), Memory Stick Pro (MS Pro), MultiMediaCard (MMC), Secure Digital ( a small amount of isopropyl alcohol. Replace the memory card if necessary. Troubleshooting 47 - HP Pavilion All-in-One MS210 | Maintenance and Service Guide: HP Pro All-in-One - Page 54
stored on your hard disk drive. This image contains the operating system and software program files that were originally installed on your computer at the factory. You can create only one set of recovery discs for your computer. Furthermore, the recovery discs you create can be used only with your - HP Pavilion All-in-One MS210 | Maintenance and Service Guide: HP Pro All-in-One - Page 55
, tap Yes to allow the program to continue. 3. Follow the on-screen instructions. Label each disc as you make it (for example, Recovery 1, Recovery 2). from HP Support. To purchase recovery discs, go to http://www.hp.com/support and visit the Software & Driver downloads page for your computer model. - HP Pavilion All-in-One MS210 | Maintenance and Service Guide: HP Pro All-in-One - Page 56
begins. After system recovery is complete, tap Finish to restart the computer. 9. Complete the registration process, and wait until you see the desktop. 10. Turn off the computer, reconnect all peripheral devices, and turn the computer back on. System recovery at system startup If Windows 7 is not - HP Pavilion All-in-One MS210 | Maintenance and Service Guide: HP Pro All-in-One - Page 57
next to Shut Down, and then click Shut Down. - or - If the computer is not responding, press and hold the On button for approximately 5 seconds, or until the computer turns off. 4. Disconnect all peripheral devices from the computer, except the monitor, keyboard, and mouse. 5. Press the On button to - HP Pavilion All-in-One MS210 | Maintenance and Service Guide: HP Pro All-in-One - Page 58
drive 13 memory 8 optical disc 16 preparing to disassemble the computer 5 speakers 19 stand 11 system board 26 system board shield 19 20 WLAN module 21 repairing software problems 33 restoring the system 33 right-side components 2 S software problems 33 software reinstallation 34 speaker - HP Pavilion All-in-One MS210 | Maintenance and Service Guide: HP Pro All-in-One - Page 59
system board removing 26 spare part number 3 system board shield, removing 19 system recovery options 49 T thermal module removing 23 spare part number 4 U updating drivers 33 USB 2.0 1 W webcam 2 webcam module removing 20 spare part number 4 WLAN module removing 21 spare part number 4 Index 53
-
 1
1 -
 2
2 -
 3
3 -
 4
4 -
 5
5 -
 6
6 -
 7
7 -
8
-
9
-
10
-
11
-
12
-
13
-
14
-
15
-
16
-
17
-
18
-
19
-
20
-
21
-
22
-
23
-
24
-
25
-
26
-
27
-
28
-
29
-
30
-
31
-
32
-
33
-
34
-
35
-
36
-
37
-
38
-
39
-
40
-
41
-
42
-
43
-
44
-
45
-
46
-
47
-
48
-
49
-
50
-
51
-
52
-
53
-
54
-
55
-
56
-
57
-
58
-
59
 |
 |

Maintenance and Service Guide
HP Pro All-in-One ms218/219