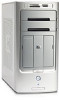
HP Pavilion Media Center m7600 Upgrading and Servicing Guide
HP Pavilion Media Center m7600 - Desktop PC Manual
 |
View all HP Pavilion Media Center m7600 manuals
Add to My Manuals
Save this manual to your list of manuals |
HP Pavilion Media Center m7600 manual content summary:
- HP Pavilion Media Center m7600 | Upgrading and Servicing Guide - Page 1
Upgrading and Servicing Guide - HP Pavilion Media Center m7600 | Upgrading and Servicing Guide - Page 2
services. Nothing herein should be construed as constituting an additional warranty. HP shall not be liable for technical or editorial errors or omissions contained herein. HP Windows are U.S. registered trademarks of Microsoft Corporation. HP supports lawful use of technology and does not endorse or - HP Pavilion Media Center m7600 | Upgrading and Servicing Guide - Page 3
a Hard Disk Drive 8 Adding an Additional Hard Disk Drive 9 Adding Memory 11 Removing a Memory Module 11 Installing a Memory Module 12 Removing or Installing an Add-in Card 12 Removing an Add-in Card 13 Installing an Add-in Card 13 Replacing the Battery 14 Upgrading and Servicing Guide iii - HP Pavilion Media Center m7600 | Upgrading and Servicing Guide - Page 4
iv Upgrading and Servicing Guide - HP Pavilion Media Center m7600 | Upgrading and Servicing Guide - Page 5
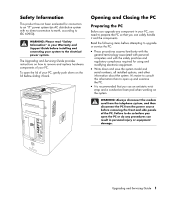
Safety Information" in your Warranty and Support Guide before installing and connecting your system to the electrical power system. The Upgrading and Servicing Guide provides instructions on how to remove and replace hardware components of your PC. To open the lid of your PC, gently push down on the - HP Pavilion Media Center m7600 | Upgrading and Servicing Guide - Page 6
PC: 1 Remove any diskette or optical disc (CD or DVD) from the PC then from the PC. 5 Disconnect PC and all peripherals such as the monitor. 5 If you installed an add-in card, install any software drivers 1 See "Before Opening the PC" on page 2. 2 Loosen it off the PC, and set it aside. NOTE - HP Pavilion Media Center m7600 | Upgrading and Servicing Guide - Page 7
See "After Closing the PC" on page 2. Removing the Front Panel This procedure is necessary only when removing or replacing an optical drive, a memory card reader, or a of the front panel with the correct holes on the chassis. 2 Guide the three small tabs on the left side of the front panel into the - HP Pavilion Media Center m7600 | Upgrading and Servicing Guide - Page 8
front of the PC. NOTE: You do not need to remove the screws on the side of the optical drive to remove it from the PC. 4 Make a note of each cable and plug orientation attached to the back of the optical drive you want to replace before removing the cables. 4 Upgrading and Servicing Guide - HP Pavilion Media Center m7600 | Upgrading and Servicing Guide - Page 9
out of the PC. 4 Screw all four guide screws into the sides of your optical drive. Refer to the instructions that came with PC, be sure to purchase the replacement memory card reader from HP. Refer to the Warranty and Support Guide for contact information. 1 Complete the procedures to prepare the PC - HP Pavilion Media Center m7600 | Upgrading and Servicing Guide - Page 10
side panel as described in "Opening and Closing the PC" on page 1. 2 Remove the front panel. See "Removing the Front Panel" on page 3. 3 Make a note of each cable attached to the hard disk drive and back of the HP Personal Media Drive bay before removing the cables. 6 Upgrading and Servicing Guide - HP Pavilion Media Center m7600 | Upgrading and Servicing Guide - Page 11
Gently pull back and hold the drive bay release tab while pulling out the drive bay from the front of the PC. 5 Disconnect the power cable and data cable from the back of the hard disk drive (B). For a Serial top. Disconnecting the Serial ATA hard disk drive cables Upgrading and Servicing Guide 7 - HP Pavilion Media Center m7600 | Upgrading and Servicing Guide - Page 12
disk drive with the holes on the HP Personal Media Drive bay bracket. Insert and tighten the four screws. 3 Slide the drive bay into the PC until it snaps into place. 4 Attach the screws to the front of the drive bay. 8 Upgrading and Servicing Guide 6 The Personal Media Drive bay connector has - HP Pavilion Media Center m7600 | Upgrading and Servicing Guide - Page 13
typical installation, a secondary Serial ATA hard disk drive connects to a Serial ATA connector on the PC motherboard. Or • Parallel ATA (Advanced Technology Attachment) drive that uses a wide data cable. 3 select (CS) position before attaching the drive to the PC. Upgrading and Servicing Guide 9 - HP Pavilion Media Center m7600 | Upgrading and Servicing Guide - Page 14
. The cable connectors must face the back of the PC. Insert and tighten the four screws. 5 Attach the data and power supply cables to the back of the hard disk drive. Serial ATA hard disk drive 10 Upgrading and Servicing Guide Parallel ATA hard disk drive WARNING: For Serial ATA hard disk drives - HP Pavilion Media Center m7600 | Upgrading and Servicing Guide - Page 15
PC on its side. 5 Locate the memory sockets on the motherboard. Serial ATA motherboard memory module your PC uses, and for specific memory module information and specifications, go to the Web site listed in your Warranty and Support Guide and click the Support link. CAUTION: When handling a memory - HP Pavilion Media Center m7600 | Upgrading and Servicing Guide - Page 16
Memory Module Upgrade the memory in your PC with memory of the same type and speed as the memory originally installed in your PC. CAUTION: When handling a memory module, be careful not to touch any of the contacts. Doing so may damage the module. 1 Open both latches of the memory in the PC. The total - HP Pavilion Media Center m7600 | Upgrading and Servicing Guide - Page 17
close the PC. See "Opening and Closing the PC" on page 1. NOTE: If the new card or device isn't working, read through the card manufacturer's installation instructions, and recheck all connections, including those to the card, power supply, keyboard, and monitor. Upgrading and Servicing Guide 13 - HP Pavilion Media Center m7600 | Upgrading and Servicing Guide - Page 18
CR2032 battery in the socket, with the positive (+) side facing the latch. 7 Replace memory modules or cables you removed. 8 Set the chassis upright. 9 Complete the procedures to replace the side panel, and to close the PC. See "Opening and Closing the PC" on page 1. 14 Upgrading and Servicing Guide - HP Pavilion Media Center m7600 | Upgrading and Servicing Guide - Page 19
Upgrading and Servicing Guide 15 - HP Pavilion Media Center m7600 | Upgrading and Servicing Guide - Page 20
-
 1
1 -
 2
2 -
 3
3 -
 4
4 -
 5
5 -
 6
6 -
 7
7 -
8
-
9
-
10
-
11
-
12
-
13
-
14
-
15
-
16
-
17
-
18
-
19
-
20
 |
 |

Upgrading and Servicing Guide