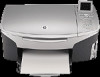
HP Photosmart 2600 Network Guide
HP Photosmart 2600 - All-in-One Printer Manual
 |
View all HP Photosmart 2600 manuals
Add to My Manuals
Save this manual to your list of manuals |
HP Photosmart 2600 manual content summary:
- HP Photosmart 2600 | Network Guide - Page 1
Network Guide - HP Photosmart 2600 | Network Guide - Page 2
HP all-in-one Network Guide - HP Photosmart 2600 | Network Guide - Page 3
. Portions Copyright © 1989-2003 Palomar Software Inc. The HP Officejet 5500 Series includes printer driver technology licensed from Palomar Software, Inc. www.palomar.com Copyright © 1999-2003 Apple Computer, Inc. Apple, the Apple logo, Mac, Mac logo, Macintosh, and Mac OS are trademarks of Apple - HP Photosmart 2600 | Network Guide - Page 4
additional computers 4 Get HP support...4 2 Choose a HP all-in-one 10 4 Install the software 11 For Windows...11 For Macintosh...12 5 Manage your network 13 Use the HP all-in-one control panel 13 Use the Embedded Web Server 15 6 Network troubleshooting 17 Wired network setup troubleshooting - HP Photosmart 2600 | Network Guide - Page 5
2 - HP Photosmart 2600 | Network Guide - Page 6
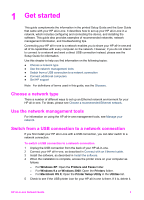
and connecting the device, and installing the software. This guide also provides examples of recommended networks, network management information, and troubleshooting tips. Connecting your HP all-in-one to a network enables you to share your HP all-in-one and all of its capabilities with every - HP Photosmart 2600 | Network Guide - Page 7
in-one software, as described in Install the software. During installation, the software will discover the SSID (network name) of the existing network. Once you have set up your HP all-in-one on the network you will not need to configure it again when you add additional computers. Get HP support For - HP Photosmart 2600 | Network Guide - Page 8
-in-one to the router with an Ethernet cable. With this configuration, you are able to access the full functionality of the HP all-in-one, including sharing pictures over the Internet . For connection instructions, see Connect with an Ethernet cable. Computer gateway HP all-in-one Network Guide 5 - HP Photosmart 2600 | Network Guide - Page 9
gateway computer uses Windows Internet Connection Sharing (ICS) or similar software to manage the network HP all-in-one will not support Internet-related functions. If you use this configuration, connect your HP all-in-one to the switch or router with an Ethernet cable. For connection instructions - HP Photosmart 2600 | Network Guide - Page 10
instructions, see Connect with an Ethernet cable. Note In order to use the HP Instant Share features on your HP all-in-one, you will need broadband Internet access, such as cable or DSL. For more information about HP Instant Share, see the printed User Guide that came with your HP all-in-one - HP Photosmart 2600 | Network Guide - Page 11
Chapter 2 8 - HP Photosmart 2600 | Network Guide - Page 12
you will need. When you are finished connecting your HP all-in-one, you will need to install the software as described in Install the software. What you need ● A functional Ethernet network that with either a wired or wireless connection to the router or access point. HP all-in-one Network Guide 9 - HP Photosmart 2600 | Network Guide - Page 13
Share directly from the device). For more information on HP Instant Share, see the printed User Guide that came with your HP all-in-one. Connect your HP all-in-one 1 Remove the yellow plug from the back of the HP all-in-one. 2 Connect the Ethernet cable to the Ethernet port on the back of your - HP Photosmart 2600 | Network Guide - Page 14
the software. Otherwise, HP all-in-one installation software might take one of the reserved drive letters, and you will not be able to access that network drive on your computer. See the instructions below for your Windows or Macintosh computer. For Windows The following instructions are for Windows - HP Photosmart 2600 | Network Guide - Page 15
installing the software, your HP all-in-one is ready for service. 8 To test your network connection, go to your computer and print a test page to your HP all-in-one. For more information, see the printed User Guide that came with yourHP all-in-one. For Macintosh The following instructions are for - HP Photosmart 2600 | Network Guide - Page 16
Use the HP all-in-one control panel The HP all-in-one control panel 1 On the control panel of the HP all-in-one, press the Setup button. 2 Press configuration page 1 On the control panel of the HP all-in-one, press the Setup button. 2 Press 8, and can reset the HP all-in-one network to factory - HP Photosmart 2600 | Network Guide - Page 17
IP setting is Automatic. However, if necessary, you can manually change the IP address, subnet mask, or the default gateway. To see the IP address and subnet mask of your HP all-in-one, print a network configuration page from your HP all-in-one (see Print and view a network configuration page). For - HP Photosmart 2600 | Network Guide - Page 18
When you open the your web browser, you can monitor status, configure HP all-in-one networking parameters, or access HP all-in-one features. For more information about these and other features available in the EWS to use the new settings to reconnect. If the print HP all-in-one Network Guide 15 - HP Photosmart 2600 | Network Guide - Page 19
Chapter 5 server loses its network connection, you might need to reset it to factory-default and reinstall the software. Note Do not disable TCP/IP (Transmission Control Protocol/Internet Protocol) on your computer. It is required for communication with the Embedded Web Server. 16 - HP Photosmart 2600 | Network Guide - Page 20
Specific information is provided for installation and configuration issues. Wired network setup troubleshooting Use this section to solve wired network setup problems. The Computer is unable to discover the HP all-in-one Cause Cables are not connected properly. Solution Check the following cables to - HP Photosmart 2600 | Network Guide - Page 21
Error: No TCP/IP Cause Your Local Area Network (LAN) card (NIC) is not installed properly. Solution Make sure your LAN card is installed properly and set up for TCP/IP. See the instructions that came with your LAN card. The Printer Not Found screen appears during installation Cause The HP all-in-one - HP Photosmart 2600 | Network Guide - Page 22
and to the HP all-in-one. Solution To obtain an IP address for the PC with the cable modem ➔ Your Internet Service Provider (ISP) HP all-in-one ➔ Use AutoIP to assign IP addresses to the remaining computers and the HP all-in-one. Do not assign a static IP address. HP all-in-one Network Guide - HP Photosmart 2600 | Network Guide - Page 23
Chapter 6 20 - HP Photosmart 2600 | Network Guide - Page 24
. Note If you call in for support, depending on the problem, you might be asked to provide the firmware revision code. The TCP/IP name assigned by the install software to the device. By default, this is the letters HP followed by the last 6 digits of the MAC address. This address uniquely identifies - HP Photosmart 2600 | Network Guide - Page 25
is an IP address assigned by the install software to make an additional network available as part Manual: the configuration parameters are set manually, such as a static IP address. ● Not Specified: the mode used when the HP all-in-one is initializing. The IP address of the domain name service - HP Photosmart 2600 | Network Guide - Page 26
applicable: this parameter does not apply to this network type. Service Set Identifier. A unique identifier (up to 32 characters) that differentiates one wireless local area network (WLAN) from another. The SSID is in use, and might differ from the requested channel HP all-in-one Network Guide 23 - HP Photosmart 2600 | Network Guide - Page 27
computer and the HP all-in-one, make sure that you are using the same communication channel on your computer and the HP all-in-one. In infrastructure mode WPA-PSK) authentication provides significantly stronger security, and is supported in most wireless access points and wireless routers. The - HP Photosmart 2600 | Network Guide - Page 28
point on the network to which the Address HP all-in-one is connected: ● : the unique MAC (media access control) hardware address of the HP all-in-one without error since it has been turned on. The counter clears after the HP all-in-one is turned off. HP all-in-one Network Guide 25 - HP Photosmart 2600 | Network Guide - Page 29
Appendix a 26 - HP Photosmart 2600 | Network Guide - Page 30
feature of the installation software, which determines the hp.com contains the domain name hp.com. The DNS on the Internet translates the domain name into an IP address. Devices use the IP addresses to refer to one another. See DNS. The SD portion stands for Service HP all-in-one Network Guide 27 - HP Photosmart 2600 | Network Guide - Page 31
MAC) address that uniquely identifies the HP allin-one. This is a unique 12-digit identification number assigned to networking hardware for identification. No two pieces of hardware have the same MAC . Service Set Identifier. A unique identifier (up to 32 characters) that differentiates one wireless - HP Photosmart 2600 | Network Guide - Page 32
22 printer found screen, Windows 11 R recommended networks 5 restore network defaults 13 RJ-45 plug 9, 27 28 router 5 10 S set link speed 14 settings, restoring defaults 13 sharing 4 signal strength (wireless network settings) 23 software installation Macintosh 12 Windows 11 HP all-in-one Network - HP Photosmart 2600 | Network Guide - Page 33
transmitted 25 troubleshooting network 17 No TCP/IP (wired) 18 Printer not Found (wired) 18 unable to discover device (wired) 17 using a cable modem without a router (wired) 19 wired network setup 17 U upgrade from USB to network 3 URL (general network settings) 21 W Windows software installation 11 - HP Photosmart 2600 | Network Guide - Page 34
Printed on at least 50% total recycled fiber with at least 10% post-consumer paper © 2004 Hewlett-Packard Development Company, L.P. Electronic Edition www.hp.com *Q3450-90273* *Q3450-90273* Q3450-90273
-
 1
1 -
 2
2 -
 3
3 -
 4
4 -
 5
5 -
 6
6 -
 7
7 -
8
-
9
-
10
-
11
-
12
-
13
-
14
-
15
-
16
-
17
-
18
-
19
-
20
-
21
-
22
-
23
-
24
-
25
-
26
-
27
-
28
-
29
-
30
-
31
-
32
-
33
-
34
 |
 |

Network Guide