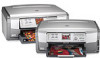
HP Photosmart 3200 User Guide
HP Photosmart 3200 - All-in-One Printer Manual
 |
View all HP Photosmart 3200 manuals
Add to My Manuals
Save this manual to your list of manuals |
HP Photosmart 3200 manual content summary:
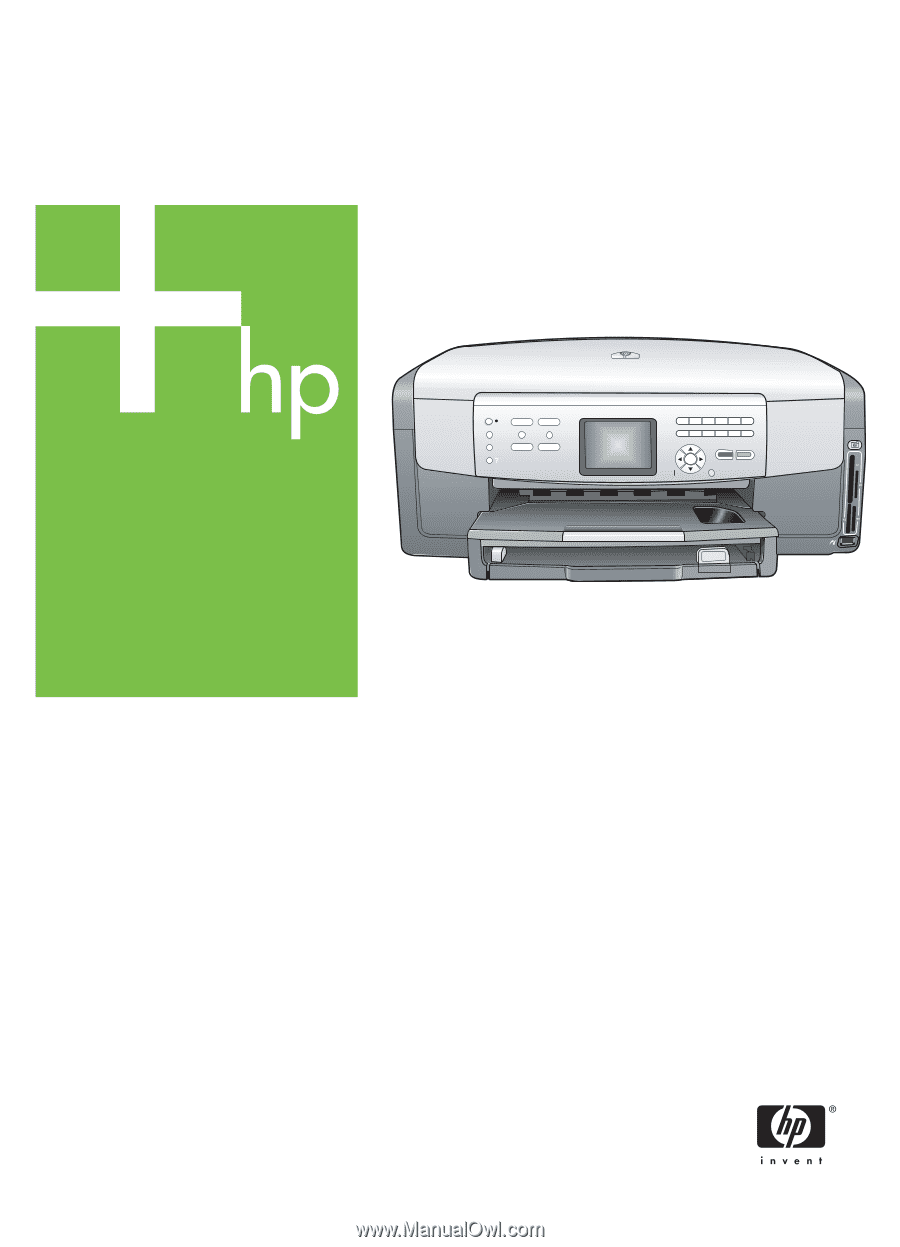
- HP Photosmart 3200 | User Guide - Page 1
HP Photosmart 3200 All-in-One series User Guide - HP Photosmart 3200 | User Guide - Page 2
HP Photosmart 3200 All-in-One series User Guide - HP Photosmart 3200 | User Guide - Page 3
the express warranty statements accompanying such products and services. Nothing herein should be construed as constituting an additional warranty. HP shall not be liable for technical or editorial errors or omissions contained herein. The Hewlett-Packard Company shall not be liable for incidental - HP Photosmart 3200 | User Guide - Page 4
software for a network connection 35 Connect to additional computers on a network 37 Change the HP All-in-One from a USB connection to a network connection .......37 Manage your network settings 37 Network troubleshooting print options 72 Save HP All-in-One from a remote location 77 Configure HP - HP Photosmart 3200 | User Guide - Page 5
-One 93 Check the estimated ink levels 94 Print a self-test report 95 Work with ink cartridges 96 Self-maintenance sounds 100 13 Troubleshooting information 101 View the Readme file 102 Setup troubleshooting 102 Operational troubleshooting 111 Device update ...113 14 HP warranty and support - HP Photosmart 3200 | User Guide - Page 6
Contents Regulatory notices 131 Declaration of conformity (European Economic Area 133 HP Photosmart 3200 All-in-One series declaration of conformity 134 Index...135 User Guide 3 - HP Photosmart 3200 | User Guide - Page 7
4 HP Photosmart 3200 All-in-One series - HP Photosmart 3200 | User Guide - Page 8
software includes copy, scan, and photo functionality, as well as troubleshooting tips and helpful information. For more information, see the onscreen HP Image Zone Help and Use the HP Image Zone software. The HP Image Zone software does not support Mac OS 9 and OS 10.0.0 10.1.4. The HP All-in-One - HP Photosmart 3200 | User Guide - Page 9
guide for the main tray Control panel: Use to access the HP All-in-One features. For more information about the buttons on the control panel, see HP Photosmart 3200 All-in-One on the glass to scan or copy. Slide and Negative Film light: This light makes it possible to scan transparent objects such as - HP Photosmart 3200 | User Guide - Page 10
. HP Photosmart 3200 All-in-One series control panel features Label 1 2 3 4 5 6 7 Name and Description On: Turn the HP All-in-One on or off. When the HP All-in-One is off, a minimal amount of power is still supplied to the device. Film: Presents or removes the Film Menu for selecting options. Scan - HP Photosmart 3200 | User Guide - Page 11
a problem occurred. See the color graphics display for more information. 18 Scan: Presents or removes the Scan To menu or the Scan Menu (depending on whether the HP All-in-One is connected to a computer with a USB cable, or through a network) for selecting options. Select the scan function - HP Photosmart 3200 | User Guide - Page 12
HP All-in-One. Icon Purpose Shows that the ink cartridge is nearly empty. The color of the icon corresponds to the color of the ink cartridge ink cartridge. Shows that an unknown ink cartridge is inserted. This icon might appear if an ink cartridge contains non-HP ink HP the HP All-in-One from - HP Photosmart 3200 | User Guide - Page 13
also to print selected photos easily from a memory card or a storage device. 1.Print Proof Sheet 2.Scan Proof Sheet Copy Menu The following Copy Menu options are available when you press the Copy button on the control panel. 1.Number of Copies 2.Copy Preview 10 HP Photosmart 3200 All-in-One series - HP Photosmart 3200 | User Guide - Page 14
appears when you press the Scan button if your HP All-in-One is connected to your computer with a USB cable. The options available on this menu vary depending on the software applications installed on your computer. Note If your HP All-in-One is connected to a network, the Scan Menu appears when you - HP Photosmart 3200 | User Guide - Page 15
Photo Menu or the Copy Menu, these options do not appear. These options appear when you start from the idle screen only. 1.Copy 3.Ink Cartridges 4.Load Originals and Load Paper 5.General Troubleshooting 6.Network Troubleshooting 7.Use Scan Features 12 HP Photosmart 3200 All-in-One series - HP Photosmart 3200 | User Guide - Page 16
Overview (continued) 8.Scan Slides and Negative Film 9.Get Support 0.Icon Glossary Enter text using the visual keyboard You can enter text or symbols by using the visual When you are finished entering text, numbers, or symbols, select Done on the visual keyboard, and then press OK. User Guide 13 - HP Photosmart 3200 | User Guide - Page 17
. Regardless, the entry point serves as the launching pad for the HP Image Zone software and services. To open the HP Image Zone software on a Windows computer 1. Do one of the following: - On the Windows desktop, double-click the HP Solution Center icon. - In the system tray at the far right of the - HP Photosmart 3200 | User Guide - Page 18
, see the Setup Guide that came with your HP All-in-One. To open the HP Image Zone software on a Mac ➔ Click the HP Image Zone icon in the Dock, and then choose a device. The HP Image Zone window appears. Note On a Mac, the features available in the HP Image Zone software vary depending on the - HP Photosmart 3200 | User Guide - Page 19
Chapter 1 Overview 16 HP Photosmart 3200 All-in-One series - HP Photosmart 3200 | User Guide - Page 20
including troubleshooting tips and step-by-step instructions. It also provides additional setup instructions to supplement those in the Setup Guide. HP Image Zone Tour (Windows) The HP Image Zone Tour is a fun, interactive way to get a brief overview of the software included with your HP All-in-One - HP Photosmart 3200 | User Guide - Page 21
Chapter 2 (continued) www.hp.com/support HP Image Zone Help The HP Image Zone Help provides detailed instructions on features of your HP All-in-One that are not described in this User Guide, including features that are only available using the HP Image Zone software. Windows ● The Get step-by - HP Photosmart 3200 | User Guide - Page 22
. To access the HP Image Zone Help on a Windows computer 1. In the HP Solution Center, click the tab for your HP All-in-One. For information on accessing the HP Solution Center, see Use the HP Image Zone software. 2. In the Device Support area, click Onscreen Guide or Troubleshooting. - If you click - HP Photosmart 3200 | User Guide - Page 23
information about your HP All-in-One, open the Troubleshooting and support book, and then open the 3100, 3200, 3300 series Troubleshooting book. - The other books listed on the Contents tab provide information on using the HP Image Zone software to complete tasks on your HP All-in-One. Sections that - HP Photosmart 3200 | User Guide - Page 24
on the right. Display area The display area on the right side of the Help window displays the Help topic you select from one of the tabs on the left. Help topics include descriptive text, step-bystep instructions, and illustrations, if applicable. ● Topics often include links to other topics in the - HP Photosmart 3200 | User Guide - Page 25
Some topics include detailed instructions or additional information that window. Use the Help on a Mac This section explains how to access the onscreen Help on a Mac. It tells you how to navigate and search the Help system to find the specific information you need. 22 HP Photosmart 3200 All-in-One - HP Photosmart 3200 | User Guide - Page 26
3300 series Help. - For information on troubleshooting issues with your HP All-in-One, click the 3100, 3200, 3300 series Troubleshooting. - The other sections listed provide information on using the HP Image Zone software to complete tasks on your HP All-in-One. ● The center pane provides a top-down - HP Photosmart 3200 | User Guide - Page 27
2 Zone software on the Mac. Use the scroll bars to the right of the display area to view all the content in a particular topic. Sometimes important information is not visible in the window without scrolling. ● Topics often include links or references to other topics in the Help system where you - HP Photosmart 3200 | User Guide - Page 28
options for your HP All-in-One, including USB, wired networking, Bluetooth, and printer sharing. For more information, see Connection information. ● Finish setting up your wired network. For more information, see Connect to a network. In addition to the setup instructions in this User Guide - HP Photosmart 3200 | User Guide - Page 29
at the factory. Normally, the computer software automatically updates the date and time to HP All-in-One. Note In the remainder of this chapter, the HP bt300 or HP bt400 series Bluetooth® Wireless Printer Adapter is referred to simply as an HP Bluetooth® adapter. Finish setup 26 HP Photosmart - HP Photosmart 3200 | User Guide - Page 30
computer are supported. Only print is supported from the other computers. For setup instructions, see Use printer sharing (Windows) or Use printer sharing (Mac). Connect using a USB cable To connect your HP All-in-One using a USB cable, follow the instructions in the printed Setup Guide. If your - HP Photosmart 3200 | User Guide - Page 31
installed on a Mac, the HP software might not recognize the HP All-in-One. To check the USB port speed on your computer (Windows XP) Note Windows versions prior to XP support USB 1.1 only. 1. On the Windows taskbar, click Start, and then click Control Panel. 2. Open System. 3. Click the Hardware - HP Photosmart 3200 | User Guide - Page 32
your HP All-in-One. ● Microsoft stack If you have Windows XP with Service Pack 2 installed on your computer, then your computer has the Microsoft Bluetooth® Protocol Stack. The Microsoft stack allows you to install an external Bluetooth® adapter automatically. If your Bluetooth® adapter supports the - HP Photosmart 3200 | User Guide - Page 33
to the HP All-in-One by using a USB cable, you can use that device as your printer using Windows printer sharing. The computer connected directly to the HP All-in-One acts as the host for the printer and has full feature functionality. Other computers on Finish setup 30 HP Photosmart 3200 All - HP Photosmart 3200 | User Guide - Page 34
. For more information on enabling Windows printer sharing, refer to the user guide that came with your computer or the Windows onscreen Help. Use printer sharing (Mac) If your computer is on a network and another computer on the network is connected to the HP All-in-One using a USB cable, you can - HP Photosmart 3200 | User Guide - Page 35
Chapter 3 Finish setup 32 HP Photosmart 3200 All-in-One series - HP Photosmart 3200 | User Guide - Page 36
This chapter describes how to connect your HP All-in-One to a network, view and manage the network settings, and troubleshoot problems with the network connections. If you want to: Connect to a wired (Ethernet) network. Install the HP All-in-One software for use in a networked environment. Add - HP Photosmart 3200 | User Guide - Page 37
The HP All-in-One supports both HP Instant Share, see Share your images with family and friends. Connect your HP All-in-One to the network An Ethernet port is provided on the back of your HP All-in-One. 1. Remove the yellow plug from the back of the HP All-in-One. Network setup 34 HP Photosmart - HP Photosmart 3200 | User Guide - Page 38
minutes depending on your operating system, the amount of available space, and the processor speed of your computer. See the instructions below for your Windows or Mac computer. To install the Windows HP All-in-One software Note The following instructions are for Windows computers only. 1. Quit all - HP Photosmart 3200 | User Guide - Page 39
find the HP All-in-One, see Network troubleshooting. 6. If the device description is correct, select Yes, install this printer. 7. At the prompt, restart your computer to finish the installation process. When you have finished installing the software, your HP All-in-One is ready for service. 8. If - HP Photosmart 3200 | User Guide - Page 40
the onscreen instructions to complete all the installation steps, including the Setup Assistant. When you have finished installing the software, your HP All-in-One is ready for service. 7. To test your network connection, go to your computer and print a self-test report to your HP All-in-One. For - HP Photosmart 3200 | User Guide - Page 41
the network configuration page. Restore network defaults You can reset the network settings to what they were when you purchased your HP All-in-One. 1. Press Setup. 2. Press until Network is hardware: - 1. Automatic - 2. 10-Full - 3. 10-Half Network setup 38 HP Photosmart 3200 All-in-One series - HP Photosmart 3200 | User Guide - Page 42
Server is a web-based user interface that provides some options not available on the HP Allin-One control panel, including advanced network security options. Also, the Embedded Web Server enables you to monitor status and order printer supplies. For information on how to use the features available - HP Photosmart 3200 | User Guide - Page 43
instructions. Network configuration page definitions The configuration page shows the network settings for the HP All-in-One. HP Image Zone Help that came with your HP All-in-One. For information on using the onscreen HP Image Zone Help, see Use the onscreen Help. Network setup 40 HP Photosmart - HP Photosmart 3200 | User Guide - Page 44
you call HP Support, depending on the problem, you might be asked to provide the firmware revision code. Hostname The TCP/IP name assigned by the installation software to the device. By default, this is the letters HP followed by the last 6 digits of the Media Access Control (MAC) address. Admin - HP Photosmart 3200 | User Guide - Page 45
: The mode used when the HP All-in-One is initializing. DNS server The IP address of the domain name service (DNS) for the network. When you use the web or send an e-mail message, you use a domain name to do it. For example, the URL http:// Network setup 42 HP Photosmart 3200 All-in - HP Photosmart 3200 | User Guide - Page 46
is shown, obtain the DNS IP address from your Internet service provider (ISP). The speed at which data is transmitted printer, which can identify it on a Bluetooth device. Passkey A value that the user must enter in order to print via Bluetooth. Visibility Shows whether or not the HP All-in-One - HP Photosmart 3200 | User Guide - Page 47
/IP. See the instructions that came with your LAN card. The Printer Not Found screen appears during installation A firewall is preventing the HP All-in-One from accessing your computer. Temporarily disable the firewall, and uninstall and then reinstall the HP All-in-One software. You can re-enable - HP Photosmart 3200 | User Guide - Page 48
) The Printer Not Found screen appears during installation Print a network configuration page, and verify that the router and HP All-in-One are on the same subnet and gateway. For more information, see View and print network settings. The HP All-in-One is not turned on. Turn on the HP All-in-One - HP Photosmart 3200 | User Guide - Page 49
Chapter 4 Network setup 46 HP Photosmart 3200 All-in-One series - HP Photosmart 3200 | User Guide - Page 50
the glass. You should also follow these instructions when loading a proof sheet on the glass for photo printing. Note Many of the special features will not work correctly if the glass and lid backing are not clean. For more information, see Clean the HP All-in-One. To load an original on the - HP Photosmart 3200 | User Guide - Page 51
of the glass. Then, match the right tab on the top half of the holder with the right edge of the glass. For information on scanning slides and negative film, see Scan slides or negative film. 48 HP Photosmart 3200 All-in-One series - HP Photosmart 3200 | User Guide - Page 52
load paper To load 35 mm slides Note The HP All-in-One does not support scanning negative film that is mounted as a slide in The slide must snap into place for the image to scan properly. If the slide does not touch the glass the final scanned image might be blurry. Tip If the slide does not - HP Photosmart 3200 | User Guide - Page 53
Load originals and load paper Chapter 5 For more information on scanning slides and negative film, see Scan slides or negative film. Replace the Slide and Negative Film holder and the the spring-loaded catch so that it connects with the notch on the holder. 50 HP Photosmart 3200 All-in-One series - HP Photosmart 3200 | User Guide - Page 54
scan oversized originals by completely removing the lid from your HP All-in-One. Your HP All-in-One functions normally with the lid removed. Tip When you copy oversized originals, place the lid over the original. This improves the quality of the copy and reduces ink - HP Photosmart 3200 | User Guide - Page 55
HP All-in-One. Review support for the HP All-in-One, go to: www.hp.com/support To purchase HP papers, go to: www.hp ink can cause printed images to smear, bleed, or not fill in completely. Depending on your country/region, some of these papers might not be available. 52 HP Photosmart 3200 All-in-One - HP Photosmart 3200 | User Guide - Page 56
HP All-in-One. They can jam the HP All-in-One or repel the ink. ● Multi-part forms, such as duplicate and triplicate forms. They can wrinkle or get stuck, and the ink is also more likely to smear. ● Envelopes with clasps or windows HP All-in-One options option you selected, the Tray Select menu option - HP Photosmart 3200 | User Guide - Page 57
inch photo paper, into the main tray of your HP All-in-One. To load full-size paper 1. Pull out the main tray, and slide the paper-width and paper-length guides to their outermost positions. 2. Tap a stack of diagram engraved in the base of the main tray. 54 HP Photosmart 3200 All-in-One series - HP Photosmart 3200 | User Guide - Page 58
sure the stack of paper fits within the main tray and is no higher than the top of the paper-width guide. 5. Push the main tray back into the HP All-in-One. 6. Pull the output tray extender toward you, as far as it will go. Flip the paper catch at the end - HP Photosmart 3200 | User Guide - Page 59
the output tray. Tip You can open the ink cartridge access door and rotate the control panel all guide. 4. Replace the output tray. 5. Press Photo Tray on the control panel to select the photo tray. When you press Photo Tray, menu options HP Image Zone Help. 56 HP Photosmart 3200 All-in-One series - HP Photosmart 3200 | User Guide - Page 60
the top of the paper-width guide. 5. Push the main tray back into the HP All-in-One. Load envelopes You can load one or more envelopes into the main tray of your HP All-in-One. Do not use shiny or embossed envelopes or envelopes that have clasps or windows. Note For specific details on how - HP Photosmart 3200 | User Guide - Page 61
printing from a software application are indicated as such. Paper HP papers Tips HP Advanced Photo Paper or HP Photo Paper HP All-in-One might not automatically detect transparency film if it is loaded incorrectly, or if you use transparency film other than HP transparency film. 58 HP Photosmart - HP Photosmart 3200 | User Guide - Page 62
paper and then manually feed one sheet at a time into the main tray with the blue stripe facing up. Tip To prevent curling, keep transfer sheets sealed in the original package until you are ready to use them. This paper is supported for printing from a software application only. HP Matte Greeting - HP Photosmart 3200 | User Guide - Page 63
Chapter 5 Load originals and load paper 60 HP Photosmart 3200 All-in-One series - HP Photosmart 3200 | User Guide - Page 64
slides, or negative film and send the scanned image to an inserted memory card or storage device. For more information, see Scan an image. Your HP All-in-One features four slots for memory cards, shown in the following illustration, with the memory cards that correspond to each slot. User Guide 61 - HP Photosmart 3200 | User Guide - Page 65
, and the contacts are facing your HP All-in-One. 2. Insert the memory card into the corresponding memory card slot. Connect a digital camera The HP All-in-One supports the PictBridge mode, which enables you mode. For instance, some cameras have a digital 62 HP Photosmart 3200 All-in-One series - HP Photosmart 3200 | User Guide - Page 66
the paper size setting on your camera is set to the default, the HP All-in-One uses the paper that is currently loaded in the default input tray selected for printing from a PictBridge camera. Refer to the user guide that came with your camera for detailed information on printing directly from the - HP Photosmart 3200 | User Guide - Page 67
graphics display of your HP All-in-One. You can also view photos using the HP Image Zone software that came with your HP All-in-One. View photos and videos using the HP All-in-One You can view and might not appear quickly on the color graphics display. 64 HP Photosmart 3200 All-in-One series - HP Photosmart 3200 | User Guide - Page 68
photos using your computer You can view and edit photos using the HP Image Zone software that came with your HP All-in-One. For more information, see the onscreen HP Image Zone Help. Select photos and videos You can use the display with the video icon at the bottom of the frame. User Guide 65 - HP Photosmart 3200 | User Guide - Page 69
HP All-in-One HP All-in-One, or connect a storage device to the front USB port. 2. Press the Select Photos button: 3. Enter the first photo number you want to select in the range by using the keypad, or by pressing the or to scroll to the number you want to select. 66 HP Photosmart 3200 All-in-One - HP Photosmart 3200 | User Guide - Page 70
it by your HP All-in-One. This photo number memory card into the appropriate slot on your HP All-in-One, or connect a storage device to the front to the frame you want to print. 5. Do one of the following: - Press 1 to advance forward card or storage device. ➔ Do one of the following: - Press OK - HP Photosmart 3200 | User Guide - Page 71
HP Image Zone Help. Use the Easy Print Wizard You can use the Easy Print Wizard to select your choices for the most commonly used photo print options. Once you have selected your photo print options using the Easy Print Wizard, the photos automatically print. 68 HP Photosmart 3200 All-in-One - HP Photosmart 3200 | User Guide - Page 72
Print Wizard. The Layout menu appears. 5. Press the number next to the Layout option you want to select. The Tray Select menu appears. 6. Press 1 to select the . 1. Insert a memory card into the appropriate slot on your HP All-in-One, or connect a storage device to the front USB port. The Guide 69 - HP Photosmart 3200 | User Guide - Page 73
, and scanning the proof sheet. Print a proof sheet The first step in using a proof sheet is to print it from the HP All-in-One. 1. Insert a memory card into the appropriate slot on your HP All-in-One, or it takes to print a proof sheet can vary greatly. 70 HP Photosmart 3200 All-in-One series - HP Photosmart 3200 | User Guide - Page 74
will be printed. 2. Select one layout style by filling in scan the completed sheet you have placed on the scanner glass. 1. Load the proof sheet print side down on the right front corner of the glass. Make sure the sides of the proof sheet touch the right and front edges. Close the lid. User Guide - HP Photosmart 3200 | User Guide - Page 75
the Proof Sheet Menu and then selects Scan Proof Sheet. The HP All-in-One scans the proof sheet and prints the selected photos. Set photo print options The Print Options menu gives you access to a variety a card only when the photo light is not blinking. 72 HP Photosmart 3200 All-in-One series - HP Photosmart 3200 | User Guide - Page 76
the C:\Documents and Settings\username\My Documents\My Pictures folder in Windows XP and Windows 2000. - For Mac: by default, files are saved to the computer in a Hard Drive:Users:User Name:Pictures:HP Photos folder. 3. The HP All-in-One is finished reading the memory card when the photo light stops - HP Photosmart 3200 | User Guide - Page 77
Chapter 6 Photos and videos 74 HP Photosmart 3200 All-in-One series - HP Photosmart 3200 | User Guide - Page 78
here varies by country/region. Some of the services described here might not be available in your country/ region. To send images ➔ Start by pressing the HP Instant Share button on the control panel of your HP All- in-One. Then, follow the onscreen instructions. Receive images from others If your - HP Photosmart 3200 | User Guide - Page 79
to an online photo finishing service to order professional quality prints. Note Availability of the services described here varies by country/region. Some of the services described here might not be available in your country/ region. Share your images 76 HP Photosmart 3200 All-in-One series - HP Photosmart 3200 | User Guide - Page 80
software for your HP All-in-One. If you want to install the HP remote printer driver on another Windows computer, such as a laptop, you can either install the HP Image Zone software that came with your HP All-in-One or you can download the HP remote printer driver from the HP website. Go to www.hp - HP Photosmart 3200 | User Guide - Page 81
and receiving images. Tip If you choose this option accidentally, register the HP All-in-One again using the same HP Passport account. The device will be assigned the same device name as before. The share destinations and settings are also reapplied. Share your images 78 HP Photosmart 3200 All-in - HP Photosmart 3200 | User Guide - Page 82
User Guide provides just a sampling of the copy features available to help you get started using your HP All-in-One to make copies. Explore the onscreen HP Image Zone Help that came with your HP All-in-One software for information on all of the copy settings that your HP All-in-One supports. For - HP Photosmart 3200 | User Guide - Page 83
Copy Menu. 3. Press OK to accept the settings as the new default settings. Explore the onscreen HP Image Zone Help to learn how to perform special copy projects such as enlarging and reducing copies, making size and type, but use defaults instead. Copy 80 HP Photosmart 3200 All-in-One series - HP Photosmart 3200 | User Guide - Page 84
photo: a. Press the Photo Tray button to select the photo tray. b. Press Start Black or Start Color. The HP All-in-One makes a borderless copy of your original photo. If you are making a borderless copy from paper loaded in the copy settings, see Change the copy settings. Copy User Guide 81 - HP Photosmart 3200 | User Guide - Page 85
to copy using the Crop setting from the Copy Menu. Selecting the Crop setting initiates a scan and displays a preview of the original on the color graphics display. Cropping changes the dimensions To stop copying, press Cancel on the control panel. Copy 82 HP Photosmart 3200 All-in-One series - HP Photosmart 3200 | User Guide - Page 86
9 Print from your computer The HP All-in-One can be used with any software application that allows printing. The instructions vary slightly depending on whether you are printing from a Windows PC or a Mac. Make sure you follow the instructions for your operating system in this chapter. In addition - HP Photosmart 3200 | User Guide - Page 87
the Properties dialog box. Depending on your software application, this button might be called Properties, Options, Printer Setup, or Printer. 4. Make changes to the print settings, and click OK. 5. Click Print or OK in the Print dialog box to print the job. 84 HP Photosmart 3200 All-in-One series - HP Photosmart 3200 | User Guide - Page 88
not appear, press Cancel again. To stop a print job from the computer (Windows XP users) 1. On the Windows taskbar, click Start, and then click Control Panel. 2. Open the Printers and Faxes control panel. 3. Double-click the HP All-in-One icon. 4. Select the print job you want to cancel. 5. On the - HP Photosmart 3200 | User Guide - Page 89
or later) from the Applications:Utilities folder. 2. Make sure the HP All-in-One is the selected printer. 3. From the Printers menu, choose Show Jobs. 4. Select the print job you want to cancel. 5. Click Delete. It can take a few moments for printing to be cancelled. 86 HP Photosmart 3200 All-in - HP Photosmart 3200 | User Guide - Page 90
lower right side of the screen, near the time. On a Mac, the HP All-in-One software is always running. Note Closing the HP Digital Imaging Monitor icon in your Windows system tray can cause your HP All-in-One to lose some of its scan functionality and result in the No Connection error message. If - HP Photosmart 3200 | User Guide - Page 91
Scanning (Windows) or HP Scan Pro (Mac) window on the computer, where you can edit it. 5. Make any edits to the preview image. When you have finished, click Accept. For more information about editing a preview image, see the onscreen HP Image Zone Help that came with your software. The HP All-in-One - HP Photosmart 3200 | User Guide - Page 92
share scanned images with friends and family using the HP Instant Share online service. HP Instant Share enables you to send images to others as email, upload photos to an online photo album or photo finishing service, or send the images to a network-connected HP All-in-One to print. User Guide 89 - HP Photosmart 3200 | User Guide - Page 93
you use your OCR software. Using OCR software is an art that takes time and practice to master. For more information about scanning documents, especially documents containing both text and graphics, see the documentation that came with your OCR software. 90 HP Photosmart 3200 All-in-One series - HP Photosmart 3200 | User Guide - Page 94
for all the ink cartridges your device supports by doing the following: ● For Windows users: In the HP Solution Center, click Settings, point to Print Settings, and then click Printer Toolbox. Click the Estimated Ink Levels tab, and then click Ink Cartridge Ordering Information. ● For Mac users: In - HP Photosmart 3200 | User Guide - Page 95
on the HP All-in-One and accepts print jobs from supported Bluetooth devices, such as a digital camera phone, personal digital assistant (PDA), or Bluetoothenabled Windows or Mac computer. Order other supplies To order other supplies, such as HP All-in-One software, a copy of the printed User Guide - HP Photosmart 3200 | User Guide - Page 96
scans remain clear. Occasionally, you will also need to replace your ink cartridges, align the printer, and clean the print head. This chapter provides instructions for keeping your HP All-in-One with a damp cloth to remove any residual alcohol. Maintain your HP All-in-One User Guide 93 - HP Photosmart 3200 | User Guide - Page 97
in the icon for that cartridge. The HP All-in-One cannot detect the amount of ink remaining in ink cartridges that contain non-HP ink. Note HP cannot guarantee the quality or reliability of non-HP ink. Printer service or repairs required as a result of printer failure or damage attributable to the - HP Photosmart 3200 | User Guide - Page 98
: includes the firmware version number and whether or not you have an HP two-sided printing accessory installed. - Ink delivery system information: displays the approximate ink level of each installed ink cartridge, the status of each ink cartridge, the date each cartridge was installed, and - HP Photosmart 3200 | User Guide - Page 99
customer support. Work with ink cartridges To ensure the best print quality from your HP All-in-One, you will need to perform some simple maintenance procedures. This section provides guidelines for handling the ink cartridges, and instructions for replacing the ink cartridges, aligning the printer - HP Photosmart 3200 | User Guide - Page 100
1 Ink cartridge latch for the black ink cartridge 2 Ink cartridge latches for the color ink cartridges 3. Pull the ink cartridge toward you out of its slot. Maintain your HP All-in-One Tip If you are removing the ink cartridge because it is low or out of ink, recycle the ink cartridge. The HP - HP Photosmart 3200 | User Guide - Page 101
the printer. Recycle or discard the page. For information on aligning the printer by using the HP Image Zone software that came with your HP All-in-One, see the onscreen HP Image Zone Help. For more information, see Use the onscreen Help. 98 HP Photosmart 3200 All-in-One series Maintain your HP - HP Photosmart 3200 | User Guide - Page 102
cleaning the print head by using the HP Image Zone software that came with your HP All-in-One, see the onscreen HP Image Zone Help. For more information, see also Use the onscreen Help. Clean the ink cartridge contacts Clean the copper-colored ink cartridge contacts if a message appears on the color - HP Photosmart 3200 | User Guide - Page 103
Chapter 12 Note Do not remove multiple ink cartridges at the same time. Remove and clean each ink cartridge one at a time. Do not leave an ink cartridge outside the HP All-in-One for more than 30 minutes. 4. Inspect the ink cartridge contacts for ink and debris buildup. 5. Dip a clean foam rubber - HP Photosmart 3200 | User Guide - Page 104
information on hardware setup and software installation troubleshooting. ● Operational troubleshooting: Contains information on issues that might occur during normal tasks when using the HP All-in-One features. ● Device update: Based on advice from HP customer support or a message on the color - HP Photosmart 3200 | User Guide - Page 105
for information on system requirements and possible installation problems. ● In Windows, you can access the Readme file from Windows taskbar by clicking Start, pointing to Programs or All Programs, pointing to HP, pointing to Photosmart All-in-One 3200 series, and then clicking Readme. ● In Mac OS - HP Photosmart 3200 | User Guide - Page 106
Troubleshooting I connected the USB cable, but I am having problems using the HP All-in-One with my computer Solution You must first install the software that came with your HP All-in-One before connecting the USB cable. During installation, do not plug in the USB cable until prompted by the - HP Photosmart 3200 | User Guide - Page 107
again. If the alignment fails again, you might have a defective sensor or ink cartridge. Contact HP Support. Go to www.hp.com/support. If prompted, choose your country/region, and then click Contact HP for information on calling for technical support. 104 HP Photosmart 3200 All-in-One series - HP Photosmart 3200 | User Guide - Page 108
information see Replace the ink cartridges. Cause The ink cartridge or sensor is defective. Solution Contact HP Support. Go to www.hp.com/support. If prompted, choose your country/region, and then click Contact HP for information on calling for technical support. The HP All-in-One does not print - HP Photosmart 3200 | User Guide - Page 109
inside the HP All-in-One. Lift open the ink cartridge access door to expose the ink cartridges and remove any objects that are blocking the print head assembly including any packing materials. For more information about clearing a paper jam, see Paper troubleshooting. 106 HP Photosmart 3200 All - HP Photosmart 3200 | User Guide - Page 110
Zone Help that came with your software. ● Open the Printers dialog box and check to see that the HP All-in-One is listed. ● Look in the system tray at the far right of the Windows taskbar for an HP All-in- One icon. This indicates that the HP All-in-One is ready. When I insert the CD-ROM into - HP Photosmart 3200 | User Guide - Page 111
Troubleshooting Chapter 13 For more information about installing the HP Image Zone Express software, see the Setup Guide that came with your HP All-in-One. A red X appears on the USB connect prompt Solution Normally, a green check appears indicating that the plug and play is successful. A red X - HP Photosmart 3200 | User Guide - Page 112
computer until after you have reinstalled the software. 2. Press the On button to turn off the HP All-in-One. 3. On the Windows taskbar, click Start, Programs or All Programs, HP, Photosmart All-in-One 3200 series, Uninstall. 4. Follow the onscreen instructions. 5. If you are asked whether you would - HP Photosmart 3200 | User Guide - Page 113
reinstalled the software. 6. Insert the HP All-in-One CD-ROM into the CD-ROM drive on your computer, and then start the Setup program. 7. Follow the onscreen instructions and the instructions provided in the Setup Guide that came with your HP All-in-One. To uninstall from a Windows computer, method - HP Photosmart 3200 | User Guide - Page 114
Follow the onscreen instructions and the instructions provided in the Setup Guide that came with your HP All-in-One. To uninstall from a Mac computer 1. Disconnect the HP All-in-One from your Mac. 2. Double-click the Applications: HP All-in-One Software folder. 3. Double-click HP Uninstaller. Follow - HP Photosmart 3200 | User Guide - Page 115
your HP Image Zone software. Paper has jammed the optional two-sided printing accessory Solution You might need to remove the two-sided printing accessory. For more information, see the printed guide that came with your two-sided printing accessory. Note If you turned the HP All-in-One off before - HP Photosmart 3200 | User Guide - Page 116
with printing, determine which ink cartridge is experiencing the problem and replace it. For instructions on how to print a self-test report, clean the print head, and align the printer, see Maintain your HP All-in-One. Device update In order to keep your HP All-in-One running smoothly with the - HP Photosmart 3200 | User Guide - Page 117
Troubleshooting Chapter 13 To use device update 1. Do one of the following: - Double-click the update .exe file you downloaded from www.hp.com/support. - When prompted, accept the device update found by the Software Update utility. The Device Update Wizard opens on your computer. 2. At the Welcome - HP Photosmart 3200 | User Guide - Page 118
HP warranty and support 14 HP warranty and support Hewlett-Packard provides Internet and phone support for your HP All-in-One. This chapter provides warranty information as well as how to get support from the Internet, contact HP customer support, access your serial number and service ID, call in - HP Photosmart 3200 | User Guide - Page 119
customer or any HP support contract with the customer. However, if printer failure or damage is attributable to the use of a non-HP or refilled ink cartridge, HP will charge its standard time and materials charges to service the printer for the particular failure or damage. 5. If HP receives, during - HP Photosmart 3200 | User Guide - Page 120
on service options in Japan, see HP Quick Exchange Service (Japan). 1. Make sure that: a. Your HP All-in-One is plugged in and turned on. b. The specified ink cartridges are installed correctly. c. The recommended paper is properly loaded in the input tray. 2. Reset your HP All-in-One: a. Turn - HP Photosmart 3200 | User Guide - Page 121
ask your dealer or call HP at the phone number provided in this guide. As part of our constant efforts to improve our phone support service, we advise you to check our website on a regular basis for new information regarding service features and delivery. 118 HP Photosmart 3200 All-in-One series - HP Photosmart 3200 | User Guide - Page 122
709-7751 Canada (Mississauga Area) (905) 206-4663 Canada 1-800-474-6836 Central America & The Caribbean www.hp.com/support Chile 800-360-999 021-3881-4518 800-810-3888 : 3002 Colombia (Bogota) Colombia 571-606-9191 01- 58-212-278-8666 0-800-474-68368 Viêt Nam +84 88234530 User Guide 119 - HP Photosmart 3200 | User Guide - Page 123
on service options in Japan, see HP Quick Exchange Service (Japan) and the instructions described in Pack your HP All-in-One. 1. Turn off the HP All-in-One. 2. Open the ink cartridge access door by lifting from the front center of the device, until the door locks into place. 120 HP Photosmart 3200 - HP Photosmart 3200 | User Guide - Page 124
into the device you are shipping back. Note If you have not received a replacement HP All-in-One, the HP customer support call agent will instruct you whether to send your ink cartridges with your HP All-in-One. 5. Lower the ink cartridge latches and press until they snap into place. 6. Close the - HP Photosmart 3200 | User Guide - Page 125
control panel functions on the replacement HP All-in-One. Note See the Setup Guide that came with your HP All-in-One for instructions on how to attach your control panel faceplate. The replacement HP All-in-One might come with instructions for setting up your device. 122 HP Photosmart 3200 All-in - HP Photosmart 3200 | User Guide - Page 126
HP warranty and support Pack your HP All-in-One Complete the following steps once you have unplugged your HP All-in-One. 1. If available, pack your HP All-in-One box: - A complete description of symptoms for service personnel (samples of print quality problems are helpful). - A copy of the sales - HP Photosmart 3200 | User Guide - Page 127
Chapter 14 HP warranty and support 124 HP Photosmart 3200 All-in-One series - HP Photosmart 3200 | User Guide - Page 128
copy specifications, memory card specifications, scan specifications, physical specifications, power specifications, environmental specifications, regulatory notices, and the declaration of conformity for your HP All-in-One. System requirements Software system requirements are located in the Readme - HP Photosmart 3200 | User Guide - Page 129
.4 inches) Weight 60 to 90 gsm (16 to 24 lbs) 75 to 90 gsm (20 to 24 lbs) N/A 236 gsm (145 lb) N/A Technical information 126 HP Photosmart 3200 All-in-One series - HP Photosmart 3200 | User Guide - Page 130
rendered dpi black when printing from a computer ● Up to 4800 x 1200 optimized dpi color when printing from a computer and 1200-input dpi Technical information User Guide 127 - HP Photosmart 3200 | User Guide - Page 131
of the document ● Panorama-size printing ● Method: drop-on-demand thermal inkjet ● Language: HP PCL Level 3, PCL3 GUI or PCL 10 ● Ink cartridges: six individual cartridges of HP Vivera Inks designed for efficient ink usage ● Duty cycle: 3000 printed pages per month Mode Speed (ppm) on plain paper - HP Photosmart 3200 | User Guide - Page 132
an adapter. See the instructions that came with your memory card for more information. Supported video file types ● Motion-JPEG Quicktime (.mov) ● Motion-JPEG AVI (.avi) ● MPEG-1 (.mpg, .mpe, or .mpeg) The printer ignores video clips in any other format. Scan specifications ● Image editor included - HP Photosmart 3200 | User Guide - Page 133
acoustic information from the HP website. Go to: www.hp.com/support Environmental product stewardship program standards. Protecting the environment Hewlett-Packard is committed to providing registered service mark of the U.S. EPA. As an ENERGY STAR partner, HP has HP Photosmart 3200 All-in-One series - HP Photosmart 3200 | User Guide - Page 134
recycle used ink cartridges free of charge. For more information, go to the following website: www.hp.com/hpinfo/ city office, your household waste disposal service, or the shop where you purchased the product. For more marketing name (HP Photosmart 3200 All-in-One series). User Guide 131 - HP Photosmart 3200 | User Guide - Page 135
and used in accordance with the instructions, might cause harmful interference to radio Hewlett-Packard Company might cause harmful interference and void the FCC authorization to operate this equipment. Notice to users in Japan VCCI-2 Technical information 132 HP Photosmart 3200 All-in-One - HP Photosmart 3200 | User Guide - Page 136
nach DIN 45635 T. 19 Declaration of conformity (European Economic Area) The Declaration of Conformity in this document complies with ISO/IEC Guide 22 and EN 45014. It identifies the product, manufacturer's name and address, and applicable specifications recognized in the European community - HP Photosmart 3200 | User Guide - Page 137
Chapter 15 HP Photosmart 3200 All-in-One series declaration of conformity Technical information 134 HP Photosmart 3200 All-in-One series - HP Photosmart 3200 | User Guide - Page 138
align printer 98 B Bluetooth configuration page 43 device address 43 device name 43 icon 9 order accessory 92 print from a computer 28 security 44 borderless photos copy 81 print from memory card 68 broadband Internet 34 C cancel button 8 copy 82 print job 85 scan 89 cartridges. See ink cartridges - HP Photosmart 3200 | User Guide - Page 139
replace ink cartridges 96 self-test report 95 make a copy 79 mDNS service name 41 media. See paper Media Access Control (MAC) address 42 memory cards CompactFlash 61 e-mail photos 73 insert 72 Memory Stick 61 MultiMediaCard (MMC) 61 overview 61 print photos 68 proof sheet 70 136 HP Photosmart 3200 - HP Photosmart 3200 | User Guide - Page 140
margin specifications 127 printer found screen, Windows 36 printer sharing 30, 31 printer, align 98 proof sheet fill in 71 menu 10 print 70 scan 71 R Readme file 102 receive images print automatically 76 save backup 77 view before printing 76 recycle HP All-in-One 131 ink cartridges 131 regulatory - HP Photosmart 3200 | User Guide - Page 141
125 troubleshoot hardware setup 102 incorrect measurements 104 ink cartridges 104, 113 jams, paper 59, 106, 112 language, display 104 operational tasks 111 paper 111 printer not found 44 Readme file 102 resources 17 setup 102 software installation 107 138 HP Photosmart 3200 All-in-One series - HP Photosmart 3200 | User Guide - Page 142
assembly 106 TCP/IP 44 USB cable 103 wired network setup 44 two-sided printing accessory jams, troubleshoot 112 U uninstall software 109 up arrow 8 upgrade to network 37 URL 41 USB installation, troubleshoot 103 port speed 27 V videos buttons 64 features 64 print selected 69 select 65 use features - HP Photosmart 3200 | User Guide - Page 143
140 HP Photosmart 3200 All-in-One series - HP Photosmart 3200 | User Guide - Page 144
© 2005 Hewlett-Packard Development Company, L.P. Electronic Edition www.hp.com *Q5841-90260* *Q5841-90260* Q5841-90260
-
 1
1 -
 2
2 -
 3
3 -
 4
4 -
 5
5 -
 6
6 -
 7
7 -
8
-
9
-
10
-
11
-
12
-
13
-
14
-
15
-
16
-
17
-
18
-
19
-
20
-
21
-
22
-
23
-
24
-
25
-
26
-
27
-
28
-
29
-
30
-
31
-
32
-
33
-
34
-
35
-
36
-
37
-
38
-
39
-
40
-
41
-
42
-
43
-
44
-
45
-
46
-
47
-
48
-
49
-
50
-
51
-
52
-
53
-
54
-
55
-
56
-
57
-
58
-
59
-
60
-
61
-
62
-
63
-
64
-
65
-
66
-
67
-
68
-
69
-
70
-
71
-
72
-
73
-
74
-
75
-
76
-
77
-
78
-
79
-
80
-
81
-
82
-
83
-
84
-
85
-
86
-
87
-
88
-
89
-
90
-
91
-
92
-
93
-
94
-
95
-
96
-
97
-
98
-
99
-
100
-
101
-
102
-
103
-
104
-
105
-
106
-
107
-
108
-
109
-
110
-
111
-
112
-
113
-
114
-
115
-
116
-
117
-
118
-
119
-
120
-
121
-
122
-
123
-
124
-
125
-
126
-
127
-
128
-
129
-
130
-
131
-
132
-
133
-
134
-
135
-
136
-
137
-
138
-
139
-
140
-
141
-
142
-
143
-
144
 |
 |
HP Photosmart 3200 All-in-One series
User Guide