HP Photosmart 7510 User Guide
HP Photosmart 7510 Manual
 |
View all HP Photosmart 7510 manuals
Add to My Manuals
Save this manual to your list of manuals |
HP Photosmart 7510 manual content summary:
- HP Photosmart 7510 | User Guide - Page 1
HP Photosmart 7510 Series - HP Photosmart 7510 | User Guide - Page 2
- HP Photosmart 7510 | User Guide - Page 3
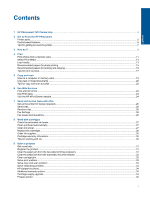
printing accessory 31 Clear the paper jam from the automatic document feeder 32 Clear carriage jam...32 Solve print problem...33 Solve copy and scan problem...33 Solve networking problem...33 HP support by phone...34 Additional warranty options...34 Cartridge supply upgrade...34 Prepare printer - HP Photosmart 7510 | User Guide - Page 4
access door...35 Printhead failure...35 Printer failure...35 Ink cartridge problem...35 SETUP cartridges...37 10 Connectivity Add the HP Photosmart to a network...39 Change from a USB connection to a wireless network...40 Connect a new printer...41 Change network settings...41 Tips for setting - HP Photosmart 7510 | User Guide - Page 5
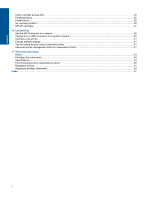
do I? on page 9 • Print on page 11 • Copy and scan on page 19 • Work with cartridges on page 27 • Send and receive faxes with eFax on page 25 • Connectivity on page 39 • Technical information on page 43 • Solve a problem on page 31 HP Photosmart 7510 Series Help HP Photosmart 7510 Series Help 3 - HP Photosmart 7510 | User Guide - Page 6
Chapter 1 HP Photosmart 7510 Series Help 4 HP Photosmart 7510 Series Help - HP Photosmart 7510 | User Guide - Page 7
• Tips for getting to know the printer Printer parts • Front view of the printer Get to Know the HP Photosmart 1 Lid 2 Lid Backing 3 Glass 4 Color graphics display (also referred to as the display) 5 Photo tray 6 Paper-width guide for the photo tray 7 Paper tray extender (also referred to as the - HP Photosmart 7510 | User Guide - Page 8
Cartridge access area 18 Printhead assembly 19 Model number location 20 Rear USB port 21 Power connection (Use only with the power adapter supplied by HP). 22 Two-sided printing menu options. NOTE: eFax may not be available in all countries/regions. Get to Know the HP Photosmart 6 Get to Know the - HP Photosmart 7510 | User Guide - Page 9
select black or color, and select the number of copies. You can also change settings to make 2-sided copies, or select size, quality, and paper type. 13 Scan: Opens the Choose Scan Destination menu, where you can select a destination for your scan. 14 eFax: Opens the eFax internet fax service. Send - HP Photosmart 7510 | User Guide - Page 10
Chapter 2 Get to Know the HP Photosmart 8 Get to Know the HP Photosmart - HP Photosmart 7510 | User Guide - Page 11
as printing photos, scanning, and making copies. • Scan to a computer or memory card on page 19 • Copy text or mixed documents on page 20 • Clear the paper jam from the two-sided printing accessory. on page 31 • Replace the cartridges on page 28 • Load media on page 13 • Use Web Services on page - HP Photosmart 7510 | User Guide - Page 12
Chapter 3 How do I? 10 How do I? - HP Photosmart 7510 | User Guide - Page 13
• Load media on page 13 Tips for print success on page 17 Print photos from a memory card Do one of the following: Print photo on small-size paper 1. Load paper. ▲ Load up to 10 x 15 cm (4 x 6 inch) photo paper print side down in photo tray. Load photo paper in the photo tray 2. Insert memory device - HP Photosmart 7510 | User Guide - Page 14
to scroll through the photos. d. Touch photo you want to print. e. Touch up arrow to increase number of copies. 4. Print photo. a. Touch Print to preview print job. b. Touch Print. Print photo on full-size paper 1. Load paper. ▲ Load full-size photo paper print side down in the main input tray. Load - HP Photosmart 7510 | User Guide - Page 15
and Services and select ink, toner and paper. Load media 1. Do one of the following: Load 10 x 15 cm (4 x 6 inch) paper a. Raise photo tray lid. ❑ Raise photo tray lid and slide paper-width guide outwards. b. Load paper. ❑ Insert stack of photo paper into photo tray with short edge forward and print - HP Photosmart 7510 | User Guide - Page 16
the photo tray. ❑ Slide paper-width guide outwards. ❑ Remove all paper from the main input tray. b. Load paper. ❑ Insert stack of paper into main input tray with short edge forward and print side down. ❑ Slide stack of paper forward until it stops. ❑ Slide paper-width guide inward until it stops at - HP Photosmart 7510 | User Guide - Page 17
printing If you want the best print quality, HP recommends using HP papers that are specifically designed for the type of project you are printing. Depending on your country/region, some of these papers might not be available. Paper HP Premium Plus Photo Paper Description HP's best photo paper - HP Photosmart 7510 | User Guide - Page 18
longer lasting documents. HP Photo Value Packs conveniently package Original HP ink cartridges and HP Advanced Photo Paper to save you time and take the guesswork out of printing affordable Lab-quality photos with your HP printer. Original HP inks and HP Advanced Photo Paper have been designed to - HP Photosmart 7510 | User Guide - Page 19
more about paper types that support 2-sided printing on your printer. Click here to go online for more information. Tips for print success Use the following tips to print successfully. Print tips • Use genuine HP cartridges. Genuine HP cartridges are designed for and tested with HP printers to help - HP Photosmart 7510 | User Guide - Page 20
Chapter 4 Print 18 Print - HP Photosmart 7510 | User Guide - Page 21
card • Copy text or mixed documents • Tips for copy and scan success Scan to a computer or memory card To scan to a computer or memory card from the printer display 1. Load original. a. Lift lid on the product. b. Load original print side down on the right front corner of glass. c. Close lid - HP Photosmart 7510 | User Guide - Page 22
Chapter 5 Related topics • Tips for copy and scan success on page 22 Copy text or mixed documents 1. Do one of the following: 1-sided copy a. Load paper. ❑ Load full-size paper in the main input tray. b. Load original. ❑ Lift lid on product. ❑ Load original print side down on right front corner of - HP Photosmart 7510 | User Guide - Page 23
screen to set the number of copies. d. Start copy. ❑ Touch B&W or Color. 2-sided copy a. Load paper. ❑ Load full-size paper in the main input tray. b. Load original. ❑ Lift lid on product. ❑ Load original print side down on right front corner of glass. ❑ Close lid. Copy text or mixed documents - HP Photosmart 7510 | User Guide - Page 24
in the software to scan from the printer display. Open the Printer Software to select Scanner Actions and then select Manage Scan to Computer. • To make a large copy of a small original, scan the original into the computer, resize the image in the scanning software, and then print a copy of the - HP Photosmart 7510 | User Guide - Page 25
Services 6 Use Web Services • Print with HP ePrint • Use Print Apps • Visit the HP ePrintCenter website Print with HP ePrint HP's free ePrint service provides an easy way to print from email. Just email a document or photo to the email address assigned to your printer when you enable Web Services - HP Photosmart 7510 | User Guide - Page 26
need to have web services enabled in order to use apps. Go to the HP ePrintCenter website for more information and specific terms and conditions: www.hp.com/go/ ePrintCenter. NOTE: Apps are offered on an availability basis to HP Photosmart 7510 Series series owners. HP and its third party content - HP Photosmart 7510 | User Guide - Page 27
Send and receive faxes with eFax 7 Send and receive faxes with eFax The HP Photosmart 7510 Series printer faxes without a phone line. The printer sends and receives faxes using eFax®, a web-based faxing service. This service is free when you send up to 20 pages and receive up to 20 pages per month. - HP Photosmart 7510 | User Guide - Page 28
Send and receive faxes with eFax Chapter 7 Send a fax Send a Fax 1. Touch eFax on the printer Home screen to display the eFax® home screen. 2. Lift the printer's lid and place the first page of your original document print side down on the scanner glass, aligning it with the right front corner. 3. - HP Photosmart 7510 | User Guide - Page 29
the product and cartridges for printing, and in printhead servicing, which keeps print nozzles clear and ink flowing smoothly. In addition, some residual ink is left in the cartridge after it is used. For more information, see www.hp.com/go/inkusage. To check the ink levels from the printer display - HP Photosmart 7510 | User Guide - Page 30
options, and then touch Clean Ink Smear. Related topics • Order ink supplies on page 30 Tips for working with ink on page 30 Replace the cartridges To replace the cartridges 1. Check that power is on. 2. Remove cartridge. a. Open cartridge access door. Wait for print carriage to move to center of - HP Photosmart 7510 | User Guide - Page 31
icons, then slide cartridge into slot until it clicks into place. d. Close cartridge door. 4. View the animation for this topic. Some screens that appear in the animation may not reflect your product. Related topics • Order ink supplies on page 30 Tips for working with ink on page 30 Replace - HP Photosmart 7510 | User Guide - Page 32
place. • Use genuine HP ink cartridges. Genuine HP ink cartridges are designed for and tested with HP printers to help you produce great results, time after time. • Consider getting replacement ink cartridges when you receive an ink alert message. This avoids possible printing delays. You do not - HP Photosmart 7510 | User Guide - Page 33
jam • Solve print problem • Solve copy and scan problem • Solve networking problem • HP support by phone • Additional warranty options • Cartridge supply upgrade • Prepare printer • Check cartridge access door • Printhead failure • Printer failure • Ink cartridge problem • SETUP cartridges Get more - HP Photosmart 7510 | User Guide - Page 34
more online troubleshooting. Clear carriage jam Remove any objects, such as paper, that are blocking the print carriage. NOTE: Do not use any tools or other devices to remove jammed paper. Always use caution when removing jammed paper from inside the printer. 32 Solve a problem Solve a problem - HP Photosmart 7510 | User Guide - Page 35
topics, touch Troubleshoot and Support, and then touch Clear Carriage Jam. Click here to go online for more information. Solve print problem Make sure that the printer is turned on and that there is paper in the paper tray. If you are still unable to print, HP provides a Print Diagnostic Utility - HP Photosmart 7510 | User Guide - Page 36
for the HP Photosmart at additional costs. Go to www.hp.com/support, select your country/region and language, then explore the services and warranty area for information about the extended service plans. Cartridge supply upgrade If the supply upgrade is not successful, try getting your printer to - HP Photosmart 7510 | User Guide - Page 37
has failed. Contact HP support for help. Click here to go online for more information. Printer failure If you have already turned the printer off and then on, and this does not solve your problem, contact HP support for help. Click here to go online for more information. Ink cartridge problem To - HP Photosmart 7510 | User Guide - Page 38
slot. Solve a problem d. Hold the ink cartridge by its sides with the bottom pointing up and locate the electrical contacts on the ink cartridge. The electrical contacts are four small rectangles of copper or gold-colored metal on the bottom of the ink cartridge. 1 Ink window 2 Electrical contacts - HP Photosmart 7510 | User Guide - Page 39
When you first set up the printer, you must install the cartridges that shipped in the box with the printer. These cartridges are labeled SETUP, and they calibrate your printer before the first print job. Failure to install the SETUP cartridges during the initial product setup causes an error - HP Photosmart 7510 | User Guide - Page 40
Chapter 9 Solve a problem 38 Solve a problem - HP Photosmart 7510 | User Guide - Page 41
instructions are for customers who have already setup and installed the printer software. For first time installation refer to the setup instructions that came with the printer. To connect the HP Photosmart button on the printer display to see the Wireless menu. If the printer is printing, in an - HP Photosmart 7510 | User Guide - Page 42
. 1. On Windows: a. From the Start menu on your computer, click All Programs, and then click HP. b. Click HP Photosmart 7510 Series, click Printer Setup & Software Selection, and then click Convert a USB connected printer to wireless. c. Follow the instructions on the screen. 2. On Mac: a. Touch - HP Photosmart 7510 | User Guide - Page 43
operating system: 1. On Windows: a. From the Start menu on your computer, click All Programs, and then click HP. b. Click HP Photosmart 7510 Series, click Printer Setup and Software, and then click Connect a new printer c. Follow the instructions on the screen. 2. On Mac: ▲ Use HP Setup Assistant in - HP Photosmart 7510 | User Guide - Page 44
printer can be found by touching the Wireless button on the control panel or by printing a network configuration page. In a supported stored on the computer until you clear them manually. You can configure your browser to accept on your printer, if you disable cookies, you also disable one or more of - HP Photosmart 7510 | User Guide - Page 45
printed documentation that came with the HP Photosmart. This section contains the following topics: • Notice • Cartridge cartridge was first installed, the date when the cartridge was last used, the number of pages printed using the cartridge, the page coverage, the printing modes used, any printing - HP Photosmart 7510 | User Guide - Page 46
HP Photosmart may be slightly distorted • HP recommends using a USB cable less than or equal to 3 m (10 feet) in length to minimize injected noise due to potential high electromagnetic fields Print resolution To learn more about the printer resolution, see the printer software. Paper specifications - HP Photosmart 7510 | User Guide - Page 47
will fall on the first sheet. * NOTE: For a complete list of supported media sizes, see the printer driver. Two-sided printing accessory paper specifications - all regions except Japan Type Paper Brochure paper Size Weight Letter: 8.5 x 11 inches Executive: 7.25 x 10.5 inches A4: 210 x 297 - HP Photosmart 7510 | User Guide - Page 48
% (depends on model) Ink cartridge yield Visit www.hp.com/go/learnaboutsupplies for more information on estimated cartridge yields. Scan specifications • Image editor included for efficient disassembly and repair. For more information, visit HP's Commitment to the Environment Web site at: www.hp.com/ - HP Photosmart 7510 | User Guide - Page 49
used print cartridges and ink cartridges free of charge. For more information, go to the following Web site: www.hp.com/hpinfo , the printer will maintain the setting that you choose. Auto Power-Off turns the printer off completely, so you must use the power button to turn the printer back on. - HP Photosmart 7510 | User Guide - Page 50
information Chapter 11 Set the Energy Save Mode The HP Photosmart Energy Save Mode reduces energy use by entering a sleep the desired time interval (5, 10 or 15 minutes). Power consumption Hewlett-Packard printing and imaging equipment marked with the ENERGY STAR® logo is qualified to the - HP Photosmart 7510 | User Guide - Page 51
Disposal of waste equipment by users in private households in the European Union Technical information Environmental product stewardship program 49 - HP Photosmart 7510 | User Guide - Page 52
(Regulation EC No 1907/2006 of the European Parliament and the Council). A chemical information report for this product can be found at: www.hp.com/go/ reach. Battery disposal in the Netherlands Battery disposal in Taiwan Attention California users The battery supplied with this product may contain - HP Photosmart 7510 | User Guide - Page 53
EU battery directive Technical information Regulatory notices The HP Photosmart meets product requirements from regulatory agencies in your country/region. This section contains the following topics: • Regulatory model identification number • FCC statement • VCCI (Class B) compliance - HP Photosmart 7510 | User Guide - Page 54
The Regulatory Model Number for your product is SDGOB-1021. This regulatory number should not be confused with the marketing name (HP Photosmart 7510 Series, etc.) or product numbers (CD734A, etc.). FCC statement Technical information VCCI (Class B) compliance statement for users in Japan Notice - HP Photosmart 7510 | User Guide - Page 55
in English only) either within the product documentation or at the following web site: www.hp.com/go/ certificates (type the product number in the search field). The compliance is indicated by one of the following conformity markings placed on the product: For non-telecommunications products and for - HP Photosmart 7510 | User Guide - Page 56
Technical information Chapter 11 (continued) For EU non-harmonized telecommunications products (If applicable, a 4-digit notified body number is inserted between CE and !). Please refer to the regulatory label provided on the product. The telecommunications functionality of this product may be - HP Photosmart 7510 | User Guide - Page 57
Technical information Notice to users in Brazil Notice to users in Canada Notice to users in Taiwan Regulatory wireless statements 55 - HP Photosmart 7510 | User Guide - Page 58
Chapter 11 Technical information 56 Technical information - HP Photosmart 7510 | User Guide - Page 59
39, 40 P paper specifications 44 phone support 34 phone support period period for support 34 photo paper specifications 44 print specifications 45 R recycle ink cartridges 47 regulatory notices regulatory model identification number 52 wireless statements 54 S scan scan specifications 46 system - HP Photosmart 7510 | User Guide - Page 60
58 Index
-
 1
1 -
 2
2 -
 3
3 -
 4
4 -
 5
5 -
 6
6 -
 7
7 -
8
-
9
-
10
-
11
-
12
-
13
-
14
-
15
-
16
-
17
-
18
-
19
-
20
-
21
-
22
-
23
-
24
-
25
-
26
-
27
-
28
-
29
-
30
-
31
-
32
-
33
-
34
-
35
-
36
-
37
-
38
-
39
-
40
-
41
-
42
-
43
-
44
-
45
-
46
-
47
-
48
-
49
-
50
-
51
-
52
-
53
-
54
-
55
-
56
-
57
-
58
-
59
-
60
 |
 |

HP Photosmart 7510 Series