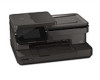
HP Photosmart 7520 User Guide
HP Photosmart 7520 Manual
 |
View all HP Photosmart 7520 manuals
Add to My Manuals
Save this manual to your list of manuals |
HP Photosmart 7520 manual content summary:
- HP Photosmart 7520 | User Guide - Page 1
HP Photosmart 7520 Series - HP Photosmart 7520 | User Guide - Page 2
- HP Photosmart 7520 | User Guide - Page 3
1 HP Photosmart 7520 Series Help...3 2 Get to Know the HP Photosmart Printer parts...5 Control panel features...6 Tips for getting to know the printer...7 3 How do I?...9 4 Print Print photos from a memory card...11 Select Print Media...13 Load media...13 Recommended papers for photo printing ...15 - HP Photosmart 7520 | User Guide - Page 4
print problem...55 Solve copy and scan problem...55 Solve networking problem...56 HP support by phone...56 Additional warranty options...57 Cartridge supply upgrade...57 Prepare printer...57 Check cartridge access door...57 Printhead failure...57 Printer failure...58 Ink cartridge problem...58 SETUP - HP Photosmart 7520 | User Guide - Page 5
the HP Photosmart: • Get to Know the HP Photosmart on page 5 • How do I? on page 9 • Print on page 11 • Copy and scan on page 19 • Work with cartridges on page 41 • Fax on page 25 • Load media on page 13 • Clear the paper jam on page 53 HP Photosmart 7520 Series Help HP Photosmart 7520 Series Help - HP Photosmart 7520 | User Guide - Page 6
Chapter 1 HP Photosmart 7520 Series Help 4 HP Photosmart 7520 Series Help - HP Photosmart 7520 | User Guide - Page 7
tray extender) 11 Paper-width guide for the main tray 12 Main tray (also referred to as the input tray) 13 Output tray 14 Wireless LED 15 On button 16 Cartridge door 17 Automatic document feeder 18 Automatic document feeder tray • Top and rear views of the printer Get to Know the HP Photosmart 5 - HP Photosmart 7520 | User Guide - Page 8
Chapter 2 19 Cartridge access area 20 Printhead assembly 21 Model number location 22 Rear USB port 23 Power connection (Use only with the power adapter supplied by HP). 24 Fax port (1-LINE ) 25 Fax port (2-EXT) 26 Two-sided printing accessory Control panel features The touch screen display shows - HP Photosmart 7520 | User Guide - Page 9
can also change settings and, if Web Services is enabled, print out a report.. 4 Wireless Settings: Opens the Wireless menu where you can see wireless properties and change wireless settings. 5 Ink Levels: Opens the Ink Levels menu showing estimated ink levels. 6 Settings: Opens the Settings menu - HP Photosmart 7520 | User Guide - Page 10
Chapter 2 Get to Know the HP Photosmart 8 Get to Know the HP Photosmart - HP Photosmart 7520 | User Guide - Page 11
section contains links to commonly performed tasks, such as printing photos, scanning, and making copies. • Scan to a computer, memory device, or email on page 19 • Copy text or mixed documents on page 20 • Clear the paper jam on page 53 • Replace the cartridges on page 42 • Load media on page 13 - HP Photosmart 7520 | User Guide - Page 12
Chapter 3 How do I? 10 How do I? - HP Photosmart 7520 | User Guide - Page 13
page 11 Related topics • Load media on page 13 • Tips for print success on page 16 Print photos from a memory card Do one of the following: Print photo on small-size paper 1. Load paper. ▲ Load up to 10 x 15 cm (4 x 6 inch) photo paper print side down in photo tray. Load photo paper in the photo - HP Photosmart 7520 | User Guide - Page 14
through the photos. d. Touch photo you want to print. e. Touch up arrow to increase number of copies. 4. Print photo. a. Touch Print to preview print job. b. Touch Print. Print photo on full-size paper 1. Load paper. ▲ Load full-size photo paper print side down in the main input tray. Load paper - HP Photosmart 7520 | User Guide - Page 15
and Services and select ink, toner and paper. Load media ▲ Do one of the following: Load 10 x 15 cm (4 x 6 inch) paper a. Raise photo tray lid. ❑ Raise photo tray lid and slide paper-width guide outwards. b. Load paper. ❑ Insert stack of photo paper into photo tray with short edge forward and print - HP Photosmart 7520 | User Guide - Page 16
main input tray. b. Load paper. ❑ Insert stack of paper into main input tray with short edge forward and print side down. ❑ Slide stack of paper forward until it stops. ❑ Slide paper-width guide inward until it stops at edge of paper. ❑ Lower the photo tray. Load envelopes a. Raise the photo tray - HP Photosmart 7520 | User Guide - Page 17
it stops. ❑ Slide paper-width guide inward against stack of envelopes until it stops. ❑ Lower the photo tray. Related topics • Tips for print success on page 16 Recommended papers for photo printing If you want the best print quality, HP recommends using HP papers that are specifically designed - HP Photosmart 7520 | User Guide - Page 18
tips to print successfully. Print tips • Use genuine HP cartridges. Genuine HP cartridges are designed for and tested with HP printers to help you produce great results, time after time. • Make sure the cartridges have sufficient ink. To check the estimated ink levels, touch the Ink Levels icon - HP Photosmart 7520 | User Guide - Page 19
black ink only, do one of the following according to your operating system. ◦ On Windows: Open your printer software, click Set Preferences. On the Paper/Quality tab, click Advanced. Select Black Ink Only from the Print in Grayscale drop-down list under Printer Features. ◦ On Mac: From the Print - HP Photosmart 7520 | User Guide - Page 20
Chapter 4 Print 18 Print - HP Photosmart 7520 | User Guide - Page 21
. b. Load original print side down on the right front corner of glass. c. Close the lid. 2. Start scan. a. On the Home screen, touch Scan. b. Select the destination by touching either Computer, USB Flash Drive, Memory Card or E-mail. If you are scanning to a computer and the printer is network - HP Photosmart 7520 | User Guide - Page 22
Copy and scan Chapter 5 Copy text or mixed documents ▲ Do one of the following: 1-sided copy a. Load paper. ❑ Load full-size paper in the main input tray. b. Load original. ❑ Load original print side up into the automatic document feeder. c. Specify number of copies. ❑ Touch Copy on Home screen. - HP Photosmart 7520 | User Guide - Page 23
make a large copy of a small original, scan the original into the computer, resize the image in the scanning software, and then print a copy of the enlarged image. • To avoid incorrect or missing scanned feature in the software and crop the scanned image manually. Tips for copy and scan success 21 - HP Photosmart 7520 | User Guide - Page 24
Chapter 5 Copy and scan 22 Copy and scan - HP Photosmart 7520 | User Guide - Page 25
to your printer when you enable Web Services, and both the email message and recognized attachments will print. • Your printer needs to have a wireless network connection to the Internet. You won't be able to use ePrint via a USB connection to a computer. • Attachments might print differently from - HP Photosmart 7520 | User Guide - Page 26
Services Chapter 6 Use HP Print Apps Print pages from the web, without using a computer, by setting up Print Apps, a free service from HP. You can print email to your printer. You can also get Product Updates, more Print Apps, and other free services. Go to the HP ePrintCenter website for more - HP Photosmart 7520 | User Guide - Page 27
-dial entries • Change fax settings • Fax and digital phone services • Fax over Internet Protocol • Use reports Send a fax You can send a fax in a variety of ways. Using the printer control panel, you can send a black-and-white or color fax. You can also send a fax manually from an attached phone - HP Photosmart 7520 | User Guide - Page 28
To use this feature, you must install the printer software using the installation program provided on the HP software CD provided with the printer. Windows 1. Open the document on your computer that you want to fax. 2. On the File menu in your software application, click Print. 3. From the Name list - HP Photosmart 7520 | User Guide - Page 29
fast enough, the printer might start sending fax tones too soon and cause your PIN not to be recognized by the calling card service. If this is the of the glass or print-side up in the Automatic Document Feeder. 2. Touch Fax, and then touch Black or Color. If the printer detects an original loaded - HP Photosmart 7520 | User Guide - Page 30
time. You can only schedule one fax to be sent at a time. You can continue to send faxes normally, however, while a fax is scheduled. NOTE: You can only send scheduled faxes in black-and-white. To schedule a fax from the printer control panel 1. Load your original print-side down in the right - HP Photosmart 7520 | User Guide - Page 31
your computer using HP Digital Fax (Fax to PC and Fax to Mac) Receive a fax manually When you are on the phone, the person you are speaking with can send you a fax while you are still connected. This is referred to as manual faxing. Use the instructions in this section to receive a manual fax. NOTE - HP Photosmart 7520 | User Guide - Page 32
most recently received fax printed first, and so on. 4. If you want to stop reprinting the faxes in memory, touch Cancel. Forward faxes to another number You can set up the printer to forward your faxes to another fax number. A received color fax is forwarded in black and white. HP recommends that - HP Photosmart 7520 | User Guide - Page 33
. 2. Touch Fax Setup, and then select Advanced Fax Setup. 3. Touch Automatic Reduction, and then select On or Off. Block unwanted fax numbers If you subscribe to a caller ID service through your phone provider, you can block specific fax numbers so the printer does not print faxes received from - HP Photosmart 7520 | User Guide - Page 34
Basic Fax Setup. 3. Touch Junk Fax Blocker. 4. Touch Print Reports, and then touch Junk Fax List. Receive faxes to your computer using HP Digital Fax (Fax to PC and Fax to Mac) If the printer is connected to your computer with a USB cable, you can use HP Digital Fax (Fax to PC and Fax to Mac) to - HP Photosmart 7520 | User Guide - Page 35
on-screen instructions. To set up Fax to Mac (Mac OS X) 1. Open HP Utility. 2. Select the printer. 3. Click Digital Fax Archive in the Fax Settings section. Modify Fax to PC and Fax to Mac settings You can update the Fax to PC settings from your computer at any time from the Digital Fax Setup Wizard - HP Photosmart 7520 | User Guide - Page 36
on page 13. 2. From the Home screen, touch Settings. 3. Touch Fax Setup, and then touch Speed Dial Setup. 4. Touch Print Speed Dial List. Change fax settings After completing the steps in the getting started guide that came with the printer, use the following steps to change the initial settings or - HP Photosmart 7520 | User Guide - Page 37
• Set the fax sound volume Configure the fax header The fax header prints your name and fax number on the top of every fax you send. HP recommends that you set up the fax header by using the HP software provided with the printer. You can also set up the fax header from the printer control panel, as - HP Photosmart 7520 | User Guide - Page 38
ring. With this feature, the printer recognizes and records the ring pattern of an incoming call and, based on this call, automatically determines the distinctive ring pattern assigned by your telephone company to fax calls. If you do not have a distinctive ring service, use the default ring pattern - HP Photosmart 7520 | User Guide - Page 39
for faxing. NOTE: HP does not guarantee that the printer will be compatible with all digital service lines or providers, in all digital environments, or with all digital-to-analog converters. It is always recommended that you discuss with the telephone company directly for the correct setup options - HP Photosmart 7520 | User Guide - Page 40
Internet faxing, contact your Internet faxing services support department or your local service provider for further assistance. Use reports You can set up the printer to print error reports and confirmation reports automatically for each fax you send and receive. You can also manually print system - HP Photosmart 7520 | User Guide - Page 41
when there is an error during transmission or reception. To set the printer to print fax error reports automatically 1. From the Home screen, touch the Fax icon. 2. Touch Settings, and then touch Fax Reports. 3. Touch Fax Error Report. 4. Touch to select one of the following. On (Send and Receive - HP Photosmart 7520 | User Guide - Page 42
1. From the Home screen, touch the Fax icon. 2. Touch Settings, and then touch Fax Reports. 3. Touch Caller ID Report. View the Call History Use the following procedure to view a list of all the calls placed from the printer. NOTE: The call history cannot be printed. You can only view it from the - HP Photosmart 7520 | User Guide - Page 43
on page 44 Tips for working with ink on page 45 Clean cartridges automatically If print quality is unacceptable, and the problem is not low ink levels or non-HP ink, try cleaning the cartridges. To clean the cartridges from the printer display 1. From the Home screen, press the Settings icon - HP Photosmart 7520 | User Guide - Page 44
Start menu on your computer, click All Programs, click HP. b. Click the HP Photosmart 7520 Series folder, click HP Photosmart 7520 Series. c. Under Print, double-click Maintain Your Printer. d. Under the Device Services tab, double-click Align Printheads. On Mac: ▲ Open HP Utility, click Align, and - HP Photosmart 7520 | User Guide - Page 45
3. Insert new cartridge. a. Remove cartridge from packaging. b. Twist orange cap to snap it off. A forceful twist may be required to remove cap. c. Match color icons, then slide cartridge into slot until it clicks into place. Work with cartridges Replace the cartridges 43 - HP Photosmart 7520 | User Guide - Page 46
it is not supported in your country/region, contact a local HP reseller for information about purchasing cartridges. Cartridge warranty information The HP cartridge warranty is applicable when the product is used in its designated HP printing device. This warranty does not cover HP ink products that - HP Photosmart 7520 | User Guide - Page 47
place. • Use genuine HP ink cartridges. Genuine HP ink cartridges are designed for and tested with HP printers to help you produce great results, time after time. • Consider getting replacement ink cartridges when you receive an ink alert message. This avoids possible printing delays. You do not - HP Photosmart 7520 | User Guide - Page 48
Chapter 8 Work with cartridges 46 Work with cartridges - HP Photosmart 7520 | User Guide - Page 49
point. NOTE: This product will only support 2.4Ghz ❑ A desktop computer or laptop with either wireless networking support. The computer must be connected to the wireless network that you intend to install the HP Photosmart on. NOTE: 1 If you have a Wi-Fi Protected Setup (WPS) router with a WPS push - HP Photosmart 7520 | User Guide - Page 50
computer, click All Programs, and then click HP. b. Click HP Photosmart 7520 Series, click Printer Setup & Software Selection, and then click Convert a USB connected printer to wireless. c. Follow the instructions on the screen. 2. On Mac: a. Touch the Wireless icon, and then touch Wireless Setup - HP Photosmart 7520 | User Guide - Page 51
From the Start menu on your computer, click All Programs, and then click HP. b. Click HP Photosmart 7520 Series, click Printer Setup and Software, and then click Connect a new printer c. Follow the instructions on the screen. 2. On Mac: ▲ Use HP Setup Assistant in Applications/Hewlett-Packard/Device - HP Photosmart 7520 | User Guide - Page 52
printer can be found by touching the Wireless button on the control panel or by printing a network configuration page. In a supported Web browser on your computer the EWS recognize your computer the next time you visit. For example, if you have configured the EWS language, a cookie helps remember - HP Photosmart 7520 | User Guide - Page 53
• Starting where you left the application (especially useful when using setup wizards). • Remembering the EWS browser language setting. • Personalizing the EWS Home page. cookies, see the documentation available with your Web browser. Connectivity Advanced printer management tools (for networked - HP Photosmart 7520 | User Guide - Page 54
Chapter 9 Connectivity 52 Connectivity - HP Photosmart 7520 | User Guide - Page 55
problem • HP support by phone • Additional warranty options • Cartridge supply upgrade • Prepare printer • Check cartridge access door • Printhead failure • Printer failure • Ink cartridge problem • SETUP cartridges Get more help You can find more information and help about your HP Photosmart - HP Photosmart 7520 | User Guide - Page 56
Chapter 10 3. Remove jammed paper. 4. Replace two-sided printing accessory. Solve a problem 5. Turn on product. 6. Try printing again. If the above solutions do not resolve the problem, click here for more online troubleshooting. Clearing paper jam from the Automatic Document Feeder To clear a - HP Photosmart 7520 | User Guide - Page 57
(Windows only) that can help solve many common "Unable to Print" issues. From the Start menu on your computer, click All Programs, and then click HP. Under HP Photosmart 7520 Series, click HP Photosmart 7520 Series, double-click Print Actions, and then double-click HP Print Diagnostic Utility. Click - HP Photosmart 7520 | User Guide - Page 58
East, and Africa, go to www.hp.com/support. Standard phone company charges apply. Placing a call Call HP support while you are in front of the computer and the product. Be prepared to provide the following information: • Product name (HP Photosmart 7520 Series) • Serial number (located on the back - HP Photosmart 7520 | User Guide - Page 59
you still receive a supply upgrade problem error message, contact HP support for help. Click here to go online for more information. Prepare printer If you are not satisfied with the print quality, try cleaning the cartridges from the control panel. See Clean cartridges automatically on page 41 for - HP Photosmart 7520 | User Guide - Page 60
have already turned the printer off and then on, and this does not solve your problem, contact HP support for help. Click here to go online for more information. Ink cartridge problem To solve ink cartridge problem 1. Try removing and reinserting the cartridges. Make sure the cartridges are in the - HP Photosmart 7520 | User Guide - Page 61
you remove, or they will quickly dry out. Some ink will still evaporate, but less than if the cartridges are uncapped. You can use the orange caps from the SETUP cartridges if necessary. If you still receive the error message, contact HP support for help. Click here to go online for more information - HP Photosmart 7520 | User Guide - Page 62
package and find the Warranty Ends date. If it says 'v1' several spaces to the right of the date, then the cartridge is the updated newer version. If it is an older generation cartridge, contact HP support for help or replacement. Click here to go online for more information. 60 Solve a problem - HP Photosmart 7520 | User Guide - Page 63
date when the cartridge was first installed, the date when the cartridge was last used, the number of pages printed using the cartridge, the page coverage, the printing modes used, any printing errors that might have occurred, and the product model. This information helps HP design future products - HP Photosmart 7520 | User Guide - Page 64
output from the HP Photosmart may be slightly distorted • HP recommends using a USB cable less than or equal to 3 m (10 feet) in length to minimize injected noise due to potential high electromagnetic fields Print resolution To learn more about the printer resolution, see the printer software. Paper - HP Photosmart 7520 | User Guide - Page 65
NOTE: For a complete list of supported media sizes, see the printer driver. Two-sided printing accessory paper specifications - all regions except (depends on model) Ink cartridge yield Visit www.hp.com/go/learnaboutsupplies for more information on estimated cartridge yields. Scan specifications • - HP Photosmart 7520 | User Guide - Page 66
visit: www.hp.com/hpinfo/globalcitizenship/environment/recycle/ HP inkjet supplies recycling program HP is committed to protecting the environment. The HP Inkjet Supplies Recycling Program is available in many countries/regions, and lets you recycle used print cartridges and ink cartridges free of - HP Photosmart 7520 | User Guide - Page 67
: If you are printing through a wireless connection over a network, Auto Power-Off should be disabled to ensure that print jobs do not get lost. Even when Auto Power-Off is disabled, the user-adjustable Energy Saver Mode helps reduce energy use. Set the Energy Save Mode The HP Photosmart Energy Save - HP Photosmart 7520 | User Guide - Page 68
Chapter 11 Disposal of waste equipment by users in private households in the European Union Technical information Chemical Substances HP is committed to providing our customers with information about the chemical substances in our products as needed to comply with legal requirements such as REACH - HP Photosmart 7520 | User Guide - Page 69
Technical information Parliament and the Council). A chemical information report for this product can be found at: www.hp.com/go/ reach. Restriction of hazardous substance (Ukraine) Battery disposal in the Netherlands Battery disposal in Taiwan California Perchlorate Material Notice Environmental - HP Photosmart 7520 | User Guide - Page 70
The HP Photosmart meets product requirements from regulatory agencies in your country/region. This section contains the following topics: • Regulatory model identification number • FCC statement • VCCI (Class B) compliance statement for users in Japan • Notice to users in Japan about the power cord - HP Photosmart 7520 | User Guide - Page 71
regulatory number should not be confused with the marketing name (HP Photosmart 7520 Series, etc.) or product numbers (CZ045A, etc.). FCC statement Technical information VCCI (Class B) compliance statement for users in Japan Notice to users in Japan about the power cord Regulatory notices 69 - HP Photosmart 7520 | User Guide - Page 72
of this product is valid only if powered with the correct CE-marked AC adapter provided by HP. If this product has telecommunications functionality, web site: www.hp.com/go/ certificates (type the product number in the search field). The compliance is indicated by one of the following conformity - HP Photosmart 7520 | User Guide - Page 73
that the country settings of the wireless network are correct. France • For 2.4-GHz Wireless LAN operation of this product, Boeblingen, GERMANY Regulatory telecommunication notices The HP Photosmart meets telecommunication requirements from regulatory agencies fax statement Regulatory notices 71 - HP Photosmart 7520 | User Guide - Page 74
Chapter 11 Notice to users of the U.S. telephone network: FCC requirements Technical information 72 Technical information - HP Photosmart 7520 | User Guide - Page 75
Notice to users of the Canadian telephone network Technical information Notice to users of the German telephone network Australia wired fax statement Regulatory notices 73 - HP Photosmart 7520 | User Guide - Page 76
statements This section contains the following regulatory information pertaining to wireless products: • Exposure to radio frequency radiation • Notice to users in Brazil • Notice to users in Canada • Notice to users in Mexico • Notice to users in Taiwan Exposure to radio frequency radiation - HP Photosmart 7520 | User Guide - Page 77
Notice to users in Canada Technical information Notice to users in Mexico Regulatory notices 75 - HP Photosmart 7520 | User Guide - Page 78
Chapter 11 Notice to users in Taiwan Technical information 76 Technical information - HP Photosmart 7520 | User Guide - Page 79
getting started guide for later use. In this section, you learn how to set up the printer so that faxing works successfully with equipment and services you might already have on the same phone line. TIP: You can also use the Fax Setup Wizard (Windows) or HP Setup Assistant (Mac OS X) to help you - HP Photosmart 7520 | User Guide - Page 80
recommended fax setup. Step-by-step instructions are included for each case in the sections that follow. NOTE: If your home or office setup is not described in this section, set up the printer as you would a regular analog phone. Make sure you use the phone cord supplied in the box to connect one - HP Photosmart 7520 | User Guide - Page 81
Other equipment or services sharing your fax line DSL PBX Distinctive Voice ring calls service Computer dial-up modem Answering machine Recommended fax setup Voice mail service Case A: Separate fax line (no voice calls received) on page 80 Case B: Set up the printer with DSL on page 80 Case - HP Photosmart 7520 | User Guide - Page 82
to Answer setting. The printer begins emitting fax reception tones to the sending fax machine and receives the fax. Case B: Set up the printer with DSL If you have a DSL service through your telephone company, and do not connect any equipment to the printer, use the instructions in this section to - HP Photosmart 7520 | User Guide - Page 83
one phone cord is supplied, you might need to obtain additional phone cords for this setup. 3. Connect an additional phone cord from the DSL filter to the telephone wall jack. 4. Run a fax test. If you encounter problems setting up the printer with optional equipment, contact your local service - HP Photosmart 7520 | User Guide - Page 84
ring service (through your telephone company) that allows you to have multiple phone numbers on one phone line, each with a different ring pattern, set up the printer as described in this section. Back view of the printer Additional fax setup 1 Telephone wall jack 2 Use the phone cord supplied - HP Photosmart 7520 | User Guide - Page 85
other office equipment (or voice mail) on this phone line, set up the printer as described in this section. Back view of the printer Additional fax setup 1 Telephone wall jack 2 Use the phone cord supplied in the box with the printer to connect to the 1-LINE port. You might need to connect the - HP Photosmart 7520 | User Guide - Page 86
. If you pick up the phone before the printer answers the call and hear fax tones from a sending fax machine, you need to answer the fax call manually. If you encounter problems setting up the printer with optional equipment, contact your local service provider or vendor for further assistance. Case - HP Photosmart 7520 | User Guide - Page 87
to respond in person to incoming fax calls, or the printer cannot receive faxes. You must initiate the manual fax before voicemail picks up the line. If you encounter problems setting up the printer with optional equipment, contact your local service provider or vendor for further assistance - HP Photosmart 7520 | User Guide - Page 88
your local service provider or vendor for further assistance. Set up the printer with a computer DSL/ADSL modem If you have a DSL line and use that phone line to send faxes, follow these instructions to set up your fax. Additional fax setup 1 2 3 86 Additional fax setup Telephone wall jack - HP Photosmart 7520 | User Guide - Page 89
-11 ports on the front and a plug on the back. Additional fax setup To set up the printer with a computer DSL/ADSL modem 1. Obtain a DSL filter from your DSL provider. 2. Using the phone cord provided in the box with the printer, connect one end to the DSL filter, and then connect the other end to - HP Photosmart 7520 | User Guide - Page 90
.) Example of a parallel splitter To set up the printer on the same phone line as a computer with two phone ports Back view of the printer Additional fax setup 1 Telephone wall jack 2 Use the phone cord supplied in the box with the printer to connect to the 1-LINE port. 3 Parallel splitter - HP Photosmart 7520 | User Guide - Page 91
up your fax. If you encounter problems setting up the printer with optional equipment, contact your local service provider or vendor for further assistance. Shared voice/fax with computer DSL/ADSL modem Use these instructions if your computer has a DSL/ADSL modem Additional fax setup 1 Telephone - HP Photosmart 7520 | User Guide - Page 92
you set in the Rings to Answer setting. The printer begins emitting fax reception tones to the sending fax machine and receives the fax. If you encounter problems setting up the printer with optional equipment, contact your local service provider or vendor for further assistance. Case I: Shared - HP Photosmart 7520 | User Guide - Page 93
connect your answering machine directly to the printer, fax tones from a sending fax machine might be recorded on your answering machine, and you might not receive faxes with the printer. 3. Using the phone cord supplied in the box with the printer, connect one end to your telephone wall jack, then - HP Photosmart 7520 | User Guide - Page 94
ports Back view of the printer Additional fax setup 1 Telephone wall jack 2 "IN" phone port on your computer 3 "OUT" phone port on your computer 4 Telephone (optional) 5 Answering machine 6 Computer with modem 7 Use the phone cord supplied in the box with the printer to connect to the - HP Photosmart 7520 | User Guide - Page 95
, contact your local service provider or vendor for further assistance. Shared voice/fax line with computer DSL/ADSL modem and answering machine Additional fax setup 1 Telephone wall jack 2 Parallel splitter 3 DSL/ADSL filter 4 Phone cord provided with the printer connected to the 1-LINE - HP Photosmart 7520 | User Guide - Page 96
. If you use the same phone line for telephone, fax, and have a computer DSL modem, follow these instructions to set up your fax. If you encounter problems setting up the printer with optional equipment, contact your local service provider or vendor for further assistance. 94 Additional fax setup - HP Photosmart 7520 | User Guide - Page 97
plug on the back.) Example of a parallel splitter • If your computer has two phone ports, set up the printer as follows: Back view of the printer Additional fax setup 1 Telephone wall jack 2 Use the phone cord supplied in the box with the printer to connect to the 1-LINE port You might need to - HP Photosmart 7520 | User Guide - Page 98
to incoming fax calls, or the printer cannot receive faxes. If you encounter problems setting up the printer with optional equipment, contact your local service provider or vendor for further assistance. Serial-type fax setup For information on setting up the printer for faxing using a serial - HP Photosmart 7520 | User Guide - Page 99
test fails, review the report for information on how to fix the problem and rerun the test. To test fax setup via the printer control panel 1. Set up the printer for faxing according to your particular home or office setup instructions. 2. Make sure the ink cartridges are installed, and that full - HP Photosmart 7520 | User Guide - Page 100
Chapter 12 Additional fax setup 98 Additional fax setup - HP Photosmart 7520 | User Guide - Page 101
fax setup with parallel phone systems 80 after the support period 56 answer ring pattern change 35 parallel phone systems 82 answering machine set up with fax (parallel phone systems) 90 set up with fax and modem 91 automatic fax reduction 31 B backup fax 29 baud rate 37 black 81 print last - HP Photosmart 7520 | User Guide - Page 102
specifications 62 print fax logs 39 fax reports 38 faxes 30 last fax details 40 specifications 63 printer control panel send faxes 25 pulse dialing 36 R receive faxes auto answer mode 35 automatically 29 blocking numbers 31 forwarding 30 manually 29 rings to answer 35 recycle ink cartridges 64
-
 1
1 -
 2
2 -
 3
3 -
 4
4 -
 5
5 -
 6
6 -
 7
7 -
8
-
9
-
10
-
11
-
12
-
13
-
14
-
15
-
16
-
17
-
18
-
19
-
20
-
21
-
22
-
23
-
24
-
25
-
26
-
27
-
28
-
29
-
30
-
31
-
32
-
33
-
34
-
35
-
36
-
37
-
38
-
39
-
40
-
41
-
42
-
43
-
44
-
45
-
46
-
47
-
48
-
49
-
50
-
51
-
52
-
53
-
54
-
55
-
56
-
57
-
58
-
59
-
60
-
61
-
62
-
63
-
64
-
65
-
66
-
67
-
68
-
69
-
70
-
71
-
72
-
73
-
74
-
75
-
76
-
77
-
78
-
79
-
80
-
81
-
82
-
83
-
84
-
85
-
86
-
87
-
88
-
89
-
90
-
91
-
92
-
93
-
94
-
95
-
96
-
97
-
98
-
99
-
100
-
101
-
102
 |
 |

HP Photosmart 7520 Series