HP Photosmart All-in-One Printer - B109 User Guide - Page 60
Print troubleshooting, HP Photosmart All-In-One Driver Software, Change, Remove
 |
View all HP Photosmart All-in-One Printer - B109 manuals
Add to My Manuals
Save this manual to your list of manuals |
Page 60 highlights
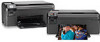
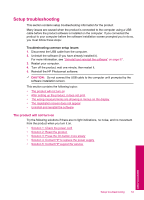
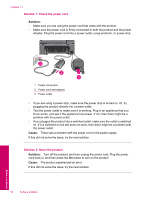
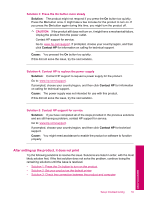
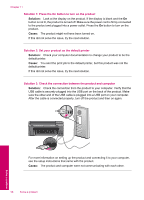
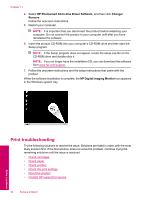
Chapter 11 4. Select HP Photosmart All-In-One Driver Software, and then click Change/ Remove. Follow the onscreen instructions. 5. Restart your computer. NOTE: It is important that you disconnect the product before restarting your computer. Do not connect the product to your computer until after you have reinstalled the software. 6. Insert the product CD-ROM into your computer's CD-ROM drive and then start the Setup program. NOTE: If the Setup program does not appear, locate the setup.exe file on the CD-ROM drive and double-click it. NOTE: If you no longer have the installation CD, you can download the software from www.hp.com/support. 7. Follow the onscreen instructions and the setup instructions that came with the product. When the software installation is complete, the HP Digital Imaging Monitor icon appears in the Windows system tray. Print troubleshooting Try the following solutions to resolve the issue. Solutions are listed in order, with the most likely solution first. If the first solution does not solve the problem, continue trying the remaining solutions until the issue is resolved. • Check cartridges • Check paper • Check product • Check the print settings • Reset the product • Contact HP support for service 58 Solve a problem Solve a problem
-
 1
1 -
2
-
3
-
4
-
5
-
6
-
7
-
8
-
9
-
10
-
11
-
12
-
13
-
14
-
15
-
16
-
17
-
18
-
19
-
20
-
21
-
22
-
23
-
24
-
25
-
26
-
27
-
28
-
29
-
30
-
31
-
32
-
33
-
34
-
35
-
36
-
37
-
38
-
39
-
40
-
41
-
42
-
43
-
44
-
45
-
46
-
47
-
48
-
49
-
50
-
51
-
52
-
53
-
54
-
 55
55 -
 56
56 -
 57
57 -
 58
58 -
 59
59 -
 60
60 -
 61
61 -
 62
62 -
 63
63 -
 64
64 -
 65
65 -
66
-
67
-
68
-
69
-
70
-
71
-
72
-
73
-
74
-
75
-
76
-
77
-
78
-
79
-
80
-
81
-
82
-
83
-
84
-
85
-
86
-
87
-
88
-
89
-
90
-
91
-
92
-
93
-
94
-
95
-
96
-
97
-
98
-
99
-
100
-
101
-
102
-
103
-
104
-
105
-
106
-
107
-
108
-
109
-
110
-
111
-
112
 |
 |
