HP Photosmart C7100 Basics Guide
HP Photosmart C7100 - All-in-One Printer Manual
 |
View all HP Photosmart C7100 manuals
Add to My Manuals
Save this manual to your list of manuals |
HP Photosmart C7100 manual content summary:
- HP Photosmart C7100 | Basics Guide - Page 1
HP Photosmart C7100 All-in-One series Basics Guide - HP Photosmart C7100 | Basics Guide - Page 2
HP Photosmart C7100 All-in-One series Basics Guide - HP Photosmart C7100 | Basics Guide - Page 3
allowed under copyright laws. The only warranties for HP products and services are set forth in the express warranty statements accompanying such products and services. Nothing herein should be construed as constituting an additional warranty. HP shall not be liable for technical or editorial errors - HP Photosmart C7100 | Basics Guide - Page 4
troubleshooting 92 Clear paper jams 98 Information on ink cartridges 99 Ink cartridge messages 99 Support process 104 HP support by phone 104 Additional warranty options 104 6 Technical information 105 System requirements 105 Paper specifications 105 Print specifications 105 Basics Guide - HP Photosmart C7100 | Basics Guide - Page 5
specifications 106 Environmental specifications 107 Acoustic information 107 Environmental product stewardship program 107 Regulatory notices 107 Ink cartridge warranty information 107 Warranty...108 Index...109 2 HP Photosmart C7100 All-in-One series - HP Photosmart C7100 | Basics Guide - Page 6
on your computer. Note This guide introduces basic operations and troubleshooting, as well as providing information for contacting HP support and ordering supplies. The onscreen Help details the full range of features and functions, including use of the HP Photosmart software that came with the - HP Photosmart C7100 | Basics Guide - Page 7
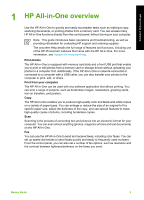
All-in-One at a glance HP All-in-One overview Label 1 2 3 4 5 6 7 8 9 10 11 12 Description -length guide for the main input tray On button Front USB port for your camera or other storage device Memory card slots and Photo light Wireless radio light and Bluetooth light 4 HP Photosmart C7100 All - HP Photosmart C7100 | Basics Guide - Page 8
HP All-in-One overview (continued) Label 13 14 15 16 17 Description Slide and Negative Film holder Slide and 2-EXT (phone) ports Rear door Power connection Control panel features The following diagram and related table provide a quick reference to the HP All-in-One control panel features. Basics - HP Photosmart C7100 | Basics Guide - Page 9
, and prints frames from a video file on your memory card or storage device. Share: Sends or receives images directly from a network-connected HP All-in-One. If the HP All-in-One is USB-connected, you can send images using the software on your computer. 6 HP Photosmart C7100 All-in-One series - HP Photosmart C7100 | Basics Guide - Page 10
problem occurred. See the display for more information. Symbols and *: Enter symbols and asterisks for fax-related tasks. Space and #: Enter spaces and pound signs for fax-related tasks. Use the HP Photosmart software You can use the HP Photosmart software (Windows) or the HP Photosmart Guide 7 - HP Photosmart C7100 | Basics Guide - Page 11
instructions for setting up your HP All-in-One and installing software. Make sure you follow the steps in the Setup Guide in order. If you have problems during setup, see Troubleshooting in the last section of the Setup Guide, or see Troubleshooting and support in this guide. ● HP Photosmart - HP Photosmart C7100 | Basics Guide - Page 12
Note Use the instructions in this section if you first installed the HP All-in-One with a USB connection, and you now want to change to either a wireless or Ethernet network connection. View or change the network settings. Manage your network settings Find troubleshooting information. Network - HP Photosmart C7100 | Basics Guide - Page 13
laptop with an Ethernet connection. Note The HP All-in-One supports both 10 Mbps and 100 Mbps Ethernet networks HP recommends broadband Internet access such as cable or DSL. Broadband Internet access is required if you want to access HP Photosmart Share directly from the HP All-in-One. Connect the HP - HP Photosmart C7100 | Basics Guide - Page 14
drives, make sure that your computer is currently connected to these drives before installing the software. Otherwise, HP All-in-One installation software might try to use one of the reserved drive letters, and you will of available space, and the processor speed of your computer. Basics Guide 11 - HP Photosmart C7100 | Basics Guide - Page 15
Windows CD that came with the HP All-in-One into the CD-ROM drive on your computer and follow the onscreen instructions. 3. If a dialog box for HP All-in-One devices. 5. From the HP Installer dialog, select your language and the HP All-in-One you want to connect. 12 HP Photosmart C7100 All - HP Photosmart C7100 | Basics Guide - Page 16
instructions to complete all the installation steps, including the Setup Assistant. When you have finished installing the software, the HP All-in-One is ready for use. 7. To test your network connection, go to your Mac and print a self-test report to the HP access ● HP Photosmart Share feature - HP Photosmart C7100 | Basics Guide - Page 17
). Note Broadband Internet access is required if you want to access HP Photosmart Share directly from the device. ❑ Network name (SSID). Note point supports using EasySetup and for additional setup instructions. Caution To prevent other users from accessing your wireless network, HP strongly - HP Photosmart C7100 | Basics Guide - Page 18
it, and then press OK. The visual keyboard appears. b. Enter the SSID. Use the arrow buttons on the HP All-in-One control panel to highlight a letter or number on the visual keyboard, and then press OK to select use encryption is highlighted, and then press OK. Go to step 7. Basics Guide 15 - HP Photosmart C7100 | Basics Guide - Page 19
likely not have shared broadband access (such as cable or DSL), and therefore not be able to use the HP Photosmart Share feature on the HP All-in-One. In order to connect the HP All-in-One to your computer, you need to create a network profile on your computer. A network profile is comprised - HP Photosmart C7100 | Basics Guide - Page 20
off the Windows firewall with Windows XP Service Pack 2 a. On the Windows Control HP recommends you create a new network profile on your computer as described here, and then run the Wireless Setup Wizard to detect the new network. 1. Make sure you have prepared your computer as instructed Guide 17 - HP Photosmart C7100 | Basics Guide - Page 21
select WEP. Note It is possible to create a network that does not use a WEP key. However, HP recommends using a WEP key in order to secure your network. d. Make sure that the check box is not running on your computer and temporarily disable all firewalls. 18 HP Photosmart C7100 All-in-One series - HP Photosmart C7100 | Basics Guide - Page 22
and privacy HP recommends down your password, which on your HP All-in-One is called a HP All-in-One and use the Wireless Setup Wizard to connect your HP Allin-One to the wireless network. Create a network profile for other operating systems If you have an operating system other than Windows XP, HP - HP Photosmart C7100 | Basics Guide - Page 23
New Network Name (SSID). The visual keyboard appears. b. Enter the SSID. Use the arrow buttons on the HP All-in-One control panel to highlight a letter or number on the visual keyboard, and then press OK to until Ad Hoc is highlighted, and then press OK. 20 HP Photosmart C7100 All-in-One series - HP Photosmart C7100 | Basics Guide - Page 24
to confirm. The HP All-in-One When the HP All-in-One HP All-in-One to more than one computer on a small network of computers. If the HP the HP All-in HP All-in-One from a USB connection to a network connection If you first install the HP the HP All-in HP All-in-One. 2. On the control panel of the HP - HP Photosmart C7100 | Basics Guide - Page 25
network settings You can display a summary of the network settings on the HP All-in-One control panel, or you can print a more detailed panel of the HP All-in-One, press Setup. 2. Press until Network is highlighted, and then press OK. The Network Menu appears. 22 HP Photosmart C7100 All-in- - HP Photosmart C7100 | Basics Guide - Page 26
might want to turn the radio off. To turn the wireless radio on and off 1. On the control panel of the HP All-in-One, press Setup. 2. Press until Network is highlighted, and then press OK. 3. Press until Wireless Radio is . You also can print the wireless network test at any time. Basics Guide 23 - HP Photosmart C7100 | Basics Guide - Page 27
and subnet mask of the HP All-in-One, print a network configuration page from the HP All-in-One. Note When manually entering an IP Setting, you HP All-in-One. To change IP settings 1. Press Setup. 2. Press until Network is highlighted, then press OK. The Network Menu appears. 24 HP Photosmart - HP Photosmart C7100 | Basics Guide - Page 28
Press until IP Settings is highlighted, and then press OK. 4. Press until Manual is highlighted, and then press OK. 5. Press to highlight one of the .1.101. The Embedded Web Server Home page appears, showing information for the HP All-in-One. Note If you are using a proxy server in your Guide 25 - HP Photosmart C7100 | Basics Guide - Page 29
.3 network. ● Wireless: The HP All-in-One is connected to a wireless (802.11) network. ● None: There is no network connection. URL The IP address of the Embedded Web Server. Note You will need to know this URL when you try to access the Embedded Web Server. 26 HP Photosmart C7100 All-in-One - HP Photosmart C7100 | Basics Guide - Page 30
Note If you call HP Support, depending on the problem, you might be have the same MAC address. Note Some Internet service providers (ISPs) require that you register the manually assigning an IP address. An invalid IP address during installation will prevent your network components from seeing the HP - HP Photosmart C7100 | Basics Guide - Page 31
already set a manual ip address. The protocol used to assign the IP address to the HP All-in-One service provider (ISP). The speed at which data is transmitted over a network. Speeds include 10TX-Full, 10TX-Half, 100TX-Full, and 100TX-Half. When set to None, networking is disabled. 28 HP Photosmart - HP Photosmart C7100 | Basics Guide - Page 32
wired Ethernet and one for wireless 802.11. Note Some Internet service providers (ISPs) require that you register the MAC address of the recommended. Note Manually assigning an invalid IP address during installation will prevent your network components from seeing the HP All-inOne. Guide 29 - HP Photosmart C7100 | Basics Guide - Page 33
● Manual: The configuration parameters are set manually, such as a static IP address. ● Not Specified: The mode used when the HP All-in-One is initializing. DNS server The IP address of the domain name service ( does not apply to this network type. 30 HP Photosmart C7100 All-in-One series - HP Photosmart C7100 | Basics Guide - Page 34
Service Set Identifier. A unique identifier (up to 32 characters) that differentiates one wireless local area network (WLAN) from another. The SSID is also referred to as the network name. This is the name of the network to which the HP of security against casual eavesdroppers. Basics Guide 31 - HP Photosmart C7100 | Basics Guide - Page 35
(WPA-PSK) authentication provides significantly stronger security, and is supported in most wireless access points and wireless routers. The access by the HP All-in-One without error since it has been turned on. The counter clears after the HP All-inOne is turned off. 32 HP Photosmart C7100 All- - HP Photosmart C7100 | Basics Guide - Page 36
or not the HP All-in-One is HP All-in-One can print to it. The level of security set for an HP All-in-One connected by Bluetooth. ● Low: The HP All-in-One does not require a passkey. Any Bluetooth device within range can print to it. ● High: The HP - HP Photosmart C7100 | Basics Guide - Page 37
all the steps in the Setup Guide, use the instructions in this section to complete your fax setup. Please keep your Setup Guide for later use. In this section, you will learn how to set up the HP All-in-One so that faxing works successfully with equipment and services you might already have on - HP Photosmart C7100 | Basics Guide - Page 38
services (if any) share the same phone line with the HP the HP All line (DSL) service through your telephone Case B: Set up the HP All-in-One with DSL. services digital network (ISDN) system? If you answered Yes, proceed directly to Case C: Set up the HP ring service on the this service, each - HP Photosmart C7100 | Basics Guide - Page 39
the box to connect one end to your telephone wall jack and the other end to the port labeled 1-LINE on the back of the HP All-in-One. If you use another phone cord, you might experience problems sending and receiving faxes. Fax setup 36 HP Photosmart C7100 All-in-One series - HP Photosmart C7100 | Basics Guide - Page 40
line (no voice calls received) (no voice calls received) DSL service (You answered Yes to question 1 only.) Case B: Set up the HP All- Case B: Set up the HP All- in-One with DSL in-One with DSL PBX or I: Shared voice/fax line with answering machine Not applicable. Fax setup Basics Guide 37 - HP Photosmart C7100 | Basics Guide - Page 41
up service hp.es/faxconfig www.hp.nl/faxconfig www.hp.be/fr/faxconfig www.hp.be/nl/faxconfig www.hp.pt/faxconfig www.hp.se/faxconfig www.hp.fi/faxconfig www.hp.dk/faxconfig www.hp.no/faxconfig www.hp.com/ie/faxconfig www.hp.com/fr/faxconfig www.hp.com/it/faxconfig Fax setup 38 HP Photosmart - HP Photosmart C7100 | Basics Guide - Page 42
. Then it will begin emitting fax reception tones to the sending fax machine and receive the fax. Case B: Set up the HP All-in-One with DSL If you have a DSL service through your telephone company, use the instructions in this section to connect a DSL filter between the telephone wall jack and the - HP Photosmart C7100 | Basics Guide - Page 43
Note If you have other office equipment or services attached to this phone line, such as a distinctive ring service, answering machine, or voice mail, see the appropriate section in this section for additional setup guidelines. 4. Run a fax test. Fax setup 40 HP Photosmart C7100 All-in-One series - HP Photosmart C7100 | Basics Guide - Page 44
Group 3 fax and another port for multiple purposes. If you have problems when connected to the fax/phone port of your ISDN converter, try send or receive faxes with the HP All-in-One. Refer to the documentation that came with your PBX phone system for instructions on how to turn off the Guide 41 - HP Photosmart C7100 | Basics Guide - Page 45
the box with the HP All-in-One to connect to the "1-LINE" port To set up the HP All-in-One with a distinctive ring service 1. Using the phone cord supplied in the box with the HP All-in-One, reception tones to the sending fax machine and receive the fax. 42 HP Photosmart C7100 All-in-One series - HP Photosmart C7100 | Basics Guide - Page 46
setting. - If you set up the HP All-in-One to answer faxes manually, you must be available to respond in person to incoming fax calls or the HP All-in-One cannot receive faxes. To set up the HP All-in-One to answer calls manually, turn off the Auto Answer setting. Basics Guide 43 - HP Photosmart C7100 | Basics Guide - Page 47
to subscribe to a distinctive ring service, or to obtain a separate phone line for faxing. Back view of the HP All-in-One 1 Telephone wall jack 2 Use the phone cord supplied in the box with the HP All-in-One to connect to the "1-LINE" port Fax setup 44 HP Photosmart C7100 All-in-One series - HP Photosmart C7100 | Basics Guide - Page 48
HP to incoming fax calls, or the HP All-in-One cannot receive faxes HP All-in-One as described HP All-in-One 1 Telephone wall jack 2 Use the phone cord supplied in the box with the HP All-in-One to connect to the "1-LINE" port 3 Computer with modem To set up the HP back of the HP All-in- One - HP Photosmart C7100 | Basics Guide - Page 49
Answer setting to the lowest setting (two rings). 7. Run a fax test. When the phone rings, the HP All-in-One will answer automatically after the number of rings you set in the Rings to Answer setting. Then not use a 2-line phone splitter, a serial Fax setup 46 HP Photosmart C7100 All-in-One series - HP Photosmart C7100 | Basics Guide - Page 50
the HP All-in-One as described below. Fax setup Back view of the HP All- HP All-in-One to connect to the "1-LINE" port To set up the HP 2-EXT on the back of the HP All-in- One. 2. Find EXT on the back of the HP All-in-One. 3. Connect a supplied in the box with the HP All-in-One, connect one the HP All - HP Photosmart C7100 | Basics Guide - Page 51
Back view of the HP All-in-One 1 Telephone wall jack 2 "IN" port on your answering machine 3 "OUT" port on your answering machine 4 Telephone (optional) 5 Answering machine 6 Use the phone cord supplied in the box with the HP All-in-One to connect to the "1-LINE" port 48 HP Photosmart C7100 All-in - HP Photosmart C7100 | Basics Guide - Page 52
HP All-in-One. Note If you do not connect your answering machine directly to the HP HP All-in-One. 3. Using the phone cord supplied in the box with the HP the HP machine and telephone to the HP All-in-One. You on the HP All-in-One to the maximum number of rings supported by HP All-in-One as described - HP Photosmart C7100 | Basics Guide - Page 53
a parallel splitter ● If your computer has two phone ports, set up the HP All-in-One as described below. Fax setup Back view of the HP All-in-One 1 Telephone wall jack 2 "IN" phone port on your computer port labeled 2-EXT on the back of the HP All-in-One. 50 HP Photosmart C7100 All-in-One series - HP Photosmart C7100 | Basics Guide - Page 54
between the HP All-in- HP All-in-One. 4. Using the phone cord supplied in the box with the HP HP to the HP All-in- modem software, the HP All-in-One HP All-in-One to the maximum number of rings supported service through your telephone company, set up the HP All-in-One as described in this - HP Photosmart C7100 | Basics Guide - Page 55
mail service at the same phone number you use for fax calls. You must receive faxes manually; this HP All-in-One as described below. Fax setup Back view of the HP All-in-One 1 Telephone wall jack 2 "IN" phone port on your computer 3 "OUT" phone port on your computer 4 Telephone 52 HP Photosmart - HP Photosmart C7100 | Basics Guide - Page 56
receive faxes successfully, you might need to change some settings on the HP All-in-One. If you are unsure which setting to choose for a specific fax option, refer to the detailed fax setup instructions provided in this guide. ● Set the answer mode ● Set the number of rings before answering ● Change - HP Photosmart C7100 | Basics Guide - Page 57
. When you subscribe to this service, each number will have a different ring pattern. You can set up the HP All-in-One to answer incoming HP All-in-One is set to answer fax calls automatically. 2. Press Setup. 3. Press to highlight Advanced Fax Setup, and then press OK. Fax setup 54 HP Photosmart - HP Photosmart C7100 | Basics Guide - Page 58
fails, review the report for information on how to fix the problem and rerun the test. To test your fax setup from the control panel 1. Set up the HP All-in-One for faxing according to your particular home or office setup instructions. 2. Insert the ink cartridges and load full-size paper in - HP Photosmart C7100 | Basics Guide - Page 59
Done on the visual keyboard, and then press OK. 5. Enter your fax number by using the numeric keypad, and then press OK. Fax setup 56 HP Photosmart C7100 All-in-One series - HP Photosmart C7100 | Basics Guide - Page 60
information about how to use the HP All-in-One for basic operations. In addition, it provides instructions about how to load paper and Tip For more help on loading an original, refer to the engraved guides along the edge of the glass. Use the HP All-in-One features 3. Close the lid. Load 10 x - HP Photosmart C7100 | Basics Guide - Page 61
-width guide. 5. Push in the photo tray, and then lower the output tray. Load an original in the Slide and Negative Film holder You can scan 35 mm slides and negatives with the HP All-in-One using the Slide and Negative Film holder. Use the HP All-in-One features 58 HP Photosmart C7100 - HP Photosmart C7100 | Basics Guide - Page 62
the top half of the holder with the right edge of the glass. 5. Lower the lid of the HP All-in-One before starting the scan. To load 35 mm slides Note The HP All-in-One does not support scanning negative film that is mounted as a slide in plastic or cardboard. Basics - HP Photosmart C7100 | Basics Guide - Page 63
not snap into place easily, try rotating it 180 degrees. Some slides have a gap on one side that prevents them from fitting properly. Use the HP All-in-One features 5. Lower the lid of the HP All-in-One before starting the scan. 60 HP Photosmart C7100 All-in-One series - HP Photosmart C7100 | Basics Guide - Page 64
guide does not bend the paper in the input tray. ● Do not force paper too far forward in the input tray. ● Use paper types that are recommended for the HP original print side down in the right front corner of the glass. Use the HP All-in-One features 3. Press Start Copy Black or Start Copy Color to - HP Photosmart C7100 | Basics Guide - Page 65
-One to lose some of its scan functionality. If this happens, you can restore full functionality by restarting your computer or by starting the HP Photosmart Software. Scan an original to a computer You can scan originals placed on the glass by using the control panel. To scan to a computer 1. Load - HP Photosmart C7100 | Basics Guide - Page 66
Yes or No as appropriate, and then press OK. The HP All-in-One scans your original and shows a preview of and then press OK. Print Options Enables you to manually specify the type of paper on which you are printing pages from the scanned image. Note If the HP All-in-One is connected to a network, - HP Photosmart C7100 | Basics Guide - Page 67
HP All-in-One automatically detects whether you are scanning color negatives, slides, or black and white negatives. You can manually HP All-in-One automatically detects whether you are scanning color negatives, slides, or black and white negatives. Use the HP All-in-One features 64 HP Photosmart - HP Photosmart C7100 | Basics Guide - Page 68
HP the HP All-in HP All-in-One, and then push the card forward into the appropriate slot until the Photo light turns on. The HP All-in-One supports the memory cards described below. Each type of memory card can only be inserted in the appropriate slot for that card. Use the HP - HP Photosmart C7100 | Basics Guide - Page 69
to print the photo using the default print settings, press Print Photos. The HP All-in-One will print a 10 x 15 cm (4 x 6 manually specify the type of paper on which you are printing and whether you want to print a date and time stamp on your photo. Use the HP All-in-One features 66 HP Photosmart - HP Photosmart C7100 | Basics Guide - Page 70
are automatically handled by the software application. You need to change the settings manually only when you change print quality, print on specific types of paper or , orientation, and scaling. 3. Make sure the HP All-in-One is the selected printer. Use the HP All-in-One features Basics Guide 67 - HP Photosmart C7100 | Basics Guide - Page 71
successfully sent, enable fax confirmation before sending any faxes. Tip You can also send a fax manually from a phone or by using monitor dialing. These features allow you to control the pace glass. c. Press Start Fax Black. Use the HP All-in-One features 68 HP Photosmart C7100 All-in-One series - HP Photosmart C7100 | Basics Guide - Page 72
HP All-in-One sends the fax. Replace the ink cartridges Follow these instructions when you need to replace ink cartridges. Note If you are installing ink cartridges in the HP HP All-in-One, to order cartridges, go to www.hp 1. Make sure the HP All-in-One is the latch inside the HP All-in-One, and - HP Photosmart C7100 | Basics Guide - Page 73
to remove it. Tip You can recycle low or empty ink cartridges. The HP Inkjet Supplies Recycling Program is available in many countries/regions, and lets you : www.hp.com/hpinfo/globalcitizenship/environment/recycle/inkjet.html Use the HP All-in-One features 70 HP Photosmart C7100 All-in-One - HP Photosmart C7100 | Basics Guide - Page 74
streaking or white lines through any of the blocks of color. If you still have print quality problems after aligning the printer, try cleaning the print head. If print quality problems persist after aligning and cleaning, contact HP customer support. Basics Guide 71 Use the HP All-in-One features - HP Photosmart C7100 | Basics Guide - Page 75
to prevent spotting. 4. Plug in the power cord, and then turn on the HP All-in-One. Clean the lid backing Minor debris can accumulate on the white document backing located underneath the lid of the HP All-in-One. Use the HP All-in-One features 72 HP Photosmart C7100 All-in-One series - HP Photosmart C7100 | Basics Guide - Page 76
-in-One does not require cleaning. Keep fluids away from the control panel and the interior of the HP All-in-One. Caution To avoid damage to the exterior of the HP All-in-One, do not use alcohol or alcohol-based cleaning products. Use the HP All-in-One features Basics Guide 73 - HP Photosmart C7100 | Basics Guide - Page 77
the Setup program. 7. Follow the onscreen instructions and the instructions provided in the Setup Guide that came with the HP All-in-One. When the software installation is complete, the HP Digital Imaging Monitor icon appears in the Windows system tray. 74 HP Photosmart C7100 All-in-One series - HP Photosmart C7100 | Basics Guide - Page 78
One Installer. 7. Follow the onscreen instructions and the instructions provided in the Setup Guide that came with the HP All-in-One. Hardware setup troubleshooting Use this section to solve any problems you might encounter while setting up the HP All-in-One hardware. The HP All-in-One will not turn - HP Photosmart C7100 | Basics Guide - Page 79
Troubleshooting and support Chapter 5 I connected the USB cable, but I am having problems using the HP All-in-One with HP Support. Go to www.hp.com/support. If prompted, choose your country/region, and then click Contact HP for information on calling for technical support. 76 HP Photosmart C7100 - HP Photosmart C7100 | Basics Guide - Page 80
Troubleshooting and support The HP All-in-One does not print Cause The HP All-in-One and computer are not communicating with each other. Solution Check the connection between the HP All-in-One and computer. Cause There might be a problem ● The "Fax Line Condition" test failed Basics Guide 77 - HP Photosmart C7100 | Basics Guide - Page 81
again, continue reviewing the troubleshooting information in this section. Note Depending how long the HP All-in-One is problems faxing, contact HP Support. Go to www.hp.com/support. If prompted, choose your country/region, and then click Contact HP for information on calling for technical support - HP Photosmart C7100 | Basics Guide - Page 82
Troubleshooting and support ● If you are using a phone splitter, this can cause faxing problems. (A splitter is a two-cord connector that plugs into a telephone wall jack.) Try removing the splitter and connecting the HP back of the HP All-in- it passes and the HP All-in-One is the HP All-in- - HP Photosmart C7100 | Basics Guide - Page 83
Troubleshooting and support Chapter 5 labeled 1-LINE on the back of the HP All-in-One and the other end to your telephone wall jack, as shown below. 1 Telephone wall jack 2 Phone cord supplied in the box with the HP All-in-One ● Check the connection between the telephone wall jack and the HP All- - HP Photosmart C7100 | Basics Guide - Page 84
the phone line. The HP All-in-One is having problems sending and receiving faxes Cause The HP All-in-One is not set up properly for faxing. Solution Follow the instructions in this guide to set up the HP All-in-One properly for faxing, based on the equipment and services you have on the same - HP Photosmart C7100 | Basics Guide - Page 85
Troubleshooting and support Chapter 5 Then, run a fax test to check the status of the HP All-in-One and to make sure you set it up properly. The HP All-in-One prints a report with the results of the test. If the test fails, review the report for information on how to fix the problem. Cause - HP Photosmart C7100 | Basics Guide - Page 86
Troubleshooting and support If you used a 4-wire phone cord, disconnect it, find the supplied 2-wire phone cord, and then connect the 2-wire phone cord to the port labeled 1-LINE on the back of the HP All-in-One. If the HP All-in-One came with a 2-wire phone cord adaptor, you can use it with - HP Photosmart C7100 | Basics Guide - Page 87
faxes at a slower rate. Try setting the Fax Speed to Medium (14400) or Slow (9600) if you use one of the following: ● An Internet phone service ● A PBX system 84 HP Photosmart C7100 All-in-One series - HP Photosmart C7100 | Basics Guide - Page 88
Internet service provider supports faxing over the Internet. If the problem persists, contact your Internet service provider. The HP All-in-One cannot send faxes, but can receive faxes Cause The HP All-in-One is not set up properly for faxing. Solution Follow the instructions provided in this guide - HP Photosmart C7100 | Basics Guide - Page 89
mail service could be interfering with the recipient's phone line. You can also ask the recipient to check the receiving fax machine for any problems. The HP All-in-One is having problems sending a manual fax Cause The recipient's fax machine might not support receiving faxes manually. Solution - HP Photosmart C7100 | Basics Guide - Page 90
-in-One is not set up properly for faxing. Solution Follow the instructions in this guide to set up the HP All-in-One properly for faxing, based on the equipment and services you have on the same phone line as the HP All-in-One. Then, run a fax test to check the status of - HP Photosmart C7100 | Basics Guide - Page 91
Troubleshooting and support Chapter 5 Solution If you have a computer dial-up modem on the same phone line as the HP All-inOne, enough quiet time after your outgoing message to allow the HP All-in-One to detect fax tones. This problem is most common with digital answering machines. Solution If - HP Photosmart C7100 | Basics Guide - Page 92
Troubleshooting and support 4 Telephone (optional) 5 Answering machine 6 Use the phone cord supplied in the box with the HP All-in-One Make sure the HP All-in-One is set to receive faxes automatically and that the Rings to Answer setting is correct. The number of rings to answer for the HP All-in- - HP Photosmart C7100 | Basics Guide - Page 93
Troubleshooting and support Chapter 5 One from printing faxes, review the display for information on the error condition. Also, check for the following problems: ● The HP All-in-One is not set up properly for faxing. ● There is no paper loaded in the input tray. ● There is a paper jam. ● The ink - HP Photosmart C7100 | Basics Guide - Page 94
Troubleshooting and support Solution Note This possible solution applies only in the countries/regions that receive a 2-wire phone cord in the box with the HP directly to the HP All-in-One HP All-in-One Make sure the HP HP HP All-in-One is set up to receive faxes manually, which means that the HP - HP Photosmart C7100 | Basics Guide - Page 95
and support Chapter 5 Network setup troubleshooting This section addresses problems you might encounter while setting up a network. ● Wired network setup troubleshooting ● Wireless setup troubleshooting ● Network software installation troubleshooting Wired network setup troubleshooting This - HP Photosmart C7100 | Basics Guide - Page 96
Troubleshooting and support To establish an active network connection 1. Check the cable connections from the HP All-in-One to your gateway, router, or hub to ensure connections are secure. 2. If the connections are secure, turn off the power on the HP All-in-One, and then turn it on again. Press - HP Photosmart C7100 | Basics Guide - Page 97
to the HP All-in-One. Solution To obtain an IP address for the computer with the cable modem ➔ Your Internet Service Provider (ISP and the HP All-in-One. Do not assign a static IP address. Wireless setup troubleshooting This section addresses problems you might HP Photosmart C7100 All-in-One series - HP Photosmart C7100 | Basics Guide - Page 98
Troubleshooting and support Solution Access the Embedded Web Server and that the wireless adapter is broadcasting the SSID. Print a network configuration page from the HP All-in-One, and verify that the SSID for the wireless adapter appears on the The equipment is not turned on. Basics Guide 95 - HP Photosmart C7100 | Basics Guide - Page 99
Troubleshooting and support Chapter 5 Solution Turn on the networked devices, such as the access point for an infrastructure network, or the computer for an ad hoc network. For more information on how to turn on the access point, see the documentation that came with your access point. Cause The HP - HP Photosmart C7100 | Basics Guide - Page 100
Troubleshooting and support HP All-inOne was able to connect. Solution Cancel the setup and start over. Network software installation troubleshooting This section addresses network setup problems the instructions that came HP All-in-One from accessing your computer. Solution Uninstall the HP the HP HP - HP Photosmart C7100 | Basics Guide - Page 101
Troubleshooting and support Chapter 5 Note The HP All-in-One functionality will be limited during VPN sessions. Cause The Ethernet cable is not plugged in to the router, switch, or hub, or the cable is defective. Solution Reinsert the cables. Or, if necessary, try a different cable. Cause The HP - HP Photosmart C7100 | Basics Guide - Page 102
Troubleshooting and support 3. Gently pull problem with one of the print cartridges. For more information, see the onscreen Help. Ink cartridge messages Use this section to solve ink cartridge-related error messages that you might encounter while using the HP for the HP All-in- Basics Guide 99 - HP Photosmart C7100 | Basics Guide - Page 103
Troubleshooting and support Chapter 5 One. To find out the reorder number for all the ink cartridges that the HP All-in-One supports, follow the instructions provided in this guide. For more information, see: Replace the ink cartridges Cause The ink cartridge(s) are not intended for use in this - HP Photosmart C7100 | Basics Guide - Page 104
Troubleshooting and support remove and replace the expired ink cartridge, and then close the message. You can also continue printing without replacing the ink cartridge, by following the instructions on the HP Allin-One or the ink cartridge expiration message on your computer screen. HP recommends - HP Photosmart C7100 | Basics Guide - Page 105
Troubleshooting and support Chapter 5 Solution Remove any objects that are blocking the print head assembly. To clear the print head assembly 1. (s) or press OK on the control panel to continue. For more information, see: Replace the ink cartridges 102 HP Photosmart C7100 All-in-One series - HP Photosmart C7100 | Basics Guide - Page 106
Troubleshooting and support Wrong ink cartridge(s) installed Cause The wrong ink cartridge(s) are installed. Solution The first time you set up and use the HP that were shipped with the HP All-in-One. For more in place. If the problem persists, clean the copper the HP All-in-One, the ink - HP Photosmart C7100 | Basics Guide - Page 107
- Software and driver updates for the HP All-in-One - Valuable HP All-in-One and troubleshooting information for common problems - Proactive device updates, support alerts, and HP newsgrams that are available when you register the HP All-in-One 3. Call HP support. Support options and availability - HP Photosmart C7100 | Basics Guide - Page 108
paper and the amount of ink you are using. HP recommends emptying the output tray frequently. * Maximum capacity. Paper sizes For a complete list of supported media sizes, see the printer software. Print specifications : PCL3 GUI ● Duty cycle: Up to 3000 printed pages per month Basics Guide 105 - HP Photosmart C7100 | Basics Guide - Page 109
at standard resolution). More complicated pages or higher resolution takes longer and uses more memory. ● Manual fax send and receive. ● Automatic busy redial up to five times (varies by model). ● ● Input voltage: AC 100 to 240 V ~ 1 A 50-60 Hz, grounded 106 HP Photosmart C7100 All-in-One series - HP Photosmart C7100 | Basics Guide - Page 110
from the HP All-in-One may be slightly distorted ● HP recommends using HP Web site. Go to: www.hp.com/support HP Photosmart C7100 All-in HP ink cartridge(s) warranty is applicable when the product is used in its designated HP printing device. This warranty does not cover HP as the HP ink is - HP Photosmart C7100 | Basics Guide - Page 111
Chapter 6 Warranty Technical information 108 HP Photosmart C7100 All-in-One series - HP Photosmart C7100 | Basics Guide - Page 112
admin password 27 ADSL. See DSL advanced network settings 24 after the support period 104 AirPort 14 align printer 71 answer ring pattern 42, 54 access point 13 wireless, without access point 13 connection problems fax 81, 85, 86, 87 HP All-in-One does not turn on 75 control panel Guide 109 - HP Photosmart C7100 | Basics Guide - Page 113
ring pattern 54 phone support 104 phone support period period for support 104 photo paper load 57 specifications 105 Photosmart Express 7 physical specifications 106 power specifications 106 print from software application 67 specifications 105 print head failure 102 110 HP Photosmart C7100 All-in - HP Photosmart C7100 | Basics Guide - Page 114
network 26 subnet mask 27, 29 subscriber identification code 55 support process 104 system requirements 105 T technical information copy specifications 106 (802.3 wired) 29 transparencies specifications 105 troubleshoot access point 97 blocked print head 77 fax 77 fax problems 81, 85, 86, 87, 90 - HP Photosmart C7100 | Basics Guide - Page 115
wireless setup wizard 92, 94 troubleshooting No TCP/IP 93, 97 Printer not Found 93 unable to discover device 104 WEP key, setup 18 wireless radio, turn off 23 setup wizard, troubleshoot 92, 94 status 30 troubleshoot 97 wireless router 10 Z zoom button 7 112 HP Photosmart C7100 All-in-One series - HP Photosmart C7100 | Basics Guide - Page 116
-
 1
1 -
 2
2 -
 3
3 -
 4
4 -
 5
5 -
 6
6 -
 7
7 -
8
-
9
-
10
-
11
-
12
-
13
-
14
-
15
-
16
-
17
-
18
-
19
-
20
-
21
-
22
-
23
-
24
-
25
-
26
-
27
-
28
-
29
-
30
-
31
-
32
-
33
-
34
-
35
-
36
-
37
-
38
-
39
-
40
-
41
-
42
-
43
-
44
-
45
-
46
-
47
-
48
-
49
-
50
-
51
-
52
-
53
-
54
-
55
-
56
-
57
-
58
-
59
-
60
-
61
-
62
-
63
-
64
-
65
-
66
-
67
-
68
-
69
-
70
-
71
-
72
-
73
-
74
-
75
-
76
-
77
-
78
-
79
-
80
-
81
-
82
-
83
-
84
-
85
-
86
-
87
-
88
-
89
-
90
-
91
-
92
-
93
-
94
-
95
-
96
-
97
-
98
-
99
-
100
-
101
-
102
-
103
-
104
-
105
-
106
-
107
-
108
-
109
-
110
-
111
-
112
-
113
-
114
-
115
-
116
 |
 |

HP Photosmart C7100 All-in-One series
Basics Guide