HP Photosmart Plus All-in-One Printer - B209 User Guide - Page 109
Solution 3: Clean the electrical contacts, Solution
 |
View all HP Photosmart Plus All-in-One Printer - B209 manuals
Add to My Manuals
Save this manual to your list of manuals |
Page 109 highlights
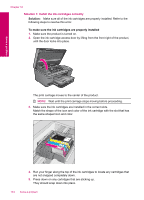
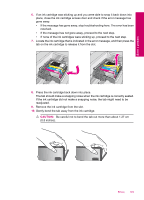
Solve a problem Solution 3: Clean the electrical contacts Solution: Clean the cartridge electrical contacts. To clean the electrical contacts 1. Make sure the product is turned on. 2. Open the cartridge access door by lifting the blue access handles on the side of the product, until the door locks into place. The print carriage moves to the center of the product. NOTE: Wait until the print carriage stops moving before proceeding. 3. Locate the ink cartridge that is indicated in the error message, and then press the tab on the ink cartridge to release it from the slot. Errors 107
-
 1
1 -
2
-
3
-
4
-
5
-
6
-
7
-
8
-
9
-
10
-
11
-
12
-
13
-
14
-
15
-
16
-
17
-
18
-
19
-
20
-
21
-
22
-
23
-
24
-
25
-
26
-
27
-
28
-
29
-
30
-
31
-
32
-
33
-
34
-
35
-
36
-
37
-
38
-
39
-
40
-
41
-
42
-
43
-
44
-
45
-
46
-
47
-
48
-
49
-
50
-
51
-
52
-
53
-
54
-
55
-
56
-
57
-
58
-
59
-
60
-
61
-
62
-
63
-
64
-
65
-
66
-
67
-
68
-
69
-
70
-
71
-
72
-
73
-
74
-
75
-
76
-
77
-
78
-
79
-
80
-
81
-
82
-
83
-
84
-
85
-
86
-
87
-
88
-
89
-
90
-
91
-
92
-
93
-
94
-
95
-
96
-
97
-
98
-
99
-
100
-
101
-
102
-
103
-
 104
104 -
 105
105 -
 106
106 -
 107
107 -
 108
108 -
 109
109 -
 110
110 -
 111
111 -
 112
112 -
 113
113 -
 114
114 -
115
-
116
-
117
-
118
-
119
-
120
-
121
-
122
-
123
-
124
-
125
-
126
-
127
-
128
-
129
-
130
-
131
-
132
-
133
-
134
-
135
-
136
-
137
-
138
-
139
-
140
-
141
-
142
 |
 |
Solution 3: Clean the electrical contacts
Solution:
Clean the cartridge electrical contacts.
To clean the electrical contacts
1.
Make sure the product is turned on.
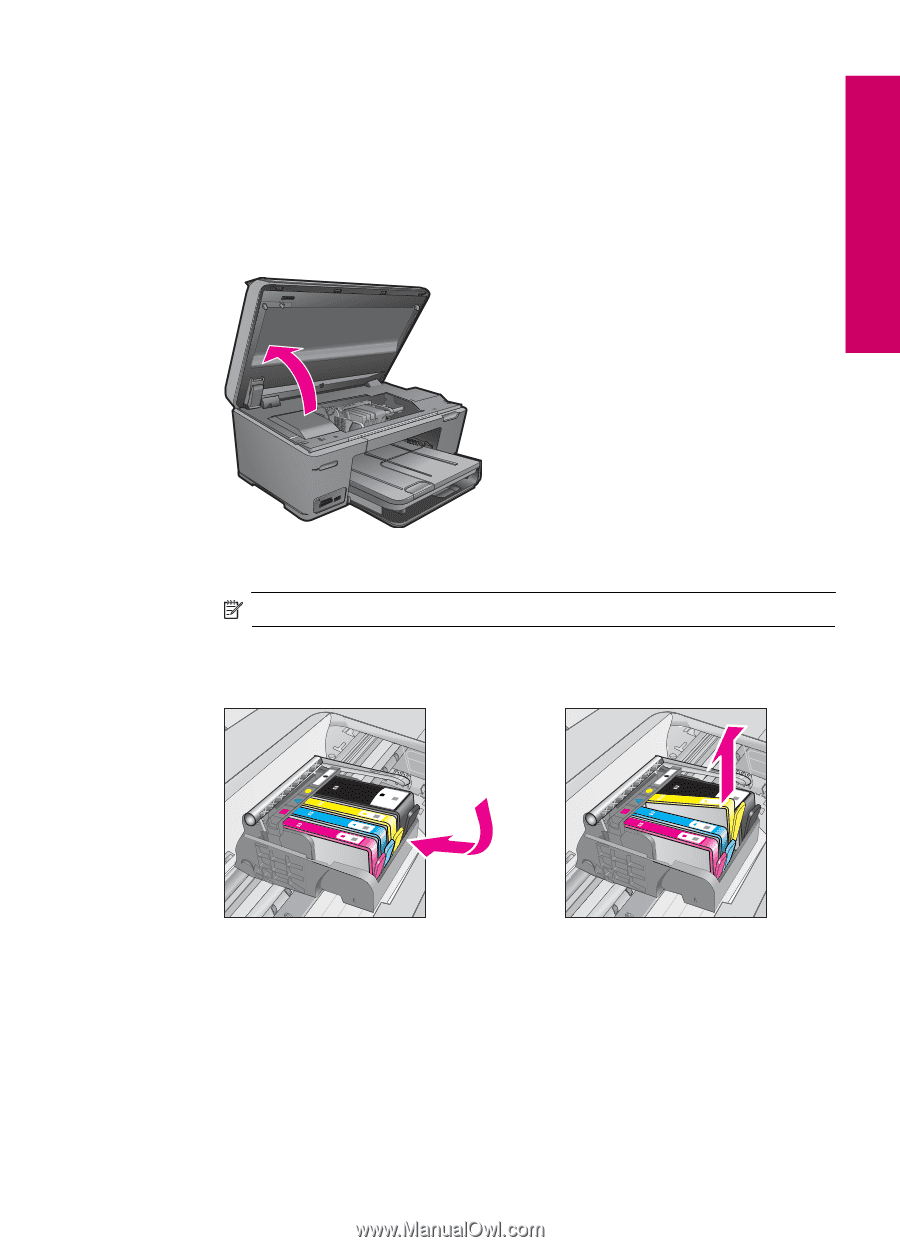
2.
Open the cartridge access door by lifting the blue access handles on the side of
the product, until the door locks into place.
The print carriage moves to the center of the product.
NOTE:
Wait until the print carriage stops moving before proceeding.
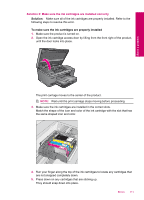
3.
Locate the ink cartridge that is indicated in the error message, and then press the
tab on the ink cartridge to release it from the slot.
Errors
107
Solve a problem