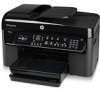
HP Photosmart Premium Fax e-All-in-One Printer - C410 User Guide - Page 10
Use the PIN method, Wireless, Wi-Fi Protected Setup, Related topics
 |
View all HP Photosmart Premium Fax e-All-in-One Printer - C410 manuals
Add to My Manuals
Save this manual to your list of manuals |
Page 10 highlights
Chapter 3 Use the PIN method a. Set up a wireless connection. Press the Wireless button. Highlight Wi-Fi Protected Setup and press OK. Highlight PIN and press OK. The device displays a PIN. Enter the PIN on the WPS-enabled router or other networking device. Check the display on the product to see if the connection was successful or not. If you receive an error, press OK to try the connection again. b. Install the software. NOTE: The product display a timer for approximately two minutes, in which you need to enter the PIN on your networking device. If the connection to the network is successful, the blue wireless light on the Wireless button should come on and remain steady. If it is blinking, this indicates that connection to the network is not a good. Related topics Install the software for a network connection Wireless with a router (infrastructure network) To connect the HP Photosmart to an integrated wireless WLAN 802.11 network, you will need the following: A wireless 802.11 network that includes a wireless router or access point. A desktop computer or laptop with either wireless networking support, or a network interface card (NIC). The computer must be connected to the wireless network that you intend to install the HP Photosmart on. Broadband Internet access (recommended) such as cable or DSL. If you connect the HP Photosmart on a wireless network that has Internet access, HP recommends that you use a wireless router (access point or base station) that uses Dynamic Host Configuration Protocol (DHCP). Network name (SSID). WEP key or WPA Passphrase (if needed). To connect the HP Photosmart with the Wireless Setup Wizard 1. Write down your network name (SSID) and WEP key or WPA passphrase. 2. Start Wireless Setup Wizard. a. Press the Wireless button. b. Highlight Wireless Setup Wizard and press OK. The setup wizard searches for available networks, and then displays list of detected network names (SSIDs). 3. Highlight your network name and press OK. Finish setting up the HP Photosmart 8 Finish setting up the HP Photosmart
-
 1
1 -
2
-
3
-
4
-
 5
5 -
 6
6 -
 7
7 -
 8
8 -
 9
9 -
 10
10 -
 11
11 -
 12
12 -
 13
13 -
 14
14 -
 15
15 -
16
-
17
-
18
-
19
-
20
-
21
-
22
-
23
-
24
-
25
-
26
-
27
-
28
-
29
-
30
-
31
-
32
-
33
-
34
-
35
-
36
-
37
-
38
-
39
-
40
-
41
-
42
-
43
-
44
-
45
-
46
-
47
-
48
-
49
-
50
-
51
-
52
-
53
-
54
-
55
-
56
-
57
-
58
-
59
-
60
-
61
-
62
-
63
-
64
-
65
-
66
-
67
-
68
-
69
-
70
-
71
-
72
-
73
-
74
-
75
-
76
-
77
-
78
-
79
-
80
-
81
-
82
-
83
-
84
-
85
-
86
-
87
-
88
-
89
-
90
-
91
-
92
-
93
-
94
-
95
-
96
-
97
-
98
-
99
-
100
-
101
-
102
-
103
-
104
-
105
-
106
-
107
-
108
-
109
-
110
-
111
-
112
-
113
-
114
-
115
-
116
-
117
-
118
-
119
-
120
-
121
-
122
-
123
-
124
-
125
-
126
-
127
-
128
-
129
-
130
-
131
-
132
-
133
-
134
-
135
-
136
-
137
-
138
-
139
-
140
-
141
-
142
-
143
-
144
-
145
-
146
-
147
-
148
-
149
-
150
-
151
-
152
-
153
-
154
-
155
-
156
-
157
-
158
-
159
-
160
-
161
-
162
-
163
-
164
-
165
-
166
-
167
-
168
-
169
-
170
-
171
-
172
-
173
-
174
-
175
-
176
-
177
-
178
-
179
-
180
-
181
-
182
-
183
-
184
-
185
-
186
-
187
-
188
-
189
-
190
-
191
-
192
-
193
-
194
-
195
-
196
-
197
-
198
-
199
-
200
-
201
-
202
-
203
-
204
-
205
-
206
-
207
-
208
-
209
-
210
-
211
-
212
-
213
-
214
-
215
-
216
-
217
-
218
-
219
-
220
-
221
-
222
-
223
-
224
-
225
-
226
-
227
-
228
-
229
-
230
-
231
-
232
-
233
-
234
-
235
-
236
-
237
-
238
-
239
-
240
-
241
-
242
-
243
-
244
-
245
-
246
-
247
-
248
-
249
-
250
-
251
-
252
-
253
-
254
-
255
-
256
-
257
-
258
-
259
-
260
-
261
-
262
-
263
-
264
 |
 |