HP Photosmart Premium Fax e-All-in-One Printer - C410 User Guide - Page 12
Network and Sharing Center, Network and Internet
 |
View all HP Photosmart Premium Fax e-All-in-One Printer - C410 manuals
Add to My Manuals
Save this manual to your list of manuals |
Page 12 highlights
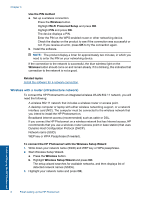
Chapter 3 NOTE: The product comes configured with a network profile with hp (product model).(6-digit unique identifier) as the network name (SSID). However, for security and privacy HP recommends you create a new network profile on your computer as described here. To create a network profile (Windows Vista) NOTE: The product comes configured with a network profile with hp (product model).(6-digit unique identifier) as the network name (SSID). However, for security and privacy HP recommends you create a new network profile on your computer as described here. 1. In the Control Panel, double-click Network and Internet, then Network and Sharing Center.. 2. In the Network and Sharing Center (under Tasks on the left), select Set up a connection or network. 3. Choose the connection option Set up a wireless ad hoc (computer-to-computer) network, then click Next. Read the description and warnings about ad hoc networks, then click Next>. 4. Enter details, including Network name (the SSID for your ad hoc connection), Security type, and SecurityPassphrase. If you are going to save this network connection, check Save this network. Make a note of the SSID and the Security key/ Passphrase for future reference. Click Next 5. Continue to follow the prompts to complete setup of the ad hoc network connection. To create a network profile (Windows XP) NOTE: The product comes configured with a network profile with hp (product model).(6-digit unique identifier) as the network name (SSID). However, for security and privacy HP recommends you create a new network profile on your computer as described here. 1. In the Control Panel, double-click Network Connections. 2. On the Network Connections window, right-click the Wireless Network Connection. If you see Enable on the pop-up menu, select it. Otherwise, if you see Disable on the menu, the wireless connection is already enabled. 3. Right-click the Wireless Network Connection icon, and then click Properties. 4. Click the Wireless Networks tab. 5. Select the Use Windows to configure my wireless network settings check box. 6. Click Add, and then do the following: a. In Network name (SSID) box, type in a unique network name of your choice. NOTE: The network name is case sensitive, so it is important to remember any uppercase (capital) and lowercase (small) letters. b. If there is a Network Authentication list, select Open. Otherwise, go to the next step. c. In the Data encryption list, select WEP. Finish setting up the HP Photosmart 10 Finish setting up the HP Photosmart
-
 1
1 -
2
-
3
-
4
-
5
-
6
-
 7
7 -
 8
8 -
 9
9 -
 10
10 -
 11
11 -
 12
12 -
 13
13 -
 14
14 -
 15
15 -
 16
16 -
 17
17 -
18
-
19
-
20
-
21
-
22
-
23
-
24
-
25
-
26
-
27
-
28
-
29
-
30
-
31
-
32
-
33
-
34
-
35
-
36
-
37
-
38
-
39
-
40
-
41
-
42
-
43
-
44
-
45
-
46
-
47
-
48
-
49
-
50
-
51
-
52
-
53
-
54
-
55
-
56
-
57
-
58
-
59
-
60
-
61
-
62
-
63
-
64
-
65
-
66
-
67
-
68
-
69
-
70
-
71
-
72
-
73
-
74
-
75
-
76
-
77
-
78
-
79
-
80
-
81
-
82
-
83
-
84
-
85
-
86
-
87
-
88
-
89
-
90
-
91
-
92
-
93
-
94
-
95
-
96
-
97
-
98
-
99
-
100
-
101
-
102
-
103
-
104
-
105
-
106
-
107
-
108
-
109
-
110
-
111
-
112
-
113
-
114
-
115
-
116
-
117
-
118
-
119
-
120
-
121
-
122
-
123
-
124
-
125
-
126
-
127
-
128
-
129
-
130
-
131
-
132
-
133
-
134
-
135
-
136
-
137
-
138
-
139
-
140
-
141
-
142
-
143
-
144
-
145
-
146
-
147
-
148
-
149
-
150
-
151
-
152
-
153
-
154
-
155
-
156
-
157
-
158
-
159
-
160
-
161
-
162
-
163
-
164
-
165
-
166
-
167
-
168
-
169
-
170
-
171
-
172
-
173
-
174
-
175
-
176
-
177
-
178
-
179
-
180
-
181
-
182
-
183
-
184
-
185
-
186
-
187
-
188
-
189
-
190
-
191
-
192
-
193
-
194
-
195
-
196
-
197
-
198
-
199
-
200
-
201
-
202
-
203
-
204
-
205
-
206
-
207
-
208
-
209
-
210
-
211
-
212
-
213
-
214
-
215
-
216
-
217
-
218
-
219
-
220
-
221
-
222
-
223
-
224
-
225
-
226
-
227
-
228
-
229
-
230
-
231
-
232
-
233
-
234
-
235
-
236
-
237
-
238
-
239
-
240
-
241
-
242
-
243
-
244
-
245
-
246
-
247
-
248
-
249
-
250
-
251
-
252
-
253
-
254
-
255
-
256
-
257
-
258
-
259
-
260
-
261
-
262
-
263
-
264
 |
 |