HP Photosmart Premium Fax e-All-in-One Printer - C410 User Guide - Page 164
The product cannot receive faxes, but can send faxes, Cause, Solution
 |
View all HP Photosmart Premium Fax e-All-in-One Printer - C410 manuals
Add to My Manuals
Save this manual to your list of manuals |
Page 164 highlights
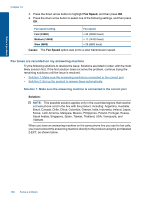
Solve a problem Chapter 12 faxes. In this case, the answering machine will answer the fax call and record the fax tones. For more information on setting up the product when you have an answering machine, see the printed documentation that came with the product. Cause: The product was set up to receive faxes manually, which means that the product would not answer incoming calls. You must be available to respond in person to incoming fax calls, or the product will not receive the fax and your answering machine will record the fax tones. The product cannot receive faxes, but can send faxes Try the following solutions to resolve the issue. Solutions are listed in order, with the most likely solution first. If the first solution does not solve the problem, continue trying the remaining solutions until the issue is resolved. • Solution 1: Make sure the product is set up for faxing correctly • Solution 2: Check the Auto Answer setting • Solution 3: Set the product to answer faxes manually • Solution 4: If you have a computer dial-up modem on the same phone line as the product, make sure the modem software is not intercepting the fax • Solution 5: If you have an answering machine on the same phone line as the product, record a new outgoing message • Solution 6: If you have an answering machine on the same phone line as the product, make sure it is connected to the correct port • Solution 7: If you use a distintive ring service, make sure the Distinctive Ring setting matches the ring pattern for your fax number • Solution 8: If you do not use a distintive ring service, make sure the Distinctive Ring setting is set to All Rings • Solution 9: Make sure other equipment on the phone line is not reducing the fax signal • Solution 10: Clear the memory of the product • Solution 11: Check for error messages on the display Solution 1: Make sure the product is set up for faxing correctly Solution: Make sure you set up the product properly for faxing, based on the equipment and services you have on the same phone line as the product. For more information, see Set up the HP Photosmart for faxing. Then, run a fax test to check the status of the product and to make sure you set it up properly. To test your fax setup from the control panel 1. Load letter or A4 unused plain white paper into the input tray. 2. Press Setup. 162 Solve a problem
-
 1
1 -
2
-
3
-
4
-
5
-
6
-
7
-
8
-
9
-
10
-
11
-
12
-
13
-
14
-
15
-
16
-
17
-
18
-
19
-
20
-
21
-
22
-
23
-
24
-
25
-
26
-
27
-
28
-
29
-
30
-
31
-
32
-
33
-
34
-
35
-
36
-
37
-
38
-
39
-
40
-
41
-
42
-
43
-
44
-
45
-
46
-
47
-
48
-
49
-
50
-
51
-
52
-
53
-
54
-
55
-
56
-
57
-
58
-
59
-
60
-
61
-
62
-
63
-
64
-
65
-
66
-
67
-
68
-
69
-
70
-
71
-
72
-
73
-
74
-
75
-
76
-
77
-
78
-
79
-
80
-
81
-
82
-
83
-
84
-
85
-
86
-
87
-
88
-
89
-
90
-
91
-
92
-
93
-
94
-
95
-
96
-
97
-
98
-
99
-
100
-
101
-
102
-
103
-
104
-
105
-
106
-
107
-
108
-
109
-
110
-
111
-
112
-
113
-
114
-
115
-
116
-
117
-
118
-
119
-
120
-
121
-
122
-
123
-
124
-
125
-
126
-
127
-
128
-
129
-
130
-
131
-
132
-
133
-
134
-
135
-
136
-
137
-
138
-
139
-
140
-
141
-
142
-
143
-
144
-
145
-
146
-
147
-
148
-
149
-
150
-
151
-
152
-
153
-
154
-
155
-
156
-
157
-
158
-
 159
159 -
 160
160 -
 161
161 -
 162
162 -
 163
163 -
 164
164 -
 165
165 -
 166
166 -
 167
167 -
 168
168 -
 169
169 -
170
-
171
-
172
-
173
-
174
-
175
-
176
-
177
-
178
-
179
-
180
-
181
-
182
-
183
-
184
-
185
-
186
-
187
-
188
-
189
-
190
-
191
-
192
-
193
-
194
-
195
-
196
-
197
-
198
-
199
-
200
-
201
-
202
-
203
-
204
-
205
-
206
-
207
-
208
-
209
-
210
-
211
-
212
-
213
-
214
-
215
-
216
-
217
-
218
-
219
-
220
-
221
-
222
-
223
-
224
-
225
-
226
-
227
-
228
-
229
-
230
-
231
-
232
-
233
-
234
-
235
-
236
-
237
-
238
-
239
-
240
-
241
-
242
-
243
-
244
-
245
-
246
-
247
-
248
-
249
-
250
-
251
-
252
-
253
-
254
-
255
-
256
-
257
-
258
-
259
-
260
-
261
-
262
-
263
-
264
 |
 |