HP Photosmart Premium Fax e-All-in-One Printer - C410 User Guide - Page 224
correctly install the ink cartridges., Using the colored shaped icons for help
 |
View all HP Photosmart Premium Fax e-All-in-One Printer - C410 manuals
Add to My Manuals
Save this manual to your list of manuals |
Page 224 highlights
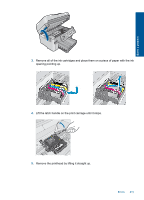
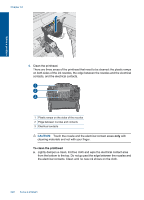
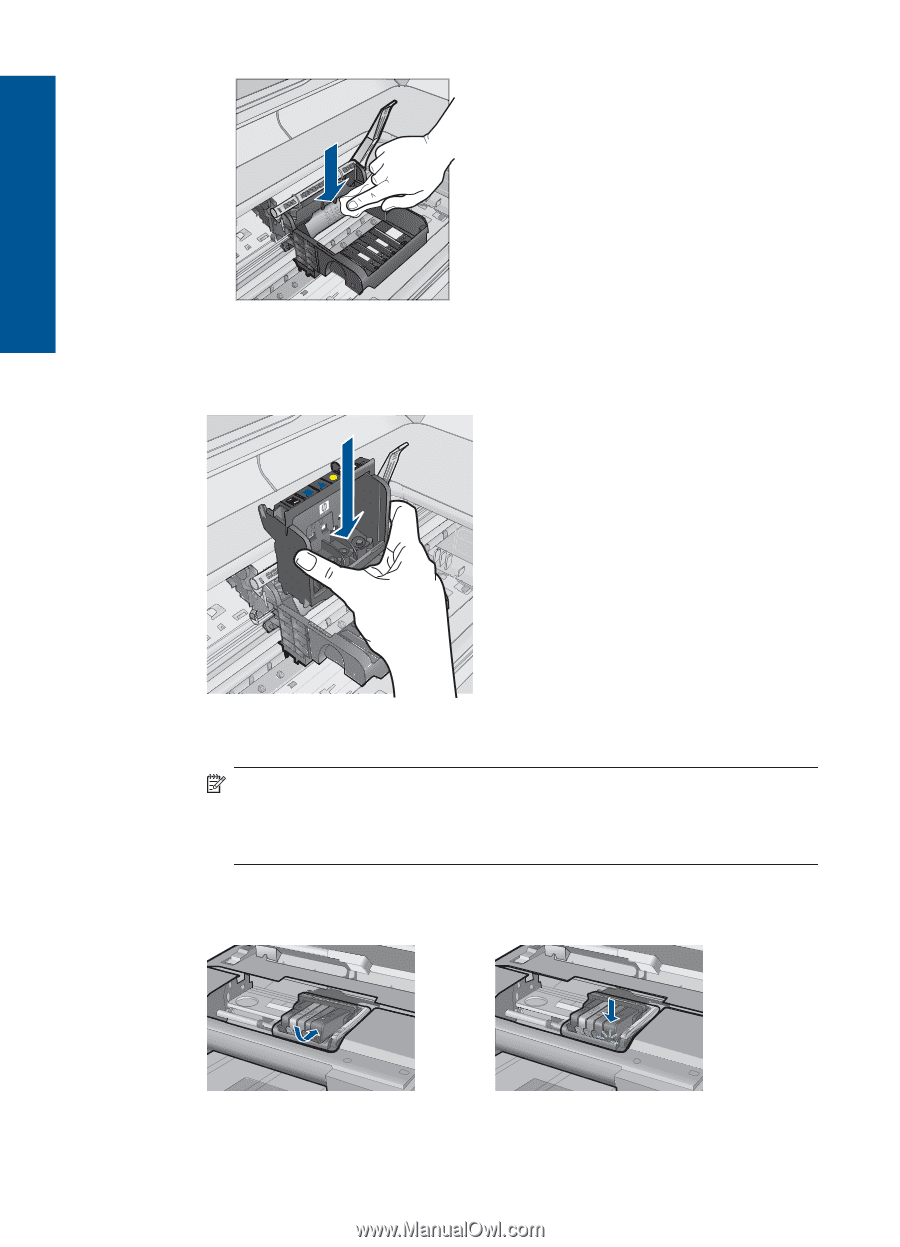
Solve a problem Chapter 12 c. Wipe the area dry with a dry lint-free cloth before proceeding to the next step. 8. Make sure the latch handle is raised, and then reinsert the printhead. 9. Carefully lower the latch handle. NOTE: Make sure you lower the latch handle before reinserting the ink cartridges. Leaving the latch handle raised can result in incorrectly seated ink cartridges and problems printing. The latch must remain down in order to correctly install the ink cartridges. 10. Using the colored shaped icons for help, slide the ink cartridge into the empty slot until it clicks into place and is seated firmly in the slot. 11. Close the ink cartridge door. 222 Solve a problem
-
 1
1 -
2
-
3
-
4
-
5
-
6
-
7
-
8
-
9
-
10
-
11
-
12
-
13
-
14
-
15
-
16
-
17
-
18
-
19
-
20
-
21
-
22
-
23
-
24
-
25
-
26
-
27
-
28
-
29
-
30
-
31
-
32
-
33
-
34
-
35
-
36
-
37
-
38
-
39
-
40
-
41
-
42
-
43
-
44
-
45
-
46
-
47
-
48
-
49
-
50
-
51
-
52
-
53
-
54
-
55
-
56
-
57
-
58
-
59
-
60
-
61
-
62
-
63
-
64
-
65
-
66
-
67
-
68
-
69
-
70
-
71
-
72
-
73
-
74
-
75
-
76
-
77
-
78
-
79
-
80
-
81
-
82
-
83
-
84
-
85
-
86
-
87
-
88
-
89
-
90
-
91
-
92
-
93
-
94
-
95
-
96
-
97
-
98
-
99
-
100
-
101
-
102
-
103
-
104
-
105
-
106
-
107
-
108
-
109
-
110
-
111
-
112
-
113
-
114
-
115
-
116
-
117
-
118
-
119
-
120
-
121
-
122
-
123
-
124
-
125
-
126
-
127
-
128
-
129
-
130
-
131
-
132
-
133
-
134
-
135
-
136
-
137
-
138
-
139
-
140
-
141
-
142
-
143
-
144
-
145
-
146
-
147
-
148
-
149
-
150
-
151
-
152
-
153
-
154
-
155
-
156
-
157
-
158
-
159
-
160
-
161
-
162
-
163
-
164
-
165
-
166
-
167
-
168
-
169
-
170
-
171
-
172
-
173
-
174
-
175
-
176
-
177
-
178
-
179
-
180
-
181
-
182
-
183
-
184
-
185
-
186
-
187
-
188
-
189
-
190
-
191
-
192
-
193
-
194
-
195
-
196
-
197
-
198
-
199
-
200
-
201
-
202
-
203
-
204
-
205
-
206
-
207
-
208
-
209
-
210
-
211
-
212
-
213
-
214
-
215
-
216
-
217
-
218
-
 219
219 -
 220
220 -
 221
221 -
 222
222 -
 223
223 -
 224
224 -
 225
225 -
 226
226 -
 227
227 -
 228
228 -
 229
229 -
230
-
231
-
232
-
233
-
234
-
235
-
236
-
237
-
238
-
239
-
240
-
241
-
242
-
243
-
244
-
245
-
246
-
247
-
248
-
249
-
250
-
251
-
252
-
253
-
254
-
255
-
256
-
257
-
258
-
259
-
260
-
261
-
262
-
263
-
264
 |
 |
c
.
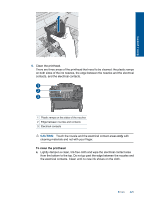
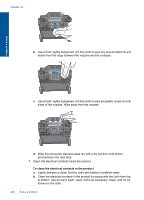
Wipe the area dry with a dry lint-free cloth before proceeding to the next step.
8.
Make sure the latch handle is raised, and then reinsert the printhead.
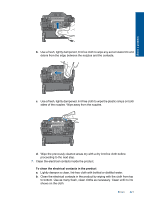
9.
Carefully lower the latch handle.
NOTE:
Make sure you lower the latch handle before reinserting the ink
cartridges. Leaving the latch handle raised can result in incorrectly seated ink
cartridges and problems printing. The latch must remain down in order to
correctly install the ink cartridges.
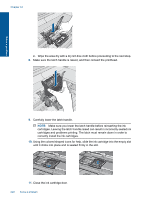
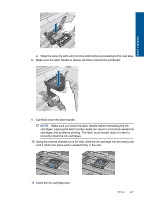
10.
Using the colored shaped icons for help, slide the ink cartridge into the empty slot
until it clicks into place and is seated firmly in the slot.
11.
Close the ink cartridge door.
Chapter 12
222
Solve a problem
Solve a problem