HP Photosmart R740 User Guide
HP Photosmart R740 Manual
 |
View all HP Photosmart R740 manuals
Add to My Manuals
Save this manual to your list of manuals |
HP Photosmart R740 manual content summary:
- HP Photosmart R740 | User Guide - Page 1
HP Photosmart R740 series Digital Camera User Guide - HP Photosmart R740 | User Guide - Page 2
express warranty statements accompanying such products and services. Nothing herein should be construed as constituting an additional warranty. HP shall not be liable for technical or editorial errors or omissions contained herein. Windows® is a U.S. registered trademark of Microsoft Corporation. SD - HP Photosmart R740 | User Guide - Page 3
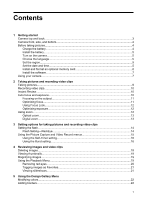
the date and time...5 Install and format an optional memory card 6 Install the software...7 Using your camera...7 2 Taking pictures and recording video clips Taking pictures...9 Recording video clips...10 Instant Review...10 Auto focus and exposure...10 Focusing on the subject...11 Optimizing focus - HP Photosmart R740 | User Guide - Page 4
31 8 Using the Camera Setup Menu 32 9 Troubleshooting Resetting the camera...33 Problems and solutions...33 Camera error messages...38 10 Product support Helpful websites...39 Getting assistance...39 A Managing batteries Top points about batteries...40 Extending battery life...40 Safety precautions - HP Photosmart R740 | User Guide - Page 5
Use this section to get familiar with camera controls, set up your digital camera for use, and begin taking pictures. Camera top and back 123 45 6 7 ). 8 Delete button-Accesses the Delete function while in Instant Review (see "Instant Review" on page 10) and Playback (see "Deleting images" on - HP Photosmart R740 | User Guide - Page 6
it using the charger that came with your camera. NOTE: Your camera uses a rechargeable HP Photosmart LI40 battery. Do not charge any other battery in the charger. 1. Plug the charger into an electrical outlet, then insert the battery into the charger as shown. The charger's Battery Charging light is - HP Photosmart R740 | User Guide - Page 7
. To remove the battery, move the battery latch as shown until the battery springs free. NOTE: Fully charge the battery before using it the first time (see "Charge the battery" on page 4). Turn off the camera before removing the battery. Turn on the camera To turn on the camera, press the button - HP Photosmart R740 | User Guide - Page 8
Setup Menu" on page 32). Install and format an optional memory card This camera supports standard, high speed, and high capacity Secure Digital (SD and SDHC) memory cards, 32MB to 8GB. 1. Turn off the camera and open the Battery/Memory Card door. 2. Insert the memory card in the smaller slot as - HP Photosmart R740 | User Guide - Page 9
and drivers. To learn about Windows Vista support for your camera, see www.hp.com/go/ windowsvista (English only). Windows: 1. Close all programs and temporarily disable any virus protection software. 2. Insert the HP Photosmart Software CD into the CD drive and follow the on-screen instructions. If - HP Photosmart R740 | User Guide - Page 10
See "Reviewing images and video clips" clips on the camera on page 18 For information on enhancing your images See "Using the Design Gallery Menu" on page 22 For information on transferring images from your camera to a computer See "Transferring images with HP Photosmart Software" on page - HP Photosmart R740 | User Guide - Page 11
you have a large capacity memory card). 3 Memory card indicator. 4 Battery level indicator (see "Power indicators" on page 41). 5 Focus brackets exposure" on page 10). Taking pictures You can take a picture when the camera is set to Picture Capture. 1. Slide to . 2. Frame the subject for - HP Photosmart R740 | User Guide - Page 12
and release the Shutter button again. Instant Review After you have taken a picture or recorded a video clip, the camera displays it briefly in Instant Review. If you want to delete the image , light, or grainy images in "Troubleshooting" on page 33. 10 Taking pictures and recording video clips - HP Photosmart R740 | User Guide - Page 13
Lock (see "Using Focus Lock" on page 12). Optimizing focus When the camera cannot auto focus, the focus brackets turn red. This indicates the picture may Close-up range (50-800 mm or 1.97-31.52 in) or set the camera to Auto (see Auto under "Using the Picture Capture and Video Record menus" on - HP Photosmart R740 | User Guide - Page 14
physically extends the lens to make the subject of your picture appear closer. After you have extended the lens fully using optical zoom, the camera employs digital zoom. Digital zoom uses no moving lens parts. TIP: The more you zoom in on the subject of your picture, the more small movements of the - HP Photosmart R740 | User Guide - Page 15
setting (MP value). As you zoom in, the scene expands to show what the camera will capture, and the MP value decreases to indicate the resolution at which the scene will be captured. When capturing images using digital zoom, make sure that the MP value on the Image Display is appropriate for - HP Photosmart R740 | User Guide - Page 16
can improve the pictures you take and the video clips you record. In addition to setting features that optimize the camera for lighting and motion, you can also set the camera to take a series of pictures rapidly or take images 10 seconds after you press the Shutter button, giving you time to place - HP Photosmart R740 | User Guide - Page 17
for images. The greater the number, the higher the resolution. The setting remains in effect until it is changed, even when you turn off the camera. • 7MP Best-For enlarging or printing images greater than 41 x 51 cm (16 x 20 in). • Normal (7MP) (Default)-For enlarging or printing images up to - HP Photosmart R740 | User Guide - Page 18
as possible until you release the Shutter button or the camera runs out of memory. The Image Display remains off during the burst capture. After the burst images have been taken, each image appears one at a time in Instant Review (see "Instant Review" on page 10). You can delete the entire burst - HP Photosmart R740 | User Guide - Page 19
The Burst setting remains in effect until it is changed again, or until you turn off the camera. Using the Picture Capture and Video Record menus 17 - HP Photosmart R740 | User Guide - Page 20
You can review and manipulate clip. 1 Playback indicator. 2 Memory card indicator. 3 Battery indicator (see "Power indicators" on page 41). 4 1 printing via an online printing service (see "Buying prints online" on page 30). 7 Number of electronic Photosmart Share destinations (see " - HP Photosmart R740 | User Guide - Page 21
Deleting images To delete a displayed image during Playback: 1. Press . 2. Use to select an option, then press . • This Image-Deletes the image or video clip. • All Except Favorites-Deletes all images except those tagged as Favorites. This menu option only appears if you have images tagged as - HP Photosmart R740 | User Guide - Page 22
or video clip, press , and follow any on-camera instructions. NOTE: To hear audio associated with video clips, on page 22). Photosmart Express...-Allows you to mark images for printing, sharing, and ordering prints online (see "Using HP Photosmart Express" on page Reviewing images and video clips - HP Photosmart R740 | User Guide - Page 23
the HP Photosmart Software installed on your computer, tagged images retain the tag when transferred to your computer (see "Transferring and printing images" on page 24). Viewing slideshows Select View Slideshow to configure and run a slideshow of images and/or video clips on the camera - HP Photosmart R740 | User Guide - Page 24
color tones on a black and white version of an image. 3. Press to select the color scheme and display the Modify Color menu. Follow the on-camera instructions to adjust the color. 4. Press to save a copy of the image with the specified color scheme and return to the Design Gallery Menu. Press to - HP Photosmart R740 | User Guide - Page 25
edges. • Rectangle-Adds a rectangular matte border with sharp corners. 3. Press to select the border and display the Add Borders menu. Follow the on-camera instructions to adjust the border. 4. Press to save a copy of the image with the specified border and return to the Design Gallery Menu. Press - HP Photosmart R740 | User Guide - Page 26
on your camera, to review images, and to transfer images. You can transfer pictures and video clips with or without the HP Photosmart Software that came with your camera. However, the HP Photosmart Software has several features for transferring and managing your images and also guides you through - HP Photosmart R740 | User Guide - Page 27
is connected to the computer, follow the instructions on the computer screen. For more information, see the Help feature in the HP Photosmart Software. NOTE: If the camera does not successfully connect to the computer, see "My camera stalls when establishing a connection to the computer." on page - HP Photosmart R740 | User Guide - Page 28
from a video clip using the HP Photosmart Software. For more information, see Help in the HP Photosmart Software. 1. Check that the printer is turned on, there is paper in the printer, and there are no printer error messages. 2. Turn off the camera, connect the camera and printer using the USB cable - HP Photosmart R740 | User Guide - Page 29
of each image. Press and follow the on-camera instructions to begin printing. • Print Index-Prints camera from the printer. NOTE: If you connect the camera to a non-HP printer and encounter problems with printing, contact your printer manufacturer. HP does not provide customer support for non-HP - HP Photosmart R740 | User Guide - Page 30
you connect the camera to your computer or printer. You must have the HP Photosmart Software installed on your computer to use some features in the Photosmart Express Menu. For information about installing this software, see "Install the software" on page 7. NOTE: Available online services vary by - HP Photosmart R740 | User Guide - Page 31
. Press . This option is available only if you have more than one image in the camera. 3. If you want to print more than one copy, highlight Change Number of Copies, connected to a printer, see "Transferring images with HP Photosmart Software" on page 24. Marking images for printing 29 - HP Photosmart R740 | User Guide - Page 32
images with HP Photosmart Software" on page 24. Sharing images You can customize the Share menu to include e-mail addresses, group distribution lists, or other online services. You can then select images to send to these destinations. Setting up online destinations in the camera You can - HP Photosmart R740 | User Guide - Page 33
image in the camera. 3. To select additional images to share, use to display an image, then repeat Step 2. 4. When you are done marking images to share, hold down until the menu disappears. 5. To send the images to the destinations, see "Transferring images with HP Photosmart Software" on page - HP Photosmart R740 | User Guide - Page 34
5. USB Configuration-Specifies how a computer recognizes the camera. See "Connecting to the computer" on page 25. • Digital Camera (Default)-Recognizes the camera as a digital camera using PTP (Picture Transfer Protocol). • Disk Drive-Recognizes the camera as a disk drive using MSDC (Mass Storage - HP Photosmart R740 | User Guide - Page 35
often fixed with new releases of firmware. To optimize your digital photography experience, periodically check the Hewlett-Packard Technical Support website (www.hp.com/support) for updates to your camera's firmware, software, and drivers. How can I get professional-quality prints if I don't have - HP Photosmart R740 | User Guide - Page 36
again after it has drained awhile. • Use only the charger that came with your camera. • If charging the battery in the battery charger that came with your camera does not work, replace the battery. It takes the camera a long time to turn on. • Your camera may be slower to turn on if you have a high - HP Photosmart R740 | User Guide - Page 37
This causes a longer exposure time, so use a tripod or hold the camera steady. For information about flash working distance for this camera, go to www.hp.com/ support, select your language and region, enter your camera model number in the Search: Product field, click Product Information, then click - HP Photosmart R740 | User Guide - Page 38
not supporting 4GB or larger cards. Try formatting the card in this camera, which supports High Capacity Secure Digital camera button to reactivate the Image Display. • Reset the camera (see "Resetting the camera" on page 33 ). The camera responds sluggishly when trying to review Troubleshooting - HP Photosmart R740 | User Guide - Page 39
, then on again. If that does not fix the problem, reset the camera (see "Resetting the camera" on page 33). • If the problem persists, contact Hewlett-Packard Technical Support (see "Product support" on page 39). The HP Photosmart Software does not start automatically when I connect to my Macintosh - HP Photosmart R740 | User Guide - Page 40
battery. I am having a problem installing or using the HP Photosmart Software. • Make sure your computer meets the minimum system requirements as stated on the camera packaging. • Refer to the HP Photosmart Software online help system. • Refer to the Hewlett-Packard Technical Support website: www.hp - HP Photosmart R740 | User Guide - Page 41
this section to find support information for your digital camera, including links to helpful websites and an overview of the support process. Helpful websites Camera tips, product registration, newsletter subscriptions, driver and software updates, purchase HP supplies and accessories Customers - HP Photosmart R740 | User Guide - Page 42
A Managing batteries Your camera uses an HP Photosmart LI40 battery (Q6277A), a rechargeable Lithium Ion battery. Top points about batteries • Use only an HP Photosmart LI40 battery with your camera. • Always insert the battery in the camera correctly (see "Install the battery" on page 5). • New - HP Photosmart R740 | User Guide - Page 43
more information about batteries, go to www.hp.com/support and search on the code R-400. Recharging the HP Photosmart LI40 battery You can recharge the HP Photosmart LI40 battery using the charger that came with your camera (see "Charge the battery" on page 4). Recharging the battery takes about - HP Photosmart R740 | User Guide - Page 44
precautions below. • Do not charge any other battery than the HP Photosmart LI40 battery in the charger that came with your camera. • Insert the battery in the correct orientation. • Use the charger in a dry location only. • Do not charge the battery in a hot location, such as in direct sunlight - HP Photosmart R740 | User Guide - Page 45
Number: • Wide-f/2.8 to f/5.7 • Telephoto-f/4.8 to f/9.7 Viewfinder None Zoom 3x optical zoom 7x digital zoom Focus Normal: • Wide-400 mm (15.76 in) to infinity • Telephoto-400 range for this camera, go to www.hp.com/ support, select your language and region, enter your camera model number in - HP Photosmart R740 | User Guide - Page 46
sources include: • One rechargeable HP Photosmart LI40 battery for HP Photosmart R-series cameras • Battery charger included with camera Temperature range Operational: 0° to 40 on page 15), go to www.hp.com/support, select your language and region, enter your camera model number in the Search: - HP Photosmart R740 | User Guide - Page 47
Express 28 HP Photosmart LI40 battery 40, 42 HP Photosmart Software 7 I Image Display 3 Image Quality 15, 44 images Date & Time Imprint 16 Image Quality 15 magnifying 19 number remaining 9 per battery 41 sending 31 transfer to computer 24 install memory card 6 install software 7 Instant Review 10 - HP Photosmart R740 | User Guide - Page 48
software install 7 solving problems 33 sounds of camera 32 space remaining in memory 9 specifications 43 State Selector 3 Steady Photo mode 15 storage 43 Sunset mode 15 support process 39 T Theatre mode 15 Thumbnails 19 Thumbnails control 3 Time & Date 5, 32 transfer images 24, 25 troubleshooting - HP Photosmart R740 | User Guide - Page 49
the product: Product name: HP Photosmart R740 series Digital Camera (may contain suffixes) Product number(s): L2507A, L2508A, L2509A, L2510A, L2783A, L2784A, L2785A, L2786A Regulatory model: SNPRB-0706 Charger and AC adapter: HP Photosmart LI40 battery charger, (Product number L2508-80001
-
 1
1 -
 2
2 -
 3
3 -
 4
4 -
 5
5 -
 6
6 -
 7
7 -
8
-
9
-
10
-
11
-
12
-
13
-
14
-
15
-
16
-
17
-
18
-
19
-
20
-
21
-
22
-
23
-
24
-
25
-
26
-
27
-
28
-
29
-
30
-
31
-
32
-
33
-
34
-
35
-
36
-
37
-
38
-
39
-
40
-
41
-
42
-
43
-
44
-
45
-
46
-
47
-
48
-
49
 |
 |

HP Photosmart
R740 series
Digital Camera
User Guide