HP Photosmart eStation All-in-One Printer - C510 User Guide - Page 24
Date and time settings, Wireless settings for the HP eStation Zeen and the main printer
 |
View all HP Photosmart eStation All-in-One Printer - C510 manuals
Add to My Manuals
Save this manual to your list of manuals |
Page 24 highlights
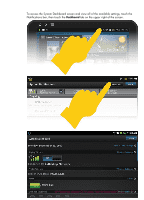
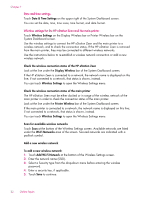
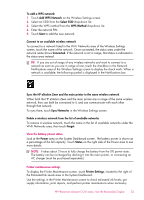
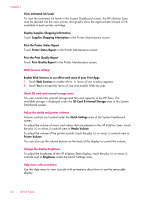
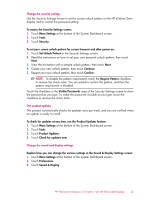
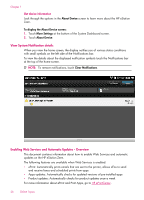
Chapter 1 Date and time settings Touch Date & Time Settings on the upper right of the System Dashboard screen. You can set the date, time, time zone, time format, and date format. Wireless settings for the HP eStation Zeen and the main printer Touch Wireless Settings on the Display Wireless bar or Printer Wireless bar on the System Dashboard screen. Use the wireless settings to connect the HP eStation Zeen and the main printer to a wireless network, and to check the connection status. If the HP eStation Zeen is removed from the main printer, they may be connected to different wireless networks. Use the instructions below to re-establish a wireless network connection or add a new wireless network. Check the wireless connection status of the HP eStation Zeen Look at the line under the Display Wireless bar of the System Dashboard screen. If the HP eStation Zeen is connected to a network, the network name is displayed on this line; if not connected to a network, that status is shown, instead. You can touch Wireless Settings to open the Wireless Settings menu. Check the wireless connection status of the main printer The HP eStation Zeen must be either docked or in range of the wireless network of the main printer in order to check the connection status of the main printer. Look at the line under the Printer Wireless bar of the System Dashboard screen. If the main printer is connected to a network, the network name is displayed on this line; if not connected to a network, that status is shown, instead. You can touch Wireless Settings to open the Wireless Settings menu. Scan for available wireless networks Touch Scan at the bottom of the Wireless Settings screen. Available networks are listed under the Wi-Fi Networks area of the screen. Secured networks are indicated with a padlock symbol. Add a new wireless network To add a new wireless network: 1. Touch Add Wi-Fi Network at the bottom of the Wireless Settings screen. 2. Enter the network name (SSID). 3. Select a Security type from the drop-down menu before entering the wireless password. 4. Enter a security key, if applicable. 5. Touch Save to continue. 22 Online Topics
-
 1
1 -
2
-
3
-
4
-
5
-
6
-
7
-
8
-
9
-
10
-
11
-
12
-
13
-
14
-
15
-
16
-
17
-
18
-
 19
19 -
 20
20 -
 21
21 -
 22
22 -
 23
23 -
 24
24 -
 25
25 -
 26
26 -
 27
27 -
 28
28 -
 29
29 -
30
-
31
-
32
-
33
-
34
-
35
-
36
-
37
-
38
-
39
-
40
-
41
-
42
-
43
-
44
-
45
-
46
-
47
-
48
-
49
-
50
-
51
-
52
-
53
-
54
-
55
-
56
-
57
-
58
-
59
-
60
-
61
-
62
-
63
-
64
-
65
-
66
-
67
-
68
-
69
-
70
-
71
-
72
 |
 |