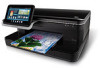
HP Photosmart eStation All-in-One Printer - C510 User Guide - Page 40
Receive a fax, Fax Settings, Enable, Continue, Send a Fax, Printer, App Favorites
 |
View all HP Photosmart eStation All-in-One Printer - C510 manuals
Add to My Manuals
Save this manual to your list of manuals |
Page 40 highlights
Chapter 1 3. Touch Enable to continue. Your eFax® number and PIN code is sent to eFax® for verification. After they are verified, your existing eFax® number is displayed on the eFax® home screen and you are ready for faxing. NOTE: If eFax® cannot verify the eFax® number and PIN you entered, log in to your eFax brand account at www.efax.com and review your account information. You cannot fax using this number until the eFax® account information is verified on the printer. 4. After connecting with the eFax® server, you are assigned the eFax® number that appears on the screen. 5. Touch Continue, and the eFax® home screen displays your eFax® number and a number entry keypad for sending faxes. Send a Fax 1. Touch Printer in the App Favorites tray, then touch Fax to display the eFax® home screen. 2. Lift the printer's lid and place the first page of your original document print side down on the scanner glass, aligning it with the right front corner. 3. If you are sending the fax inside your own country, proceed to the next step. If you are sending the fax outside of your country, touch this option on the screen. This ensures that the appropriate international dialing codes are used. 4. Enter the fax number on the keypad and touch Continue. Your document is scanned. When scanning is complete, you are asked if you have more pages to fax. 5. If you have more pages to fax, touch Yes, remove your first original from the scanner glass and replace it with the next one. OR If you do not have more pages to fax, touch No. Your fax is sent. Once it has been successfully sent to eFax's® server, you are notified with a message. Touch OK to acknowledge the message and continue. OR To cancel your fax, touch Back. Print a confirmation report of faxes you have sent 1. Touch Sent Faxes on the bottom of the screen. 2. Touch the checkbox next to the fax(es) you want included in the report. 3. Touch Print Confirmation. Receive a fax Provide your eFax® number to anyone who needs to send you a fax. When a fax is received, it is printed automatically. Fax Settings Touch Settings at the bottom of the eFax® home screen to display the Fax Settings. 38 Online Topics
-
 1
1 -
2
-
3
-
4
-
5
-
6
-
7
-
8
-
9
-
10
-
11
-
12
-
13
-
14
-
15
-
16
-
17
-
18
-
19
-
20
-
21
-
22
-
23
-
24
-
25
-
26
-
27
-
28
-
29
-
30
-
31
-
32
-
33
-
34
-
 35
35 -
 36
36 -
 37
37 -
 38
38 -
 39
39 -
 40
40 -
 41
41 -
 42
42 -
 43
43 -
 44
44 -
 45
45 -
46
-
47
-
48
-
49
-
50
-
51
-
52
-
53
-
54
-
55
-
56
-
57
-
58
-
59
-
60
-
61
-
62
-
63
-
64
-
65
-
66
-
67
-
68
-
69
-
70
-
71
-
72
 |
 |
