HP Photosmart eStation All-in-One Printer - C510 User Guide - Page 46
HP Photosmart eStation C510 series - Scan to a Computer, dialog box.
 |
View all HP Photosmart eStation All-in-One Printer - C510 manuals
Add to My Manuals
Save this manual to your list of manuals |
Page 46 highlights
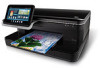
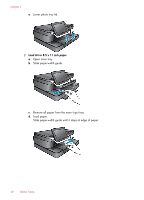
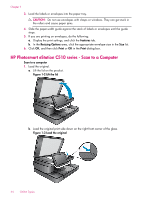
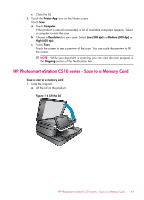
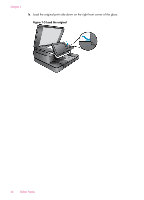
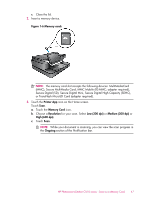
Chapter 1 3. Load the labels or envelopes into the paper tray. CAUTION: Do not use envelopes with clasps or windows. They can get stuck in the rollers and cause paper jams. 4. Slide the paper-width guide against the stack of labels or envelopes until the guide stops. 5. If you are printing on envelopes, do the following: a. Display the print settings, and click the Features tab. b. In the Resizing Options area, click the appropriate envelope size in the Size list. 6. Click OK, and then click Print or OK in the Print dialog box. HP Photosmart eStation C510 series - Scan to a Computer Scan to a computer 1. Load the original. a. Lift the lid on the product. Figure 1-2 Lift the lid b. Load the original print side down on the right front corner of the glass. Figure 1-3 Load the original 44 Online Topics
-
 1
1 -
2
-
3
-
4
-
5
-
6
-
7
-
8
-
9
-
10
-
11
-
12
-
13
-
14
-
15
-
16
-
17
-
18
-
19
-
20
-
21
-
22
-
23
-
24
-
25
-
26
-
27
-
28
-
29
-
30
-
31
-
32
-
33
-
34
-
35
-
36
-
37
-
38
-
39
-
40
-
 41
41 -
 42
42 -
 43
43 -
 44
44 -
 45
45 -
 46
46 -
 47
47 -
 48
48 -
 49
49 -
 50
50 -
 51
51 -
52
-
53
-
54
-
55
-
56
-
57
-
58
-
59
-
60
-
61
-
62
-
63
-
64
-
65
-
66
-
67
-
68
-
69
-
70
-
71
-
72
 |
 |