HP Presario V6500 Multimedia - Windows Vista
HP Presario V6500 - Notebook PC Manual
 |
View all HP Presario V6500 manuals
Add to My Manuals
Save this manual to your list of manuals |
HP Presario V6500 manual content summary:
- HP Presario V6500 | Multimedia - Windows Vista - Page 1
Multimedia User Guide - HP Presario V6500 | Multimedia - Windows Vista - Page 2
© Copyright 2007 Hewlett-Packard Development Company, L.P. Windows is a U.S. registered trademark of Microsoft Corporation. The information contained herein is subject to change without notice. The only warranties for HP products and services are set forth in the express warranty statements - HP Presario V6500 | Multimedia - Windows Vista - Page 3
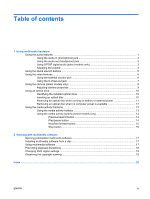
Using the audio features ...1 Using the audio-in (microphone) jack 3 Using the audio-out (headphone) jack 3 Using S/PDIF digital audio (select Inserting an optical disc ...10 Removing an optical disc when running on battery or external power 11 Removing an optical disc when no computer power - HP Presario V6500 | Multimedia - Windows Vista - Page 4
iv ENWW - HP Presario V6500 | Multimedia - Windows Vista - Page 5
different from the illustration in this section. Component (1) Internal microphones (2) (select models only) (2) Speakers (2) (3) Audio-in (microphone) jack Description Record sound. NOTE A microphone icon next to each microphone opening indicates that the computer has internal microphones - HP Presario V6500 | Multimedia - Windows Vista - Page 6
Connect optional powered stereo speakers, headphones, ear buds, a headset, or television audio. Provides enhanced audio performance, including surround sound and other high-end audio output. Mutes and restores computer sound. Adjusts speaker volume. Slide your finger to the left to decrease volume - HP Presario V6500 | Multimedia - Windows Vista - Page 7
surround sound and other high-end audio output. For digital audio connections, connect the S/PDIF digital audio plug to the digital audio connector on your audio/video equipment. NOTE In order to use S/PDIF with the headphone jack, you will need an optional mini TOS link cable and/or adapter. ENWW - HP Presario V6500 | Multimedia - Windows Vista - Page 8
, slide your finger across the volume scroll zone from left to right. NOTE The tapping sound made by the volume button is enabled at the factory. You can disable the sound in the Setup Utility (f10). ● Windows® volume control: a. Click the Volume icon in the notification area, at the far right of - HP Presario V6500 | Multimedia - Windows Vista - Page 9
Launch buttons is enabled at the factory. You can disable the sound in the Setup Utility (f10). The media button (1) and the set up to require a logon password, you may be asked to log on to Windows. QuickPlay or DVDPlay launches automatically after you log on. Refer to the QuickPlay or DVDPlay - HP Presario V6500 | Multimedia - Windows Vista - Page 10
Using the video features Using the external monitor port The external monitor port connects an external display device, such as an external monitor or a projector, to the computer. To connect a display device, connect the device cable to the external monitor port. NOTE If a properly connected - HP Presario V6500 | Multimedia - Windows Vista - Page 11
need a standard audio cable, available from most electronics retailers, to connect to the headphone jack. The computer can support one S-Video device Plug the other end of the cable into the video device, as instructed in the user guide included with the device. 3. Press the fn+f4 keys to switch - HP Presario V6500 | Multimedia - Windows Vista - Page 12
camera may not work properly across some network firewalls. If you are having trouble viewing or sending video to someone on another LAN or outside your network firewall, contact your Internet service provider for assistance. ● Whenever possible, place bright light sources behind the camera and - HP Presario V6500 | Multimedia - Windows Vista - Page 13
Adjusting camera properties You can adjust the following camera properties: ● Brightness-Controls the amount of light that is incorporated into the image. A higher brightness setting creates a brighter image; a lower brightness setting creates a darker image. ● Contrast-Controls the difference - HP Presario V6500 | Multimedia - Windows Vista - Page 14
Using an optical drive Depending on the type of optical drive and software installed on your computer, the optical drive plays, copies, and creates CDs or DVDs. Identifying the installed optical drive ▲ Select Start > Computer. Inserting an optical disc 1. Turn on the computer. 2. Press the release - HP Presario V6500 | Multimedia - Windows Vista - Page 15
Removing an optical disc when running on battery or external power 1. Press the release button (1) on the drive bezel to release the media tray, and then gently pull out the tray (2) until it - HP Presario V6500 | Multimedia - Windows Vista - Page 16
Removing an optical disc when no computer power is available 1. Insert the end of a paper clip (1) into the release access in the front bezel of the drive. 2. Press in gently on the paper clip until the tray is released, and then pull out the tray (2) until it stops. 3. Remove the disc (3) from the - HP Presario V6500 | Multimedia - Windows Vista - Page 17
Using the media activity functions The media activity hotkeys and the media activity buttons (select models only) control the play of an audio CD or a DVD that is inserted into the optical drive. Using the media activity hotkeys A media activity hotkey is a combination of the fn key (1) and a - HP Presario V6500 | Multimedia - Windows Vista - Page 18
by the media activity buttons is enabled at the factory. You can disable the sound in the Setup Utility (f10). The following illustration and tables describe the functions of the media activity buttons when a disc is in the optical drive. ● - HP Presario V6500 | Multimedia - Windows Vista - Page 19
Next/fast forward button Disc status Playing Playing Stop button Disc status Playing Button Next/fast forward button fn + next/fast forward button Function Plays the next track or chapter. Fast forwards the playback. Button Stop button Function Stops the playback. ENWW Using the media activity - HP Presario V6500 | Multimedia - Windows Vista - Page 20
may be supported: ● Playing digital media, including audio and video CDs, audio and video not write to a disc while the computer is running on battery power. Before writing to a disc, close all open programs computer, refer to the software manufacturer's instructions that may be provided on disc, - HP Presario V6500 | Multimedia - Windows Vista - Page 21
use. For example, if you want to use Windows Media Player to play an audio CD, click Windows Media Player. NOTE Some programs may be located in subfolders. 2. Insert the media disc, such as an audio CD, into the optical drive. 3. Follow the instructions on the screen. - or - 1. Insert the media disc - HP Presario V6500 | Multimedia - Windows Vista - Page 22
Preventing playback disruptions To reduce the possibility of playback disruption: ● Save your work and close all open programs before playing a CD or a DVD. ● Do not connect or disconnect hardware while playing a disc. Do not initiate Hibernation or Sleep while playing a disc. Otherwise, you may see - HP Presario V6500 | Multimedia - Windows Vista - Page 23
for tasks such as installing applications, running utilities, or changing Windows settings. Refer to Windows online Help for more information. 3. Click the "+" sign next material, including computer programs, films, broadcasts, and sound recordings. Do not use this computer for such purposes - HP Presario V6500 | Multimedia - Windows Vista - Page 24
settings 19 E earbuds 2 external monitor port 6 H headphones 2 J jacks audio-in (microphone) 1, 3 audio-out (headphone) 2, 3 S-Video-out 7 M media activity buttons 14 media activity hotkeys 13 media button 5 microphones, supported 3 monitor, connecting 6 multimedia software described 16 using 17 - HP Presario V6500 | Multimedia - Windows Vista - Page 25
-
 1
1 -
 2
2 -
 3
3 -
 4
4 -
 5
5 -
 6
6 -
 7
7 -
8
-
9
-
10
-
11
-
12
-
13
-
14
-
15
-
16
-
17
-
18
-
19
-
20
-
21
-
22
-
23
-
24
-
25
 |
 |

Multimedia
User Guide