HP ProBook 4545s Getting Started HP Notebook
HP ProBook 4545s Manual
 |
View all HP ProBook 4545s manuals
Add to My Manuals
Save this manual to your list of manuals |
HP ProBook 4545s manual content summary:
- HP ProBook 4545s | Getting Started HP Notebook - Page 1
Getting Started HP Notebook - HP ProBook 4545s | Getting Started HP Notebook - Page 2
-Packard Company under license. Microsoft and Windows are U.S. registered trademarks of Microsoft Corporation. SD Logo is a trademark of its proprietor. The information contained herein is subject to change without notice. The only warranties for HP products and services are set forth in the express - HP ProBook 4545s | Getting Started HP Notebook - Page 3
Safety warning notice WARNING! To reduce the possibility of heat-related injuries or of overheating the computer, do not place the computer directly on your lap or obstruct the computer air vents. Use the computer only on a hard, flat surface. Do not allow another hard surface, such as an adjoining - HP ProBook 4545s | Getting Started HP Notebook - Page 4
iv Safety warning notice - HP ProBook 4545s | Getting Started HP Notebook - Page 5
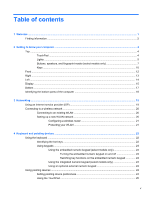
bottom parts of the computer 18 3 Networking ...19 Using an Internet service provider (ISP 19 Connecting to a wireless network ...20 Connecting to an 20 Configuring a wireless router 21 Protecting your WLAN 21 4 Keyboard and pointing devices ...22 Using the keyboard ...22 Identifying the hot keys - HP ProBook 4545s | Getting Started HP Notebook - Page 6
28 Pinching/Zooming 28 5 Maintenance ...29 Inserting or removing the battery ...29 Using the optional security screw ...30 Removing or replacing the service door 31 Removing the service door 31 Replacing the service door 32 Replacing or upgrading the hard drive 33 Removing the hard drive ...33 - HP ProBook 4545s | Getting Started HP Notebook - Page 7
Operating environment ...46 Index ...47 vii - HP ProBook 4545s | Getting Started HP Notebook - Page 8
viii - HP ProBook 4545s | Getting Started HP Notebook - Page 9
updates. For more information, see the HP Notebook Reference Guide. For instructions on accessing this guide, see Finding information on page 2. ● Get to know your computer-Learn about your computer features. See Getting to know your computer on page 4 and Keyboard and pointing devices on page 22 - HP ProBook 4545s | Getting Started HP Notebook - Page 10
For information about Setup Instructions poster ● How to set up the computer ● Help to identify computer components HP Notebook Reference Guide To access this guide: Select Start > Help and Support > User Guides. ● Power management features ● How to maximize battery life ● How to use the - HP ProBook 4545s | Getting Started HP Notebook - Page 11
, warranty period (found on your service label), name, and postal address. IMPORTANT: Do NOT return your HP product to the addresses above. For U.S. product support, go to http://www.hp.com/ go/contactHP. For worldwide product support, go to http://welcome.hp.com/country/us/en/wwcontact_us.html - HP ProBook 4545s | Getting Started HP Notebook - Page 12
Left TouchPad button (4) Right TouchPad button Description Turns the TouchPad on and off. Moves the pointer and selects or activates items on the screen. Functions like the left button on an external mouse. Functions like the right button on an external mouse. 4 Chapter 2 Getting to know your - HP ProBook 4545s | Getting Started HP Notebook - Page 13
is on. ● Off: The computer is off or in Hibernation. ● White: An integrated wireless device, such as a wireless local area network (WLAN) device and/or a Bluetooth® device, is on. ● Amber: All wireless devices are off. ● Amber: The TouchPad is off. ● Off: The TouchPad is on. Top 5 - HP ProBook 4545s | Getting Started HP Notebook - Page 14
. ● Off: The computer is off or in Hibernation. ● White: An integrated wireless device, such as a wireless local area network (WLAN) device and/or a Bluetooth® device, is on. ● Amber: All wireless devices are off. ● Amber: The TouchPad is off. ● Off: The TouchPad is on. 6 Chapter 2 Getting to know - HP ProBook 4545s | Getting Started HP Notebook - Page 15
the button briefly to exit Hibernation. If the computer has stopped responding and Microsoft® Windows® shutdown procedures are ineffective, press and hold the power button down for at least and Security > Power Options. ● For more information, see the HP Notebook Reference Guide. Produce sound. Top 7 - HP ProBook 4545s | Getting Started HP Notebook - Page 16
browser. (4) Wireless button Turns the wireless feature on or off but does not establish a wireless connection. (5) Fingerprint reader (select models only) Allows a fingerprint logon to Windows, instead of a password logon. 8 Chapter 2 Getting to know your computer - HP ProBook 4545s | Getting Started HP Notebook - Page 17
exit Hibernation. If the computer has stopped responding and Microsoft® Windows® shutdown procedures are ineffective, press and hold the power button Security > Power Options. ● For more information, see the HP Notebook Reference Guide. Produce sound. Opens the default Web browser. (4) Wireless - HP ProBook 4545s | Getting Started HP Notebook - Page 18
key, the esc key, or other keys. For more information, see Keyboard and pointing devices on page 22. Displays the Windows Start menu. Execute frequently used system functions when pressed in combination with off when pressed in combination with the fn key. 10 Chapter 2 Getting to know your computer - HP ProBook 4545s | Getting Started HP Notebook - Page 19
pressed in combination with a function key, the num lk key, the esc key, or other keys. For more information, see Keyboard and pointing devices on page 22. Displays the Windows Start menu. Execute frequently used system functions when pressed in combination with the fn key. For more information, see - HP ProBook 4545s | Getting Started HP Notebook - Page 20
Description ● Blinking White: The hard drive is being accessed. ● Amber: HP 3D DriveGuard has temporarily parked the hard drive. NOTE: For information on HP 3D DriveGuard, refer to the HP Notebook Reference Guide. Supports the following digital card formats: ● Memory Stick Pro ● Memory Stick Duo - HP ProBook 4545s | Getting Started HP Notebook - Page 21
only) Optical drive eject button (select models only) Description Connect an optional USB device. For more information about USB devices, see the HP Notebook Reference Guide. Reads an optical disc. NOTE: On select models, the optical drive also writes to an optical disc. Lights when the optical - HP ProBook 4545s | Getting Started HP Notebook - Page 22
battery that is the only available power source has reached a low battery level. When the battery reaches a critical battery level, the AC adapter/battery light begins blinking rapidly. ● Off: The battery USB devices, see the HP Notebook Reference Guide. 14 Chapter 2 Getting to know your computer - HP ProBook 4545s | Getting Started HP Notebook - Page 23
, refer to the section of the Regulatory, Safety, and Environmental Notices that applies to your country or region. These notices are located in Help and Support. Display 15 - HP ProBook 4545s | Getting Started HP Notebook - Page 24
, refer to the section of the Regulatory, Safety, and Environmental Notices that applies to your country or region. These notices are located in Help and Support. 16 Chapter 2 Getting to know your computer - HP ProBook 4545s | Getting Started HP Notebook - Page 25
illustration in this section. Component (1) Battery and service door release latches Description ● Releases the battery from the battery bay by sliding the release latches one time. ● When the battery has been removed from the battery bay, releases the service door from the computer by sliding - HP ProBook 4545s | Getting Started HP Notebook - Page 26
Component (3) Service door (4) Vents (2) Description Protects the hard drive bay, the wireless LAN (WLAN) module slot, and the memory module slots. CAUTION: To prevent an unresponsive system, replace the wireless module only with a wireless module authorized for use in the computer by the - HP ProBook 4545s | Getting Started HP Notebook - Page 27
and your location. Your computer may support one or both of the following types network, refer to the HP Notebook Reference Guide. Using an Internet service provider (ISP) Before you specific IP address and POP3 and SMTP settings. To access the Windows Connect to the Internet Wizard and instructions - HP ProBook 4545s | Getting Started HP Notebook - Page 28
Bluetooth device For more information on wireless technology and connecting to a wireless network, refer to the HP Notebook Reference Guide and information and Web site links provided in Help and Support . You can choose to manually search for and connect to service purchased from an Internet service - HP ProBook 4545s | Getting Started HP Notebook - Page 29
through your wireless network. Protecting your WLAN When you set up a WLAN or access an existing WLAN, always turn on security features to protect your network from unauthorized access. For information on protecting your WLAN, refer to the HP Notebook Reference Guide. Connecting to a wireless - HP ProBook 4545s | Getting Started HP Notebook - Page 30
computer, fn+f4 alternates the screen image from computer display to Windows user password or a Windows administrator password. For instructions, refer to Help and Support. Launches HP Power Assistant. Displays charge information for all installed batteries. The display indicates which batteries - HP ProBook 4545s | Getting Started HP Notebook - Page 31
keypads The computer includes an embedded numeric keypad or an integrated numeric keypad. The computer also supports an optional external numeric keypad or an optional external keyboard that includes a numeric keypad. Using the embedded numeric keypad (select models only) Component fn key Embedded - HP ProBook 4545s | Getting Started HP Notebook - Page 32
keypad. NOTE: The embedded numeric keypad is turned off while an external keyboard or numeric keypad is connected to the computer. Switching key functions on . Setting pointing device preferences Use Mouse Properties in Windows to customize settings for pointing devices, such as button configuration, click - HP ProBook 4545s | Getting Started HP Notebook - Page 33
To access Mouse Properties: ● Select Start > Devices and Printers. Then right-click the device representing your computer, and select Mouse settings. Using the TouchPad To move the pointer, slide one finger across the TouchPad in the direction you want the pointer to go. Use the left and right - HP ProBook 4545s | Getting Started HP Notebook - Page 34
TouchPad is on. Navigating To move the pointer, slide one finger across the TouchPad in the direction you want the pointer to go. 26 Chapter 4 Keyboard and pointing devices - HP ProBook 4545s | Getting Started HP Notebook - Page 35
Properties. 3. Click the Device Settings tab, select the device in the window that is displayed, and then click Settings. 4. Select the check box next 5. Click Apply, and then click OK. NOTE: The computer also supports additional TouchPad features. To view and turn on these features, click the - HP ProBook 4545s | Getting Started HP Notebook - Page 36
. ● Zoom out by placing two fingers apart on the TouchPad, and then moving them together. NOTE: Pinching/zooming is enabled at the factory. 28 Chapter 4 Keyboard and pointing devices - HP ProBook 4545s | Getting Started HP Notebook - Page 37
Inserting or removing the battery NOTE: For additional information on using the battery, refer to the HP Notebook Reference Guide. To insert the battery: ▲ Insert the battery bay, aligning the tabs on the battery (1) with the notches on the computer, and then press the battery (2) down until it is - HP ProBook 4545s | Getting Started HP Notebook - Page 38
security screw to lock the service door to the bottom of the computer. When not in use, the security screw can be stored inside the battery bay. To use the security screw: 1. Remove the battery (see Inserting or removing the battery on page 29). CAUTION: Removing a battery that is the sole power - HP ProBook 4545s | Getting Started HP Notebook - Page 39
the security screw from inside the battery bay (1) and insert it (2) to lock the service door in place. Removing or replacing the service door CAUTION: To prevent information loss or an unresponsive system: Save your work and shut down the computer before adding or replacing a memory module or hard - HP ProBook 4545s | Getting Started HP Notebook - Page 40
the front of the computer (3) and lift (4) to remove the service door. Replacing the service door Replace the service door after accessing the memory module slots, hard drive, regulatory label, and other components. To replace the service door: 1. Tilt the service door down to align the tabs on the - HP ProBook 4545s | Getting Started HP Notebook - Page 41
the optional security screw on page 30). 3. Replace the battery (see Inserting or removing the battery on page 29). 4. Turn the computer right-side up, and then reconnect the AC power and external devices to the computer. 5. Turn on the computer. Replacing or upgrading the hard drive CAUTION: To - HP ProBook 4545s | Getting Started HP Notebook - Page 42
door (see Removing or replacing the service door on page 31). NOTE: Instructions for removing the hard drive are imprinted on the service door. 7. Remove the four hard drive screws (1) from the hard drive. 8. Pull the tab on the hard drive (2) towards the side of the computer to - HP ProBook 4545s | Getting Started HP Notebook - Page 43
the four hard drive screws (2). 4. Replace the service door (see Removing or replacing the service door on page 31). 5. Replace the security screw, if desired (see Using the optional security screw on page 30). 6. Replace the battery (see Inserting or removing the battery on page 29). 7. Turn the - HP ProBook 4545s | Getting Started HP Notebook - Page 44
battery (seeInserting or removing the battery on page 29). 5. Remove the security screw, if using (see Using the optional security screw on page 30). 6. Remove the service door (see Removing or replacing the service . To protect a memory module after removal, place it in an electrostatic-safe - HP ProBook 4545s | Getting Started HP Notebook - Page 45
do not bend the memory module. 9. Replace the service door (see Removing or replacing the service door on page 31). 10. Replace the security screw, if desired (see Using the optional security screw on page 30). 11. Replace the battery (see Inserting or removing the battery on page 29). 12. Turn the - HP ProBook 4545s | Getting Started HP Notebook - Page 46
update your programs and drivers on a regular basis with the latest versions. Go to http://www.hp.com/support to download the latest versions. You your computer. WARNING! To prevent electric shock or damage to components, do not attempt to clean your notebook or tablet PC while it is turned on: Turn - HP ProBook 4545s | Getting Started HP Notebook - Page 47
WARNING! To reduce the risk of electric shock or damage to internal components, do not use a vacuum cleaner attachment to clean the keyboard. A vacuum cleaner can deposit household debris on the keyboard surface. CAUTION: When cleaning the TouchPad and keyboard, do not let liquids drip between the - HP ProBook 4545s | Getting Started HP Notebook - Page 48
information using recovery tools NOTE: For detailed instructions, perform a search for these topics in Help and Support. In case of system instability, HP recommends that you print the recovery procedures and save them for later use. NOTE: Windows includes the User Account Control feature to - HP ProBook 4545s | Getting Started HP Notebook - Page 49
All Programs > HP > HP Recovery Disc Creator. 2. Select Driver DVD or Windows DVD. 3. and DVDs with double-layer (DL) support store more information than CDs, so size and the speed of the computer. 1. Select Start > All Programs > Maintenance > Backup and Restore. 2. Follow the on-screen instructions - HP ProBook 4545s | Getting Started HP Notebook - Page 50
, and then press f8 before the Windows operating system loads. 4. Select Startup Repair. 5. Follow the on-screen instructions. NOTE: For additional information on recovering information using the Windows tools, perform a search for these topics in Help and Support. 42 Chapter 6 Backup and recovery - HP ProBook 4545s | Getting Started HP Notebook - Page 51
while the "Press for recovery" message is displayed on the screen. 5. Follow the on-screen instructions. Using a Windows 7 operating system DVD (purchased separately) To order a Windows 7 operating system DVD, go to http://www.hp.com/support, select your country or region, and follow the on - HP ProBook 4545s | Getting Started HP Notebook - Page 52
in a particular language, it is available in English. ● E-mail HP support. ● Find support telephone numbers. ● Locate an HP service center. Labels The labels affixed to the computer provide information you may need when you troubleshoot system problems or travel internationally with the computer - HP ProBook 4545s | Getting Started HP Notebook - Page 53
this information available when you contact technical support. The service label is affixed inside the battery bay. ● Microsoft® Certificate of Authenticity-Contains the Windows Product Key. You may need the Product Key to update or troubleshoot the operating system. The Microsoft Certificate of - HP ProBook 4545s | Getting Started HP Notebook - Page 54
by HP for use with this computer. The computer can operate on DC power within the following specifications. Input 10% to 90% 5% to 95% -15 m to 3,048 m -15 m to 12,192 m U.S. 41°F to 95°F -4°F to 140°F 10% to 90% 5% to 95% -50 ft to 10,000 ft -50 ft to 40,000 ft 46 Chapter 8 Specifications - HP ProBook 4545s | Getting Started HP Notebook - Page 55
14 RJ-45 (network) 14 K keyboard hot keys, identifying 22 keypad, embedded numeric 10 keypad, integrated numeric 11 keypads, identifying 23, 24 keys esc 10, 11 fn 10, 11, 23 function 10, 11 num lk 10, 11 Windows Applications 10, 11 Windows logo 10, 11 L labels Bluetooth 45 Microsoft Certificate of - HP ProBook 4545s | Getting Started HP Notebook - Page 56
43 regulatory information regulatory label 45 wireless certification labels 45 release latches battery 17 service door 17 restoring the hard drive 43 RJ-45 (network) jack, identifying 14 S screen brightness keys 22 screen image, switching 22 scrolling TouchPad gesture 28 security cable slot
-
 1
1 -
 2
2 -
 3
3 -
 4
4 -
 5
5 -
 6
6 -
 7
7 -
8
-
9
-
10
-
11
-
12
-
13
-
14
-
15
-
16
-
17
-
18
-
19
-
20
-
21
-
22
-
23
-
24
-
25
-
26
-
27
-
28
-
29
-
30
-
31
-
32
-
33
-
34
-
35
-
36
-
37
-
38
-
39
-
40
-
41
-
42
-
43
-
44
-
45
-
46
-
47
-
48
-
49
-
50
-
51
-
52
-
53
-
54
-
55
-
56
 |
 |

Getting Started
HP Notebook