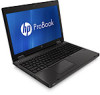
HP ProBook 6570b Getting Started HP Notebook
HP ProBook 6570b Manual
 |
View all HP ProBook 6570b manuals
Add to My Manuals
Save this manual to your list of manuals |
HP ProBook 6570b manual content summary:
- HP ProBook 6570b | Getting Started HP Notebook - Page 1
Getting Started HP Notebook - HP ProBook 6570b | Getting Started HP Notebook - Page 2
and used by Hewlett-Packard Company under license. Microsoft and Windows are U.S. registered trademarks of Microsoft Corporation. SD Logo is a trademark of its proprietor. The information contained herein is subject to change without notice. The only warranties for HP products and services are set - HP ProBook 6570b | Getting Started HP Notebook - Page 3
the computer air vents. Use the computer only on a hard, flat surface. Do not allow another hard surface, such as an adjoining optional printer, or a soft surface, such as pillows or rugs or clothing, to block airflow. Also, do not allow the AC adapter to come into contact with the skin or a soft - HP ProBook 6570b | Getting Started HP Notebook - Page 4
iv Safety warning notice - HP ProBook 6570b | Getting Started HP Notebook - Page 5
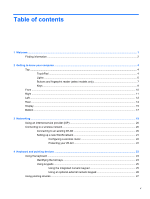
computer ...4 Top ...4 TouchPad ...4 Lights ...6 Buttons and fingerprint reader (select models only 7 Keys ...9 Front ...10 Right ...11 Left ...12 Rear ...14 Display ...15 Bottom ...17 3 Networking ...19 Using an Internet service provider (ISP 20 Connecting to a wireless network ...20 Connecting - HP ProBook 6570b | Getting Started HP Notebook - Page 6
37 Replacing a hard drive ...37 Replacing an optical drive 39 Adding or replacing memory modules 41 Updating programs and drivers ...43 Cleaning your computer ...44 Cleaning products ...44 Cleaning procedures ...44 Cleaning the display 44 Cleaning the sides and cover 44 Cleaning the TouchPad and - HP ProBook 6570b | Getting Started HP Notebook - Page 7
7 Support ...51 Contacting support ...51 Labels ...52 8 Specifications ...53 Input power ...53 Operating environment ...54 Index ...55 vii - HP ProBook 6570b | Getting Started HP Notebook - Page 8
viii - HP ProBook 6570b | Getting Started HP Notebook - Page 9
wired or wireless network so that you can connect to the Internet. For more information, see Networking on page 19. ● Update your antivirus subscription for free updates. For more information, see the HP Notebook Reference Guide. For instructions on accessing this guide, see Finding information - HP ProBook 6570b | Getting Started HP Notebook - Page 10
● How to create a wired and/or wireless network Help and Support ● Operating system information To access Help and Support, select Start > Help and ● Software, driver, and BIOS updates Support. ● Troubleshooting tools NOTE: For U.S. support, go to http://www.hp.com/ go/contactHP. For worldwide - HP ProBook 6570b | Getting Started HP Notebook - Page 11
Asia Pacific: Hewlett-Packard, POD, P.O. Box 200, Alexandra Post Office, Singapore 9115077 When you request a printed copy of your warranty, please include your product number, warranty period (found on your service label), name, and postal address. IMPORTANT: Do NOT return your HP product to the - HP ProBook 6570b | Getting Started HP Notebook - Page 12
stick (select models only) (2) Left pointing stick button (select models only) (3) TouchPad on/off button (4) TouchPad zone (5) Left TouchPad button Description Moves the pointer and selects or activates items on the screen. Functions like the left button on an external mouse. Turns the - HP ProBook 6570b | Getting Started HP Notebook - Page 13
Component (6) (7) Right TouchPad button Right pointing stick button (select models only) Description Functions like the right button on an external mouse. Functions like the right button on an external mouse. Top 5 - HP ProBook 6570b | Getting Started HP Notebook - Page 14
off. ● Off: The TouchPad is on. On: Caps lock is on. ● On: The computer is on. ● Blinking: The computer is in the Sleep state. ● Off: The computer is off or in Hibernation. ● White: An integrated wireless device, such as a wireless local area network (WLAN) device and/or a Bluetooth® device, is on - HP ProBook 6570b | Getting Started HP Notebook - Page 15
more about your power settings: ● Select Start > Control Panel > System and Security > Power Options. ● For more information, see the HP Notebook Reference Guide. Turns the wireless feature on or off but does not establish a wireless connection. When Windows is running, press the button to open the - HP ProBook 6570b | Getting Started HP Notebook - Page 16
Component (6) Calculator button Description Activates the calculator function. (7) Fingerprint reader (select models only) Allows a fingerprint logon to Windows, instead of a password logon. 8 Chapter 2 Getting to know your computer - HP ProBook 6570b | Getting Started HP Notebook - Page 17
fn key. For more information, see Keyboard and pointing devices on page 23. Executes frequently used system functions when pressed in combination with a function key, the num lk key, the esc key, or other keys. For more information, see Keyboard and pointing devices on page 23. Displays the Windows - HP ProBook 6570b | Getting Started HP Notebook - Page 18
Display release latch Wireless light Power light AC adapter/Battery light (5) Hard drive light (6) Speakers (2) Description Opens the computer. ● White: An integrated wireless device, such as a wireless local area network (WLAN) device and/ or a Bluetooth® device, is on. ● Amber: All wireless - HP ProBook 6570b | Getting Started HP Notebook - Page 19
microphone, or monaural microphone. (3) USB 3.0 ports (2) Connect optional USB 3.0 devices and provide enhanced USB power performance. (4) Upgrade bay (optical drive shown) The upgrade bay can hold a weight-saver option, a hard drive, or an optical drive that reads an optical disc. NOTE: On - HP ProBook 6570b | Getting Started HP Notebook - Page 20
Card Reader (4) 1394 port (5) Vents (2) (6) eSATA/USB 2.0 combo port (7) External monitor port (VGA) (8) Smart card reader Description Connect optional USB devices. For more information about USB devices, see the HP Notebook Reference Guide. Supports optional ExpressCards. Supports the - HP ProBook 6570b | Getting Started HP Notebook - Page 21
(1) (2) Description USB 2.0 ports (2) Media Card Reader (3) 1394 port (4) Vents (2) (5) eSATA/USB 2.0 combo port (6) External monitor port (VGA) Connect optional USB devices. For more information about USB devices, see the HP Notebook Reference Guide Supports the following digital card - HP ProBook 6570b | Getting Started HP Notebook - Page 22
Component (1) (2) (3) (4) RJ-11 (modem) jack Serial port Power connector DisplayPort Description Connects a modem cable. Connects an optional serial device such as a modem, mouse, or printer. Connects an AC adapter. Connects an optional digital display device, such as a high-performance monitor or - HP ProBook 6570b | Getting Started HP Notebook - Page 23
display is closed while DC power is on. NOTE: The display switch is not visible from the outside of the computer. (2) WLAN antennas (3)* Send and receive wireless signals to communicate with wireless Communication and Chat > HP Webcam. (7) Keyboard light . To see wireless regulatory notices, see - HP ProBook 6570b | Getting Started HP Notebook - Page 24
display is closed while DC power is on. NOTE: The display switch is not visible from the outside of the computer. (2) WLAN antennas (2)* Send and receive wireless signals to communicate with wireless the webcam, select Start > All Programs > HP > HP Webcam. *The antennas are not visible from the - HP ProBook 6570b | Getting Started HP Notebook - Page 25
Speakers (2) (8) Bluetooth compartment Description Releases the battery. Connects an optional docking device. Releases the service door from the computer. Supports a wireless subscriber identity module (SIM). The SIM slot is located inside the battery bay. Holds the battery. Enable airflow to - HP ProBook 6570b | Getting Started HP Notebook - Page 26
(10) Service door Accessory battery connector Description Provides access to the hard drive bay, the wireless LAN (WLAN) module slot, the WWAN module slot, and the memory module slots. CAUTION: To prevent an unresponsive system, replace the wireless module only with a wireless module authorized - HP ProBook 6570b | Getting Started HP Notebook - Page 27
use a wireless connection. For more information, see Connecting to an existing WLAN on page 20 or Setting up a new WLAN network on page 21. ● Wired-You can access the Internet by connecting to a wired network. For information on connecting to a wired network, see the HP Notebook Reference Guide. 19 - HP ProBook 6570b | Getting Started HP Notebook - Page 28
(WLAN) device ● HP Mobile Broadband Module, a wireless wide area network (WWAN) device ● Bluetooth device For more information on wireless technology and connecting to a wireless network, see the HP Notebook Reference Guide and information and website links provided in Help and Support. Connecting - HP ProBook 6570b | Getting Started HP Notebook - Page 29
connection or network. A list of options is displayed. You can choose to manually search for and connect to a network or service purchased from an Internet service provider (ISP) ● A wireless router (purchased separately) (2) ● Your new wireless computer (3) NOTE: Some modems have a built-in wireless - HP ProBook 6570b | Getting Started HP Notebook - Page 30
the Internet through your wireless network. Protecting your WLAN When you set up a WLAN or access an existing WLAN, always enable security features to protect your network from unauthorized access. For information on protecting your WLAN, see the HP Notebook Reference Guide. 22 Chapter 3 Networking - HP ProBook 6570b | Getting Started HP Notebook - Page 31
key (2) or one of the function keys (3). NOTE: Your computer may look slightly different from the illustration in this section. To use a hot key: ▲ Briefly press the fn key, and then briefly press the second key of the hot key combination. Hot key combination fn+esc Description Displays system - HP ProBook 6570b | Getting Started HP Notebook - Page 32
the hard drive. The function of the fn+f3 hot key can be changed. For example, you can set the fn+f3 hot key to initiate Hibernation instead of Sleep. In all Windows operating system windows, references to the sleep button apply to the fn+f3 hot key. Switches the screen image among display devices - HP ProBook 6570b | Getting Started HP Notebook - Page 33
is turned off is reinstated when the computer is turned back on. Set at the factory to function like an external numeric keypad. To alternate between this numeric function and the navigational function (indicated by the directional arrows on the keys), press the num lk key. Using the keyboard 25 - HP ProBook 6570b | Getting Started HP Notebook - Page 34
the factory.) For example: ● When num lock is on, most keypad keys type numbers. ● When num lock is off, most keypad keys function like the arrow, page up, or page down keys. external keypad as you work: ▲ Press the num lk key on the external keypad, not on the computer. 26 Chapter 4 Keyboard - HP ProBook 6570b | Getting Started HP Notebook - Page 35
of the USB ports on the computer. Setting pointing device preferences Use Mouse Properties in Windows to customize settings for pointing devices, such as on an external mouse. Using the TouchPad To move the pointer, slide one finger across the TouchPad in the direction you want the pointer to go - HP ProBook 6570b | Getting Started HP Notebook - Page 36
the TouchPad. NOTE: If you are using the TouchPad to move the pointer, you must lift your finger off the TouchPad before moving it to the scroll zone. Simply sliding your finger from the TouchPad to the scroll zone does not activate the scrolling function. 28 Chapter 4 Keyboard and pointing devices - HP ProBook 6570b | Getting Started HP Notebook - Page 37
notification area, at the far right of the taskbar. 2. Click the Synaptics Pointing Device icon , and then click Pointing Device Properties. 3. Click the Device Settings tab, select the device in the window that is displayed, and then click Settings. 4. Select the check box next to the gesture that - HP ProBook 6570b | Getting Started HP Notebook - Page 38
a page or image. To scroll, place two fingers slightly apart on the TouchPad, and then drag them across the TouchPad in an up, down, left, or right motion. NOTE: Scrolling speed placing two fingers together on the TouchPad, and then moving them apart. ● Zoom out by placing two fingers apart on the - HP ProBook 6570b | Getting Started HP Notebook - Page 39
the factory. Flicking Flicking allows you to navigate through screens or quickly scroll through documents. To flick, use three fingers to touch the TouchPad zone in a light, quick flicking motion up, down, left, or right. NOTE: Three-finger flicking is disabled at the factory. Using pointing devices - HP ProBook 6570b | Getting Started HP Notebook - Page 40
information on using the battery, see the HP Notebook Reference Guide. To insert the battery: 1. Turn the computer upside down on a flat surface, with the battery bay toward you. 2. Insert the battery (1) into the battery bay until it is seated. The battery release latch (2) automatically locks - HP ProBook 6570b | Getting Started HP Notebook - Page 41
3. Remove the battery from the computer (2). Inserting or removing the battery 33 - HP ProBook 6570b | Getting Started HP Notebook - Page 42
Removing or replacing the service door CAUTION: To prevent information loss or an unresponsive system: Save your work and shut down the computer before adding or replacing a memory module or hard drive. If you are not sure whether the computer is off or in Hibernation, turn the computer on by - HP ProBook 6570b | Getting Started HP Notebook - Page 43
to hold the service door in place. Slide the release latch to the right to lock the service door (5). NOTE: If you want to use the optional screw, it is stored inside the service door. 5. Insert the battery (see Inserting or removing the battery on page 32). Removing or replacing the service door 35 - HP ProBook 6570b | Getting Started HP Notebook - Page 44
this section. To remove the hard drive: 1. Save your work and shut down the computer. 2. Disconnect AC power and external devices connected to the computer. 3. Remove the battery (see Inserting or removing the battery on page 32). 4. Remove the service door (see Removing the service door on page 34 - HP ProBook 6570b | Getting Started HP Notebook - Page 45
the computer to engage the hard drive with the connector. 3. Tighten the hard drive screws (4). 4. Replace the service door (see Replacing the service door on page 34). 5. Insert the battery (see Inserting or removing the battery on page 32). 6. Connect AC power and external devices to the computer - HP ProBook 6570b | Getting Started HP Notebook - Page 46
cord from the AC outlet. 5. Turn the computer upside down on a flat surface, with the upgrade bay toward you. 6. Remove the battery (see Inserting or removing the battery on page 32). 7. Remove the service door (see Removing the service door on page 34). 8. Remove the hard drive screws from the - HP ProBook 6570b | Getting Started HP Notebook - Page 47
bay screw (2). 2. Replace the hard drive screws. 3. Replace the service door (see Replacing the service door on page 34). 4. Insert the battery (see Inserting or removing the battery on page 32). 5. Turn the computer right-side up, and then reconnect AC power and external devices to the computer - HP ProBook 6570b | Getting Started HP Notebook - Page 48
To remove an optical drive from the upgrade bay: 1. Save your work. 2. Shut down the computer and close the display. 3. Disconnect all external hardware devices connected to the computer. 4. Unplug the power cord from the AC outlet. 5. Turn the computer upside down on a flat surface, with the - HP ProBook 6570b | Getting Started HP Notebook - Page 49
Replace the service door (see Replacing the service door on page 34). 4. Insert the battery (see Inserting or removing the battery on page 32). 5. Turn the computer right-side up, and then reconnect AC power and external devices batteries system: Shut down the computer before adding or replacing system - HP ProBook 6570b | Getting Started HP Notebook - Page 50
To add or replace a memory module: 1. Save your work and shut down the computer. 2. Disconnect AC power and external devices connected to the computer. 3. Remove the battery (see Inserting or removing the battery on page 32). 4. Remove the service door (see Removing the service door on page 34). 5. - HP ProBook 6570b | Getting Started HP Notebook - Page 51
memory module. 7. Replace the service door (see Replacing the service door on page 34). 8. Insert the battery (see Inserting or removing the battery on page 32). 9. Connect AC power and external devices to the computer. 10. Turn on the computer. Updating programs and drivers HP recommends that you - HP ProBook 6570b | Getting Started HP Notebook - Page 52
off the computer. Disconnect external power. Disconnect all powered external devices. CAUTION: Do not spray cleaning agents or liquids directly on any the surface can permanently damage internal components. Cleaning the display Gently wipe the display using a soft, lint-free cloth moistened with an - HP ProBook 6570b | Getting Started HP Notebook - Page 53
deposit household debris on the keyboard surface. CAUTION: When cleaning the TouchPad and keyboard, do not let liquids drip between the keys. This can permanently damage internal components. ● To clean and disinfect the TouchPad and keyboard, use a soft microfiber cloth or chamois moistened with one - HP ProBook 6570b | Getting Started HP Notebook - Page 54
information using recovery tools NOTE: For detailed instructions, perform a search for these topics in Help and Support. In case of system instability, HP recommends that you print the recovery procedures and save them for later use. NOTE: Windows includes the User Account Control feature to - HP ProBook 6570b | Getting Started HP Notebook - Page 55
system recovery if the hard drive becomes corrupted. A system recovery reinstalls the original operating system and the software programs installed at the factory, and then configures the settings for the programs. HP Recovery Disc Creator can create two kinds of recovery DVDs as follows: ● Windows - HP ProBook 6570b | Getting Started HP Notebook - Page 56
Startup Repair to fix problems that might prevent Windows from starting correctly. ● f11 recovery tools: You can use the f11 recovery tools to recover your original hard drive image. The image includes the Windows operating system and software programs installed at the factory. NOTE: If you are - HP ProBook 6570b | Getting Started HP Notebook - Page 57
are permanently removed. The f11 recovery tool reinstalls the operating system and HP programs and drivers that were installed at the factory. Software not installed at the factory must be reinstalled. To recover the original hard drive image using f11: 1. If possible, back up all personal files - HP ProBook 6570b | Getting Started HP Notebook - Page 58
key. 4. Follow the on-screen instructions. 5. Click Next. 6. Select Repair your computer. 7. Follow the on-screen instructions. After the repair is completed: 1. Eject the Windows 7 operating system DVD, and then insert the Driver Recovery disc. 2. Install the Hardware Enabling Drivers first - HP ProBook 6570b | Getting Started HP Notebook - Page 59
welcome.hp.com/country/us/en/ wwcontact_us.html. Here you can: ● Chat online with an HP technician. NOTE: When support chat is not available in a particular language, it is available in English. ● E-mail support. ● Find support telephone numbers. ● Locate an HP service center. Contacting support 51 - HP ProBook 6570b | Getting Started HP Notebook - Page 60
only) Have this information available when you contact support. The service label is affixed inside the battery bay. ● Microsoft® Certificate of Authenticity-Contains the Windows Product Key. You may need the Product Key to update or troubleshoot the operating system. The Microsoft Certificate of - HP ProBook 6570b | Getting Started HP Notebook - Page 61
be powered only with an AC adapter or a DC power source supplied and approved by HP for use with this computer. for IT power systems in Norway with phase-to-phase voltage not exceeding 240 V rms. NOTE: The computer operating voltage and current can be found on the system regulatory label. Input - HP ProBook 6570b | Getting Started HP Notebook - Page 62
Operating environment Factor Temperature Operating Nonoperating Relative humidity (noncondensing) Operating Nonoperating Maximum altitude (unpressurized) Operating Nonoperating Metric 5°C to 35°C -20°C to 60°C 10% to 90% 5% to 95% -15 m to 3,048 m -15 m to 12,192 m U.S. 41°F to 95°F -4°F to 140°F - HP ProBook 6570b | Getting Started HP Notebook - Page 63
display release latch 10 DisplayPort, identifying 14 docking connector, identifying 17 E eSATA port 12 esc key, identifying 9 ExpressCard slot 12, 13 external monitor port 12, 13 F f11 recovery 49 fingerprint reader, identifying 8 fn key, identifying 9, 23 function keys, identifying 9 H hard drive - HP ProBook 6570b | Getting Started HP Notebook - Page 64
52 latch, battery release 17 latches, service door release 17 lights battery 10 calculator 6 caps lock 6 hard drive 10 num lock 6 power 6, 10 TouchPad 6 webcam 15, 16 wireless 6, 10 M Media Card Reader, identifying 12, 13 memory module identifying 18 inserting 42 removing 42 replacing 41 microphone - HP ProBook 6570b | Getting Started HP Notebook - Page 65
wireless network, connecting 20 wireless router, configuring 22 wireless setup 21 WLAN connecting 20 protecting 22 WLAN antennas, identifying 15, 16 WLAN device 52 WLAN label 52 WWAN antennas, identifying 15, 16 Z zooming TouchPad gesture 30 Index 57
-
 1
1 -
 2
2 -
 3
3 -
 4
4 -
 5
5 -
 6
6 -
 7
7 -
8
-
9
-
10
-
11
-
12
-
13
-
14
-
15
-
16
-
17
-
18
-
19
-
20
-
21
-
22
-
23
-
24
-
25
-
26
-
27
-
28
-
29
-
30
-
31
-
32
-
33
-
34
-
35
-
36
-
37
-
38
-
39
-
40
-
41
-
42
-
43
-
44
-
45
-
46
-
47
-
48
-
49
-
50
-
51
-
52
-
53
-
54
-
55
-
56
-
57
-
58
-
59
-
60
-
61
-
62
-
63
-
64
-
65
 |
 |

Getting Started
HP Notebook