HP ProDesk 600 G2 Installation Instructions
HP ProDesk 600 G2 Manual
 |
View all HP ProDesk 600 G2 manuals
Add to My Manuals
Save this manual to your list of manuals |
HP ProDesk 600 G2 manual content summary:
- HP ProDesk 600 G2 | Installation Instructions - Page 1
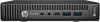
Installation Instructions HP Desktop Mini Security/Dual VESA Sleeve Mounting your sleeve 765004-003 The Security/Dual VESA Sleeve can be mounted to the following monitors: HP V193B, HP P232 Security bracket for 400/600/705/ 800 Desktop Mini models Security bracket for the 260 Desktop Mini model 8mm - HP ProDesk 600 G2 | Installation Instructions - Page 2
assistance, community forums or IT experts, broad multivendor knowledge base, monitoring and diagnostic tools, go to http://www.hp.com/support. Documentation feedback HP is committed to providing documentation that meets your needs. To help us improve the documentation, please send any suggestions
-
 1
1 -
 2
2
 |
 |

Installation Instructions
HP Desktop Mini
Security/Dual VESA
Sleeve
Copyright © 2015 HP Development Company, L.P. The
information contained herein is subject to change without
notice.
Printed in
Third Edition: August 2015
*765004-003*
765004-003
The Security/Dual VESA Sleeve can be mounted to the
following monitors: HP V193B, HP P232
Security bracket for 400/600/705/
800 Desktop Mini models
Security bracket for the 260 Desktop
Mini model
8mm ladder screws, Torx/flat head
Install in the Desktop Mini to attach
the sleeve
8mm machine screws, Torx/flat head
Attaches the sleeve to the rear of
monitors that do not require a spacer
20mm machine screws, Phillips head
Attaches the sleeve to the rear of
monitors that require a spacer
7mm VESA mount spacer
Required for mounting the sleeve to
ProDisplay monitor models
Place the security bracket for your model into the rear of the sleeve so that it aligns with the screw holes on the sleeve
and the padlock loop for your model
1
, and then attach the sleeve to the underside of a desktop (screws not provided),
a wall with a quick release and a monitor (screws not provided), or the rear of a monitor using the 8mm machine screws
provided
2
.
Slide the Desktop Mini all the way into the sleeve
1
until it is stopped by the tabs on the rear of the
sleeve. Use a Torx T15 screwdriver and the four
8mm ladder screws provided in the kit to secure
the Desktop Mini to the sleeve
2
.
Secure the Desktop Mini in the sleeve with a
padlock or slim cable lock (padlock and slim cable
lock not included in the kit).
Mounting your sleeve
Attaching a Desktop Mini to a sleeve
Securing a Desktop Mini in a sleeve
If mounting the sleeve to a ProDisplay monitor, remove the panel from the rear of the monitor. Place the 7mm spacer
provided between the sleeve and the rear of the monitor
1
, and then place the security bracket for your model into the
rear of the sleeve so that it aligns with the screw holes on the sleeve and the padlock loop for your model
2
. Attach the
sleeve and spacer to the rear of a monitor using the 20mm machine screws provided
3
.