HP R937 User Guide
HP R937 - PhotoSmart Digital Camera Manual
 |
UPC - 883585230921
View all HP R937 manuals
Add to My Manuals
Save this manual to your list of manuals |
HP R937 manual content summary:
- HP R937 | User Guide - Page 1
HP Photosmart R930 series Digital Camera User Guide - HP R937 | User Guide - Page 2
express warranty statements accompanying such products and services. Nothing herein should be construed as constituting an additional warranty. HP shall not be liable for technical or editorial errors or omissions contained herein. Windows® is a U.S. registered trademark of Microsoft Corporation. SD - HP R937 | User Guide - Page 3
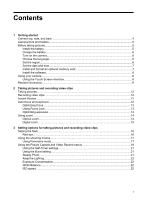
...5 Before taking pictures...5 Install the battery...5 Charge the battery...6 Turn on the camera...6 Choose the language...6 Set the region...6 Set the date and time...7 Install and format an optional memory card 7 Install the software...8 Using your camera...8 Using the Touch Screen interface - HP R937 | User Guide - Page 4
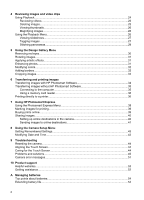
Time...43 9 Troubleshooting Resetting the camera...44 Aligning the Touch Screen...44 Caring for the Touch Screen...44 Problems and solutions...45 Camera error messages...51 10 Product support Helpful websites...52 Getting assistance...52 A Managing batteries Top points about batteries...54 Extending - HP R937 | User Guide - Page 5
Contents Safety precautions for using batteries 54 Power indicators...55 Number of shots per battery charge 55 Recharging the Lithium Ion battery 55 Safety precautions for recharging batteries 56 B Specifications Memory capacity...58 Image quality...58 Video quality...59 Index...60 3 - HP R937 | User Guide - Page 6
1 Getting started Use this section to get familiar with the camera controls, set up your digital camera for use, and begin taking pictures. Camera top, side, and back 34 5 6 1 2 11 7 8 10 9 1 Speaker. 2 button 3 Power light. 4 selector-Switches between Picture Capture, Video Record, - HP R937 | User Guide - Page 7
catches. 3. Close the Battery/Memory Card door. To remove the battery, move the battery latch until the battery springs free. NOTE: Fully charge the battery before using it the first time (see "Charge the battery" on page 6). Turn off the camera before removing the battery. Camera front and bottom - HP R937 | User Guide - Page 8
power adapter into an electrical outlet, as shown. The camera's blinking Battery Charging light indicates that the battery is charging. The battery is fully charged when the Battery Charging light turns on solid (see "Recharging the Lithium Ion battery" on page 55 for information on charging times - HP R937 | User Guide - Page 9
Menu" on page 42). Install and format an optional memory card This camera supports standard, high speed, and high capacity Secure Digital (SD and SDHC) memory cards, 32MB to 8GB. 1. Turn off the camera and open the Battery/Memory Card door. 2. Insert the optional memory card in the smaller slot - HP R937 | User Guide - Page 10
and drivers. To learn about Windows Vista support for your camera, see www.hp.com/go/ windowsvista (English only). Windows: 1. Close all programs and temporarily disable any virus protection software. 2. Insert the HP Photosmart Software CD into the CD drive and follow the on-screen instructions. If - HP R937 | User Guide - Page 11
clips on the camera See "Reviewing images and video clips" on page 24. For information on enhancing your images See "Using the Design Gallery Menu" on page 30. For information on transferring images from your camera to a computer See "Transferring images with HP Photosmart Software" on page 34 - HP R937 | User Guide - Page 12
Chapter 1 TIP: To switch between Picture Capture, Video Record, and Playback, slide to the desired option. 10 Getting started - HP R937 | User Guide - Page 13
• Picture Capture indicator. • Video Record indicator. Memory card indicator. Battery level indicator (see "Power indicators" on page 55). 3 Focus brackets see "Auto focus and exposure" on page 12). Whenever you set a camera feature to a setting other than the default, a button displays with an - HP R937 | User Guide - Page 14
begin recording video. 5. To stop recording video, press and release the Shutter button again. Instant Review After you have taken a picture or recorded a video clip, the camera displays it briefly in Instant Review. If you want to delete the image or video clip, touch , then touch This Image in - HP R937 | User Guide - Page 15
to be in proper focus or exposure when viewed in Playback, see the topics on blurry, dark, light, or grainy images in "Troubleshooting" on page 44. Optimizing focus When the camera cannot auto focus, the focus brackets turn red. This indicates the picture may be out of focus because the subject is - HP R937 | User Guide - Page 16
physically adjusts the lens to make the subject of your picture appear closer. After you have zoomed the lens fully using optical zoom, the camera employs digital zoom. Digital zoom uses no moving lens parts. TIP: The more you zoom in on the subject of your picture, the more small movements of the - HP R937 | User Guide - Page 17
scene enlarges within the yellow frame to indicate the area of the scene the camera will capture, and the MP value decreases to indicate the resolution at which the scene will be captured. When capturing images using digital zoom, make sure that the MP value shown in the Image Display is appropriate - HP R937 | User Guide - Page 18
features that optimize the camera for lighting and motion, you can also set the camera to create a panorama, to take a series of pictures rapidly or (see "Removing red eyes" on page 30) or the HP Photosmart Software that came with your camera. You can remove the glowing eyes in animal subjects after - HP R937 | User Guide - Page 19
remains in effect until it is changed again, or until you turn off the camera. Using Panorama mode The / Panorama mode allows you to take a sequence of use Stitch Panorama on the camera (see "Stitching panoramas" on page 29). If you installed the HP Photosmart Software (see "Install the Using the - HP R937 | User Guide - Page 20
3 software" to take the first picture in the panoramic sequence. 3. Position the camera to take the second picture. Use the transparent overlay of the first touch End Panorama to end the panoramic sequence. During Instant Review (see "Instant Review" on page 12), each image in the panoramic sequence - HP R937 | User Guide - Page 21
The setting remains in effect until it is changed, even when you turn off the camera. • 8MP Best-For enlarging or printing images greater than 41 x 51 cm (16 The setting remains in effect until it is changed, even when you turn off the camera. To select a tag to apply, touch a tag, then touch OK. For - HP R937 | User Guide - Page 22
select. • Off (Default) • ± 0.5 • ±1.0 During Instant Review (see "Instant Review" on page 12), you can delete the entire bracketing sequence. on page 13) with Spot. Camera Setup...-Displays the Camera Setup Menu for setting camera behavior (see "Using the Camera Setup Menu" on page 42). - HP R937 | User Guide - Page 23
as possible until you release the Shutter button or the camera runs out of memory. The Image Display remains off during the burst capture. After the burst images have been taken, each image appears one at a time in Instant Review (see "Instant Review" on page 12). You can delete the entire burst - HP R937 | User Guide - Page 24
too far away for the flash to reach, or is severely backlit (for example, in front of a window) Exposure Compensation You can use Exposure Compensation to override the camera's automatic exposure setting. Exposure Compensation is useful in scenes that contain many light objects (like a white object - HP R937 | User Guide - Page 25
Higher ISO numbers allow faster shutter speeds, and can be used when taking pictures in dark areas without a flash, or when taking pictures of fast moving objects. Higher ISO speeds produce pictures with more grain (or noise) and, therefore, can be of lower quality. Using the Picture Capture and - HP R937 | User Guide - Page 26
2. Touch or to scroll through your images (see "Reviewing videos" on page 25 for information about reviewing videos). TIP: If your image is obscured by the that actually display depend upon the images you have stored on your camera and the settings or features you have applied to those images). - HP R937 | User Guide - Page 27
of this image or video clip out of the total number of stored images. Playback indicator. Memory card indicator. Battery indicator (see "Power indicators" on page 55). Reviewing videos With a video displayed in Playback: 1. Touch to play the video (the number below indicates the length of the - HP R937 | User Guide - Page 28
to return to Playback. Using the Playback Menu 1. While in Playback, touch Menu, then touch the option you want to use and follow the on-camera instructions. 2. Touch repeatedly to return to Playback. 26 Reviewing images and video clips - HP R937 | User Guide - Page 29
online (see "Using HP Photosmart Express" on page 38). Tag-Allows you to tag images (see "Tagging images" on page 27). View Slideshow-Allows you to create and view slideshows of your images and videos (see "Viewing slideshows" on page 27). Stitch Panorama-Allows you to stitch, on-camera, a panoramic - HP R937 | User Guide - Page 30
11). You can also create new tags on the camera (see "Managing tags on the camera" on page 28) or by using the HP Photosmart Software (see "Managing tags in Windows" on page 29 and "Managing tags on your cancel the entry. 2. When you have finished, touch Done. 28 Reviewing images and video clips - HP R937 | User Guide - Page 31
Settings, then select HP Photosmart Tag Setup. 4. Follow the instructions in the Tag Setup Software help system to create, delete, and reorder tags, and to save new and modified tags to your camera. Managing tags on your Macintosh The HP Photosmart Software that came with your camera allows you use - HP R937 | User Guide - Page 32
or to scroll to an image. 2. Touch Menu, touch Design Gallery, then touch the Design Gallery option you want to use and follow any on-camera instructions. 3. Touch repeatedly to return to Playback. TIP: To more clearly view the effect of Design Gallery options on the displayed image, press to hide - HP R937 | User Guide - Page 33
and emphasizes outlines. • Drawing-Creates a pencil drawing using the edges in the image. 3. Touch Next to select the artistic effect. Follow the on-camera instructions to adjust the artistic effect. 4. Touch Save to save a copy of the image with the artistic effect and return to the Design Gallery - HP R937 | User Guide - Page 34
subjects for a slimmer look. • Pet-Eye Fix-Allows you to correct glowing-eye problems in images of animals. • Press and to zoom in and out on the 3. Touch Next to preview the color effect on the image. Follow the on-camera instructions to adjust the color. 4. Touch Save to save a copy of the image - HP R937 | User Guide - Page 35
the matte border. • Square-Adds a square matte border with beveled edges. 3. Touch Next to preview the border effect on the image. Follow the on-camera instructions to adjust the border. 4. Touch Save to save a copy of the image with the specified border and return to the Design Gallery Menu. Touch - HP R937 | User Guide - Page 36
camera, to review images, and to transfer images. You can transfer pictures and video clips with or without the HP Photosmart Software that came with your camera. However, the HP Photosmart Software has several features for transferring and managing your images and also guides the instructions on - HP R937 | User Guide - Page 37
is connected to the computer, follow the instructions on the computer screen. For more information, see the Help feature in the HP Photosmart Software. NOTE: If the camera does not successfully connect to the computer, see "My camera stalls when establishing a connection to the computer." on page - HP R937 | User Guide - Page 38
's help. Printing directly to a printer You can print images directly from the camera to any PictBridge-certified printer. For information about printing images from your computer, see "Transferring images with HP Photosmart Software" on page 34. NOTE: You cannot print video clips using the method - HP R937 | User Guide - Page 39
has printed all the images you selected, disconnect the camera from the printer. NOTE: If you connect the camera to a non-HP printer and encounter problems with printing, contact your printer manufacturer. HP does not provide customer support for non-HP printers. Printing directly to a printer 37 - HP R937 | User Guide - Page 40
you connect the camera to your computer or printer. You must have the HP Photosmart Software installed on your computer to use some features in the Photosmart Express Menu. For information about installing this software, see "Install the software" on page 8. NOTE: Available online services vary by - HP R937 | User Guide - Page 41
mark images you want to order as prints. The next time you connect the camera to a computer with the HP Photosmart Software installed, you can order prints of the marked images online. 1. While in the Photosmart Express Menu, touch Buy Prints Online. 2. To mark individual images you want to order - HP R937 | User Guide - Page 42
that came with your camera. 3. When the Transfer Images screen displays, click Cancel. 4. Access the Share Setup software. • For Windows: On the Windows desktop, double-click the Photosmart Share Setup icon. • For Macintosh: Open System Preferences, click HP Photosmart Camera, then click Share. 40 - HP R937 | User Guide - Page 43
instructions on the computer screen to create, delete, and reorder share destinations. 6. When you are done, turn off the camera and disconnect the camera from the computer. Turn on the camera, access the Photosmart see "Transferring images with HP Photosmart Software" on page 34. Sharing images 41 - HP R937 | User Guide - Page 44
43. USB Configuration-Specifies how a computer recognizes the camera. See "Connecting to the computer" on page 35. • Digital Camera (Default)--Recognizes the camera as a digital camera using PTP (Picture Transfer Protocol). • Disk Drive-Recognizes the camera as a disk drive using MSDC (Mass Storage - HP R937 | User Guide - Page 45
Options with check marks will retain their setting even when you turn off the camera. Set or clear the check mark by touching the option. Repeat this step modify. 3. When you are done, touch OK. Modifying Date and Time The camera uses its internal date and time when it imprints the date and time on - HP R937 | User Guide - Page 46
9 Troubleshooting Use this section to find information on: • Resetting the camera (see "Resetting the camera" on page 44). • Aligning the Touch Screen (see "Aligning the Touch Screen" on page 44). • Caring for the Touch Screen (see "Caring for the Touch Screen" on page 44). • Possible problems and - HP R937 | User Guide - Page 47
often fixed with new releases of firmware. To optimize your digital photography experience, periodically check the Hewlett-Packard Technical Support website (www.hp.com/support) for updates to your camera's firmware, software, and drivers. How can I get professional-quality prints if I don't have - HP R937 | User Guide - Page 48
camera button to wake up the camera. • The Touch Screen overlay may be turned off. Press to turn on the overlay. • Align the Touch Screen (see "Aligning the Touch Screen" on page 44). • Replace or recharge the battery. • Reset the camera (see "Resetting the camera" on page 44). 46 Troubleshooting - HP R937 | User Guide - Page 49
This causes a longer exposure time, so use a tripod or hold the camera steady. For information about flash working distance for this camera, go to www.hp.com/ support, select your language and region, enter your camera model number in the Search: Product field, click Product Information, then click - HP R937 | User Guide - Page 50
marked SDHC) memory card is now available that prevents improper formatting and use by devices not supporting 4GB or larger cards. Try formatting the card in this camera, which supports High Capacity Secure Digital cards. • Your memory card may be defective. If you have formatted your memory card in - HP R937 | User Guide - Page 51
• Turn the camera off, then on again. If that does not fix the problem, reset the camera (see "Resetting the camera" on page 44). • If the problem persists, contact Hewlett-Packard Technical Support (see "Product support" on page 52). The camera responds sluggishly when trying to review images. 49 - HP R937 | User Guide - Page 52
battery. I am having a problem installing or using the HP Photosmart Software. • Make sure your computer meets the minimum system requirements as stated on the camera packaging. • Refer to the HP Photosmart Software online help system. • Refer to the Hewlett-Packard Technical Support website: www.hp - HP R937 | User Guide - Page 53
the message by visiting www.hp.com/support and searching on the specific code. • Lens Error (general)-R930-021 • Unsupported card-R930-200 • Unable to format card-R930-202 • Error saving image-R930-100 • Error saving video-R930-102 • Batteries cannot be charged-R930-435 Camera error messages 51 - HP R937 | User Guide - Page 54
specialists. • Firmware, software, and driver updates for your camera. • Valuable product and troubleshooting information for technical issues. • Proactive product updates, support alerts, and HP newsletters (available when you register your camera). 3. HP support by phone. Support options and fees - HP R937 | User Guide - Page 55
you would like to extend or upgrade your camera's warranty, please contact the store where you bought the camera or check the HP Care Pack offers at www.hp.com/support. 6. If you already purchased an HP Care Pack Service, please check the support conditions on your contract. Getting assistance 53 - HP R937 | User Guide - Page 56
batteries Your camera uses a rechargeable HP Photosmart R07 Lithium Ion battery (L1812A/L1812B). Top points about batteries Always insert the battery in the camera correctly (see "Install the battery" on page 5). If the battery is inserted improperly, the compartment door may close but the camera - HP R937 | User Guide - Page 57
, the clock may be reset and you may be prompted to update it the next time you power on the camera. Number of shots per battery charge A fully charged HP Photosmart R07 Lithium Ion battery should take approximately 190 pictures. This number is an estimate based on standards established by the - HP R937 | User Guide - Page 58
you should follow the safety precautions below. • Do not charge any other battery than the HP Photosmart R07 Lithium Ion battery in the camera or quick recharger. • Insert the Lithium Ion battery in the correct orientation. • Use the camera or quick recharger in a dry location only. • Do not charge - HP R937 | User Guide - Page 59
None Zoom • 3x optical zoom with 10 positions between wide and telephoto • 8x digital zoom Focus Focus settings: Auto (Default), Close-up Auto (Default): • Wide-500 working range for this camera, go to www.hp.com/ support, select your language and region, enter your camera model number in the - HP R937 | User Guide - Page 60
• This camera supports standard, high speed, and high capacity Secure Digital (SD) memory cards, 32MB to 8GB. • This camera supports storing a One rechargeable HP Photosmart R07 Lithium Ion battery for HP Photosmart R-series cameras • HP AC power adapter included with camera Temperature range - HP R937 | User Guide - Page 61
Quality settings (see Video Quality under "Using the Picture Capture and Video Record menus" on page 18), go to www.hp.com/support, select your language and region, enter your camera model number in the Search: Product field, click Product Information, then click Specifications. Video quality 59 - HP R937 | User Guide - Page 62
52 H HP Photosmart Express 38, 39 HP Photosmart Software 8 I Image Display 4 Image Quality 19, 58 images correcting 31 Date & Time Imprint 19 deleting 25 Image Quality 19, 58 magnifying 26 number remaining 11 L Landscape mode 17 Language 6, 42 LEDs 4 lights on camera 4 Lithium Ion battery 54, 56 - HP R937 | User Guide - Page 63
39 problems and solutions 45 product support 52 R record video clips 12 red-eye removal 16, 30 Region 6 remaining pictures count 11 Remembered Settings 42 removing red eyes 30 reset camera 44 resolution 57 reviewing images 24 reviewing videos 25 rotating images 31 S safety precautions for batteries - HP R937 | User Guide - Page 64
energy and, if not installed and used in accordance with the instructions, may cause harmful interference to radio communications. However, there is Street Palo Alto, Ca 94304 (650) 857-1501 HP Photosmart R930 series Digital Camera Declaration of Conformity (European Economic Area) According to ISO
-
 1
1 -
 2
2 -
 3
3 -
 4
4 -
 5
5 -
 6
6 -
 7
7 -
8
-
9
-
10
-
11
-
12
-
13
-
14
-
15
-
16
-
17
-
18
-
19
-
20
-
21
-
22
-
23
-
24
-
25
-
26
-
27
-
28
-
29
-
30
-
31
-
32
-
33
-
34
-
35
-
36
-
37
-
38
-
39
-
40
-
41
-
42
-
43
-
44
-
45
-
46
-
47
-
48
-
49
-
50
-
51
-
52
-
53
-
54
-
55
-
56
-
57
-
58
-
59
-
60
-
61
-
62
-
63
-
64
 |
 |

HP Photosmart
R930 series
Digital Camera
User Guide