HP Rx5910 HP iPAQ rx5700 and rx5900 Travel Companion Series - Additional Produ
HP Rx5910 - iPAQ Travel Companion Manual
 |
UPC - 882780587625
View all HP Rx5910 manuals
Add to My Manuals
Save this manual to your list of manuals |
HP Rx5910 manual content summary:
- HP Rx5910 | HP iPAQ rx5700 and rx5900 Travel Companion Series - Additional Produ - Page 1
Additional Product Information User Guide - HP Rx5910 | HP iPAQ rx5700 and rx5900 Travel Companion Series - Additional Produ - Page 2
Corporation in the U.S. and other countries. HP iPAQ Products are Powered by Microsoft Windows Mobile®TM Version 5.0 for Pocket PC. SD Logo is a trademark of its proprietor. Bluetooth® is a trademark owned by its proprietor and used by Hewlett-Packard Development Company, L.P. under license. All - HP Rx5910 | HP iPAQ rx5700 and rx5900 Travel Companion Series - Additional Produ - Page 3
Learning The Basics HP Quick Launch ...9 Today Screen ...10 Status Icons ...10 iPAQ Wireless ...11 Entering Owner Information ...12 HP Help and Support ...13 Using TodayPanel Lite ...14 Viewing the Operating System Information 15 Performing a Soft Reset ...16 Protecting Your HP iPAQ with a Password - HP Rx5910 | HP iPAQ rx5700 and rx5900 Travel Companion Series - Additional Produ - Page 4
Interference When Using GPS Software 46 6 WorldMate WorldMate Standard Edition ...47 WorldMate ActiveSync Settings ...48 Screen Navigation ...48 Clocks ...49 Using the Alarm ...50 World Map ...51 City List ...52 Weather Service ...53 Currency Converter Service ...54 Updating Currency Rates ...55 - HP Rx5910 | HP iPAQ rx5700 and rx5900 Travel Companion Series - Additional Produ - Page 5
Stored on the HP iPAQ 92 Add a Picture to a Contact ...93 Print Pictures ...94 Assign a Picture to the Today Screen Background 95 11 Windows Media Player 10 Mobile Windows Media Player ...96 Listening to Music and Watching Videos 97 Clearing the Now Playing List ...98 Updating a Library ...99 12 - HP Rx5910 | HP iPAQ rx5700 and rx5900 Travel Companion Series - Additional Produ - Page 6
to a Message 109 Downloading Messages 110 Downloading Messages from a Server Display of the Work Week 118 Viewing Today's Agenda ...118 Viewing Appointments ...119 Scheduling an Appointment ...120 Sending a Meeting Request ...120 Setting a Default Reminder for All New Appointments 121 Updating - HP Rx5910 | HP iPAQ rx5700 and rx5900 Travel Companion Series - Additional Produ - Page 7
Setting Options for Displaying Tasks on the Today Screen 140 Marking a Task as Completed ...141 19 Product Specifications System Specifications ...142 Physical Specifications France ...149 Italy ...149 Battery Warning ...149 Equipment Warning ...150 Airline Travel Notice ...151 Medical Electronic - HP Rx5910 | HP iPAQ rx5700 and rx5900 Travel Companion Series - Additional Produ - Page 8
Index ...157 viii - HP Rx5910 | HP iPAQ rx5700 and rx5900 Travel Companion Series - Additional Produ - Page 9
1 Registering the iPAQ Registering your HP iPAQ When you register your HP iPAQ with Hewlett-Packard, you receive e-mail regarding special offers and promotions. Take time now to register your HP iPAQ online at http://www.register.hp.com. If your mailing or e-mail address needs to be updated after - HP Rx5910 | HP iPAQ rx5700 and rx5900 Travel Companion Series - Additional Produ - Page 10
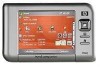
the box with the Travel Companion. Use this illustration to become more familiar with the device. NOTE Box contents vary by model. Box Contents (1) HP iPAQ (2) Case (3) Mini-USB synchronization cable/power cable (2 ea) (4) HP iPAQ Documentation (5) Stylus (6) 1,700mAH li-ion removable - HP Rx5910 | HP iPAQ rx5700 and rx5900 Travel Companion Series - Additional Produ - Page 11
Box Contents (8) AC adapter with interchangeable plug (9) Car kit - holder (10) Car kit - Travel power adapter (11) Car kit - windshield mounting bracket Box Contents 3 - HP Rx5910 | HP iPAQ rx5700 and rx5900 Travel Companion Series - Additional Produ - Page 12
3 Components Top Components Component (1) Reset Button (2) Record Button (3) SD Slot Function Press to perform a soft reset of the Travel Companion. Press to record voice or sound. Insert a Secure Digital (SD) storage card for data storage or a Secure Digital Input/Output card (SDIO) card to - HP Rx5910 | HP iPAQ rx5700 and rx5900 Travel Companion Series - Additional Produ - Page 13
current window or exit the current application. ● When in Standard mode: ● Top - Scroll up ● Bottom - Scroll down ● Left - Scroll left ● Right - Scroll right ● When using GPS: ● Top - Zoom in ● Bottom - Zoom out ● Left - Volume down ● Right - Volume up Front Components 5 - HP Rx5910 | HP iPAQ rx5700 and rx5900 Travel Companion Series - Additional Produ - Page 14
Release Button (3) Battery Cover (4) Stylus Function Use the speaker to get spoken navigation instructions. Press to remove the battery cover. Remove to install or remove the battery. Use to input information. Slide out to remove the stylus. Slide in to replace the stylus. Chapter 3 Components - HP Rx5910 | HP iPAQ rx5700 and rx5900 Travel Companion Series - Additional Produ - Page 15
out to remove the stylus. Slide in to replace the stylus. Allows connection to wireless networks. (rx5900 series models only) Speak into the microphone to record voice notes. Press to access the HP Quick Launch screen. Press and hold to launch Calendar. Press to launch GPS navigation. Press and hold - HP Rx5910 | HP iPAQ rx5700 and rx5900 Travel Companion Series - Additional Produ - Page 16
Bluetooth Antenna (13) Power Button and LED Function Allows connection to other Bluetooth devices. Press to turn the unit on and off. ● Solid amber light - Battery is charging ● Solid green light - Battery is fully charged ● Flashing amber light - Reminder or alarm Chapter 3 Components 8 - HP Rx5910 | HP iPAQ rx5700 and rx5900 Travel Companion Series - Additional Produ - Page 17
to access the Internet browser. ● Tap the Navigation icon to use GPS navigation. HP Quick Launch is configured by default to be the home screen of the Travel Companion. Switch to use the Today screen as the home screen by tapping Menu> Settings and clearing the check boxes. You can also access the - HP Rx5910 | HP iPAQ rx5700 and rx5900 Travel Companion Series - Additional Produ - Page 18
softkey. Any type of alert, such as a meeting reminder is displayed on the Today screen as a notification. Status Icons The following status icons are displayed on the Navigation or Command bar. Tap the icon on the HP iPAQ screen to view more information related to the item. Icon Status Indicates - HP Rx5910 | HP iPAQ rx5700 and rx5900 Travel Companion Series - Additional Produ - Page 19
, and to configure their settings. The GPS software controls the GPS receiver. Icon Status WLAN is on. WLAN is off. Bluetooth is on. Bluetooth is off. GPS receiver is on. GPS receiver is off. *WLAN is available on rx5900 series models only. The iPAQ Wireless screen has two power buttons to - HP Rx5910 | HP iPAQ rx5700 and rx5900 Travel Companion Series - Additional Produ - Page 20
Enter your owner information so your HP iPAQ can be returned to you if it is lost. 1. Tap Start > Settings > Personal tab > Owner Information. 2. On the Identification tab, enter your personal information. Tip If owner information is displayed on the Today screen, you can open and edit the - HP Rx5910 | HP iPAQ rx5700 and rx5900 Travel Companion Series - Additional Produ - Page 21
list of help topics for the HP iPAQ. ● Customer Support - provides various different sources of information about your HP iPAQ. ● Asset Viewer - provides information about your HP iPAQ, including serial number, memory, version number, display type, and wireless information. HP Help and Support 13 - HP Rx5910 | HP iPAQ rx5700 and rx5900 Travel Companion Series - Additional Produ - Page 22
Today screen settings. View the amount of battery power remaining. Set the time duration for turning off your HP iPAQ. View the amount of main memory available on your HP iPAQ. View, activate, and stop all running programs from this screen. View the amount of storage memory available in iPAQ File - HP Rx5910 | HP iPAQ rx5700 and rx5900 Travel Companion Series - Additional Produ - Page 23
Viewing the Operating System Information ▲ Tap Start > Settings > System tab > About. The operating system version displays near the top of the screen. Viewing the Operating System Information 15 - HP Rx5910 | HP iPAQ rx5700 and rx5900 Travel Companion Series - Additional Produ - Page 24
erase any programs or saved data. NOTE Be sure to close all running applications before performing a soft reset. To perform a soft reset: 1. Locate the recessed Reset button on your HP iPAQ. 2. Use the stylus to lightly press the Reset button. The HP iPAQ restarts. Chapter 4 Learning The Basics 16 - HP Rx5910 | HP iPAQ rx5700 and rx5900 Travel Companion Series - Additional Produ - Page 25
is displayed after the wrong password is entered five times. 5. When prompted, tap OK. The next time your HP iPAQ is unused for the specified amount of time, you are prompted to enter your password. Tip Use the same steps as above to change or reset your password. Protecting Your HP iPAQ - HP Rx5910 | HP iPAQ rx5700 and rx5900 Travel Companion Series - Additional Produ - Page 26
about your HP iPAQ, including: ● Identity - Lists the device serial number, as well as owner information. ● Memory - Provides system ROM and RAM size and other relevant information about device memory. ● Version - Lists system image and operating system information. ● Display - Provides detailed - HP Rx5910 | HP iPAQ rx5700 and rx5900 Travel Companion Series - Additional Produ - Page 27
The style in which numbers, currency, dates, and times are displayed is specified in regional settings. To change the regional settings: 1. Tap Start > Settings > System tab > Regional Settings > Region tab. 2. Select a region. The region you select determines which options are available on the - HP Rx5910 | HP iPAQ rx5700 and rx5900 Travel Companion Series - Additional Produ - Page 28
1. Tap the Speaker icon at the top of the screen. 2. Move the system volume slider on the screen, or roll the scroll wheel on your HP iPAQ to the desired volume level. 3. To mute system NOTE Turning off sounds and the LED notification helps conserve battery power. Chapter 4 Learning The Basics 20 - HP Rx5910 | HP iPAQ rx5700 and rx5900 Travel Companion Series - Additional Produ - Page 29
enable the equalizer and 3D sound. You can also enable automatic gain control (AGC) or create your own settings for the microphone. To modify audio settings, tap Start > Settings > System tab > Audio. To enable the headphone equalizer: 1. Tap the Equalizer tab. 2. Select Enable Headphone Equalizer - HP Rx5910 | HP iPAQ rx5700 and rx5900 Travel Companion Series - Additional Produ - Page 30
Changing Power Management Settings 1. Tap Start > Settings > System tab > Power. 2. Tap the Advanced tab to select the length of time your HP iPAQ stays on when using battery power or external power. Chapter 4 Learning The Basics 22 - HP Rx5910 | HP iPAQ rx5700 and rx5900 Travel Companion Series - Additional Produ - Page 31
the backlight. 1. Tap Start > Settings > System tab > Backlight > Brightness tab. 2. Move the sliders up to increase and down to decrease the brightness. NOTE To conserve battery power on your HP iPAQ, keep the backlight only as bright as required to view the screen easily. Dimming or Adjusting the - HP Rx5910 | HP iPAQ rx5700 and rx5900 Travel Companion Series - Additional Produ - Page 32
Programs To install programs on your HP iPAQ: 1. Use the mini-USB synchronization cable to connect your HP iPAQ to a personal computer. 2. Follow the instructions in the Installation Wizard provided with the program you want to install. 3. Check the screen on your HP iPAQ to see if any further steps - HP Rx5910 | HP iPAQ rx5700 and rx5900 Travel Companion Series - Additional Produ - Page 33
see the desired program, tap Start > Programs. In most cases, the system closes programs that are no longer in use to free needed memory. However, you can close programs manually if you prefer. 1. Tap Start > Settings > System tab > Memory > Running Programs tab. 2. In the Running Programs list, tap - HP Rx5910 | HP iPAQ rx5700 and rx5900 Travel Companion Series - Additional Produ - Page 34
Name To get detailed information: ▲ Tap Start > Settings > System tab > About. The Version tab displays important device information, including the type of processor and the amount of memory installed. The device name is used to identify your HP iPAQ in the following situations: ● Synchronizing with - HP Rx5910 | HP iPAQ rx5700 and rx5900 Travel Companion Series - Additional Produ - Page 35
the day of the week for the alarm. You can select multiple days by tapping each desired day. 4. Tap the time to open a clock and set the time for the alarm. Then tap OK. 5. Tap the Alarm icon to specify the type of alarm. You can choose a flashing light, a single sound - HP Rx5910 | HP iPAQ rx5700 and rx5900 Travel Companion Series - Additional Produ - Page 36
Shortcut Menus A shortcut menu appears when you tap and hold an item. The menu displays the most common commands for the specific item. For example, you can delete an appointment or send an e-mail message to a contact by using commands on a shortcut menu. To use a shortcut menu, - HP Rx5910 | HP iPAQ rx5700 and rx5900 Travel Companion Series - Additional Produ - Page 37
Creating and Assigning a Category In the Calendar, Contacts, and Tasks programs, you can use categories to help you organize and group appointments, contacts, and tasks. 1. From the program, tap an existing item or create a new one. 2. Do one of the following: ● For an existing item in Calendar and - HP Rx5910 | HP iPAQ rx5700 and rx5900 Travel Companion Series - Additional Produ - Page 38
scroll through items in a list by rolling the scroll wheel or by using the soft keys on the screen of your HP iPAQ. To change the speed at which scrolling with the soft keys occurs: 1. Tap Start > Settings > Personal tab > Buttons > Up/Down Control tab. 2. Under Delay before first repeat, move the - HP Rx5910 | HP iPAQ rx5700 and rx5900 Travel Companion Series - Additional Produ - Page 39
Screen Orientation Tap Start> Settings > System tab Screen Orientation to change the orientation of the screen on your HP iPAQ. Use the Rotate screen button as well to change the screen orientation. Screen Orientation 31 - HP Rx5910 | HP iPAQ rx5700 and rx5900 Travel Companion Series - Additional Produ - Page 40
instructions that came with the HP branded product. Refer to the warranty document included with your HP iPAQ for more information. If you have a nonwarranty event occur such as a damaged or cracked screen and want your device repaired, contact HP Customer Support at www.hp.com/support for service - HP Rx5910 | HP iPAQ rx5700 and rx5900 Travel Companion Series - Additional Produ - Page 41
hard objects. ● Never use any device other than the stylus that comes with the HP iPAQ or an approved replacement to tap or write on the screen. If you lose or break your stylus, order extras at www.hp.com/accessories/ipaq. ● Clean your HP iPAQ by wiping the screen and the exterior with a soft - HP Rx5910 | HP iPAQ rx5700 and rx5900 Travel Companion Series - Additional Produ - Page 42
your HP iPAQ to fit your individual needs and to help the battery last as long as possible between charges. Here are some recommendations for how to conserve battery life. ● Dim the Backlight - Keep the display only as bright as required to view the screen easily. On the Today screen, use the stylus - HP Rx5910 | HP iPAQ rx5700 and rx5900 Travel Companion Series - Additional Produ - Page 43
Checking the Battery Charge Level To monitor the battery power, tap either the Battery icon on the TodayPanel Lite or tap Start > Settings > System tab > Power. If the battery charge level is low, connect to AC power. Checking the Battery Charge Level 35 - HP Rx5910 | HP iPAQ rx5700 and rx5900 Travel Companion Series - Additional Produ - Page 44
not be moving the first time you attempt to establish a GPS connection. Satellite signal reception for your GPS-enabled HP iPAQ Travel Companion generally requires that you go outdoors to start the GPS navigation software. Place the Travel Companion where there is a clear view of the sky or on - HP Rx5910 | HP iPAQ rx5700 and rx5900 Travel Companion Series - Additional Produ - Page 45
out of the box. The sections that follow provide instruction to prepare and use the Travel Companion immediately after purchase. Installing the Battery The battery provides power for the Travel Companion to operate. The Travel Companion comes with a mini-USB synchronization cable, which you must - HP Rx5910 | HP iPAQ rx5700 and rx5900 Travel Companion Series - Additional Produ - Page 46
and sliding it closed. Powering On and Setting Up NOTE If the Travel Companion does not come on when you press the power button after first installing or replacing the battery, press and hold the Reset button for at least two seconds, or connect to power (AC or travel adapter). Chapter 5 GPS 38 - HP Rx5910 | HP iPAQ rx5700 and rx5900 Travel Companion Series - Additional Produ - Page 47
the on-screen set up instructions. After completing this initial setup, the Travel Companion displays the Quick Start Tour, which provides information about using the Travel Companion. View as much of the Quick Setup Tour as needed. When exiting the tour, the Travel Companion initiates the HP Quick - HP Rx5910 | HP iPAQ rx5700 and rx5900 Travel Companion Series - Additional Produ - Page 48
. 2. Attach the power cable to the clips on the back of the Travel Companion holder. Be sure to leave enough cable to plug into the Travel Companion, and that the connector is turned the correct way to plug into the unit. 3. Install the holder onto the windshield mounting bracket. Chapter 5 GPS 40 - HP Rx5910 | HP iPAQ rx5700 and rx5900 Travel Companion Series - Additional Produ - Page 49
and then press the locking lever (2) to securely mount the assembly into place. 5. To install the Travel Companion: a. Insert the Travel Companion into the mounted car kit holder (1). b. Insert the securing clip into the slot on the top of the Travel Companion (2). c. Plug the power cable into the - HP Rx5910 | HP iPAQ rx5700 and rx5900 Travel Companion Series - Additional Produ - Page 50
to adjust the vertical and horizontal orientation of the Travel Companion. Managing GPS Automatically Your GPS-enabled HP iPAQ uses Microsoft Windows Mobile® 5.0, so the operating system automatically manages access to the HP iPAQ GPS receiver to allow multiple programs to simultaneously access - HP Rx5910 | HP iPAQ rx5700 and rx5900 Travel Companion Series - Additional Produ - Page 51
use there is no need for an external antenna. An optional 3V active external antenna is available if you want to use your Travel Companion in locations that do not provide ideal GPS reception, such as inside of a car away from the windshield. Plug this antenna into the gold MMCX connector on your - HP Rx5910 | HP iPAQ rx5700 and rx5900 Travel Companion Series - Additional Produ - Page 52
Signal While in My Car GPS performance on the Travel Companion may be affected if the vehicle has thermal glass windows and windshields, which can block the HP iPAQ from receiving a GPS signal from satellites. To improve GPS signal strength, place the HP iPAQ where there is a clear view of the sky - HP Rx5910 | HP iPAQ rx5700 and rx5900 Travel Companion Series - Additional Produ - Page 53
Frequently To improve the satellite signal to the GPS-enabled Travel Companion, go outdoors to start the GPS navigation software. Place the HP iPAQ where there is a clear view of the sky or on the dashboard of a vehicle that does not have thermal glass windshields or windows. NOTE Interference - HP Rx5910 | HP iPAQ rx5700 and rx5900 Travel Companion Series - Additional Produ - Page 54
Common Reasons For Interference When Using GPS Software Interference Type How to Avoid Vehicles with thermal glass windows and windshields Place the HP iPAQ where there is a clear view of the sky or on the dashboard of a vehicle that does not have thermal glass windows. If your vehicle has - HP Rx5910 | HP iPAQ rx5700 and rx5900 Travel Companion Series - Additional Produ - Page 55
6 WorldMate WorldMate Standard Edition The Travel Companion comes pre-installed with WorldMate Standard Edition. This travel assistant provides a world clock, currency converters, weather, and other travel organizing tools. WorldMate Standard Edition 47 - HP Rx5910 | HP iPAQ rx5700 and rx5900 Travel Companion Series - Additional Produ - Page 56
ActiveSync Settings The Getting Started CD includes WorldMate software for your PC. Install this software to your PC to sync and update WorldMate information on your Travel Companion. The WorldMate ActiveSync component updates currency rates and weather forecasts, as well as your Travel Companion - HP Rx5910 | HP iPAQ rx5700 and rx5900 Travel Companion Series - Additional Produ - Page 57
four other pre-selected clocks. To change a displayed city, tap the city name and select a new city from the list. To view the weather forecast for that city, tap the sun/cloud icon. Sync your Travel Companion with a personal computer running WorldMate software to get updated forecasts. Clocks 49 - HP Rx5910 | HP iPAQ rx5700 and rx5900 Travel Companion Series - Additional Produ - Page 58
list. 4. If you want a message to display when the alarm goes off, type the message in the Message box. 5. Tap OK. Icons indicating the alarm is on display around the bell icon after you turn on the alarm. Your Travel Companion displays the Alarm screen when the alarm sounds. Chapter 6 WorldMate 50 - HP Rx5910 | HP iPAQ rx5700 and rx5900 Travel Companion Series - Additional Produ - Page 59
and then select a city to see the city's location on the map. - or ● Tap the map to display the closest city. Tap the Sun/Cloud icon to display the weather forecast for the selected city. Note that you must sync with a PC that is online running the WorldMate software to get weather forecasts. World - HP Rx5910 | HP iPAQ rx5700 and rx5900 Travel Companion Series - Additional Produ - Page 60
WorldMate's city list, from either the World Map screen or the Clocks screen, tap Menu > Cities. To sort the list of cities by either city name or offset from GMT, tap the appropriate label at the top of the list. Tap a city name to display information about the city including country, longitude - HP Rx5910 | HP iPAQ rx5700 and rx5900 Travel Companion Series - Additional Produ - Page 61
city name to display a list of cities to choose from. NOTE WorldMate supports only cities that are in its database for weather updates. To get current forecasts, update the WorldMate software on your PC, sync your Travel Companion with your PC, and then tap Get Updated Forecast . Weather Service 53 - HP Rx5910 | HP iPAQ rx5700 and rx5900 Travel Companion Series - Additional Produ - Page 62
Currency Converter Service This easy-to-use converter allows you to simultaneously calculate the sum of values in up to three different currencies, as well as receive updated rates online or insert them manually. To convert currencies: 1. Tap the arrow in each heading cell to display a list from - HP Rx5910 | HP iPAQ rx5700 and rx5900 Travel Companion Series - Additional Produ - Page 63
value of the base currency in terms of what you are editing). NOTE Updating a Euro-based currency affects all other Euro-based currencies. You cannot change exchange rates between two Euro-based currencies. Sync your Travel Companion to automatically update currency rates. Updating Currency Rates 55 - HP Rx5910 | HP iPAQ rx5700 and rx5900 Travel Companion Series - Additional Produ - Page 64
Measurement Converter Service To use the Measurements screen: 1. Select the type of measurement (length, temperature, etc.) from the Convert list. 2. Select the measurements (meters, feet, etc.) from the two lists below the Convert - HP Rx5910 | HP iPAQ rx5700 and rx5900 Travel Companion Series - Additional Produ - Page 65
and Canadian area codes. The table provides: ● Country/State names ● Dialing prefixes ● Local time offset from GMT in hours (this table does not update for Daylight Saving Time) Tap a column heading to sort according to the column. Use the Find box to look up prefixes according to the currently - HP Rx5910 | HP iPAQ rx5700 and rx5900 Travel Companion Series - Additional Produ - Page 66
Clothing Sizes This table shows the clothing sizes to buy when traveling overseas. Use the different categories with the man-woman-child icons to quickly find the size you need. NOTE Use the size table only as a - HP Rx5910 | HP iPAQ rx5700 and rx5900 Travel Companion Series - Additional Produ - Page 67
create a packing list: 1. Select the category of items you want from the category drop-down list at the top of the screen. 2. Select the items you want to pack from the All Items list. WorldMate automatically moves items you select to My List. You can then use - HP Rx5910 | HP iPAQ rx5700 and rx5900 Travel Companion Series - Additional Produ - Page 68
7 Entering Text Entering Text Using Block Recognizer 1. From any program, tap the Input Selector arrow, and then Block Recognizer. 2. Write characters, numbers, and symbols in the designated writing area. ● Enter letters by writing in the abc (left) area of the box. ● Enter numbers by writing in the - HP Rx5910 | HP iPAQ rx5700 and rx5900 Travel Companion Series - Additional Produ - Page 69
arrow, and then Keyboard. 2. Tap on the appropriate characters, numbers, and symbols on the on-screen keyboard. Increase the size of the on-screen keyboard keys to make them easier to tap. 1. Tap Start > Settings > Personal tab > Input. 2. On the Input Method tab, select Keyboard as the input method - HP Rx5910 | HP iPAQ rx5700 and rx5900 Travel Companion Series - Additional Produ - Page 70
Entering Text Using Letter Recognizer 1. From any program, tap the Input Selector arrow, and then Letter Recognizer. 2. Write characters, numbers, and symbols in the designated writing area. ● Enter capital letters by writing in the ABC (left) area of the box. ● Enter lowercase letters by writing in - HP Rx5910 | HP iPAQ rx5700 and rx5900 Travel Companion Series - Additional Produ - Page 71
transparently in the background of programs, recognizing words with its integrated dictionary. When Transcriber is turned on, it interprets stylus movement anywhere on the screen as handwriting input. To write with Transcriber: 1. From any program, position the cursor where you want the text to - HP Rx5910 | HP iPAQ rx5700 and rx5900 Travel Companion Series - Additional Produ - Page 72
with your personal computer Synchronization Microsoft ActiveSync software, located on the Getting Started CD, allows your HP iPAQ and your personal computer to communicate with each other. For synchronization to work properly, install Microsoft ActiveSync on your personal computer before connecting - HP Rx5910 | HP iPAQ rx5700 and rx5900 Travel Companion Series - Additional Produ - Page 73
Exchange server. 6. When the Synchronization Options screen displays, select the items to synchronize between your HP iPAQ and your computer, and then click Next. it manually: ▲ On your personal computer, open ActiveSync by selecting the Start menu > Programs > Microsoft ActiveSync. Troubleshooting - HP Rx5910 | HP iPAQ rx5700 and rx5900 Travel Companion Series - Additional Produ - Page 74
and perform a soft reset on your HP iPAQ. (A soft reset does not erase any settings, programs or data.) Use the stylus to lightly press the Reset button. Your HP iPAQ restarts and displays the HP QuickStart Tour. Once your personal computer and HP iPAQ restart, reconnect your HP iPAQ to your - HP Rx5910 | HP iPAQ rx5700 and rx5900 Travel Companion Series - Additional Produ - Page 75
success in solving the connection problem, perform a factory reset on your HP iPAQ. (A factory reset clears all user-installed settings, programs, and data and restores your HP iPAQ to factory settings.) Reinstall applications on your HP iPAQ once the factory reset is complete by using ActiveSync - HP Rx5910 | HP iPAQ rx5700 and rx5900 Travel Companion Series - Additional Produ - Page 76
Palm, then click Remove. Follow the on-screen instructions. 4. Insert the Getting Started CD into the personal computer's CD-ROM drive and follow the on-screen instructions to install ActiveSync on the personal computer and create a partnership between your HP iPAQ and the personal computer. Chapter - HP Rx5910 | HP iPAQ rx5700 and rx5900 Travel Companion Series - Additional Produ - Page 77
9 Connections Connections Use your HP iPAQ to connect to and exchange information with other handheld devices, your computer, various network types, or the Internet. You can connect using: ● WLAN* ● Bluetooth Access these connection types by tapping Start > Settings > Connections tab. *WLAN is - HP Rx5910 | HP iPAQ rx5700 and rx5900 Travel Companion Series - Additional Produ - Page 78
HP iPAQ to the Internet. Instead, access points transmit data to and from the wireless device. Your HP iPAQ service provider for availability and coverage in your area. Not all web content may be available. Some web content may require installation of additional software its own specific IP address - HP Rx5910 | HP iPAQ rx5700 and rx5900 Travel Companion Series - Additional Produ - Page 79
To turn WLAN on or off: 1. Tap Start > Today > iPAQ Wireless. 2. Tap the WLAN icon on the iPAQ Wireless screen. When WLAN is on: ● The WLAN icon on the iPAQ Wireless screen turns amber or green. ● The wireless light-emitting diode (LED) on your HP iPAQ flashes blue. NOTE Even though the indicator is - HP Rx5910 | HP iPAQ rx5700 and rx5900 Travel Companion Series - Additional Produ - Page 80
when the network is automatically detected. Or, manually enter the settings information to add the network. To determine if authentication information is needed, check with your Network Administrator or Hotspot Service Provider. 1. Tap Start > Today > iPAQ Wireless. 2. Turn on WLAN by tapping the - HP Rx5910 | HP iPAQ rx5700 and rx5900 Travel Companion Series - Additional Produ - Page 81
The key is automatically provided. Otherwise, enter the network key manually. Deleting Wireless Network Settings You can delete network settings you manually entered. However, if a network was automatically detected, your HP iPAQ may continue to automatically detect the network. To delete existing - HP Rx5910 | HP iPAQ rx5700 and rx5900 Travel Companion Series - Additional Produ - Page 82
Information Manager (PIM) Profiles Service discovery Definition Verification of a numeric passkey before a connection or activity can be completed. Approval of a connection, access, or activity before it can be completed. Creating a trusted connection between your HP iPAQ and another device. After - HP Rx5910 | HP iPAQ rx5700 and rx5900 Travel Companion Series - Additional Produ - Page 83
time, tap Yes to set up a pairing with a Bluetooth phone. 3. Follow the on-screen instructions to create a pairing between your HP iPAQ and the phone. For battery power, turn Bluetooth off when you are not using it. Bluetooth Device Profiles The functions that Bluetooth supports are called services - HP Rx5910 | HP iPAQ rx5700 and rx5900 Travel Companion Series - Additional Produ - Page 84
(HFP) ● Headset Support Profile (HSP) ● Human Interface Device Profile (HID) Service Discovery Application Profile (SDAP) ● Dial-up Networking Client (DUN) ● Hard Copy Replacement Profile (HCRP) Creating, Ending, and Accepting a Bluetooth Partnership You can create a partnership between your HP iPAQ - HP Rx5910 | HP iPAQ rx5700 and rx5900 Travel Companion Series - Additional Produ - Page 85
. 3. Tap the Bluetooth tab > Bluetooth Settings. Setting Up an Incoming or Outgoing Bluetooth Serial (COM) Port 1. Be sure your HP iPAQ is connected to the other device via Bluetooth. 2. Tap Start > Today > iPAQ Wireless > Bluetooth tab > Bluetooth Settings > Services tab. 3. Select Serial Port in - HP Rx5910 | HP iPAQ rx5700 and rx5900 Travel Companion Series - Additional Produ - Page 86
4. Select the Enable service check box. 5. To limit communication on this COM port to only devices with which your HP iPAQ has a Bluetooth partnership, select the Authentication (Passkey) required check box. 6. Tap OK. Chapter 9 Connections 78 - HP Rx5910 | HP iPAQ rx5700 and rx5900 Travel Companion Series - Additional Produ - Page 87
to intranet sites that have periods in their URLs (for example, intranet.companyname.com), add them to the Work URL Exceptions list. 1. Tap Start > Settings > Connections tab. 2. Tap Connections > Advanced tab > Exceptions. 3. Tap Add new URL. 4. In Work URL, enter the intranet URL. NOTE If you use - HP Rx5910 | HP iPAQ rx5700 and rx5900 Travel Companion Series - Additional Produ - Page 88
Changing an Intranet URL 1. Tap Start > Settings > Connections tab > Connections > Advanced tab > Exceptions. 2. Tap the intranet URL exception you want to change, then make the desired changes. NOTE To delete a work URL - HP Rx5910 | HP iPAQ rx5700 and rx5900 Travel Companion Series - Additional Produ - Page 89
Automatic Choice for Connections If you have already created more than one connection, you can set up your HP iPAQ to connect to the best available connection automatically. 1. Tap Start > Settings > Connections tab > Connections. 2. Under My ISP or My Work Network, tap Manage existing connections - HP Rx5910 | HP iPAQ rx5700 and rx5900 Travel Companion Series - Additional Produ - Page 90
connected to your Internet Service Provider (ISP) or private network during synchronization, your HP iPAQ should download proper proxy settings during synchronization from your computer. If these settings are not on your computer or need to be changed, you can change them manually. Before you begin - HP Rx5910 | HP iPAQ rx5700 and rx5900 Travel Companion Series - Additional Produ - Page 91
Configuring Advanced Proxy Settings 1. For the appropriate server type, enter the proxy server name and port. 2. If necessary, enter the credentials for , select Socks 4 or Socks 5. If using Socks 5, enter the credentials for connecting with your proxy server. Configuring Advanced Proxy Settings 83 - HP Rx5910 | HP iPAQ rx5700 and rx5900 Travel Companion Series - Additional Produ - Page 92
Service Provider (ISP) or select My Work Network to connect to a company network. Choose My Work Network only if the network requires a proxy server. To change or create a new network management name, tap the Edit or New button and OK. 5. Tap the Advanced tab on the Connections screen to set - HP Rx5910 | HP iPAQ rx5700 and rx5900 Travel Companion Series - Additional Produ - Page 93
, tap the Help question mark. NOTE To change existing settings, under My Work Network, tap Manage existing connections > VPN tab. Select the desired VPN connection, tap Edit, then follow the instructions on the screen. To manually start a connection, tap and hold the connection, then tap Connect - HP Rx5910 | HP iPAQ rx5700 and rx5900 Travel Companion Series - Additional Produ - Page 94
Changing a Connection Group Name Your HP iPAQ is already set up with two groups of connection settings: My ISP and My Work Network. You can change the name of these groups to something more meaningful. For example, if you put all of your corporate settings under My Work Network connections, you can - HP Rx5910 | HP iPAQ rx5700 and rx5900 Travel Companion Series - Additional Produ - Page 95
. Tap and hold the connection name, and then tap Delete. ● When connected via a network (Ethernet) card, remove the card from your HP iPAQ. NOTE A modem is not included with your HP iPAQ but may be purchased separately. Visit www.hp.com/accessories/ipaq for more information. Ending a Connection 87 - HP Rx5910 | HP iPAQ rx5700 and rx5900 Travel Companion Series - Additional Produ - Page 96
to: ● View pictures stored on the HP iPAQ or a storage card. ● Add voice or text notes to pictures. ● Print pictures. ● View a slideshow. ● Send pictures by e-mail attachments. ● Associate a picture with a Contact. ● Assign a picture to the Today screen background. Chapter 10 HP Photosmart Mobile 88 - HP Rx5910 | HP iPAQ rx5700 and rx5900 Travel Companion Series - Additional Produ - Page 97
Attaching a Voice Note to a Picture To attach a sound file to a picture: 1. Tap Start > Programs > Photosmart Mobile. 2. Tap the thumbnail picture in which you want to add a voice note. 3. Tap the Cassette icon. 4. Tap the Record button on the Recording toolbar. 5. Speak into the microphone to - HP Rx5910 | HP iPAQ rx5700 and rx5900 Travel Companion Series - Additional Produ - Page 98
be protected by Digital Rights Management (DRM). DRM is software that enables secure distribution and prevents illegal distribution of pictures, over the Internet. For more information on DRM, refer to the on-screen Help by tapping Start > Help and search on DRM. 3. Tap Menu HP Photosmart Mobile 90 - HP Rx5910 | HP iPAQ rx5700 and rx5900 Travel Companion Series - Additional Produ - Page 99
Viewing a Slideshow To view a slideshow: 1. Tap Start > Programs > Photosmart Mobile. 2. Tap the slideshow icon at the bottom of the screen. 3. Tap the screen to view the Pause, Forward, Backward, and Stop buttons. Viewing a Slideshow 91 - HP Rx5910 | HP iPAQ rx5700 and rx5900 Travel Companion Series - Additional Produ - Page 100
iPAQ To view pictures using HP Photosmart Mobile: 1. Tap Start> Programs > Photosmart Mobile. 2. Tap the thumbnail (a smaller representation of the larger picture). HP Photosmart Mobile displays the picture and file information associated with it. NOTE Tap the zoom icon at the bottom of the screen - HP Rx5910 | HP iPAQ rx5700 and rx5900 Travel Companion Series - Additional Produ - Page 101
Add a Picture to a Contact To add a picture to contact information: 1. Tap Start> Programs > Photosmart Mobile. 2. Tap the contact. 3. Tap Menu> Edit. 4. Tap Picture. 5. Tap the picture you want to add. To remove a picture from contact information: 1. Tap Contacts. 2. Tap the contact. 3. Tap Menu> - HP Rx5910 | HP iPAQ rx5700 and rx5900 Travel Companion Series - Additional Produ - Page 102
or by saving the picture to a storage card and inserting the card into a printer. To print pictures: 1. Tap Start> Programs > Photosmart Mobile. 2. Tap the thumbnail. 3. Tap Menu> Print. 4. Select the method by which to print. 5. Follow the on-screen instructions to print the picture. Chapter 10 - HP Rx5910 | HP iPAQ rx5700 and rx5900 Travel Companion Series - Additional Produ - Page 103
Assign a Picture to the Today Screen Background You can set the Today screen background to display a picture. To assign a picture to the Today screen background: 1. Tap Start > Programs > Photosmart Mobile. 2. Tap the thumbnail. 3. Tap Menu > Assign To > Today Background. Assign a Picture to the - HP Rx5910 | HP iPAQ rx5700 and rx5900 Travel Companion Series - Additional Produ - Page 104
recorded TV during sync to an optimized and size reduced format for better viewing on your HP iPAQ. ● Manually select digital media to sync to your HP iPAQ, or automatically sync to your HP iPAQ each time you connect, based on your preferences. For more information about Windows Media Player, visit - HP Rx5910 | HP iPAQ rx5700 and rx5900 Travel Companion Series - Additional Produ - Page 105
to play songs, videos, and playlists that are stored on your HP iPAQ or removable storage card. 1. If you are not on the Library screen, tap Menu > Library. 2. If necessary, on the Library screen, tap the Library arrow (near the top of the screen), and then tap the library that you want to use (for - HP Rx5910 | HP iPAQ rx5700 and rx5900 Travel Companion Series - Additional Produ - Page 106
by clearing it. 1. If you are on the Library screen, select the Now Playing category to display the Now Playing screen. If you are on the Playback screen, select Now Playing to display the Now Playing screen. 2. On the Now Playing screen, tap Menu > Clear Now Playing. Chapter 11 Windows Media - HP Rx5910 | HP iPAQ rx5700 and rx5900 Travel Companion Series - Additional Produ - Page 107
. However, you can manually update a library to ensure that it has links to any new files that you might have recently copied to your HP iPAQ or a removable storage card. 1. If you are not already on the Library screen, tap Menu > Library. 2. On the Library screen, tap Menu > Update Library. 3. Wait - HP Rx5910 | HP iPAQ rx5700 and rx5900 Travel Companion Series - Additional Produ - Page 108
to view and download web pages as well as browse web sites through synchronization, or when connected to the Internet. Before connecting to the Internet, setting up a wireless connection or network card, obtain the following: ● Internet Service Provider (ISP) or wireless service provider ● ISP - HP Rx5910 | HP iPAQ rx5700 and rx5900 Travel Companion Series - Additional Produ - Page 109
and templates as .doc, .rtf, .txt, and .dot files. With Word Mobile: ● Edit Word documents and templates created on your computer. ● Open and edit Pocket Word (*.psw) documents. NOTE If you edit a file, save it in .doc, .rtf, .txt, or .dot format. To access Word Mobile, tap Start > Programs - HP Rx5910 | HP iPAQ rx5700 and rx5900 Travel Companion Series - Additional Produ - Page 110
Excel Mobile Create and edit workbooks and templates on your HP iPAQ with Excel Mobile. With Excel Mobile: ● View, edit, and create charts and graphics, which can be embedded as objects in a worksheet or placed on a separate - HP Rx5910 | HP iPAQ rx5700 and rx5900 Travel Companion Series - Additional Produ - Page 111
on your computer. With PowerPoint Mobile: ● Open a presentation from an e-mail message. ● Download a presentation from a file share or the Internet. ● Copy a presentation to your HP iPAQ via a storage card. ● Obtain a presentation by synchronizing with your computer. NOTE Slide shows created in - HP Rx5910 | HP iPAQ rx5700 and rx5900 Travel Companion Series - Additional Produ - Page 112
3 (POP3) or Internet Message Access Protocol 4 (IMAP4) e-mail server. When connecting to a POP3 or IMAP4 server, you use a modem to connect to an Internet Service Provider (ISP). You can also use a modem or Ethernet card to connect to the local area network that your e-mail server is connected to - HP Rx5910 | HP iPAQ rx5700 and rx5900 Travel Companion Series - Additional Produ - Page 113
your e-mail server, whether it is from your HP iPAQ or a personal computer. This synchronization of folders occurs whenever you connect to your e-mail server, create new folders, or rename/delete folders when connected. You can also set different download options for each folder. Using Folders 105 - HP Rx5910 | HP iPAQ rx5700 and rx5900 Travel Companion Series - Additional Produ - Page 114
a message on your HP iPAQ, it's deleted from the personal computer or Exchange Server the next time you synchronize. ● The default sync settings synchronize messages from the past three days only and the first 0.5 KB of each new message is downloaded. It does not download file attachments. NOTE For - HP Rx5910 | HP iPAQ rx5700 and rx5900 Travel Companion Series - Additional Produ - Page 115
Settings, and then select Include file attachments. If you have an IMAP4 e-mail account with an Internet Service storage card rather than on the device, tap Menu > Tools > Options > Storage tab, and select the Store attachments on storage Encapsulation Format (TNEF) support for your account. With - HP Rx5910 | HP iPAQ rx5700 and rx5900 Travel Companion Series - Additional Produ - Page 116
After you are set up to receive meeting requests, do the following: 1. Open the meeting request. the next time that you synchronize or connect to your email server and the calendar on your HP iPAQ is updated. Creating or Changing a Signature 1. Tap Start > Messaging. 2. Tap Menu > Tools > Options - HP Rx5910 | HP iPAQ rx5700 and rx5900 Travel Companion Series - Additional Produ - Page 117
. To quickly add common messages, tap Menu > My Text and tap a desired message. 6. To check the spelling, tap Menu > Spell Check. 7. Tap Send. Tip To set the priority, tap Menu > Message Options. If you are working offline, e-mail messages are moved to the Outbox folder and are sent the next time - HP Rx5910 | HP iPAQ rx5700 and rx5900 Travel Companion Series - Additional Produ - Page 118
Downloading Messages To send and receive e-mail for an Outlook E-mail account, begin synchronization through ActiveSync. Tip By default, messages you send are not saved on your HP iPAQ to help conserve memory 's directory service check box to enable it and tap OK. 6. If your e-mail service is not - HP Rx5910 | HP iPAQ rx5700 and rx5900 Travel Companion Series - Additional Produ - Page 119
on this server check box, and enter your user name and password. 9. To have Messaging check this service, select the Check name against this server check box. Tip To delete a service, tap and hold the service, and tap Delete. While synchronizing your Outlook E-mail account, disable any directory - HP Rx5910 | HP iPAQ rx5700 and rx5900 Travel Companion Series - Additional Produ - Page 120
. ● Messaging & Security Feature Pack (MSFP) with Microsoft Exchange 2003 Service Pack 2 Push technology keeps Outlook Mobile up-to-date by delivering Inbox, Calendar, Contacts, and Tasks list quickly and directly to your HP iPAQ. For more information about Connect to Mobile Business E-mail using - HP Rx5910 | HP iPAQ rx5700 and rx5900 Travel Companion Series - Additional Produ - Page 121
screen displays several messages, click on the link that reads If your company supports synchronizing directly with its Exchange Server you can set up your HP iPAQ NOTE Synchronizing directly with Exchange Server is supported only on Windows Mobilepowered Pocket PC 2002 or later. By clicking Tools > - HP Rx5910 | HP iPAQ rx5700 and rx5900 Travel Companion Series - Additional Produ - Page 122
wireless service provider and the connections have been set up correctly. To set up an e-mail account on your HP iPAQ: 1. Tap Start > Messaging. 2. Tap Menu > Tools > New Account. 3. Enter your e-mail address, and tap Next. Auto configuration attempts to download necessary e-mail server settings so - HP Rx5910 | HP iPAQ rx5700 and rx5900 Travel Companion Series - Additional Produ - Page 123
Composing and Sending Outlook E-mail Messages To compose and send a message: 1. Tap Start > Messaging. Outlook E-mail is displayed. 2. Tap New. An Outlook E-mail text box is displayed. 3. Enter the e-mail address or phone number of one or more recipients, separating them with a semicolon. To access - HP Rx5910 | HP iPAQ rx5700 and rx5900 Travel Companion Series - Additional Produ - Page 124
Replying to or Forwarding an Outlook E-mail Message To reply to or forward a message: 1. Tap on the message to open it, and then tap Menu > Reply, Reply All, or Forward. 2. Enter your response. To quickly add common messages, tap Menu > My Text and tap a desired message. 3. To check spelling, tap - HP Rx5910 | HP iPAQ rx5700 and rx5900 Travel Companion Series - Additional Produ - Page 125
Sorting the Message List To sort the message list: 1. In the message list, tap the sort list (labeled Received by default) and select an option. 2. Select the option again to reverse the sort order (ascending and descending). Sorting the Message List 117 - HP Rx5910 | HP iPAQ rx5700 and rx5900 Travel Companion Series - Additional Produ - Page 126
to schedule appointments, meetings, and other events. You can display appointments on the Today screen. If you use Outlook on your personal computer, you can synchronize appointments between your HP iPAQ and computer. You can also set Calendar to remind you of appointments with a sound or flashing - HP Rx5910 | HP iPAQ rx5700 and rx5900 Travel Companion Series - Additional Produ - Page 127
Viewing Appointments To view an appointment on your calendar: 1. Tap Start > Calendar. 2. Tap the appointment to view. To view appointments for the week: 1. Tap Start > Calendar. 2. Tap Menu > View > Week. NOTE You can also view appointments for the month or year by tapping the appropriate selection - HP Rx5910 | HP iPAQ rx5700 and rx5900 Travel Companion Series - Additional Produ - Page 128
attendees, tap Add and the tap the name. 6. Tap OK. The meeting request is sent to the attendees the next time you synchronize your HP iPAQ. When attendees accept a meeting request, the meeting is automatically added to their calendars. When their response is sent back to you, your calendar is - HP Rx5910 | HP iPAQ rx5700 and rx5900 Travel Companion Series - Additional Produ - Page 129
To automatically turn on a reminder for all new appointments: 1. Tap Start > Calendar. 2. Tap Menu > Options > Appointments tab. 3. Select the Set reminders for new items check box. 4. Set the time for the reminder to alert you. 5. Tap OK. Setting a Default Reminder for All New Appointments 121 - HP Rx5910 | HP iPAQ rx5700 and rx5900 Travel Companion Series - Additional Produ - Page 130
Updating an Appointment To update an appointment on the calendar: 1. Tap Start > Calendar. 2. Tap the appointment, then tap Edit to make the changes. 3. Tap OK. Chapter 14 Calendar 122 - HP Rx5910 | HP iPAQ rx5700 and rx5900 Travel Companion Series - Additional Produ - Page 131
computer the next time you synchronize. If the appointment has not been synchronized with a personal computer, it is deleted only from your HP iPAQ. 1. Tap Start > Calendar. 2. In Agenda view, select the appointment to delete. 3. Tap Menu > Delete. 4. Tap Yes to delete the appointment, or tap - HP Rx5910 | HP iPAQ rx5700 and rx5900 Travel Companion Series - Additional Produ - Page 132
, tap the Contacts softkey on the bottom of the Today screen or tap Start > Contacts. Tap a contact in the list for a summary of contact information. If you use Outlook on your computer, synchronize contacts between your HP iPAQ and your personal computer. Creating a Contact 1. Tap Start > Contacts - HP Rx5910 | HP iPAQ rx5700 and rx5900 Travel Companion Series - Additional Produ - Page 133
Begin entering a name or phone number in the provided text box until the contact is displayed. To show all contacts again, tap the text box and clear the text, or arrow to the right of the text box. ● Use the alphabetical index displayed at the top of the contact list. Tap the tab that corresponds to - HP Rx5910 | HP iPAQ rx5700 and rx5900 Travel Companion Series - Additional Produ - Page 134
Changing Contact Information 1. Tap Start > Contacts. 2. Tap the contact. 3. Tap Menu > Edit and enter the changes. 4. When finished, tap OK. To include a nickname, title, and more, for an existing contact in the contact list, tap the name of the contact, then tap Menu > Edit and the Name arrow. - HP Rx5910 | HP iPAQ rx5700 and rx5900 Travel Companion Series - Additional Produ - Page 135
desired contact. 3. Tap Copy Contact. 4. Tap the copy of the contact. 5. Tap Menu > Edit. 6. Change the contact information as needed and tap OK. NOTE The displayed category is automatically assigned to the new contact. Copying a Contact 127 - HP Rx5910 | HP iPAQ rx5700 and rx5900 Travel Companion Series - Additional Produ - Page 136
Sending an E-mail Message to a Contact 1. Tap Start > Contacts. 2. Tap the contact you want to send a message to. 3. Tap the address you want to send a message to. 4. Tap the account you want to send the message from. NOTE To quickly add a contact's address to a new message, tap the To, Cc, or Bcc - HP Rx5910 | HP iPAQ rx5700 and rx5900 Travel Companion Series - Additional Produ - Page 137
Adding and Removing a Picture To add a picture to contact information: 1. Tap Start > Contacts. 2. Tap the contact. 3. Tap Menu > Edit. 4. Tap Picture. 5. Tap the picture you want to add. To remove a picture from contact information: 1. Tap Start > Contacts. 2. Tap the contact. 3. Tap Menu > Edit. - HP Rx5910 | HP iPAQ rx5700 and rx5900 Travel Companion Series - Additional Produ - Page 138
or number into the Name view. ● To see a list of contacts employed by a specific name or company, tap Menu > View By > Name or Company. ● To see a a contact, tap and hold the contact. NOTE To display a greater number of contacts on the screen, tap Menu > Options, select the Show contact names only - HP Rx5910 | HP iPAQ rx5700 and rx5900 Travel Companion Series - Additional Produ - Page 139
1. Tap Start > Programs > Notes. NOTE Writing must be selected as the default input mode. 2. In the note list, tap New. 3. Write the text on the screen. 4. When finished, tap OK to return to the note list. To select handwritten text, tap and hold next to the writing. As soon as dots - HP Rx5910 | HP iPAQ rx5700 and rx5900 Travel Companion Series - Additional Produ - Page 140
the correct word is not shown, use they keyboard to tap the backspace key and retype the word. For more details, refer to the on-screen Help, tap Start > Help > Contents > Using Notes. Chapter 16 Notes 132 - HP Rx5910 | HP iPAQ rx5700 and rx5900 Travel Companion Series - Additional Produ - Page 141
note you want to copy. 3. Tap Menu > Create Copy. A copy of the note appears in the note list. For more details, refer to the on-screen Help, tap Start > Help > Contents > Using Notes. Creating a Copy of a Note 133 - HP Rx5910 | HP iPAQ rx5700 and rx5900 Travel Companion Series - Additional Produ - Page 142
) Cards Use optional SD cards for: ● Expanding the memory of your HP iPAQ ● Adding functionality to your HP iPAQ-for example, with an SD input/output (SDIO) card NOTE SD cards must be purchased separately and are not included with your HP iPAQ. To locate information about SD cards, visit http://www - HP Rx5910 | HP iPAQ rx5700 and rx5900 Travel Companion Series - Additional Produ - Page 143
SD slot. NOTE If the SD card is not recognized, follow the card manufacturer's instructions to install it. If you have trouble installing an SD card, try the following: ● Have the label face the front of the HP iPAQ. ● Insert the connection area (the metal area) first. ● Do not insert the card at - HP Rx5910 | HP iPAQ rx5700 and rx5900 Travel Companion Series - Additional Produ - Page 144
Card To remove an SD card from the SD slot on your HP iPAQ: 1. Close all programs that are using the SD card. 2. disengages and pops up, pull it from the SD slot. NOTE HP recommends inserting the protective plastic card that came with your HP iPAQ into the SD slot when not in use. Chapter 17 Secure - HP Rx5910 | HP iPAQ rx5700 and rx5900 Travel Companion Series - Additional Produ - Page 145
the Up soft key at the bottom of the screen, then select the Storage Card folder to see a list of files and folders. If your HP iPAQ does not recognize the SD card, try to: ● Firmly pushed the card down into the SD slot. ● Install any drivers that came with the SD card. ● Reset your HP iPAQ by using - HP Rx5910 | HP iPAQ rx5700 and rx5900 Travel Companion Series - Additional Produ - Page 146
the list to quickly find a specific task. 1. Tap Start > Programs > Tasks. 2. In the task list, do one of the following: ● Sort the list. Tap Menu > Sort By, and tap a sort option. ● Filter the list by category. Tap Menu > Filter, and tap the category to display. Setting the Start and Due Dates for - HP Rx5910 | HP iPAQ rx5700 and rx5900 Travel Companion Series - Additional Produ - Page 147
Showing Start and Due Dates in the Task List 1. Tap Start > Programs > Tasks. 2. Tap Menu > Options. 3. Select the Show start and due dates check box. 4. Tap OK. Showing Start and Due Dates in the Task List 139 - HP Rx5910 | HP iPAQ rx5700 and rx5900 Travel Companion Series - Additional Produ - Page 148
Tap the word Tasks to access Options, then tap the Options button. 4. Under Display number of, select the type of tasks you want to appear on the Today screen. 5. In the Category list, select whether to display only tasks assigned to a specific category or to display all tasks. Chapter 18 Tasks 140 - HP Rx5910 | HP iPAQ rx5700 and rx5900 Travel Companion Series - Additional Produ - Page 149
Marking a Task as Completed To mark a task as completed: 1. Tap Start > Programs > Tasks. 2. In the task list, select the check box next to the task you want to mark as completed. To mark an open task as completed: 1. Tap Edit. 2. In the Status box, tap Completed. Marking a Task as Completed 141 - HP Rx5910 | HP iPAQ rx5700 and rx5900 Travel Companion Series - Additional Produ - Page 150
Memory External Power Display LED Backlight SD Slot Antenna Audio Battery Wireless LAN Bluetooth LED Indicators: Charge and Notification LED Wireless LED Description Samsung SC32442 Processor 400MHz Microsoft® Windows Mobile® 5.0 software for Pocket PC Up to 2.0 GB flash ROM for persistent storage - HP Rx5910 | HP iPAQ rx5700 and rx5900 Travel Companion Series - Additional Produ - Page 151
System Feature WLAN is available on rx5900 series models only. GPS Receiver GPS Antenna ● WLAN is on. ● LED off indicates Bluetooth and WLAN are off Description Integrated SiRF Star III Integrated omni-directional System Specifications 143 - HP Rx5910 | HP iPAQ rx5700 and rx5900 Travel Companion Series - Additional Produ - Page 152
Physical Specifications Width Height Depth Weight US 4.74 in. 3.00 in. 0.65 in. 4.48 oz with battery Metric 120.5 mm 76.2 mm 16.5 mm 127.0 g with battery Chapter 19 Product Specifications 144 - HP Rx5910 | HP iPAQ rx5700 and rx5900 Travel Companion Series - Additional Produ - Page 153
Operating Environment Temperature Relative Humidity Maximum Altitude Operating Nonoperating Operating Nonoperating Operating Nonoperating US 32° to 104°F -4° to 140°F up to 90% up to 90% 15,000ft 40,000ft Metric 0° to 40°C -20° to 60°C up to 90% up to 90% 4,572m 12,192m Operating Environment - HP Rx5910 | HP iPAQ rx5700 and rx5900 Travel Companion Series - Additional Produ - Page 154
in accordance with the instructions, may cause harmful PDA must not be co-located or operating in conjunction with any other antenna or transmitter. Modifications The FCC requires the user to be notified that any changes or modifications made to this device that are not expressly approved by HP - HP Rx5910 | HP iPAQ rx5700 and rx5900 Travel Companion Series - Additional Produ - Page 155
Box 692000, Mail Stop 530113 Houston, TX 77269-2000 or call 1-800-HP-INVENT (1-800-474-6836) For questions regarding this FCC declaration, write to Hewlett-Packard Company P. O. Box 692000, Mail Stop 510101 Houston, TX 77269-2000 or call HP at 281-514-3333 To identify your product, refer to the part - HP Rx5910 | HP iPAQ rx5700 and rx5900 Travel Companion Series - Additional Produ - Page 156
with these directives implies conformity to harmonized European standards (European Norms) that are listed in the EU Declaration of Conformity issued by HP for this product or product family. This compliance is indicated by one of the following conformity markings placed on the product. ● This - HP Rx5910 | HP iPAQ rx5700 and rx5900 Travel Companion Series - Additional Produ - Page 157
e Gestione Frequenze). Battery Warning WARNING! This HP iPAQ contains a lithium ion rechargeable battery. To reduce the risk Replace only with the HP spare. CAUTION Risk of explosion if battery is replaced by an incorrect type. Dispose of used batteries according to the instructions. Battery - HP Rx5910 | HP iPAQ rx5700 and rx5900 Travel Companion Series - Additional Produ - Page 158
on a cord or cable. When unplugging from the electrical outlet, grasp the cord by the plug or, in the case of the AC adapter, grasp the AC adapter and pull out from the electrical outlet. Do not use converter kits sold for appliances to power your iPAQ Pocket PC. Chapter 20 Regulatory Notices 150 - HP Rx5910 | HP iPAQ rx5700 and rx5900 Travel Companion Series - Additional Produ - Page 159
Airline Travel Notice Use of electronic equipment aboard commercial aircraft is at the discretion of the airline. Airline Travel Notice 151 - HP Rx5910 | HP iPAQ rx5700 and rx5900 Travel Companion Series - Additional Produ - Page 160
type of medical electronic equipment, consult the manufacturer of the equipment to determine if the medical equipment is shielded from RF energy. Turn off your HP iPAQ in health care facilities or hospitals when there are posted restrictions requiring you to do so. Chapter 20 Regulatory Notices 152 - HP Rx5910 | HP iPAQ rx5700 and rx5900 Travel Companion Series - Additional Produ - Page 161
be minimized. This PDA has been tested and demonstrated compliance when Bluetooth and WLAN are transmitting simultaneously. This PDA must not be cause undesired operation of the device. Brazilian Notice Este equipamento opera em caráter secundário, isto é, não tem direito a proteção contra interfer - HP Rx5910 | HP iPAQ rx5700 and rx5900 Travel Companion Series - Additional Produ - Page 162
Japanese Notice Wireless LAN 802.11b Devices Wireless LAN 802.11g Devices Bluetooth Devices Chapter 20 Regulatory Notices 154 - HP Rx5910 | HP iPAQ rx5700 and rx5900 Travel Companion Series - Additional Produ - Page 163
Taiwan DGT Notice Taiwan DGT Notice 155 - HP Rx5910 | HP iPAQ rx5700 and rx5900 Travel Companion Series - Additional Produ - Page 164
dispose of the battery in general household waste. Follow the local laws and regulations in your area for computer battery disposal. French Acoustics at full volume. HP recommends that you use the headset, part number 430219, manufactured by Plantronics, included with your HP iPAQ. Chapter 20 - HP Rx5910 | HP iPAQ rx5700 and rx5900 Travel Companion Series - Additional Produ - Page 165
153 C Calendar appointments 119, 120 Today screen 118 today's agenda 118 view 119 calendar canceling appointments 123 display of work week 118 setting default reminders 121 updating appointments 122 Canadian notice 153 Canadian notices 147 car kit 3, 39 case 2 categories assigning 29 creating 29 - HP Rx5910 | HP iPAQ rx5700 and rx5900 Travel Companion Series - Additional Produ - Page 166
149 G GPS interference when using GPS 46 losing the GPS signal 44 losing the GPS signal frequently 45 managing GPS automatically 42 using an external antenna 43 H Handwriting recognition 62 headset connector 7 help 13 HP Help and Support 13 HP Quick Launch 9 I Icons Command bar 10 iPAQ Wireless 11 - HP Rx5910 | HP iPAQ rx5700 and rx5900 Travel Companion Series - Additional Produ - Page 167
for cracked or damaged screen 32 HP Customer Support, contacting 32 setting up, car kit 39 shortcut menus 28 Soft reset 16 speaker 6 specifications operating environment 145 physical 144 system 142 Start Menu button 5 storage card 4 stylus 6 subscription music service 96 synchronization migrating - HP Rx5910 | HP iPAQ rx5700 and rx5900 Travel Companion Series - Additional Produ - Page 168
71, 72 LED 71 manually connecting 72 network key 72 network security settings 72 searching for networks 71 terms 70 turning on/off 71 using hotspots 70 using VPNs 70 WLAN-enabled devices 70 Word Mobile 101 world map 51 WorldMate alarm 50 city list 52 clocks 49 clothing sizes 58 country and
-
 1
1 -
 2
2 -
 3
3 -
 4
4 -
 5
5 -
 6
6 -
 7
7 -
8
-
9
-
10
-
11
-
12
-
13
-
14
-
15
-
16
-
17
-
18
-
19
-
20
-
21
-
22
-
23
-
24
-
25
-
26
-
27
-
28
-
29
-
30
-
31
-
32
-
33
-
34
-
35
-
36
-
37
-
38
-
39
-
40
-
41
-
42
-
43
-
44
-
45
-
46
-
47
-
48
-
49
-
50
-
51
-
52
-
53
-
54
-
55
-
56
-
57
-
58
-
59
-
60
-
61
-
62
-
63
-
64
-
65
-
66
-
67
-
68
-
69
-
70
-
71
-
72
-
73
-
74
-
75
-
76
-
77
-
78
-
79
-
80
-
81
-
82
-
83
-
84
-
85
-
86
-
87
-
88
-
89
-
90
-
91
-
92
-
93
-
94
-
95
-
96
-
97
-
98
-
99
-
100
-
101
-
102
-
103
-
104
-
105
-
106
-
107
-
108
-
109
-
110
-
111
-
112
-
113
-
114
-
115
-
116
-
117
-
118
-
119
-
120
-
121
-
122
-
123
-
124
-
125
-
126
-
127
-
128
-
129
-
130
-
131
-
132
-
133
-
134
-
135
-
136
-
137
-
138
-
139
-
140
-
141
-
142
-
143
-
144
-
145
-
146
-
147
-
148
-
149
-
150
-
151
-
152
-
153
-
154
-
155
-
156
-
157
-
158
-
159
-
160
-
161
-
162
-
163
-
164
-
165
-
166
-
167
-
168
 |
 |

Additional Product Information
User Guide