HP S10614 Compaq Fan (110V/220V) Rack Option Kit Installation Instructions
HP S10614 Manual
 |
View all HP S10614 manuals
Add to My Manuals
Save this manual to your list of manuals |
HP S10614 manual content summary:
- HP S10614 | Compaq Fan (110V/220V) Rack Option Kit Installation Instructions - Page 1
statements accompanying such products. Nothing herein should be construed as constituting an additional warranty. Compaq Fan (110V/220V) Rack Option Kit Installation Instructions Third Edition (October 2001) Part Number 142562-023 Compaq Computer Corporation 142562- 023 About This Device The Compaq - HP S10614 | Compaq Fan (110V/220V) Rack Option Kit Installation Instructions - Page 2
the assembly using the four T-30 Torx screws retained from step 1. Insert the notched end of the tie wrap into a small hole in the rack rail and push it in to lock it in place. Encircle the power cord with the tie wrap, insert the free end into the hole - HP S10614 | Compaq Fan (110V/220V) Rack Option Kit Installation Instructions - Page 3
Zu diesem Gerät Das Compaq Lüfter (110 V/220 V) Rack-Optionskit ist für Racks der Compaq Serie 10000 und 9000 vorgesehen und soll die natü Werkzeug Sie benötigen einen Torx-T-30-Schraubendreher. Hinweise zu Racks Bevor Sie mit der Installation beginnen, sollten Sie die folgenden - HP S10614 | Compaq Fan (110V/220V) Rack Option Kit Installation Instructions - Page 4
Sie die Abdeckung. Bewahren Sie die Schrauben auf, da sie in Schritt 2 wieder benötigt werden. HINWEIS: Die oberen Abdeckungen bei Racks verschiedener Compaq Serien können unterschiedlich sein, allerdings ist der Einbau des Lüfter-Optionskits in allen Fällen gleich. VORSICHT: Vergewissern Sie sich - HP S10614 | Compaq Fan (110V/220V) Rack Option Kit Installation Instructions - Page 5
KIT OPCIONAL DE VENTILADORES (110V/220V) PARA BASTIDOR Instrucciones de Instalación Abra la tarjeta completamente antes de iniciar los procedimientos de instalación AVISO © 2001 Compaq Computer Corporation Compaq y el logotipo de Compaq son marcas comerciales de Compaq Information Technologies Group - HP S10614 | Compaq Fan (110V/220V) Rack Option Kit Installation Instructions - Page 6
Instalación del Kit Opcional de Ventiladores 3 1 Extraiga los cuatro tornillos T-30 Torx que fijan la cubierta superior al bastidor y, a continuación, extraiga esta cubierta. Guarde los tornillos para utilizarlos en el paso 2. NOTA: Es posible que las cubiertas superiores de las diferentes Series - HP S10614 | Compaq Fan (110V/220V) Rack Option Kit Installation Instructions - Page 7
garantie supplémentaire. Instructions d'installation du kit de ventilation pour rack Compaq (110/220 supportent tout le poids du rack. n Les pieds stabilisateurs doivent être fixés au rack, en cas d'installation d'un seul rack. n Les racks doivent être couplés en cas d'installation de plusieurs racks - HP S10614 | Compaq Fan (110V/220V) Rack Option Kit Installation Instructions - Page 8
les quatre vis Torx T-30 conservées à l'étape 1. Insérez l'extrémité crantée du collier de serrage dans un petit orifice dans le rail du rack et enfoncez-la pour la mettre en place. Faites passer le collier de serrage autour du cordon d'alimentation, puis insérez l'extrémité libre dans - HP S10614 | Compaq Fan (110V/220V) Rack Option Kit Installation Instructions - Page 9
potrà essere interpretato come garanzia ulteriore o aggiuntiva. Istruzioni di installazione del kit delle opzioni della ventola (110 V/220 V) per rack Compaq Terza edizione (ottobre 2001) Numero di parte 142562-023 Compaq Computer Corporation Informazioni sul dispositivo Il kit delle opzioni della - HP S10614 | Compaq Fan (110V/220V) Rack Option Kit Installation Instructions - Page 10
le viti Torx T-30 conservate nella Fase 1. Inserire l'estremità dentellata della fascetta in uno dei piccoli fori presenti sulla guida del rack e spingerla fino a bloccarla in posizione. Circondare il cavo di alimentazione con la fascetta, inserire l'estremità libera nel foro situato nell'altra - HP S10614 | Compaq Fan (110V/220V) Rack Option Kit Installation Instructions - Page 11
mogelijk extra materialen om het u gemakkelijker te maken. Benodigd gereedschap U heeft een T-30 Torx-schroevendraaier nodig. Overwegingen met betrekking tot racks Neem de volgende voorzorgsmaatregelen voordat u de procedure start. WAARSCHUWING: Neem de volgende instructies in acht om het risico op - HP S10614 | Compaq Fan (110V/220V) Rack Option Kit Installation Instructions - Page 12
en schade aan de apparatuur te beperken. Sluit het netsnoer aan op de ventilatormodule. 4 Plaats de ventilatormodule boven in het rack met de netsnoerstekker naar de achterkant van het rack gericht. Zet de module vast met de vier T-30 Torx-schroeven uit stap 1. Steek het uiteinde met de uitsparing - HP S10614 | Compaq Fan (110V/220V) Rack Option Kit Installation Instructions - Page 13
- HP S10614 | Compaq Fan (110V/220V) Rack Option Kit Installation Instructions - Page 14
-
 1
1 -
 2
2 -
 3
3 -
 4
4 -
 5
5 -
 6
6 -
 7
7 -
8
-
9
-
10
-
11
-
12
-
13
-
14
 |
 |

F
AN
(110V/220V) R
ACK
O
PTION
K
IT
Installation Instructions
Open Card Completely Before Beginning
Installation Procedures
NOTICE
© 2001 Compaq Computer Corporation
Compaq and the Compaq logo are trademarks of Compaq Information
Technologies Group, L.P. All other product names mentioned herein may be
trademarks of their respective companies.
Compaq shall not be liable for technical or editorial errors or omissions
contained herein.
The information in this document is provided “as is”
without warranty of any kind and is subject to change without notice.
The
warranties for Compaq products are set forth in the express limited warranty
statements accompanying such products.
Nothing herein should be construed
as constituting an additional warranty.
Compaq Fan (110V/220V) Rack Option Kit Installation Instructions
Third Edition (October 2001)
Part Number 142562-023
Compaq Computer Corporation
About This Device
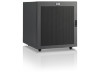
The Compaq Fan (110V/220V) Rack Option Kit is for use
with Compaq 10000 and 9000 Series racks to enhance natural
convection cooling by increasing the airflow in the rack.
Kit Contents
Below are the items and quantities required for assembly:
Fan assembly (1)
Power cord (2)
Cable fastener (4)
This kit may contain extra pieces of hardware for your
convenience.
Tool Required
You will need a T-30 Torx screwdriver.
Rack Considerations
Before beginning these procedures, make sure you understand
and follow these precautions.
WARNING:
To reduce the risk of personal injury or damage to the equipment,
be sure that:
The leveling jacks are extended to the floor.
The full weight of the rack rests on the leveling jacks.
The stabilizing feet are attached to the rack if it is a single-rack
installation.
The racks are coupled in multiple-rack installations.
Only one component is extended at a time. A rack may become
unstable if more than one component is extended for any reason.
WARNING:
To reduce the risk of electric shock or damage to your
equipment:
Do not disable the power cord grounding plug. The grounding plug is an
important safety feature.
Plug the power cord into a ground (earthed) outlet that is easily
accessible at all times.
Disconnect the power from the unit by unplugging the power cord from
either the electrical outlet or the unit.
Continued on Reverse
142562- 023